

You’ve just returned from a once-in-a-lifetime venture, and among hundreds of photos you took, there’s one that stands out. You were excited until you zoomed in and realized the image is immensely blurry. The faces are soft, the details are lost, and the unforgettable moment in real life falls flat on screen.
At the very moment, the stress might emerge, but in 2025, you don’t have to settle for blurry memories. Now, with dedicated programs, you can fix out-of-focus photos in a way that might seem impossible at first. For your assistance, this article contains workable methods to sharpen blurry images with proper guides. In the end, we’ve overviewed each approach in a comparison table to make an informed choice.
In this article
Part 1. Why Do Cameras Capture Out-of-Focus Photos, and What Causes the Problem
Even today, the most advanced cameras aren’t immune to focus issues, and one small misstep can result in blurry images. To fix out-of-focus pictures, you’ll first need to understand why your photos end up like this through the discussed reasons:

Shaky Camera Issues: When you’re capturing handheld images without any stabilization, camera shake becomes a common reason behind out-of-focus pictures. It becomes more problematic in low-light situations because, without a tripod, longer exposures increase shake-induced blur.
Incorrect Focus Point: The camera might incorrectly focus on the wrong part of the scene, and the result is a photo that's sharp in the wrong place. It's common in scenes with multiple layers or distractions, where the camera prioritizes contrasts rather than the actual focal point.
In Low-Light Situations: While cameras autofocus, the system depends on contrast detection to determine the sharpest point in the frame, and they often struggle in dim environments. In low-light conditions, there's less contrast for the camera to see thoroughly, leading to out-of-focus pictures.
Motion Blurriness: Another frequent cause for blurriness is motion blur, which happens when either the subject or the camera moves during exposure. Here, it might look like a focusing issue, but in reality, the camera’s inability to keep up with the speed of movement.
Shallow Depth in Field: Shooting with a wide aperture creates a beautiful shallow depth of field, isolating your subject and blurring the background. At such apertures, even the slightest movement of the subject can take them out of the sharp zone.
Part 2. How to Fix Out-of-Focus Photos Online Free with Repairit AI
It's an annoying surprise when you discover that your picture from a special event or vacation is extremely blurry. Fortunately, a dedicated platform like Repairit provides a viable solution to fix out-of-focus photos online free. Not only this, but it also benefits users in achieving extraordinary visual clarity with AI assistance. Through AI upscaling, you can improve image quality within seconds, right from your browser.
Besides this, its AI Image Upscaler enhances picture quality by up to 800%, significantly outperforming traditional methods. For an instant repair, it allows users to drop their blurry images onto the platform. It even provides a History Files section to review your previously repaired photos for further usage. Here, all the uploaded and repaired images are handled securely and backed by its satisfaction guarantee.
Key Features

-
Incorporate Multiple Pictures: With Repairit, you can mend multiple blurry portraits at the same time, regardless of their format or size.
-
View Improvised Images: As soon as the enhancement process finishes, it allows users to preview their improved images and save them on their devices.
-
Improves Gray Photos: The program utilizes advanced technology to uncover hidden details in your grayed-out images, restoring clarity within them.
An Expert Manual to Fix Out-of-Focus Photos Online Free via Repairit Online
To repair out-of-focus photos, adhere to the provided manual and give your blurry images a chance to relive:
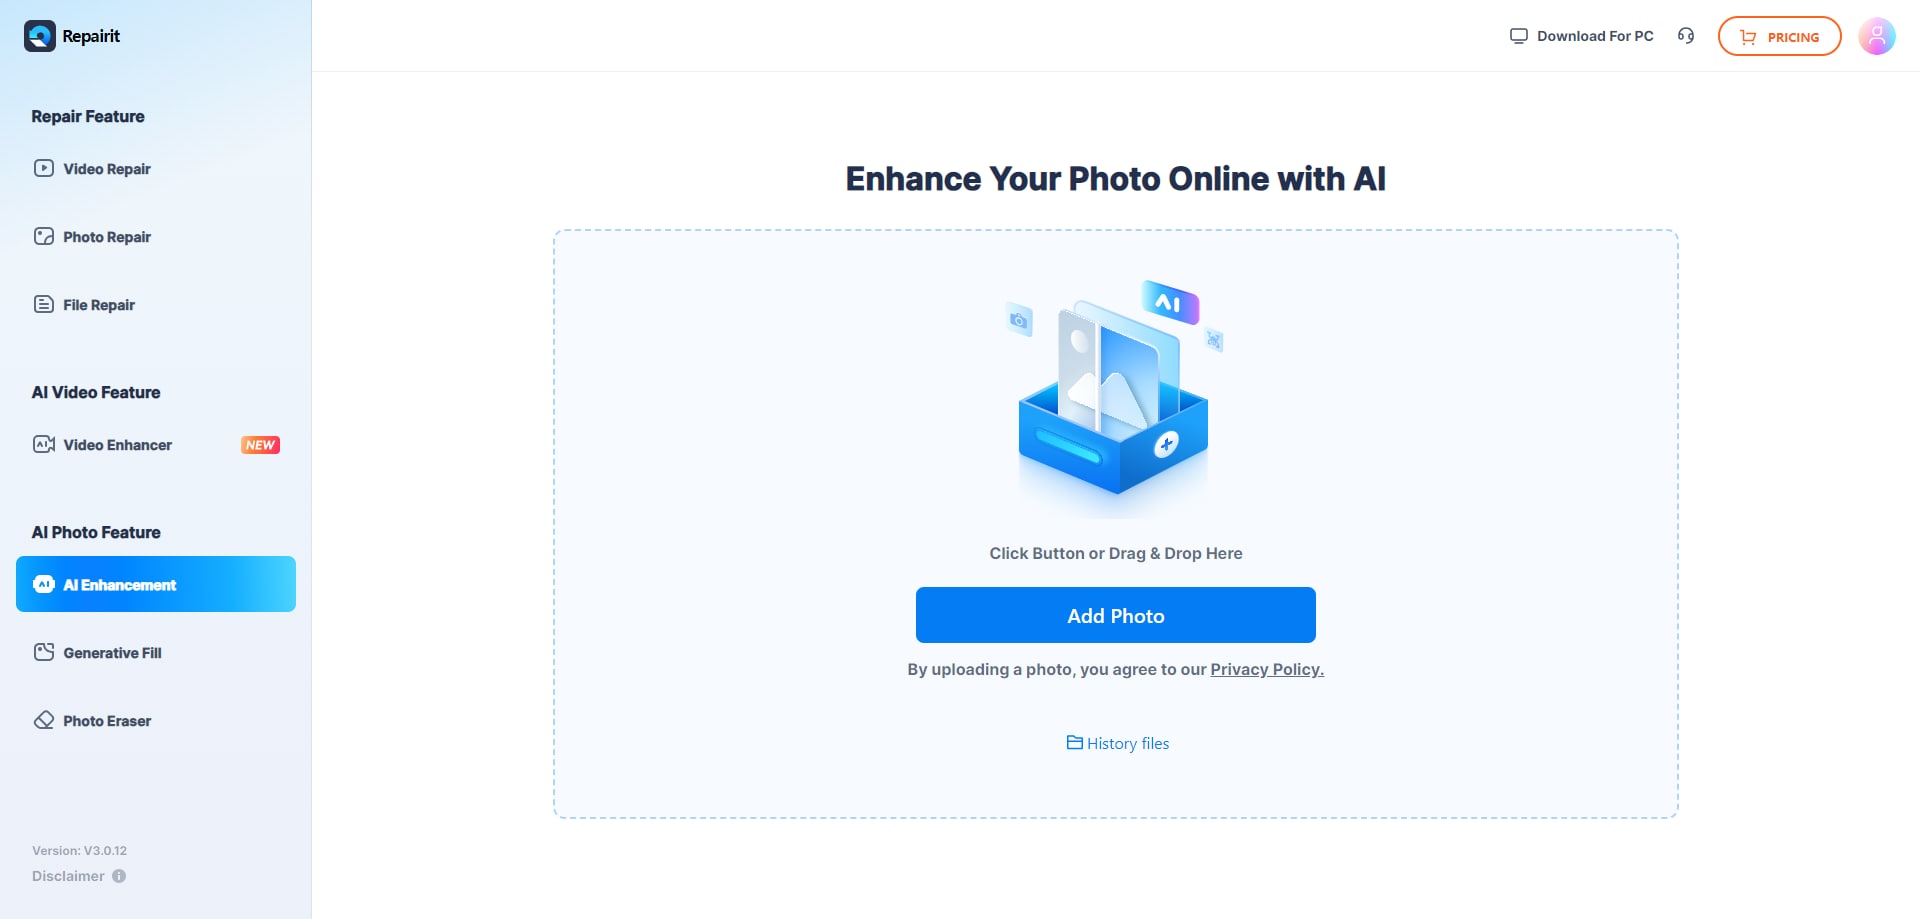
Step 1. Browse the Program and Upload Blurry Photos
Visit the platform from your browser and access the “AI Enhancement" option from the left panel of the main interface. Move forward and press the "Add Photo” button to add all your blurry pictures to the platform.
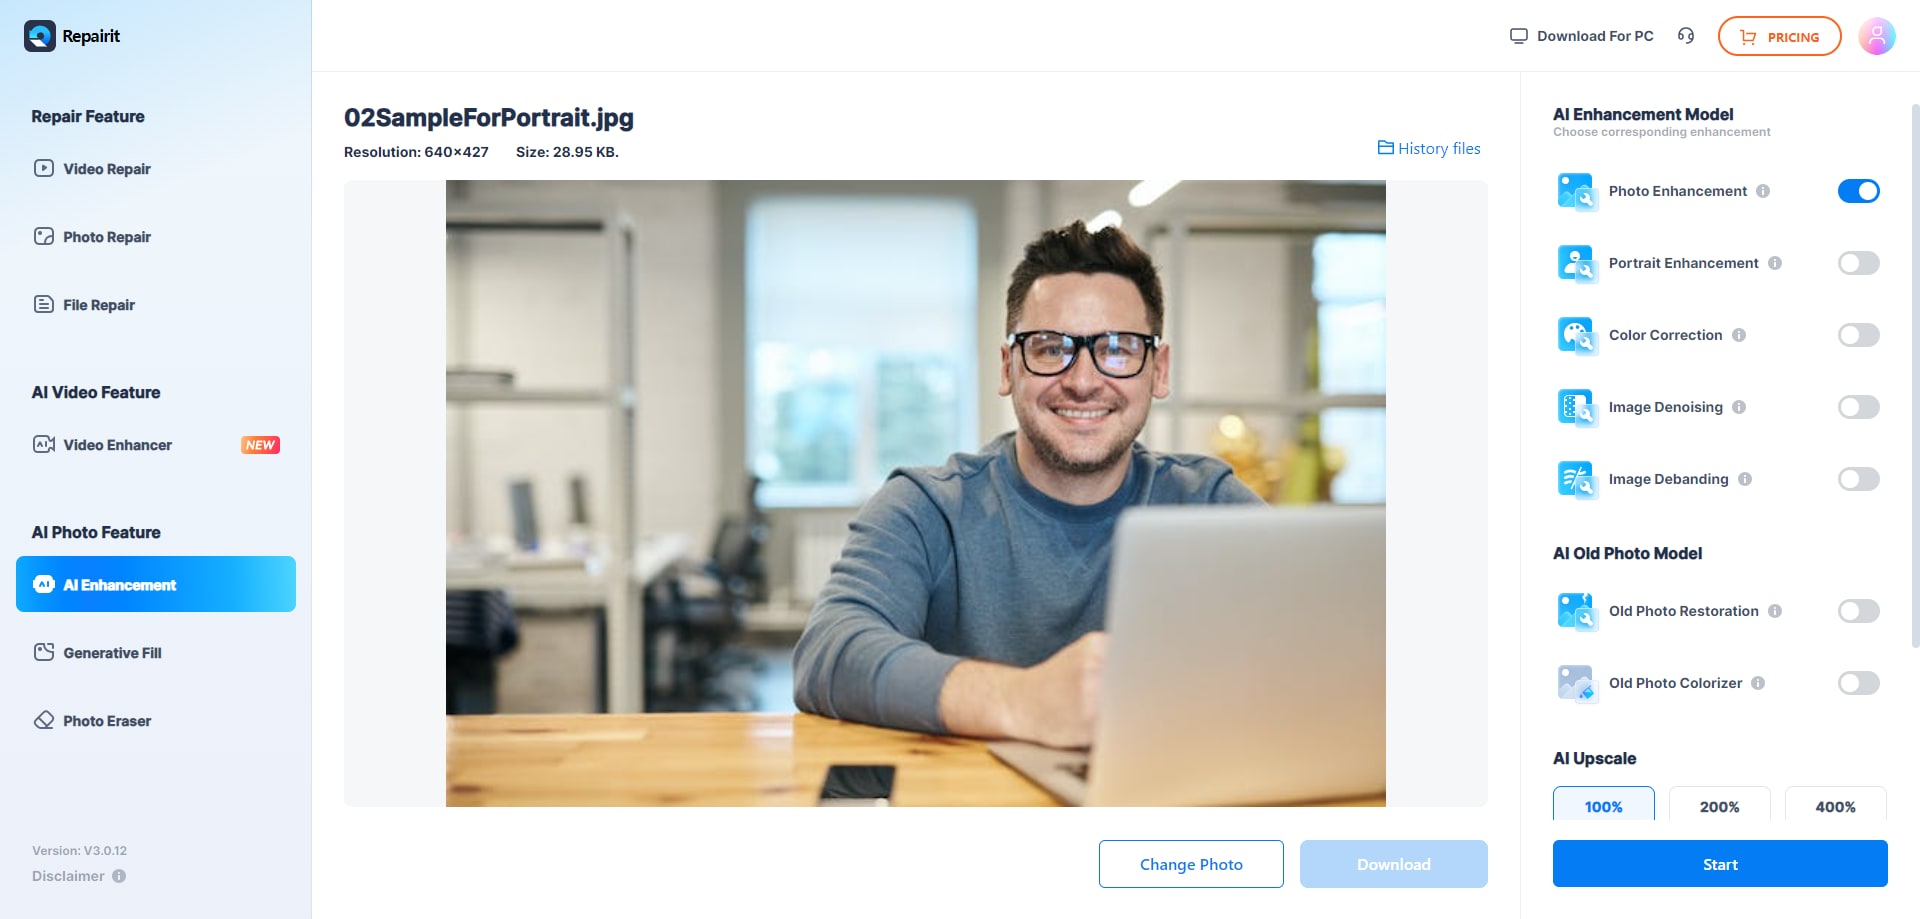
Step 2. Initiate Photo or Portrait Enhancement Process
Now, choose the “AI Enhancement Model” to select the “Photo Enhancement” option to fix blurriness on the uploaded images. Once done, navigate to the “Start” button and begin the process of enhancement on your blurry pictures.
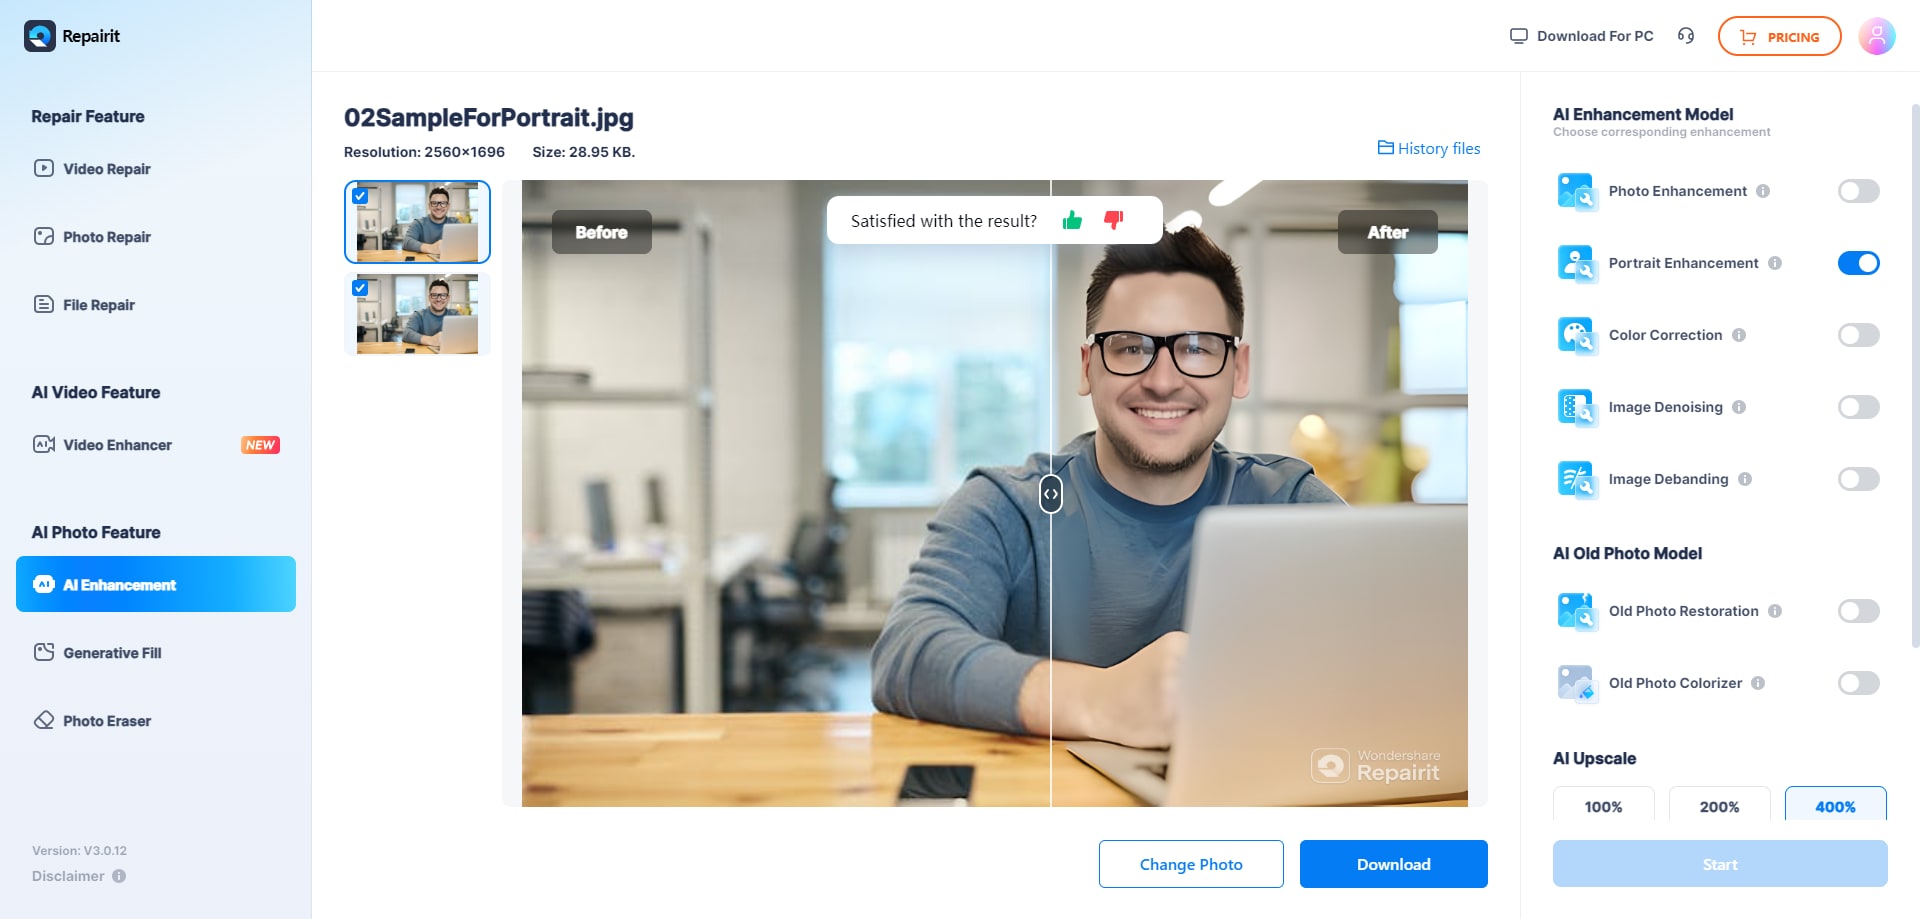
Step 3. View Your Repaired Pictures and Save Them
Upon receiving the “Processed Successfully” message, double-click the images to preview and save them on your device using the “Download” button.
Besides online convenience, if you need a more reliable solution to fix out-of-focus pictures, you can use the Repairit desktop version. With this repair program, users are allowed to mend multiple images that have undergone any damage or blurriness. It even supports more than 20 file formats, including common, RAW, BMP, HEIC, GPR, and SWF.
Fix Out of Focus Photo
 Security Verified. Over 7,302,189 people have downloaded it.
Part 3. How to Repair Out-of-Focus Photos Using Photoshop
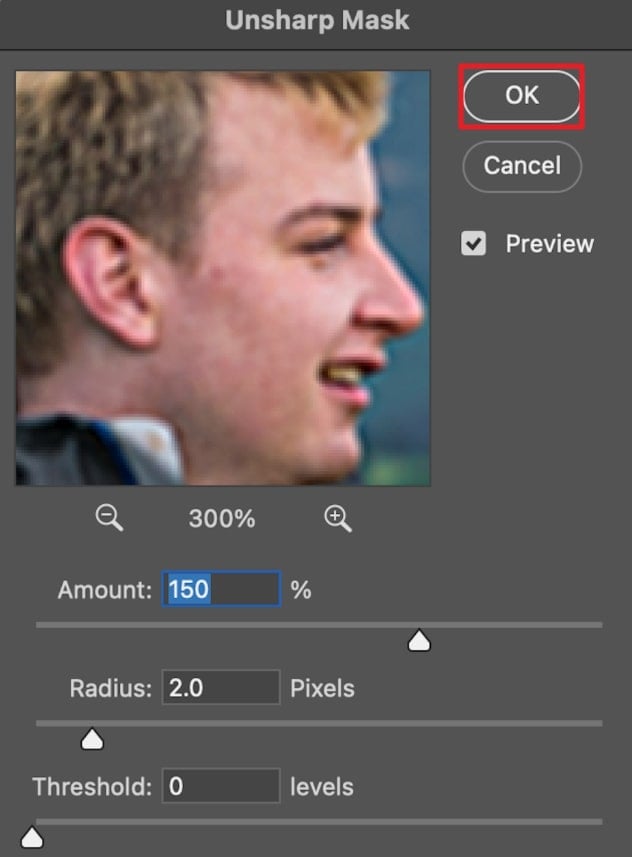
Adobe Photoshop remains one of the trusted choices among professionals for its precision and ability to fix out-of-focus images. It features an Unsharp Mask feature, which identifies edges and amplifies contrasts between light and dark pixels. With critical settings like Amount, Radius, and Threshold, you can have complete control over sharpening. Follow the provided tutorial to learn how to proceed with sharpening pictures:
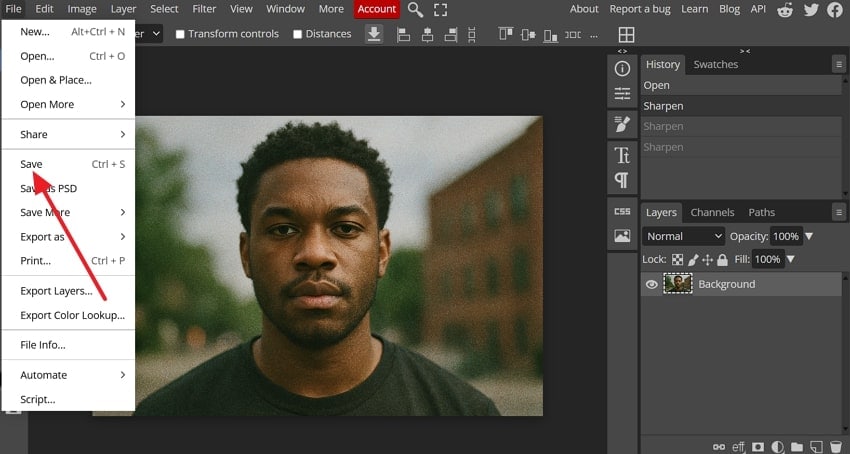
Step 1. Deploy the program, open your photo, and unlock the background layer by clicking the “Lock” button in the layer panel.
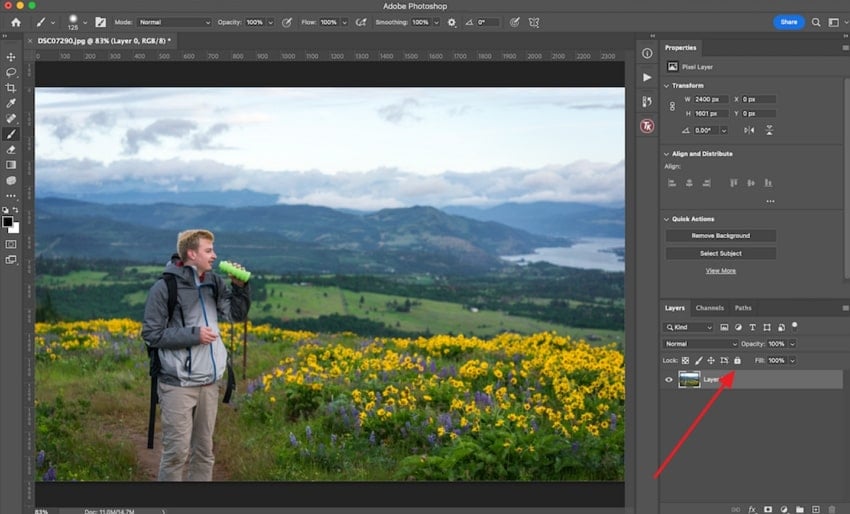
Step 2. Once the photo layer is selected, use the “Command + J” keys to duplicate the layer to apply sharpening.
Step 3. Next, head to the “Filter” tab from the top toolbar and choose the “Sharpen” option from the drop-down menu. Here, select the “Unsharp Mask” to modify the settings for Amount, Radius, and Threshold. Lastly, press the “OK” button to load the applied settings and make final adjustments to your photo.
Part 4. How to Fix Out an Out-of-Focus Image with the Free Online Editor: Photopea
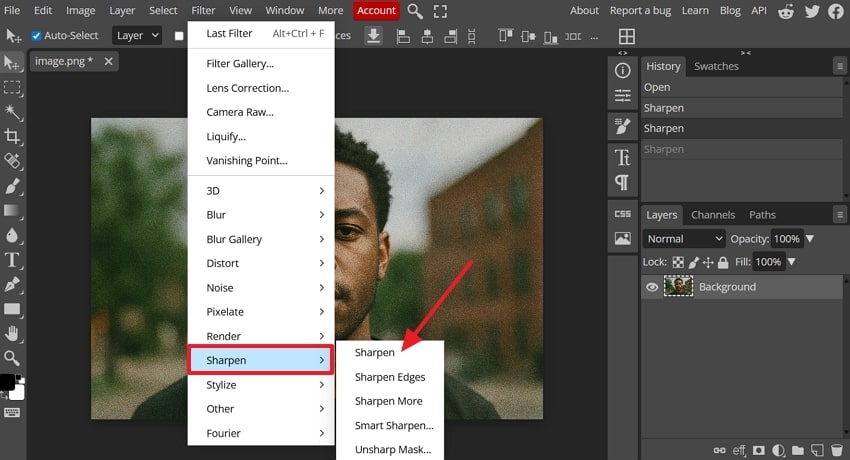
When you’re hunting for a photo editor that doesn’t require downloads, consider Photopea to fix out-of-focus photos. Through its Sharpen function, editors can easily modify their image until they achieve their desired result. Besides this, it provides options like Sharpen Edges or More Sharpen to obtain clarity for more professionalism. For better understanding, head to the tutorial provided and explore Photopea's editing capabilities:
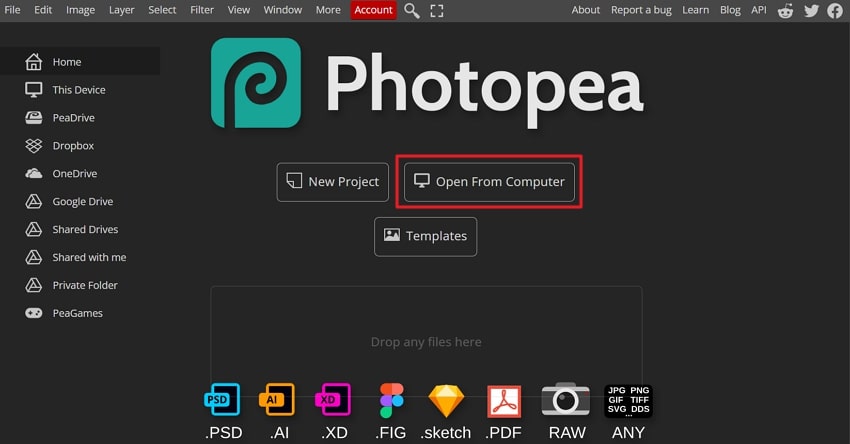
Step 1. Gain entrance to Photopea through your device and press the “Open from Computer” option to add a blurry image to the platform.
Step 2. Once uploaded, press the “Filter” tab from the top toolbar and choose the “Sharpen” option from the drop-down menu. From the expanded menu, select the “Sharpen” option and keep repeating the action until a sharp result is achieved.
Step 3. When done sharpening, hit the “File” tab in the top right corner and choose the “Save” option from the expanded menu. Upon following this, you’ll be able to preserve your sharpened images for using them afterward.
Part 5. How to Fix Out-of-Focus Pictures with Lightroom
To edit your photos with accuracy, you can refer to Adobe Lightroom, which provides a slider for setting Amount and Details. It allows the removal of noise, along with color noise from images, and fixes out-of-focus pictures to a professional level. For a targeted sharpening on specific areas, you can select the Adjustment Brush and increase clarity. Explore the given tutorial and learn how to remove blurriness:
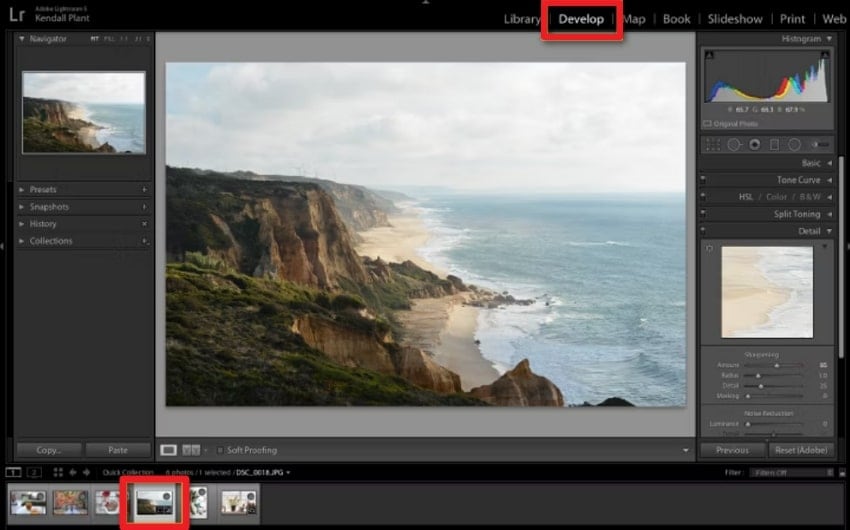
Step 1. Enter the editing interface for Lightroom and press the “Develop” option from the top bar. From the filmstrip provided at the bottom of your window, select the photo for sharpening.
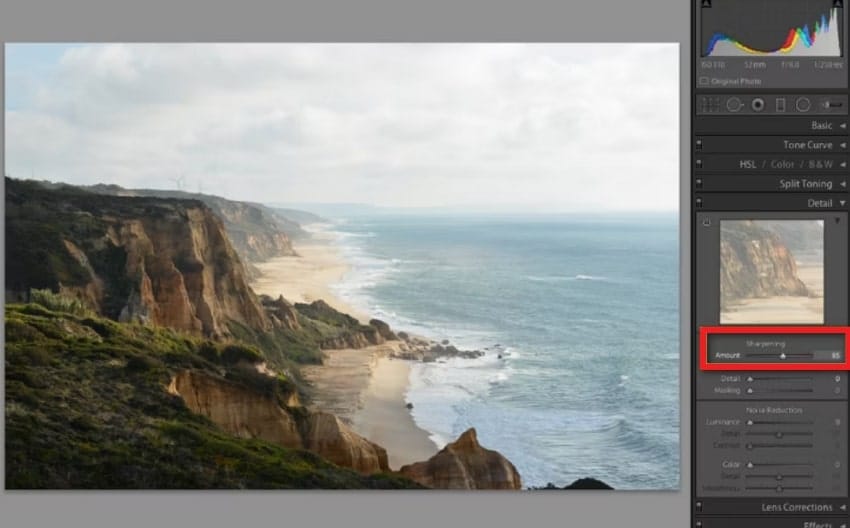
Step 2. Access the editing panel, expand the menu for “Sharpening,” and move the slider for “Amount” to make alterations. Similarly, modify the settings for Masking and Detail through the provided sliders for more accuracy.
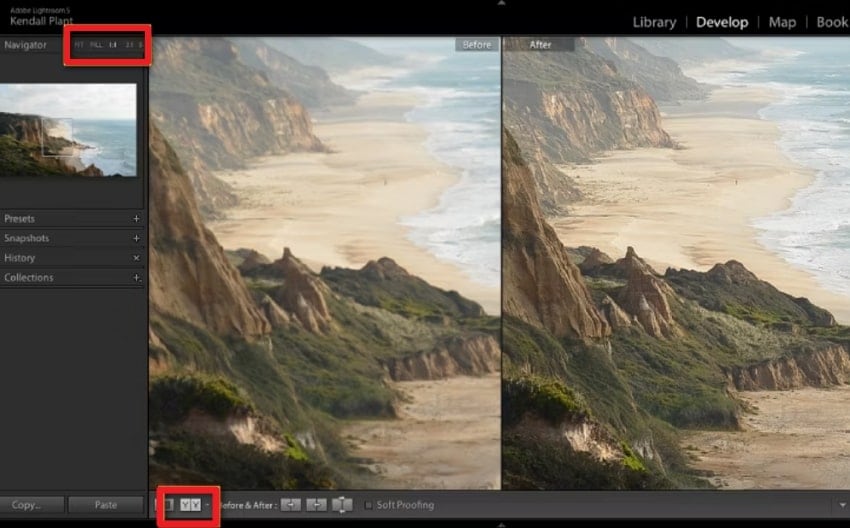
Step 3. Move to the “Navigator” panel in the top left corner and examine your sharpened image in 100% zoomed-in view. Now, locate the view options and press the “Y/Y” option to compare your before and after results.
Part 6. Which Method Works Best to Fix Out-of-Focus Photos: A Comparison
As each method discussed above delivers different techniques to fix out-of-focus photos, for better analysis, explore the table below:
| Platforms | Standout Feature | Sharpening Capabilities | Ease of Use | Additional Functions | Best For |
| Repairit (Online) | AI-driven restoration with image upscaling | Automatically detect blur and upscale a photo up to 800%. | Extremely easy editing experience. | History Files section Batch photo processingPreview photos. | Perfect for beginners who need to sharpen images from a browser. |
| Adobe Photoshop | Unsharp Mask for manual precision | Sharpening with full manual control over Amount, Radius, and Threshold settings. | Moderate to advanced skill level. | Pixel-level editingLayer and masking function. | For professionals who demand more precise and accurate sharpened results. |
| Photopea | Blur function through brush size adjustment | Includes Blur and Sharpen tools with adjustable brush size, hardness, and strength. | Beginner-friendly with no installation required. | Supports PSD, XCF, and other formats. | It's convenient for users looking for a free Photoshop alternative. |
| Adobe Lightroom | Detail panel and selective adjustment brush | Adjustment Brush allows local clarity and texture improvements without overprocessing. | Clean interface with real-time previews and intuitive sliders. | Color CorrectionNoise Reduction | Suitable for photographers editing RAW and portrait shots on the go. |
Conclusion
To sum up, in the current year, fixing a blurry photo is no longer a task reserved for professionals or advanced editors. The dedicated program discussed above, including Adobe Photoshop and Lightroom, leaves no blurry image untreated. To fix out-of-focus photos online, you can refer to the Repairit online version and get multiple images enhanced at once.
Frequently Asked Questions
-
Q1. Will sharpening a blurry image make it look unnatural?
There's a possibility that a blurry image can look unnatural when you try to sharpen it. At the very moment, professional programs like Photoshop or Lightroom offer functions like Unsharp Mask and Clarity to avoid a processed look. -
Q2. Is it possible to sharpen only certain parts of a photo?
Programs such as Lightroom provide the Adjustment Brush function, which allows editors to apply sharpening with accuracy. To fix out-of-focus pictures, these tools even help in improving blurriness over eyes or objects without affecting the entire image. -
Q3. Can AI sharpening tools work on scanned or old printed photos?
A diverse range of platforms, such as Repairit, are particularly valuable for restoring scanned or vintage images that are too online. Through this repair program, all you need to do is simply upload your photo and let AI detect and restore details.
