Lighting is one of the essential ingredients of taking a photo. Therefore, you want the lighting to be perfect or be able to fix it. However, there are times when the lighting isn’t exactly right, and fixing it becomes a problem. Additionally, Google Photos allow you to fix the lighting on your photo if the lighting is terrible.
But there are times you want to disable the Google Photos fix lighting and don’t know-how. This article provides knowledge on Google Photos fix lighting disable feature. You also gain access to solutions for similar issues related to Google Photos; let’s begin.
Part 1. Abstract of Google Photos
Most of us have thousands of photos stored in our smartphones in different folders. Google Photos is an easy way to organize your photos and sync them. This way, you can access these photos wherever you are and on various devices. Google Photos is one of the best photo storage apps out there. It was launched in May 2015 and used Google image analysis technology to organize photos and videos.
It has an app with billions of downloads which got a redesign in June 2020. It offers users unlimited storage to store millions of photos. However, you can pay to get a higher quality for your photos. It has become one of the best platforms for storing, tweaking, and organizing photos. The best part is that Google is continually working and improving Google Photos features. With the many features available on the platform, you can get your shots looking their best.
Although Google Photos tend to have a different look depending on the device you’re using; its image editing features are more than enough. This platform also allows you to share your photos and videos to other platforms without switching apps. Google Photos is your one-stop for all your photo editing, storing, and sharing needs.
Part 2. What Does Fix Lighting Mean in Google Photo

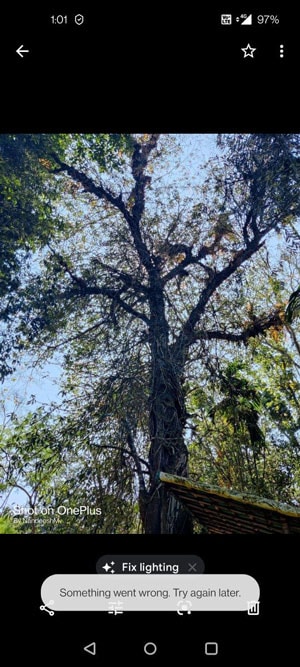
Google Photos offers many features to help you edit your photos and have you looking your best. Some of the features include tweaking brightness, contrast, sharpness, and many more. One of Google Photos' new features is to suggest actions for you. These suggestions are aimed at helping images become more productive. One of these features is the ‘fix lighting’ feature. When a photo is too dark, Google Photos suggests that you ‘fix lighting.’
For those who might be in the habit of taking photos everywhere and of anything, you might benefit from this new feature. When you click on this tab, the Google Photos algorithm automatically brightens your picture; This function can be pretty helpful to achieve natural lighting without necessarily editing the photo. The results are usually impressive, and you can save the edited picture as a copy to compare with the original images. It also has the option of reverting to the original photo.
Therefore ‘fix lighting’ in Google is simply an automatic lighting feature for dark photos. It means that the images’ brightness isn’t quite perfect. It gives you the option to adjust so that your shot looks much better. However, this feature is only available on the updated Google Photos app. It was created for the Google Pixel smartphone, and to access it, you have to upgrade your app to the recent version.
Part 3. Questions That Related to Google Photos
Although the knowledge of Google photos fix lighting disable feature is essential and will be reviewed in this article, other questions are related to Google photos. This article explores these questions and provides suitable answers; let’s take a look.
-
How do I get rid of the fix light in Google Photos?
One of the common questions that most people ask is how to get rid of the fixed light in Google photos. To answer this question, we would be exploring the knowledge of Google Photos fix lighting disable feature. Turning off the ‘fix lighting’ feature in Google photos is relatively easy and only requires a few steps. Keep reading this guide to determine how to turn off the feature if it gets in your way of storing, editing, and tweaking pictures on Google Photos.
-
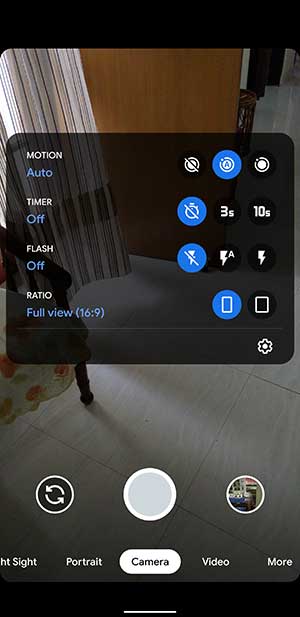
Firstly, go to the camera app on your smartphone.
-
Swipe down on the pictures to reveal the settings quick picks. The quick choices usually include flashlights and several other features.
-
In the right corner of the option, select the setting icon to proceed.
-
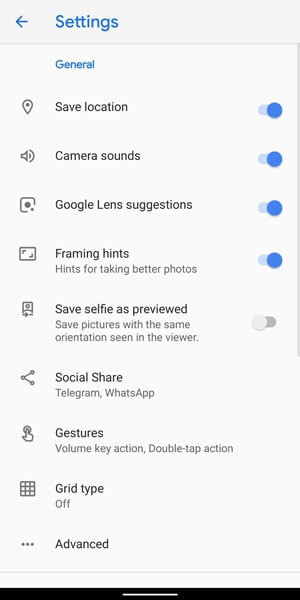
This will lead you to a new page with options; scroll through for framing hints.
-
Turn off ‘framing hints’ and ‘Google lens suggestions’
-
The ‘fix lighting’ suggestion should disappear in Google Photos.
Next time you open a photo on Google Photos, you will notice that the ‘fix lighting’ suggestion will no longer be in the way.
-
How do I turn on fix lighting in Google Photos?
If you want access to the ‘fix lighting’ feature in Google Photos and can’t seem to find it, we have a solution for you. While some are lucky to have these features and seek knowledge of Google Photos fix lighting disable feature, you might be among those who want to turn it on. This feature is automatic on Google Photos but only on the updated version. If you wish to access the ‘fix lighting’ feature, you must update to the current version. To update the Google Photos app on your smartphone, follow the steps below.
-
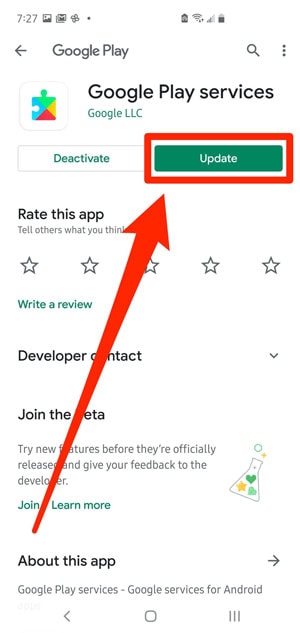
On your smartphone, visit Google Play Store for Android devices and App Store for iPhones.
-
Search Google Photos, and it should be at the top of the results.

-
Click on ‘update’ to update to the latest version without bugs.
-
Once it is updated, you can open it, and you should see the ‘fix lighting’ option on dark photos.
If this option doesn’t work, you might need to rest or reinstall the Google Photos app. This action won’t erase your backed-up photos or those you're yet to back up, so you have nothing to worry about.
-
How do I tackle corrupted photos (including photo lighting issues) in Google Photos?
When you want to fix photo lighting issues or photo corruption issues on Google Photos with the easiest way, an effective photo repair software like Wondershare Repairit will help you. It is a secure photo repair software that is compatible with almost all photo issues. It is entirely safe and will fix photos with all kinds of damages or corruption. Wondershare Repairit doesn’t affect the quality of your image.
Using Wondershare Repairit is relatively easy, and it only requires three simple steps. Additionally, It restores top-quality images to their original state without blemish. It also provides you with a valuable option of advanced repair for pictures intricately damaged. Keep reading to find out how to use this photo editing software.
Step One: Choose files

The initial step you should take when you want to repair corrupted photos using Wondershare Repairit is to choose the corrupted files. To do this, you need to open Repairit software, choose "Photo Repair" in the "More Types Repair" section, then click the "+Add" button to upload photos on your PC. Wondershare Repairit allows you to select multiple files to repair.
Step 2: Click repair

Once you select the files, you’re ready to begin the repair process. Select ‘repair,’ which is at the bottom right corner of the page. Clicking this tab will start the repair process, and Wondershare Repairit will carry out an elaborate repair process on your files.
Step 3: Preview and save
After the repair, Wondershare Repairit allows users to preview the files. This step is to ensure that your files are back to their original.

If that’s not the case, you have to click on advanced repair to begin your files' more intricate repair process. However, if the files are satisfactory, click on save at the end of the screen and choose the location to save your photos.
Further Reading:
Here are the useful articles to help you.
1. Google Chrome Has No Sound.
2. Fix Google Photos Save to Device Not Working Problem.
3. How to Fix Google Drive Videos Not Playing.
-
How do I fix Google Photos unable to save changes error?
If your problem isn’t about the knowledge of Google photos fix lighting disable feature or turning on the feature, then it could be about saving. Sometimes, after editing pictures, you might find it hard to save the photo. Maybe Google Photos refuses to save the changes. There are varying reasons why this could be happening. One of them is because it has no access to background data usage. It could lead to unable to save changes error, and you need to activate background data usage to get rid of this problem. Follow the process below to activate background data.
-
First, you have to go to settings on your smartphones
-
Choose apps and notifications
-
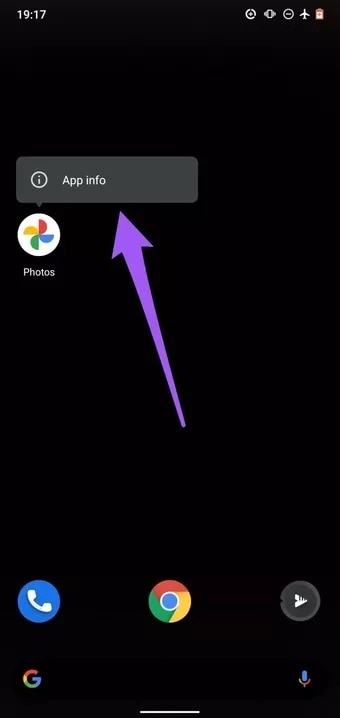
On the list of apps, click on the Google photos’ app icon. It will take you to a page with more details about the app.
-
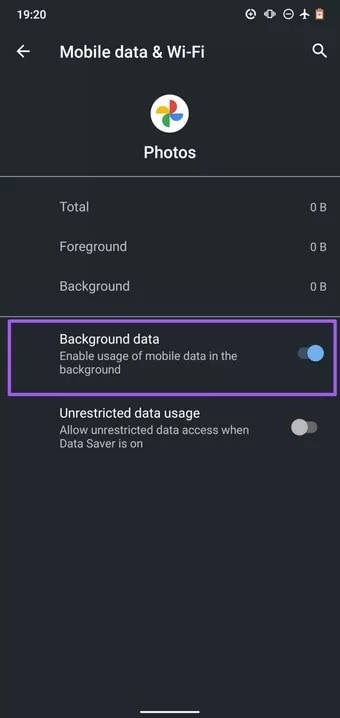
Choose ‘app info’ from the list of options displayed and then select ‘mobile data & wi-fi.’
-
Toggle on ‘background data.’ If this option is already on, toggle it on and off.
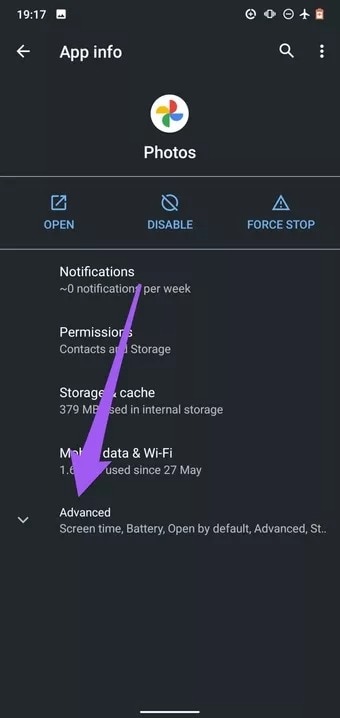
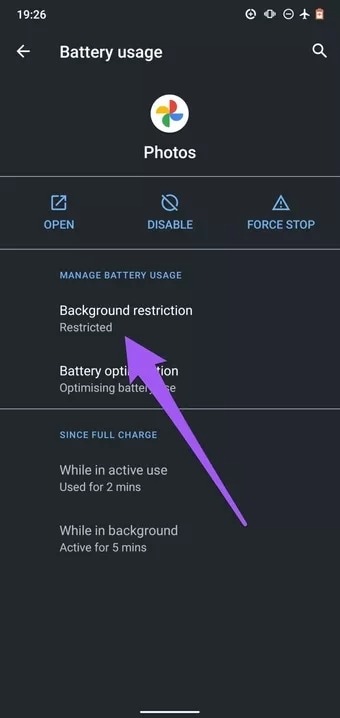
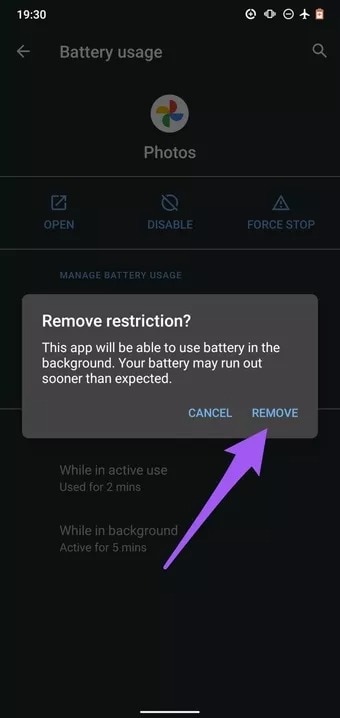
The next step is to disable background restrictions on the Google Photos app.
-
On the app info page, choose advanced for more options
-
Select battery and if it is ‘restricted,’ enable background battery usage.
Additionally, the issue might have to do with Google Photos not having access to save files on your mobile device. To check this out, follow the steps below.
-
Visit the settings page and choose ‘apps and notification.’
-
From the list of apps, select ‘Google Photos.’
-
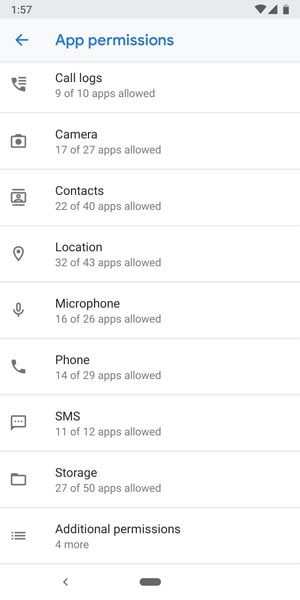
On the Google Photos page, tap permission.
-
If there’s any permission Google Photos does not have, it should appear on this page.
-
You can always change a permission's settings to ‘allow’ to give Google Photos access.
Following these processes should get rid of the ‘unable to save changes’ error on Google Photos.
How do I adjust photo lighting with Google Photos on Pixel?
Adjusting photo lighting with Google Photos on Pixel is relatively easy. One of the features peculiar to Pixel phones on Google Photos is the portrait lighting feature. It allows users to change the lighting source or brighten up the photos. To adjust photo lighting with Google Photos on Pixel, follow the steps below.
-
Firstly, launch Google Photos on your Pixel phone. Select the photo that needs lighting adjustment.
-
Next, choose the edit icon, which is amongst the toolbar at the bottom.

-
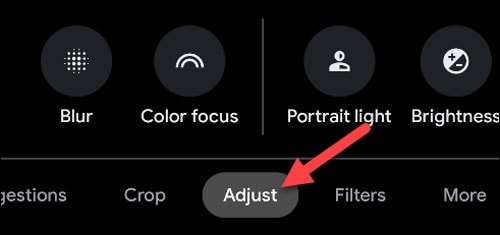
Swipe from the right to explore the available options and choose ‘adjust’ from the options.
-
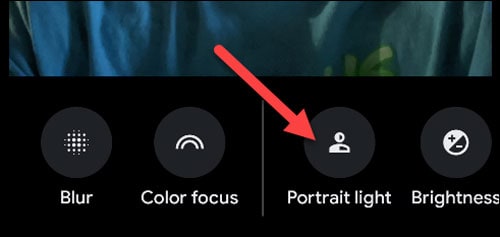
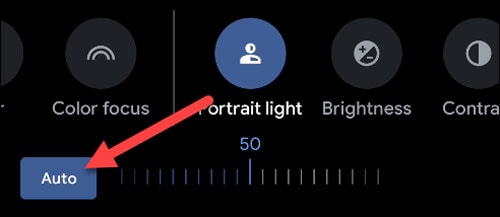
One of the options that you will find is ‘portrait light,’ tap on it to utilize on your photo.
-
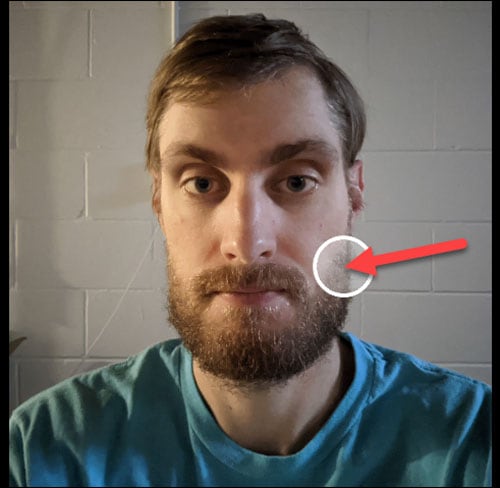
At the top of your photo will appear a circular handle. This handle explains where the lighting source is. Move the circle around to change the lighting source.
-
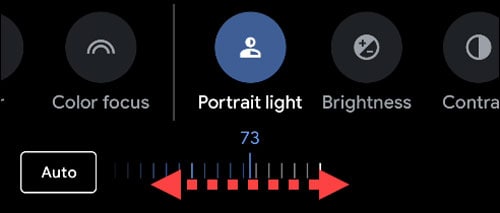
Additionally, the brightness tab will be below the photo. Drag the slider to adjust the lighting brightness for your picture.
-
Alternatively, you can tap ‘auto’ to let the Google Photo algorithm choose the best position for the photo.
-
Once you’re satisfied with the changes, tap 'done' and save a copy to save the new improvements to your photos.

Following the steps above allow Google Photo to make remarkable changes to your photos with poor lighting.
Part 4. Tricks to Master Google Photos
Google Photos can be pretty easy to use. However, there are some tricks you can employ to master Google Photos. Apart from knowledge of Google Photos fix lighting disable feature, this tricks help you become adept at storing, sharing, and tweaking photos on Google Photos.
Learn how to Show a Slideshow
One of the top features of Google Photos is that you can view your photo as a slideshow. You only need to select any of your images albums to begin the process. It’s even nicer when you have a Chromecast to pair your device with your TV. Click the options icon at the right corner of the Google Photo app and choose’ slideshow.’ This option will begin to display your photos in a particular order in a slideshow.
Utilize the search feature
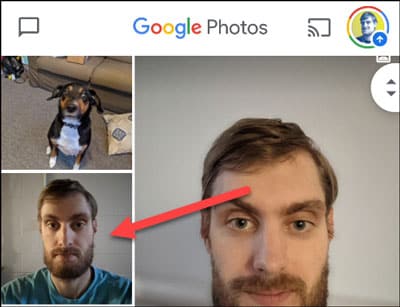
To master Google Photos, you should also learn how to use the Google Photos search feature. Google tags images automatically through face recognition. It even identifies people who are simply in the background. If you have puppy pictures on your Google Photos and search ‘dog,’ this photos app will provide every image with puppies you have. This feature can be helpful when you have thousands of pictures and are looking for a specific feature.
Label people for Live Albums
Once you click on the search option, it would provide you with an option for people and pets. It will also show you various headshots of photos on your mobile device. Choose an image without a label and enter a name. Google will then use the ID feature to help you find every picture of that person on your device. Once you label people successfully, you can create a live album of them. After creating a live album, select the labels of people or pets you would like to include and confirm. You could also help Google enhance facial recognition by helping face-match some photos.
Share a library automatically.
One of the many functions of Google photo is sharing photos. Apart from gaining knowledge of Google Photos fix lighting disable feature, you need to learn how to use the share feature. Google Photos allow you to share more than just a couple of pictures; you can share a whole photo library. To access this, select sharing from the menu and click on ‘partner sharing.’ Pick someone from your contacts, and you can share all your photos or specific people's photos. Additionally, you can choose to share pictures from a particular date only.
Hide your location
Another trick you should learn if you want to master Google Photos is to hide your location. Most photos today possess location data. Google Photos uses this information to map your images which makes it a nice feature. However, it's entirely possible if you don’t want people to know where the picture's location when you share the photo. Go to Google Photos settings and choose ‘hide photo location data’ from the options. When you share your pictures after this, the recipients won’t get information about the location.
Time to Conclude
Google photos is an efficient application for syncing your photos and videos across various devices. It also allows you to upload, edit and store your photos. It offers top tools that will enable you to search your photos and share your photos.
However, features like ‘fix lighting’ on Google photo come in handy when you’re editing your photos. If you want to gain knowledge of Google photos fix lighting disable feature, this article provides you with answers. It also answers other related questions about Google Photos and tricks to master the app. This article should help you master Google Photos and enjoy the app better.
FAQs
-
Why is snap brightening my photos?
This is an automatic feature to prevent you from taking dark pictures. It helps to improve the lighting on your photo and to avoid over-editing of images. You can disable it by following the simple steps to disable 'fix light' on Google Photos. -
How do I get a portrait light in Google Photos?
Portrait light allows you to choose the direction of the light on your photos and the light intensity. However, this feature is only available for those using the Pixel phone. You would have to upgrade your smartphone to Pixel 2 or a higher option to access this feature.