

The advanced design platform AutoCAD is not free from technical glitches. If you happen to use it regularly, more than likely, you must have faced a roadblock while using JPEG image files on AutoCAD. There are many common issues while embedding, inserting, or importing JPEG image files in the AutoCAD drawings.

Many times even the most straightforward task of converting DWG files to JPEG becomes a colossal job. But there is nothing to worry about since it only needs a few steps to resolve such issues. We have summarised the possible causes and solutions to fix AutoCAD JPEG problems and get your technical life back on track.
Part 1: Overview of AutoCAD JPEG
In the olden days, engineers and architects could only bring their ideas to life by drawing them on paper. As the technology advanced, this mammoth task was taken over by computer software. AutoCAD is one such computer-aided design software that helps in making and editing 3D and 2D design effortlessly. The plans can be viewed and improved anytime, anywhere. Drawings saved in the AutoCAD are in DWG format. However, these need to be converted to a more universally recognized format like JPEG for easier access.
The JPEG format is a faster image format, has a small file size, and has excellent image quality. Thereby making it easier to print, share or send files through email. Sometimes, you also need to insert jpeg images into your drawing to make them more descriptive and attractive. Furthermore, converting the DWG files to JPEG makes it easier to view them on a mobile device and an image viewer.
AutoCAD is an excellent software for any professional designer. However, many users face everyday problems with AutoCAD jpeg. So we have enlisted most of them here to help you find the right solution.
Part 2: Fix Common Problems of AutoCAD JPEG
Problem 1. JPG image disappears on reopening AutoCAD file.
While reopening a drawing in AutoCAD JPEG files can particularly pose problems many times. The image may not show in the pictures or even in the plot view. This problem can persist even after rotating the raster image. You need to re-embed the image into the picture by following the steps given below:
Step 1: Begin by opening the image in Microsoft paint.
Step 2: Select and copy the image again from Microsoft Paint.
Step 3: Go back to AutoCAD and use the 'Paste Special' command and the option 'Image Entity'.
Problem 2. Distorted or colors are not properly displayed on reopening the AutoCAD JPEG file.
When you open your AutoCAD drawing, you notice that the JPEG images are distorted, and the colors are not showing correctly. A common problem occurs when the images are saved in JPEG format in CMYK (Cyna, Magenta, Yellow, Black). AutoCAD rasterizes the pictures protected with RGB (Red, Blue, Green) color instead of CMYK.
There are two leading solutions to this problem. Let's look at both:
(i) First, open the JPEG file in an image editing software like Microsoft Paint or Adobe Photoshop and change the mode to RGB mode for your JPEG file. This step will improve your color distortion.
(ii) Wondershare Repairit is another great tool if you ever find yourself in a situation where the JPEG files have distorted colors. It is user-friendly and resolves the problem whether you are windows or a MAC user. Let's download this software and look at the steps involved:
Step 1: Launch Wondershare Repairit on your PC and load damaged or corrupt photos
The first step is to start by downloading and launching the Wondershare Repairit on your PC. The tool will help you fix many issues like pixelated photos, grey images, or even wrong colors. Once the images are loaded, it will also display the other details like resolution and size.

Step 2: Repair the images
Once you have chosen the images that you need to repair, add the images before going to the next step of improving. Hit the 'Repair' icon at the bottom right corner of the screen and wait for the application to run the process. Then, the unique algorithm is utilized to fix the loaded images. Once the process is complete, the Wondershare Repairit will let you know the result.

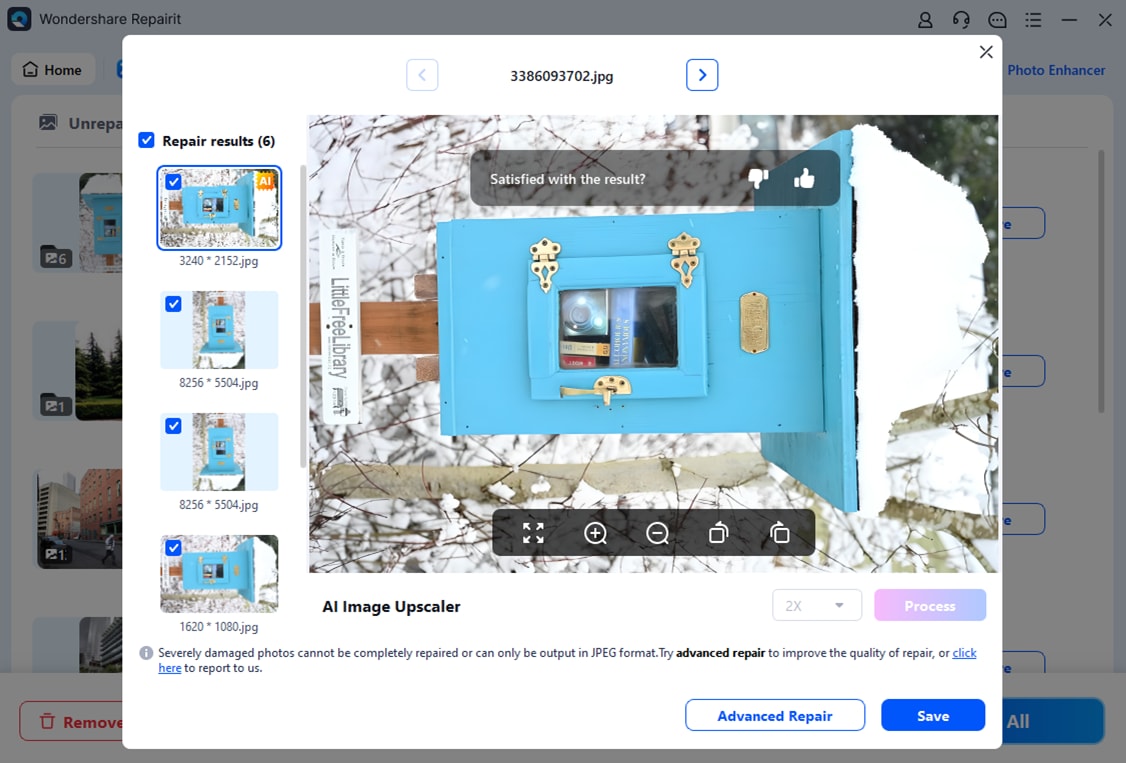
Step 3: Preview the save photos
You can click on the Preview button (the eye icon) to see the results of the repairing process. You can also access the image preview by clicking the thumbnail of the image. This way, you can check if the standard repairing process was successful or not.

Optional:Advanced Repair
If the standard repair doesn't give you desired results, there is an option of choosing advanced repair. Click on the 'Advanced Repair Button' to access it.
A sample image needs to be loaded to run the 'Advanced Photo Repair.' The critical point to remember while loading the sample image is that it should be shot with the same FujiFilm camera and should be in the same format. After loading the image, click on repair, which will begin the repairing action. View the repaired image now.
'Advanced Repair Mode' can also be found at the bottom panel of the screen when you start the repair process in the beginning.
Problem 3. Fail to import JPEG image in AutoCAD
The JPEG images stored on your PC can sometimes not be imported on AutoCAD drawing. As a result, simple copy and pasting don't always work. Let us look at how to resolve this issue. Unfortunately, the raster images like JPEG do not work with the IMPORT command 'File Menu' in AutoCAD. Let us look at the correct path to follow with resolving this:
Step 1: Follow the path: Insert > References Panel > Attach > Find.
Step 2: Then select image file dialogue appears at this stage.
Step 3: Select an image file and click open the picture.
Step 4: At this point in the image dialogue box, you can specify insertion point, scale, or rotation and click OK.
Problem 4. Unable to export AutoCAD file to JPEG or get poor resolution after exporting to JPEG
If you are unable to export your AutoCAD files to the JPEG, just follow the steps below:
Step 1: At the command prompt, enter JPGOUT.
Step 2: Then 'Create Raster File' Dialog box, select the folder in which you intend to store your file, click 'Save.' It will append the. JPG extension to the file name.
Step 3: Select the objects that you want to save.
Furthermore, if your JPEG files do not get saved in a high resolution, we have enlisted the steps to configure the page setup to get better results.
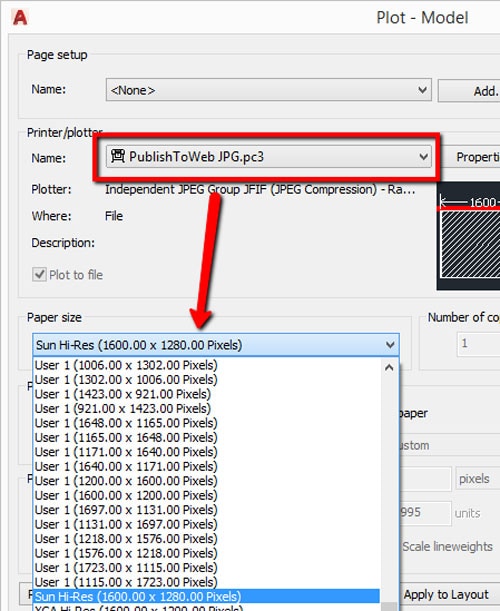
Step 1: Enter PLOT or PAGE SETUP.
Step 2: In the Plot dialogue window, select PublishTo Web JPG.pc3 from the plotter drop-down menu.
Step 3: Choose the resolution you want by selecting the resolution from the paper size, as shown in the image below.
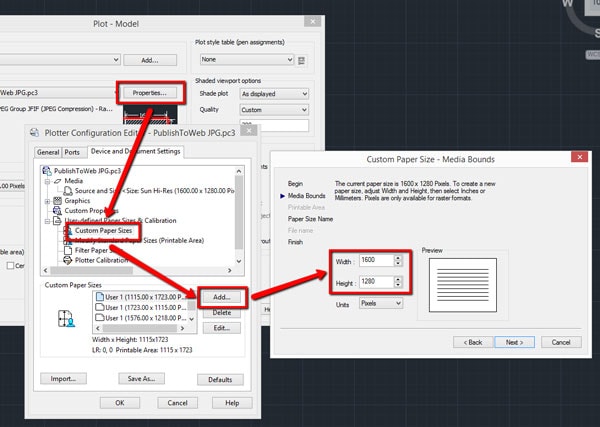
Step 4: If you feel that the resolution is still not high enough, you can create a custom one by following the path below:
Click on Properties > from Device and Document Settings tab, click on Custom Paper Sizes, Click Add > Create a perper size with the desired height and width.
The change in these settings will resolve the resolution or the quality issue when exporting your AutoCAD files to JPEG.
Problem 5. JPEG links showing frames but no images
The problem of images not showing in the frame usually occurs after AutoCAD updates. Though it rarely happens, can be resolved by simply restoring to the original settings.
Step 1: Ensure that you save AutoCAD drawings in a folder before you reset.
Step 2: Follow the path Start Menu > click on All Apps > Autodesk > Reset settings to Default.
Part 3: Other Related Problems
Q1. How do I bind a JPEG in AutoCAD?
The 'Binding' of the JPEG in an AutoCAD simply means that you don't need to send the image files separately to someone if you share them with others in DWG format. To bind the JPEG files, follow the steps below to make it hassle-free for yourself and the receiver too.
Step 1: Open the that you want to bind with an image editor. Go to Windows Explorer, browse to the image file > Right-click on it > select open with > select paint.

Step 2: Once the image file is open in paint. On your keyboard, press' Ctrl+A' to select all and then press Ctrl+C, a shortcut to copy on the clipboard.
Step 3: Open your AutoCAD file where the images need to bind.
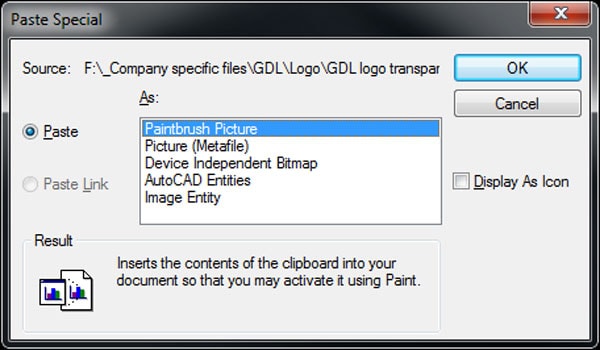
Step 4: Go to the command line and type PASTESPEC, and press enter.
Step 5: A dialogue box will show up > select 'Paintbrush Picture'> Click OK
Step 6: To finally bind the image to your AutoCAD drawing, click anywhere on your graphics and place the image file. You can reposition or scale the image as per your voice as you would typically do. But this way, you are not attaching the picture, but it will become a permanent part of the drawing.
Besides, here are some messages of Windows Explorer.
Q2. Why are my images not showing up in AutoCAD?
There are many times when the images in your AutoCAD drawings don't show up; it mainly happens with JPEG format. To resolve this issue, open the XREF manager by typing XREF in the command line. Somehow, as soon as you press to enter, the image reappears. It is a peculiar feature of AutoCAD, but, in most cases, it works!
Q3. How do I make a high quality JPEG from AutoCAD?
There are many times the images, once converted to JPEG, get degraded in resolution and color quality. You can improve this with the help of a tool called Wondershare Repairit. The effortless steps to improve the quality of your image are mentioned above. There are numerous other reasons why you should choose the Wondershare Repairit for all your image quality issues.
Supports all major image formats: Wondershare Repairit is truly remarkable since it supports all the major image formats like JPG, JPEG, NRW, NEF, ARW, GPR, RAF files. So if you are looking to improve the quality of your JPEG images in AutoCAD, you know where you stand your best chance. Also, it can repair pixelated images.
A unique feature of preview and then repair: The part wherein you can preview the repaired image first before making the final changes makes Wondershare Repairit unique. This intelligent feature helps you decide which files are worth fixing.
User-friendly: The super-friendly User Interface (UI) makes it a remarkable tool. Wondershare Repairit becomes an excellent choice for repairing your degraded image files with the details like photo resolution, size and formats displayed. As recently released Repairit 3.0 which has drastically improved the overall interface of Repairit, making it easier for users to navigate and access its video and photo repairing features.
Conclusion
Design software like AutoCAD makes the work simple for designers, architects, students, and engineers alike. But there are many technical issues that the users face while using this software, obstructing day-to-day designing. The guide above can help you fix the AutoCAD JPEG problems.
Along with this, the images can be repaired and enhanced using Wondershare Repairit. Little investment in this tool can resolve your technical issues in the long run. From repaired of your corrupt files to improving your images to a high resolution, Wondershare Repairit has many options to suit your needs. DO visit our website Wondershare Repairit for more details.