
In this article
If you can’t figure out image resizing without reducing the quality of your photos, you’ve come to the right place. No matter what you do, the results are more than dissatisfying. Crazy, isn’t it?
Well, things don’t have to be that way.
You can actually resize your precious images without sacrificing quality. You can even enhance them and make them look more focused, clearer, and sharper.
How, you might ask? By choosing the right tools for the job.
Although image resizing might be challenging due to reducing the number of pixels, there are ways to do it without reducing the quality of the image. Read on to learn more.
Why Does Traditional Image Resizing Reduce Quality?

A high-quality photo serves two primary purposes on the web. It helps you represent yourself in the best light across websites and social media networks, and it helps your business look professional, authoritative, and credible.
As you can see, so much depends on the quality of your visuals, as images are critical to digital content creation. However, different platforms have different image sizing requirements, so you can easily lose yourself in image resizing.
You may also think the higher the image resolution, the better, but you’d be wrong. Why? Because a high-resolution image takes longer to load and display, which can slow your website loading time and kill your traffic.
Ideally, you should stick to the nominal image file size, around 100 KB. That should be enough to balance size and quality effectively, but problems arise when resizing larger images.
Traditional methods will typically scale an image down. However, that impacts the overall quality of an image due to reducing the number of pixels. Although this decrease in the image size can be unnoticeable, things become tricky when you try to make the resized image larger.
That’s when it starts losing quality, focus, and sharpness. In other words, you need a way to resize the image without touching the pixels and losing quality.
Importance of Resizing Images Without Losing Quality
Using a good example is the best way to explain the importance of preserving quality when resizing images. Imagine that you’re trying to sell a particular product or service online. You’ve taken your photos, but they are all blurry.
Naturally, you see little to no traffic to your website.
Why? Because your competitors have crystal clear images that attract customers. Top-quality visuals showcase your offer in the best light with all its essential details and features.
Aside from conveying professionalism, well-formatted images help your customers make an informed purchasing decision. In the buyer’s eyes, things are quite simple. If you can’t even try to get the images right, how will you develop products with real value for the buyer?
The importance of top-quality images goes well beyond user experience and professionalism. High-resolution images may impact your website’s loading speed. Slow websites can reduce traffic and lead generation and impact conversions.
Although they might look great on your website, customers will lose patience if your website takes forever to load. That’s why you can’t afford to sacrifice the quality of your images – there’s simply too much at stake.
Tips for Resizing Images
Here are some guidelines for image resizing without distorting the quality.
Pay attention to dimensions when reducing pixels
Related Readings::
Best Ways to Reduce Image Dimensions within Minutes
The Best 8 Image Dimension Changers In 2024
Although there are no standards regarding height or width you should abide by when resizing images, reducing pixels in an image is subject to various factors.
For example, people use mobile or desktop devices to access the web, so you need well-formatted images that fit each preference.
On the other hand, the size of an image will depend on its location on your website. In most situations, 600-1200 pixels should do fine for quality while fitting most screen sizes.
Stick to an acceptable KB file size
When compressing images, you reduce the KB file size, thus impacting quality. Ideally, you should aim to balance quality and nominal file size by keeping the image file size around 100KB or less.
Resizing PNG vs JPG
JPG files are much easier to compress and resize than PNG images. Therefore, you should convert PNG images to JPG before compressing them to maintain quality. Although some quality loss is unavoidable, you won’t lose much of it while reducing your KB size.
Best Options for Resizing Images Without Losing Quality
Here are the top four options for resizing images without distorting or losing quality.
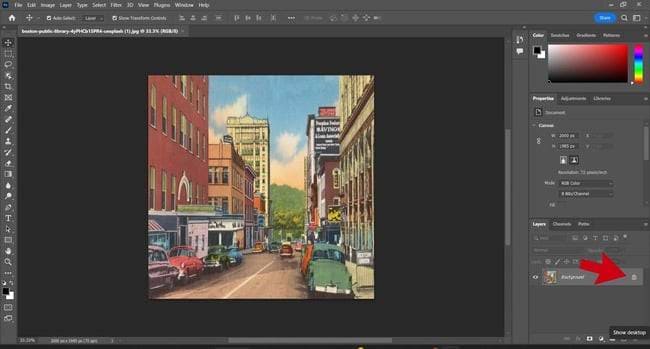
1. Resizing Images in Photoshop Without Losing Quality
Download and install Photoshop on your device, then follow these steps to resize your image in Photoshop without losing quality.
Step 1: Import your image
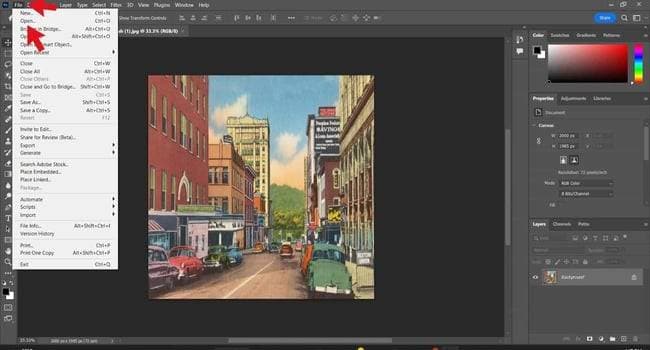
Open Photoshop, click File, and select Open to import your image. Select the image you want to resize and click Ok.
Step 2: Unlock the background layer
Unlock the background layer to enable image editing options in Photoshop. Find the lock icon in the panel on the right side and click on it to unlock it.
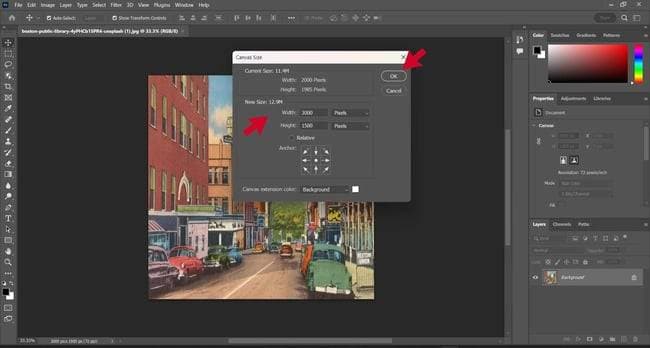
Step 3: Manipulate image dimensions
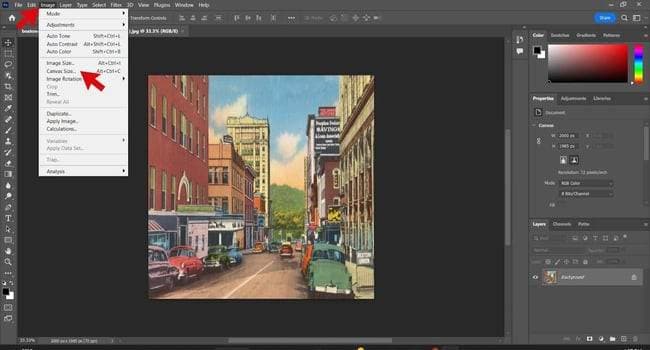
Find the Image tab in the menu bar and open it. Click on the Canvas Size option and select New Size to change image dimensions according to your needs.
Step 4: Image adjustment within the canvas

Tick the Show Transformation Controls box to adjust your image to fit your resizing requirements by dragging it around until it fits. Confirm your new settings by hitting Enter.
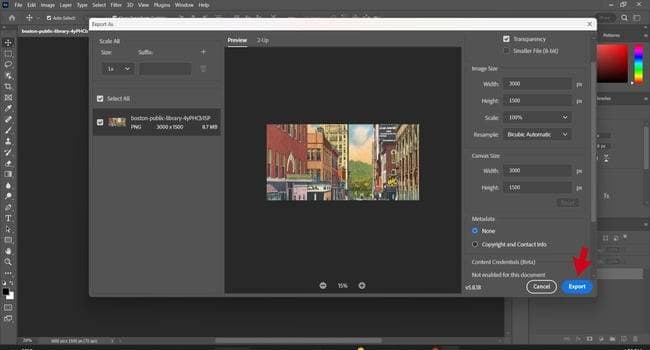
Step 5: Save your new image
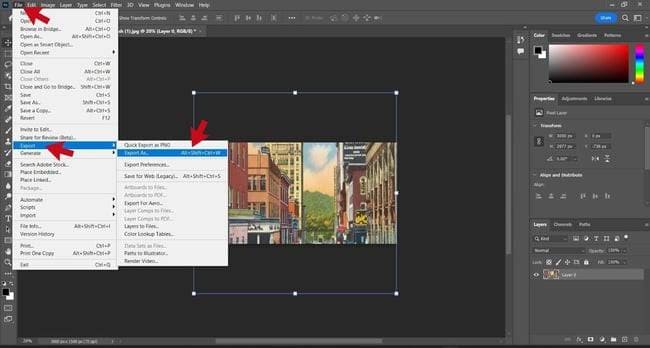
Navigate to File, click Export, and select Export as. Choose the fitting format for your resized image and click Export to save your progress.
2. Resizing Images in Adobe Express Without Losing Quality
Download and install Adobe Express on your device. Run it to start resizing images.
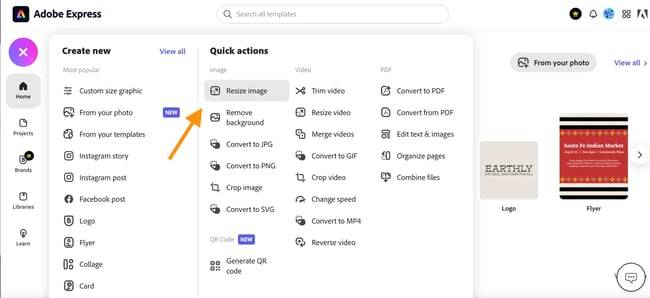
Step 1: Open a new project
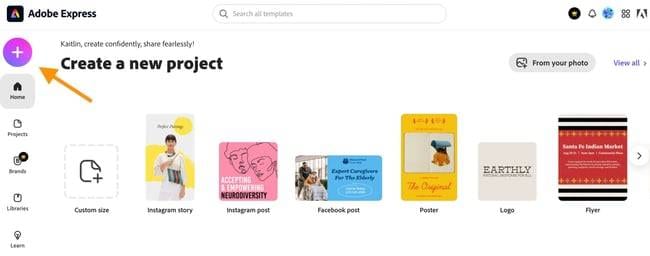
Open Adobe Express and click on the + icon in the upper left corner to start a new project. When a new tab appears, select Resize image.
Step 2: Upload your image
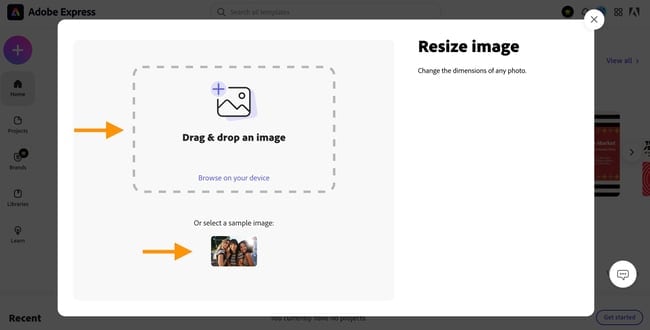
In the Resize image tab, either browse for an image on your device or drag and drop an image directly into Adobe Express.
Step 3: Resize your image
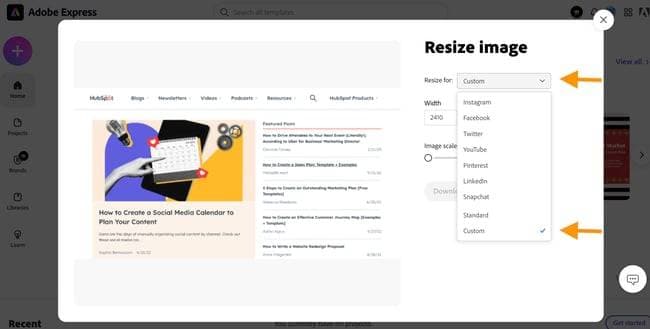
Insert custom dimensions or opt for one of the available templates to resize your image.
Step 4: Set image adjustments
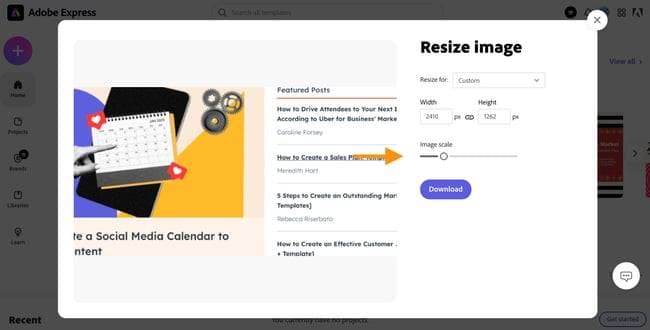
Since cropping can be messy, you can set further image adjustments by changing the scale of the image using the slider or panning the image.
Step 5: Download and save your image
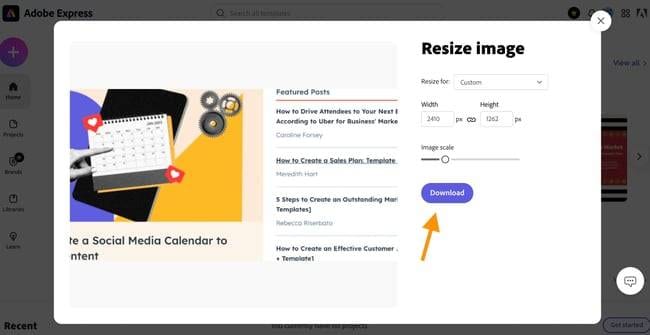
Once you’re done with image resizing, hit Download to download and save your image on your device.
3. Resizing Images in MS Paint
Download and install MS Paint on your device. Follow these steps to resize images. Step 1: Upload your image
Open MS Paint, navigate to the File tab, and click Open. Select the image you want to resize to upload it from your device.
Step 2: Zoom out
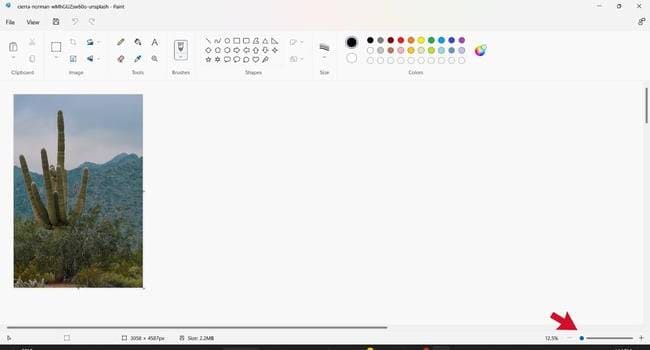
Once MS Paint opens your image, navigate to the slider at the bottom of the page to zoom out, sharpen the focus and make your image clearer.
Step 3: Crop your image
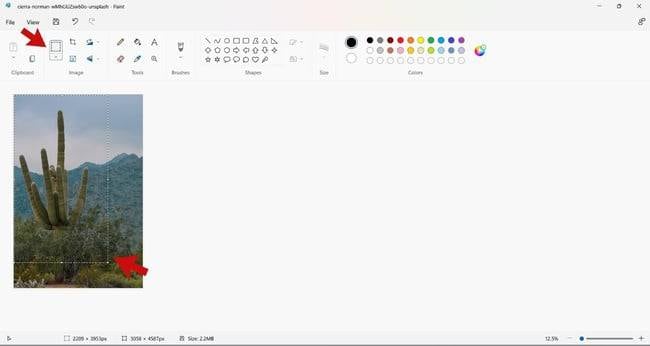
Click the Square icon to crop your image and reduce it to a portion you would like to keep. Once finished, select Crop.
Step 4: Resize your image

Select the Resize icon to open a new tab with options to resize your image. You can reduce the image pixel size or resize your image by percentage. Click Ok once you’re finished.
Step 5: Save your image
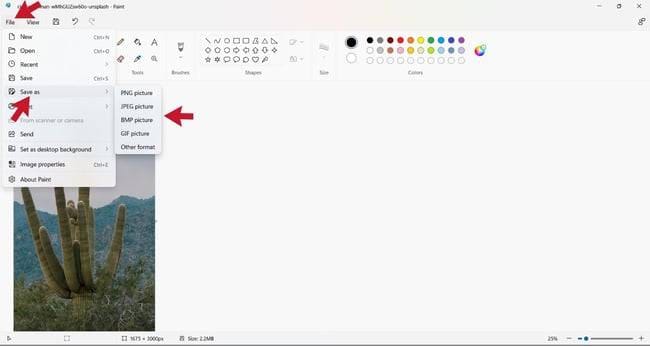
Navigate the File tab to the Save as option and save your image in a preferred format.
4. Resizing Images in Canva Without Losing Quality
Download and install Canva on your device and follow these steps to resize images.
Step 1: Click Create a design
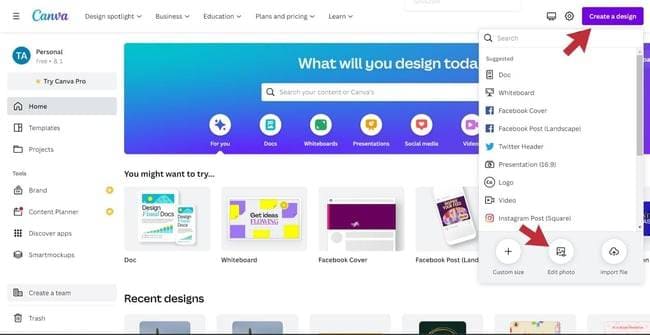
Open Canva and locate the Create a design option in the upper right corner. Click on it and select Edit Photo. This option will prompt you to select an image your want to resize.
Step 2: Select Use in a design
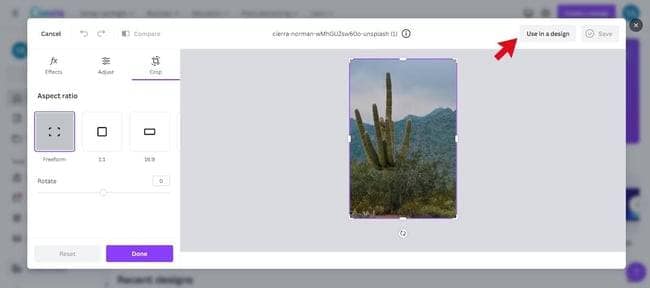
Select the Use in a design option to get access to image resizing.
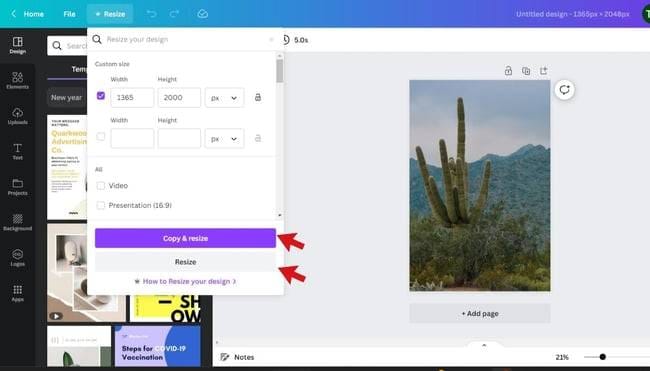
Step 3: Resize your image

Select Resize to open a dropdown menu. When the menu appears, select a template or resize your image by changing dimensions. Once you’re finished, click Copy and Resize to save your changes or select Resize to resize your image.
Step 4: Save your image
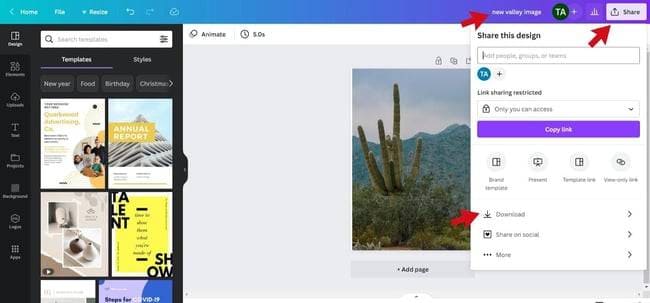
Rename your resized image and select Share in the upper right corner to save your changes. Select what you want to do with your new image in the dropdown menu.
Bonus Tip: Improving Image Quality Before Resizing
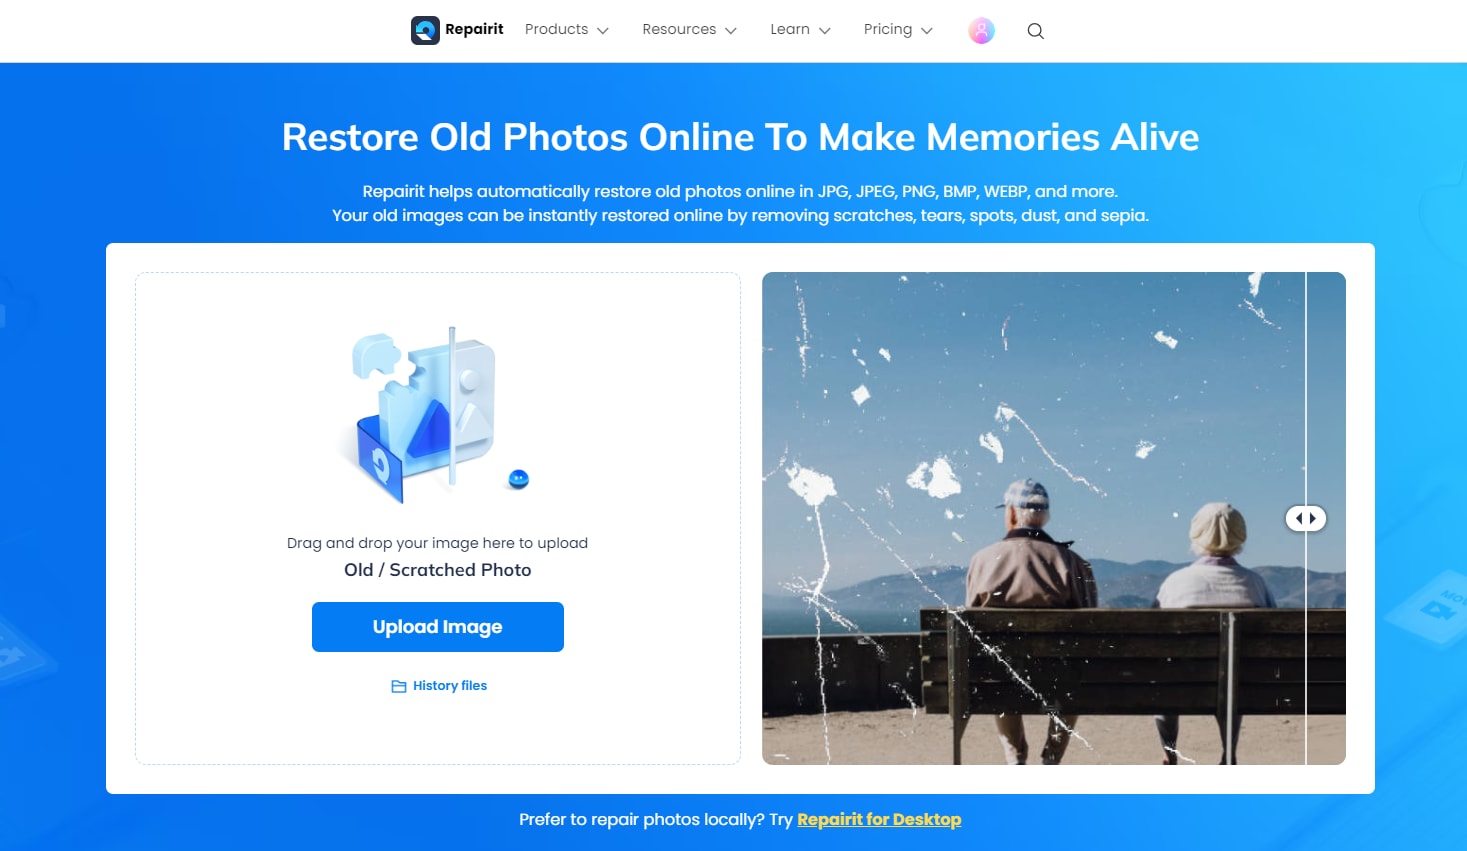
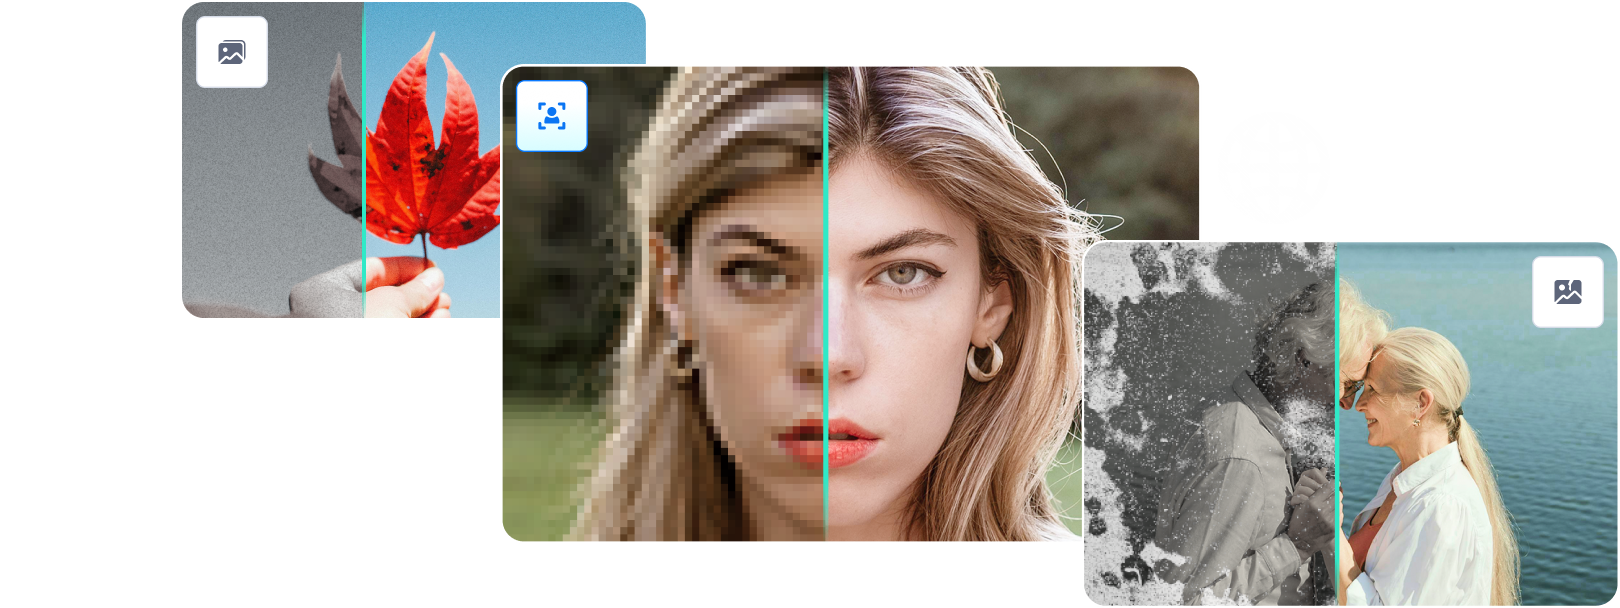
Although you can use the aforementioned software to resize your images, it would be best to improve image quality before resizing to preserve image quality. You can use a specialized program like Wondershare Repairit’s Online AI Photo Restoration tool.
Aside from enhancing image quality, Repairit can also sharpen blurry parts of your old photos, enhance colors, remove scratches, improve face clarity, and give you access to multiple photo colorization options.
And the best part about it? You can repair your images for free, and improving image quality with the Online AI Photo Restoration tool takes only three steps.
Conclusion
Image resizing doesn’t have to be complicated or tedious. Whether you’re a blogger, digital marketer, or a simple internet user on your way to conquering social media networks, you need top-grade images to accomplish your goals.
Although image resizing might seem easy, it isn’t that simple. Fortunately, this guide can help you conquer common challenges in image resizing and get the best results without spending too much time or investing too much effort.
Resizing can be effortless, quick, and straightforward when you know what you’re doing. You can’t go wrong with any of the solutions mentioned here.