

In this article
Every professional video editor knows about the importance of color correction as it’s a crucial part of the process. Editors often spend hours dealing with it, so it’s an excellent idea to use capable applications to handle this for you much more quickly and efficiently.
That’s where Adobe Premiere Pro comes in. Color correction in Premiere Pro can save you a lot of time with its powerful color-adjusting options, while creating a well-rounded finished product.
However, Adobe Premiere Pro color correction isn’t the only way – alternative options are also available, and they often use artificial intelligence to do color correction for you, making things a lot easier.
Premiere Pro Color Correction Effects Explained
Many professional video editors use Adobe Premiere Pro to handle everything related to video editing, and the reason for that is simple – Adobe has been in the game for four decades. Their apps constantly improve as the company follows new editing trends and incorporates the latest technologies.
The same goes for color correction effects. Adobe’s color correction in Premiere Pro is unmatched by the competition. Moreover, since they’ve been doing this for a long time, video editors trust them like no other company. Years of industry experience means that various color-correction options can create wonders for your shots and benefit anyone from a complete beginner to a seasoned professional.
Benefits of Color Correction in Premiere Pro
Using Premiere Pro for color correction instead of other video editing apps brings significant benefits that other applications can’t replicate. Here are some of the advantages you can gain by doing color correction in Premiere Pro:
- Increase quality – Your videos and edits will gain quality that raw footage can’t achieve alone. No matter the price and quality of your video-capturing gadgets, you won’t achieve this quality without color correction in Premiere Pro.
- Gain consistency – Once you adjust the settings that fit your style, you can apply the effects to all your shots. That will create a consistent look and feel between your videos, making it look like you filmed them under similar conditions and marking your unique editing style.
- Fix color issues – Adding graphic elements or restricting colors to a particular range can recover lost details and fix any color issues in your videos. What your video-capturing gear can’t do, color correction in Premiere Pro can handle.
What Can They Do?
Color correction is beneficial as the options are consistent across Adobe apps. These edits can create a unique look for your videos, putting a stamp on your modifications and allowing people to recognize your style.
Moreover, since Adobe uses its own unique color space, all your edits will look as close to the same as possible on different brands of monitors, TVs, and phones. They’ll have a professional feel, and whoever is watching your videos will enjoy the colors to the fullest.
Color Correction Effects in Premiere Pro
Premiere Pro offers many color correction options for video editors to create unique videos and impressive edits. These effects deal with highlights, hues, saturation, mid-tones, shadows, and everything else color-related. Below is a list of options you can try when dealing with color correction in Premiere Pro.
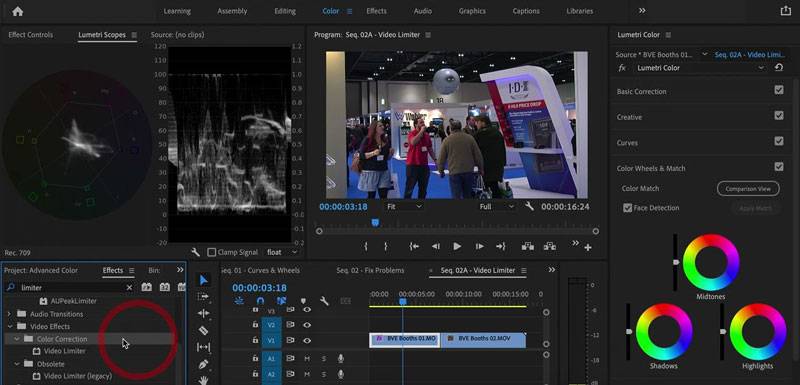
1. Video Limiter
Since digital broadcasting companies limit the colors of their videos by limiting RGB values to brighten their image and add detail, Premiere Pro has an option for that, too. For instance, HDTV’s RGB spectrum is limited to 16–235 instead of 0–255.
The video limiter option can help create videos perfect for TVs, increasing detail and brightness for movies and TV shows. Otherwise, darker areas would appear too dark or completely lack detail.
You can add the video limiter option to a single shot or the entire video editing timeline to be applied to the final export.
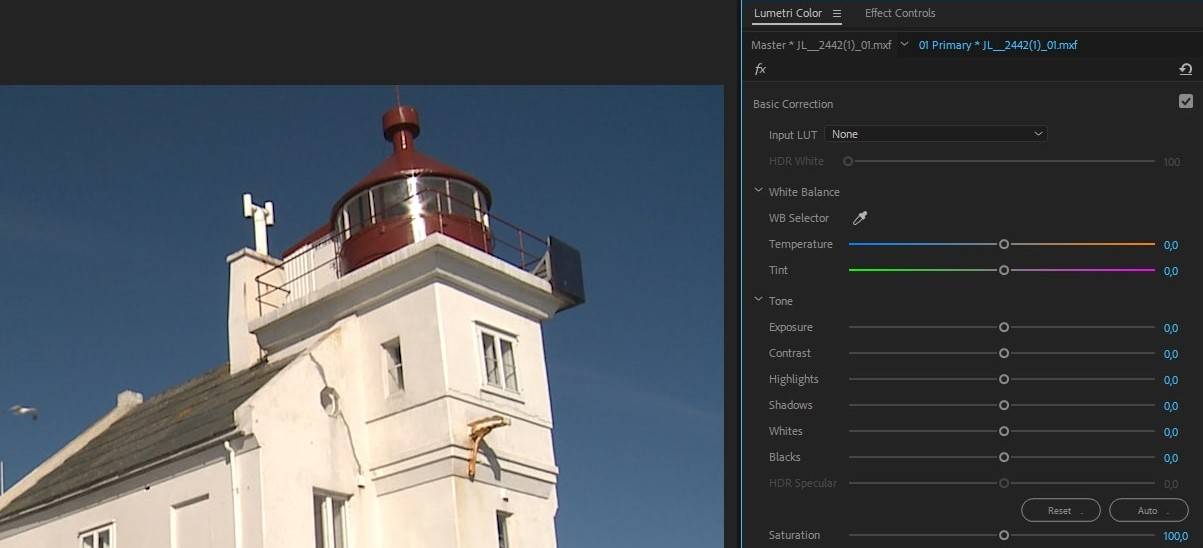
2. Tint
Adobe Premiere Pro has an effect that changes the video’s color information for each frame. The effect is called Tint, and it affects each pixel, where you can adjust the luminance or brightness by altering black and white values.
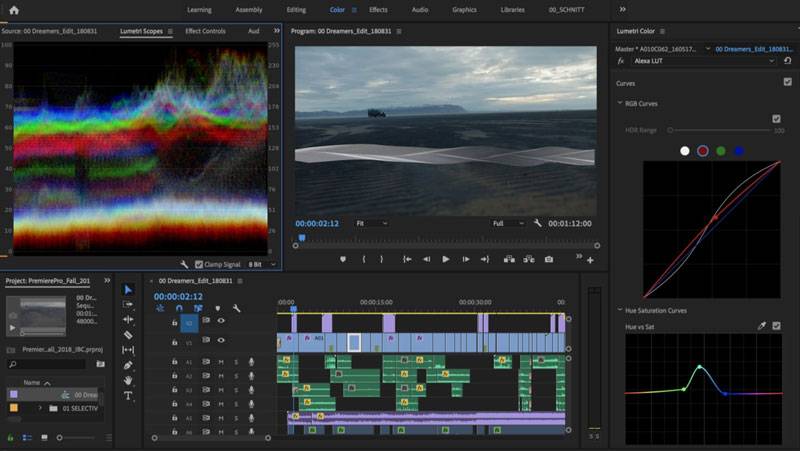
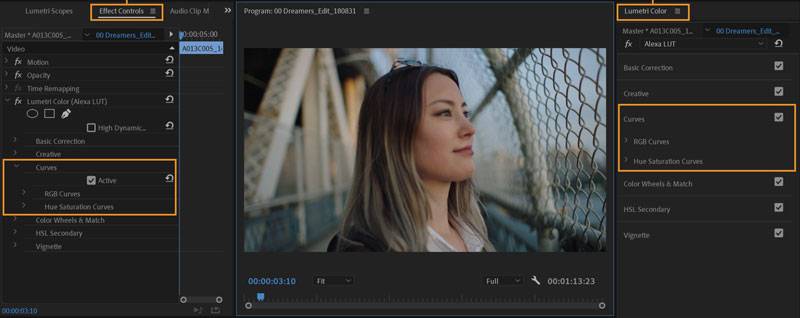
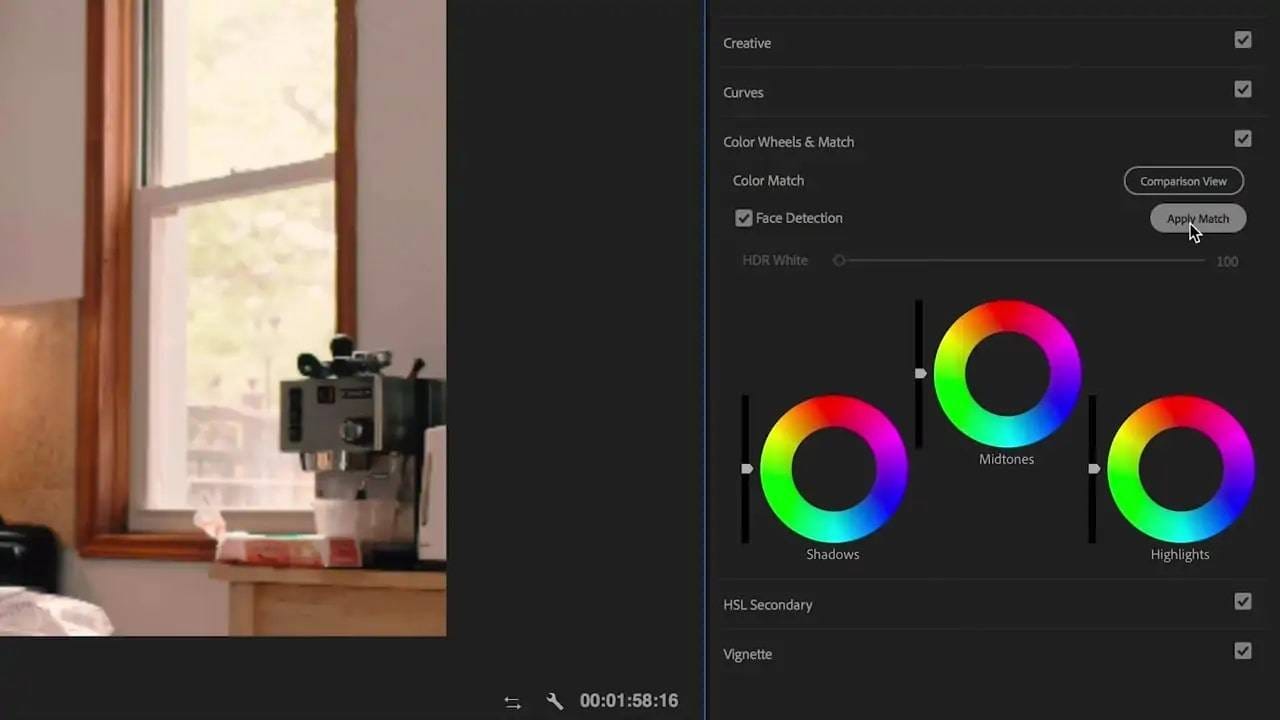
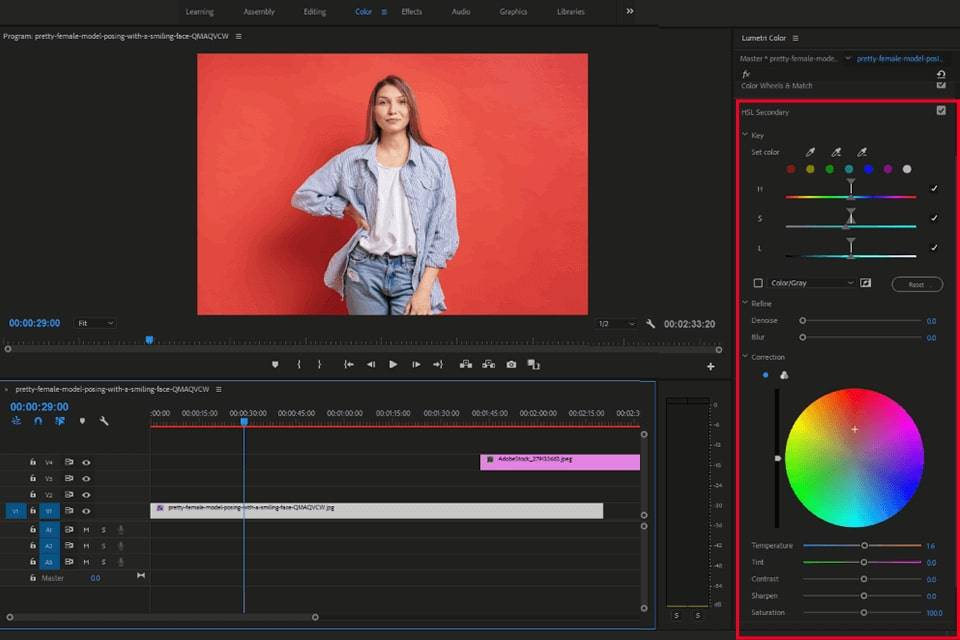
3. Lumetri Color
Premiere Pro takes color correction incredibly seriously, so they have an entire color grading control panel inside the app. All color grading tools are inside this control panel, and you can deal with color adjustments by opening the Lumetri Color option without leaving the project.
You can adjust contrast, colors, and lights by trying Lumetri Color’s curves, vignettes, HSL secondary, or basic correction options. Other options also exist, and they can help apply pre-existing color adjustments or help you create new ones for your video projects.

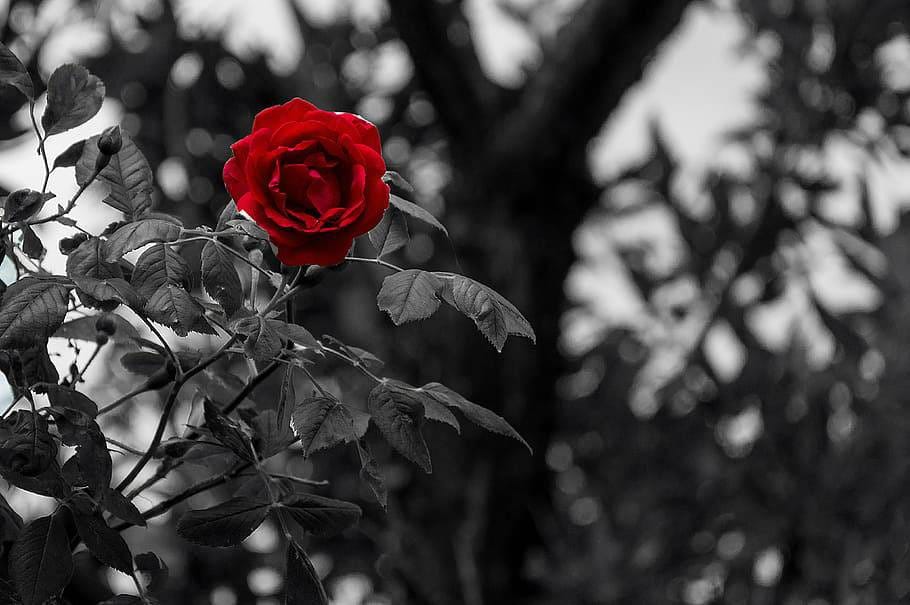
4. Leave Color
If you’ve seen black-and-white pictures with a single colored detail, they’re most likely done with the Leave Color feature. An example would be a black-and-white shot with a single red flower, and the effect decolors everything except your chosen color.
There are plenty of sub-options where you can change how much you want to remove, the flexibility of color matching, how the matching happens, and the edge softness between other colors and gray.
5. Equalize
Another fantastic effect you can try is the Equalize effect which deals with brightness. Namely, it’s similar to the Tint effect as it also handles pixel values to create improvements. However, it changes pixel values to create a more even spread of colors and brightness levels.
You can use the effect with various options, adjusting how it equalizes pictures and how much it equalizes the brightness levels.
6. Color Balance
There are practically two Color Balance effects included in the Adobe Premiere Pro application. One effect deals with RGB amounts in highlights, shadows, and mid-tones, while the other handles hue, luminance, and saturation, and that’s why it’s called the HLS effect.
The Color Balance (HLS) options let you select the image’s color scheme when adjusting the hue, the brightness when adjusting lightness, and the saturation, which can create grayscale videos or make the colors pop out more.
7. Channel Mixer
The Channel Mixer effect is another fascinating effect that can create exciting and new colors for your images. As the name suggests, you can use the Channel Mixer to create new color channels by specifying the amount you want from the existing color channels.
You can create outstanding grayscale photos, incredible tinted images, and great sepia-tone style pictures with the Channel Mixer effect by adjusting the values of red, green, and blue and specifying how much you want to change one color or the other.
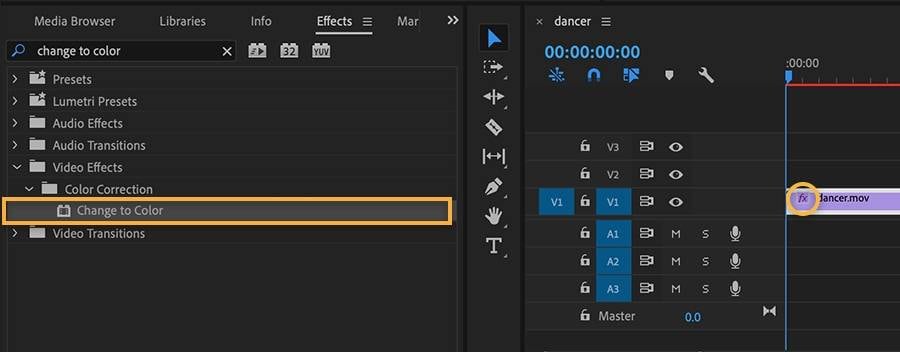
8. Change to Color
If you want to change a specific part of your image to another color and leave the rest untouched, you can do so with the help of the Change to Color effect. Try it, and you’ll see many sliders that can help with hue, lightness, and saturation levels, and you can type in the exact RGB value of the color you want.
9. Change Color
Although they have similar names, the effects of Change to Color and Change Color differ. If you want to adjust the color range’s lightness, hue, and saturation, try the Change Color effect since it handles such color adjustments perfectly and does so with the help of layers.
The effect has many transform and matching options, such as matching softness or colors or transforming saturation or hue. The View option lets you see what you’re changing so you know precisely where the adjustments are happening.
A Simpler Color Correction Alternative to Premiere Pro: AI Photo Colorizer
Color correction in Premiere Pro isn’t the only way to adjust the colors of your shots. Many other applications and online tools also deal with color correction, and some of them are excellent. They’ve become so powerful that certain apps might even be better than Premiere Pro since they use powerful AI engines.
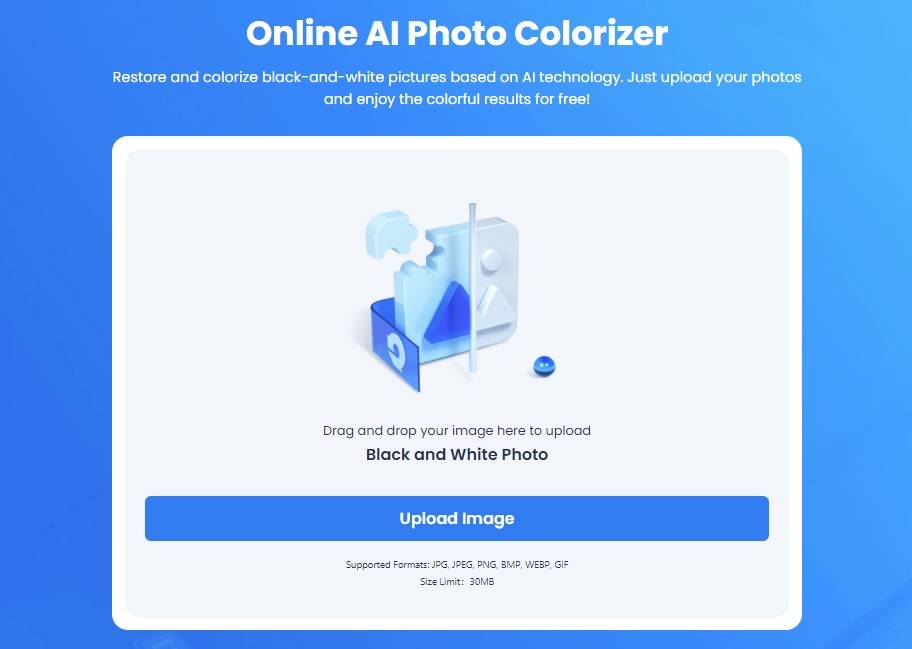
One such application is Wondershare’s AI Photo Colorizer, and it’s likely the best solution for coloring black-and-white photos on the market. The app is straightforward to use – all you have to do is upload the B&W image, and the AI engine will do the rest, giving you a few colorized options to choose from and download.
Conclusion
Video editors know that Adobe Premiere Pro color correction is an excellent way of giving your images and videos incredible colors that leave the viewers in awe. Moreover, color correction in Premiere Pro can make the colors pop and bring life into your edits.
However, Adobe Premiere color correction is only one of many ways to achieve stunning colors. Some powerful new tools have been unleashed, and these can even use artificial intelligence to recolor old black-and-white photos.