
The visual effect of an image can be spoiled by blurry content due to shaky hands and a lack of concentration. In today’s visually driven world, where sharp imagery powers everything, it's important to prioritize image quality. For this reason, several AI tools are available to unblur images that utilize deep learning models to deblur pictures.
However, many individuals are struggling to find the most reliable unblur image AI tool with advanced features. In this article, we have compiled a list of the 5 most efficient tools, each accompanied by a detailed step-by-step guide and its limitations.
Table of Contents
Part 1. How Does the Unblur Images AI Tool Restore Photo Clarity?
AI unblur image tools restore photo clarity through a process that uses deep neural networks and machine learning algorithms. If you are eager to explore how these AI image sharpening tools transform fuzzy photos into crystal-clear images, read the following:
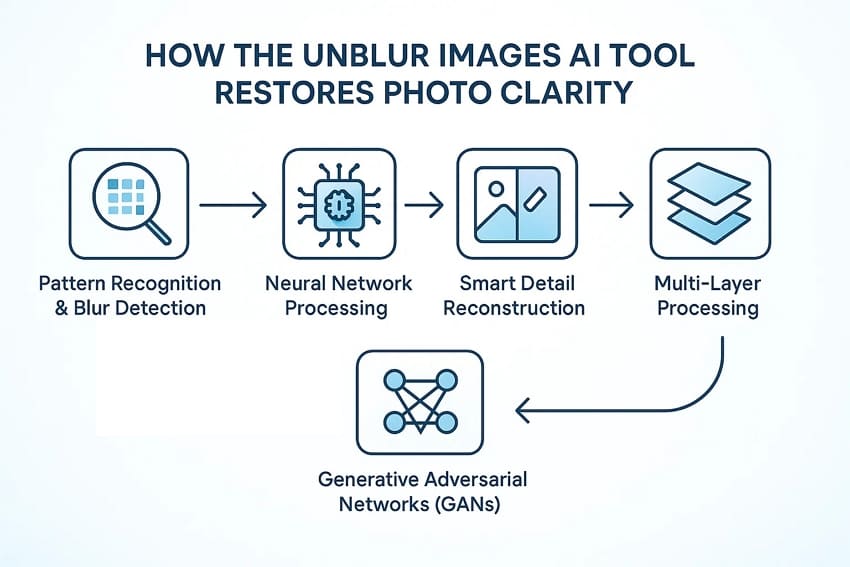
- Pattern Recognition and Blur Detection: These tools first analyze the uploaded images pixel-by-pixel to identify blur patterns of the image for precise editing.
- Neural Network Processing: The associated AI technology uses advanced neural systems trained on a vast dataset of unblurred images to generate more accurate outcomes.
- Smart Detail Reconstruction: AI tools do not just sharpen the existing edges; they actually recreate details that were previously lost.
- Multi-Layer Processing: Unblurring algorithms process the pictures by detecting significant parts of the picture, such as edges, and applying several enhancing layers.
- Generative Adversarial Networks (GANs): Some advanced systems use GANs to generate realistic image details, where one network creates enhanced pixels.
Part 2. 5 Tested Unblur Image AI Tools You Can Use
Ready to turn your blurry photos into crystal-clear masterpieces? To save you time, we’ve tested and rounded up the top AI image sharpening tools that can effectively unblur your images:
1. Repairit Photo Enhancer
You might be preparing to list a new property on your company website. While you have several promising shots during an overcast afternoon, many came out dull and blurry. In this situation, we recommend using Repairit, which provides a dedicated Photo Enhancer tool. It is a professional-grade image enhancement tool designed to automatically detect blurriness and restore natural details.
This tool provides 3 modes, including General Model, Portrait Enhance, and Old Photo Repair, which users can opt for accordingly. Not only this, it also lets users repair their corrupted files of any format to make them easily accessible.
Key Features
- Batch Processing: To save your time efficiently, Repairit provides you with specific batch processing, which lets you enhance all the blurred images simultaneously.
- Preview Feature: Users can preview their upscaled image to examine its quality even before downloading it to their device.
- Compatibility: Provides broader compatibility by accessing this tool on all major OS systems and mobile devices.
Ultimate Guide to Use Repairit for Photo Unblur AI
Upon hearing about this image-sharpening AI tool, let's dive into its detailed guide to ensure your pictures are perfect and crisp:
Step 1. Access AI Media Enhancer Section
Upon entering the tool, click on the “AI Media Enhancer” in the left tab. Afterwards, click on the “Blurry Photo Enhancer” to import the desired blurred picture.

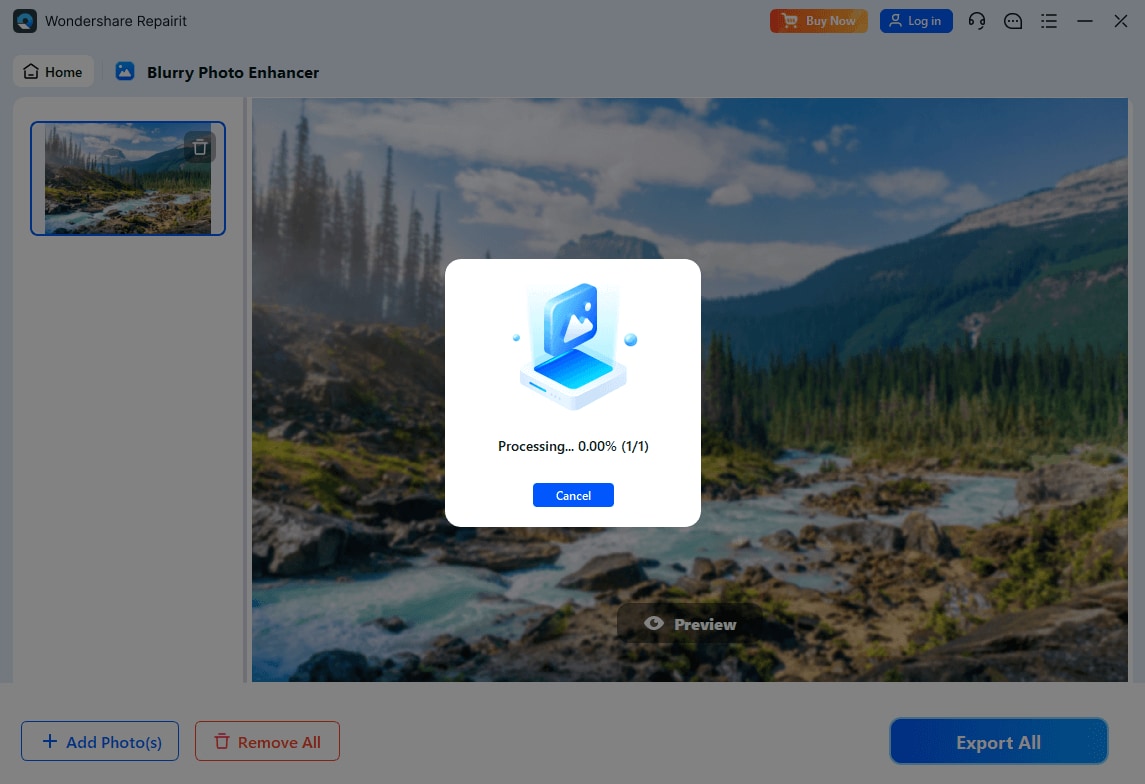
Step 2. Initiate the Enhancing Procedure of The Image
Upon inserting the image, press the “Preview” button on the image to start the image enhancement process.
Step 3. Save Enhanced Image from Repairit
Finally, the image is enhanced, you can examine its before and after by using the slider available in the middle of the image. Once you are satisfied with the outcome, click on the "Export All" button to get it rendered to the designated device folder.

Unblur Your Image With AI Now
 Security Verified. Over 7,302,189 people have downloaded it.
2. Luminar Neo
This is an AI image sharpening tool that assists photographers in sharpening their photos with intelligent automation and creative control. Its image unblurring tool, which is powered by AI, enhances finer details that were lost because of camera shaking or focus problems. The smart algorithms analyze image depth and textures to sharpen areas that require clarity.
Guide to Enhance Images Using Luminar Neo
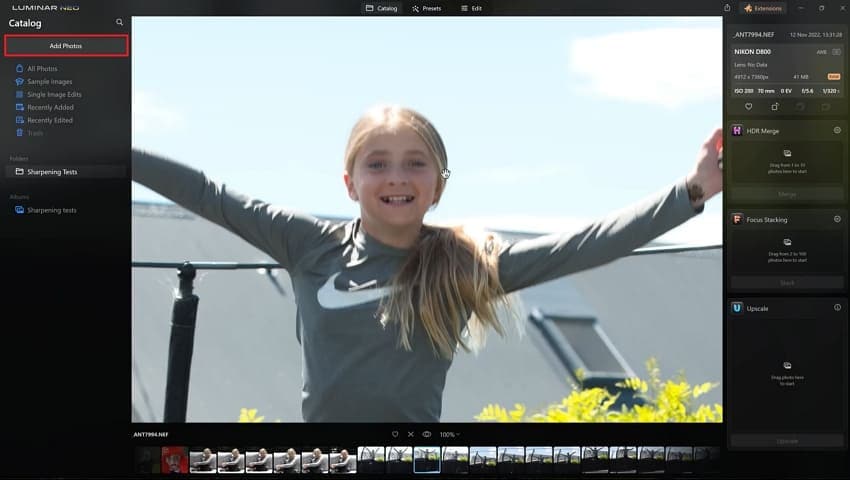
Step 1. First off, head to the “Add Photos” section to import your blurred image to the tool.
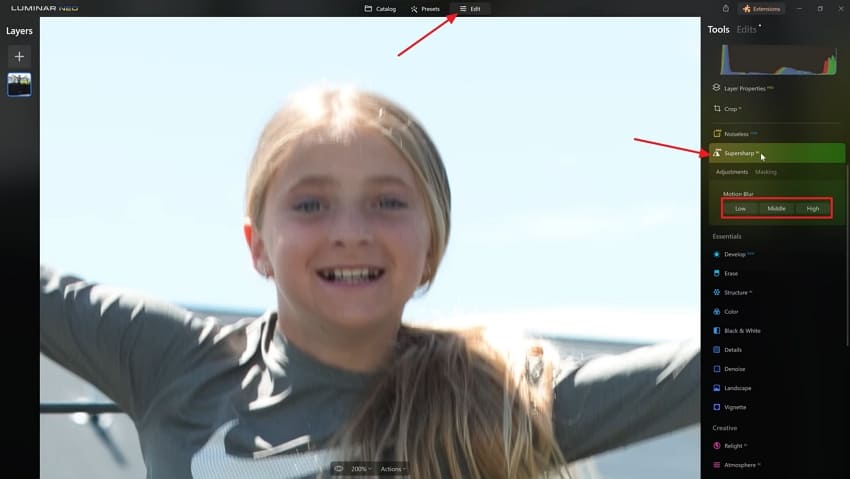
Step 2. After the image is uploaded, hit the “Edit” button on the top bar and press the “Supersharp AI” feature from the tool menu. Select the “High” or “Medium” option to begin the unblurring process.
Step 3. Once the processing is done, use the “Eye” icon to view the before and after results and tap “Share” to export the image.

3. VideoProc Converter AI
This image-sharpening AI software merges the power of AI with hardware acceleration to process images. It works by detecting and correcting motion blur and noise in the images. VideoProc Converter AI uses advanced AI models like Gen Detail v3 and Real Smooth v3 to sharpen textures and upscale resolution to up to 4K.
Detailed Instructions to Unblur Images With VideoProc
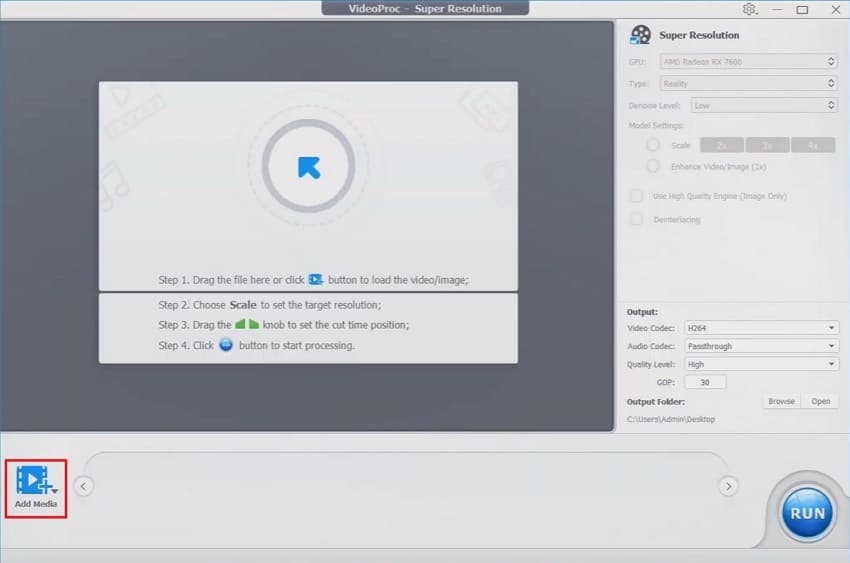
Step 1. After selecting “Super Resolution” from the main interface, press the “Add Media” button, or simply drag and drop the images.
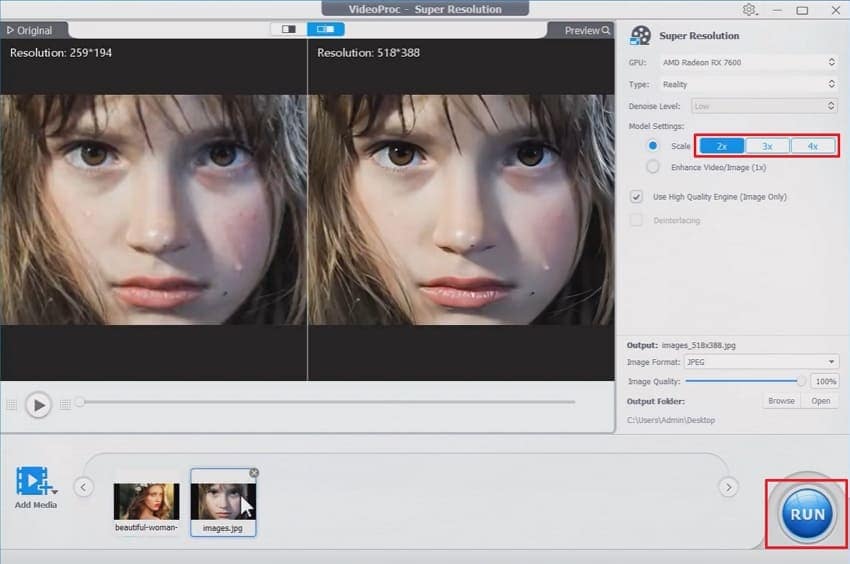
Step 2. Access the “Model Settings” option in the right settings bar. Select the “4x” option in the “Scale” feature and hit the “Run” button.
4. Adobe Photoshop
It is an unblur images AI photo editor that eliminates blur in images due to the shakiness of the camera and focus absence. The system examines pixels, recovers finer details and sharpens the edges to be clearer. Adobe Photoshop uses tools like the Shake Reduction, Smart Sharpen, and Neural Filters to bring the best out of the image.
Comprehensive Step-By-Step Guide to Unblur AI with Photoshop
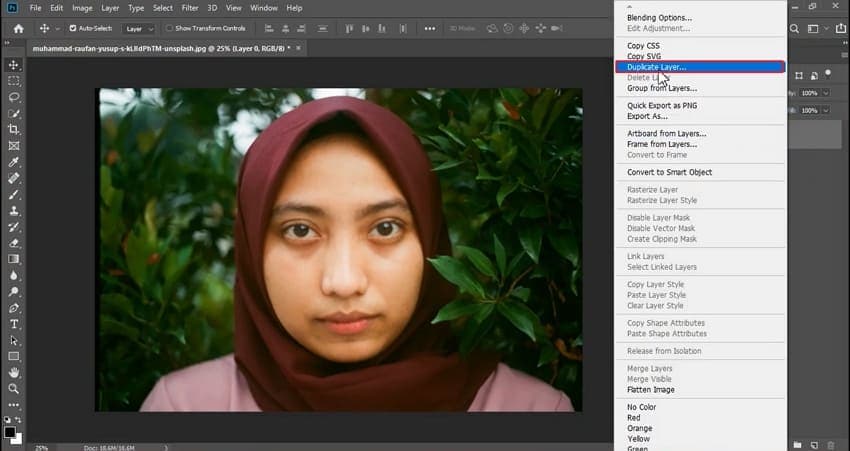
Step 1. Import your image and right-click on it to select the “Duplicate Layer” option in the content menu.
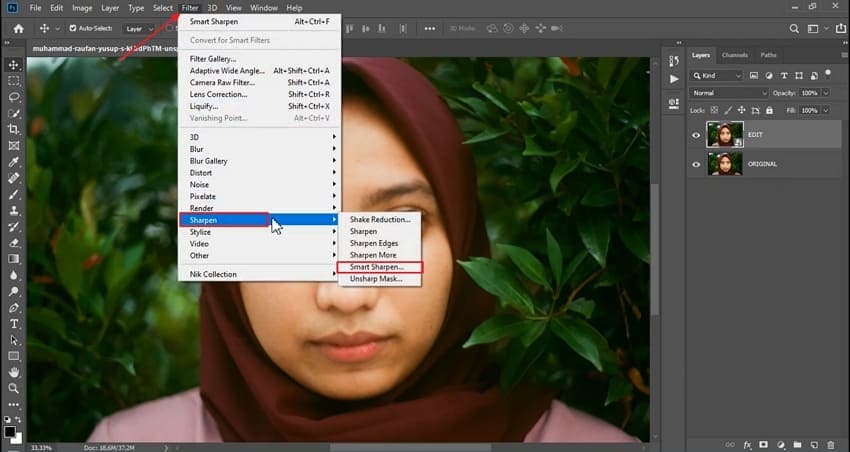
Step 2. Access the “Filter” tab at the top and hover the pointer over the “Sharpen” option. Next, hit the “Smart Sharpen” option to proceed further.
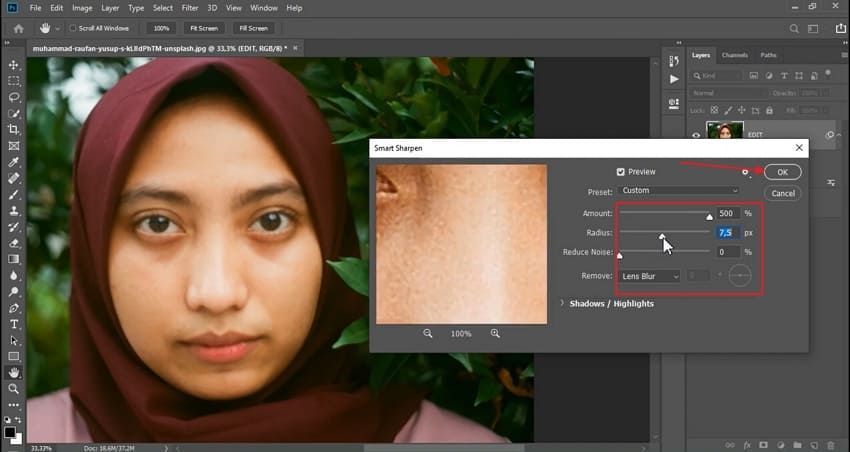
Step 3. In the pop-up, adjust the “Amount” and other sliders as per the sharpening needed. Next, hit the “OK” option after setting adjustment is done.
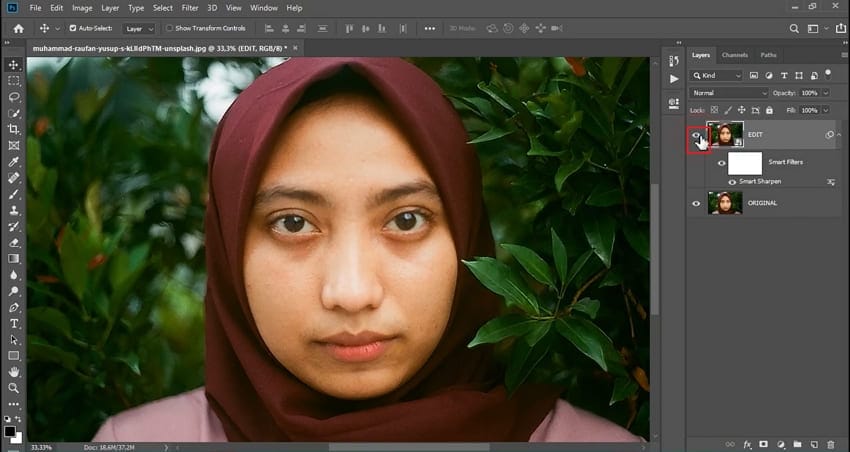
Step 4. Preview and compare the results by pressing the “Eye” icon on the layer.
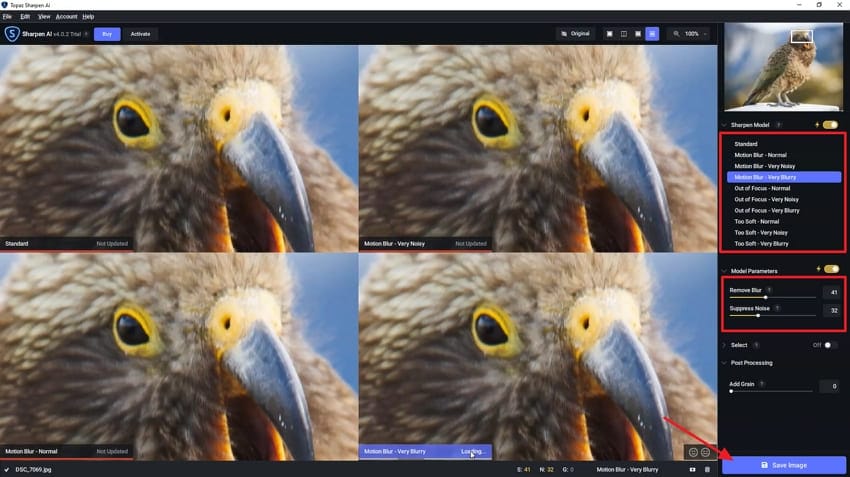
5. Topaz Sharpen AI
This is a sharpening image AI software built to restore image sharpness. Topaz Sharpen AI integrates multiple model types that specialize in stabilizing and correcting images. The engine isolates blurred regions, predicts missing pixel information, and reconstructs crisp edges for realistic depth. With high-quality post-processing features, Topaz Sharpen AI removes all sorts of noise and blur.
Step-By-Step Process to Unblur AI With Topaz
Step 1. As you import the image into Topaz Sharpen AI, the sharpening AI filter will be automatically applied to your photo.
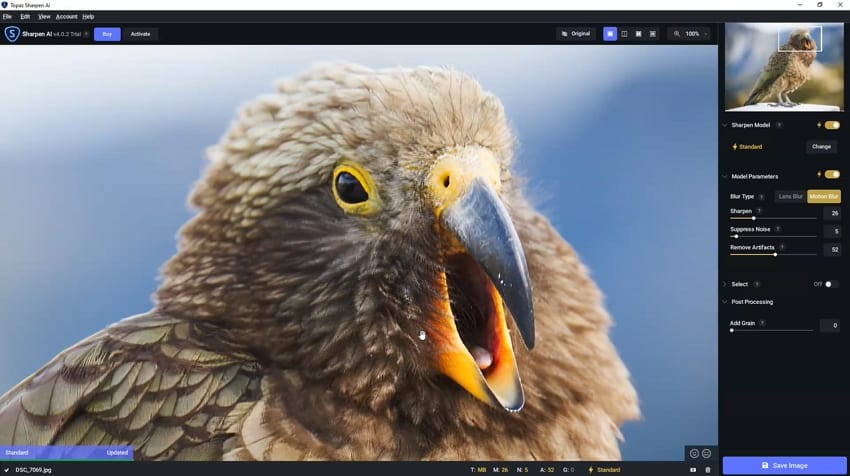
Step 2. Press the “Change” button alongside the “Standard” option to choose a specific standard. Adjust the “Remove Blur” and “Suppress Noise” sliders. Next, hit the “Save Image” button to export the unblurred image.
Part 3. Looking for a Mobile App to Sharpen Images Directly? Try the Repairit App
Imagine a travel influencer returning from a week-long mountain trip only to realize most of the photos he took are a bit blurred. However, those images are intended to be his social media posts with brand partnerships and can't ruin them. Instead of re-editing them in complex software, which takes immense manual effort, we recommend using the Repairit App, which sharpens images in seconds.
This application can be used by Android and iOS users, and it gets rendered faster when performance is required. All you have to do is upload the blurred images, and the Quality Enhancer tool will transform them into attractive pictures. When this tool is processing, it also lets you cancel the processing in between if you want to make some more changes.
Detailed Stepwise Guide to Use the Repairit App
Now, if you are aware of the AI sharpen image tool features, let's jump to its detailed guide below:
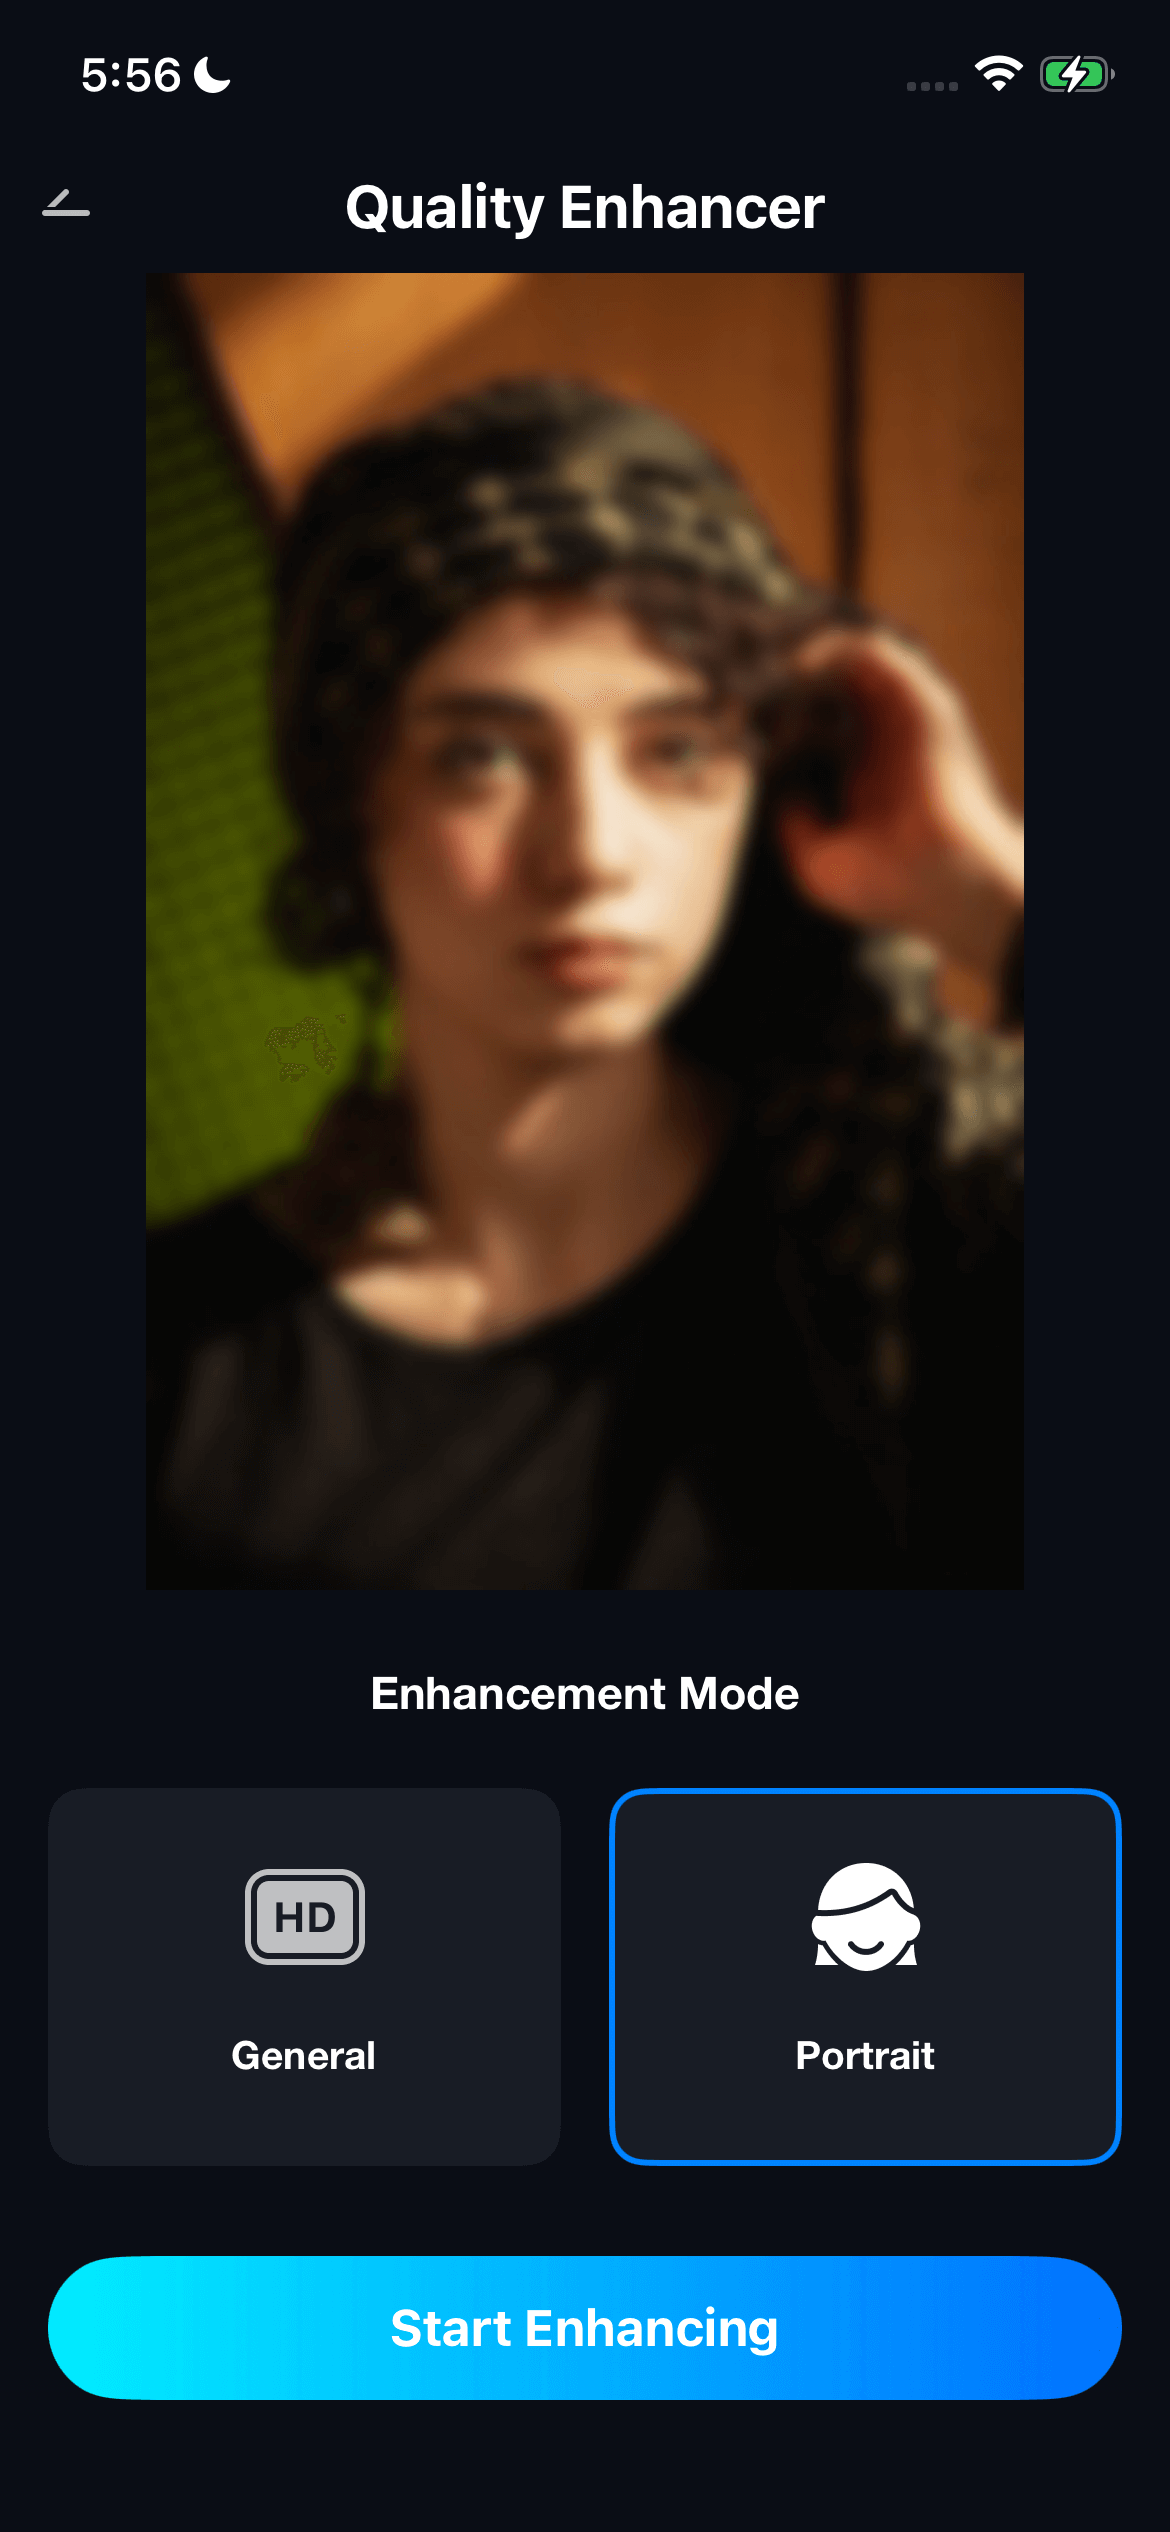
Step 1. Look For Quality Enhancer and Insert Photo
As you enter the tool, tap on the "Quality Enhancer" tool option and select the "Select a Photo" button to insert the desired image.

Step 2. Initiate the Enhancing Procedure with Repairit App
Here, choose the “Portrait” mode for the image and hit the “Start Enhancing” button to get the process started.
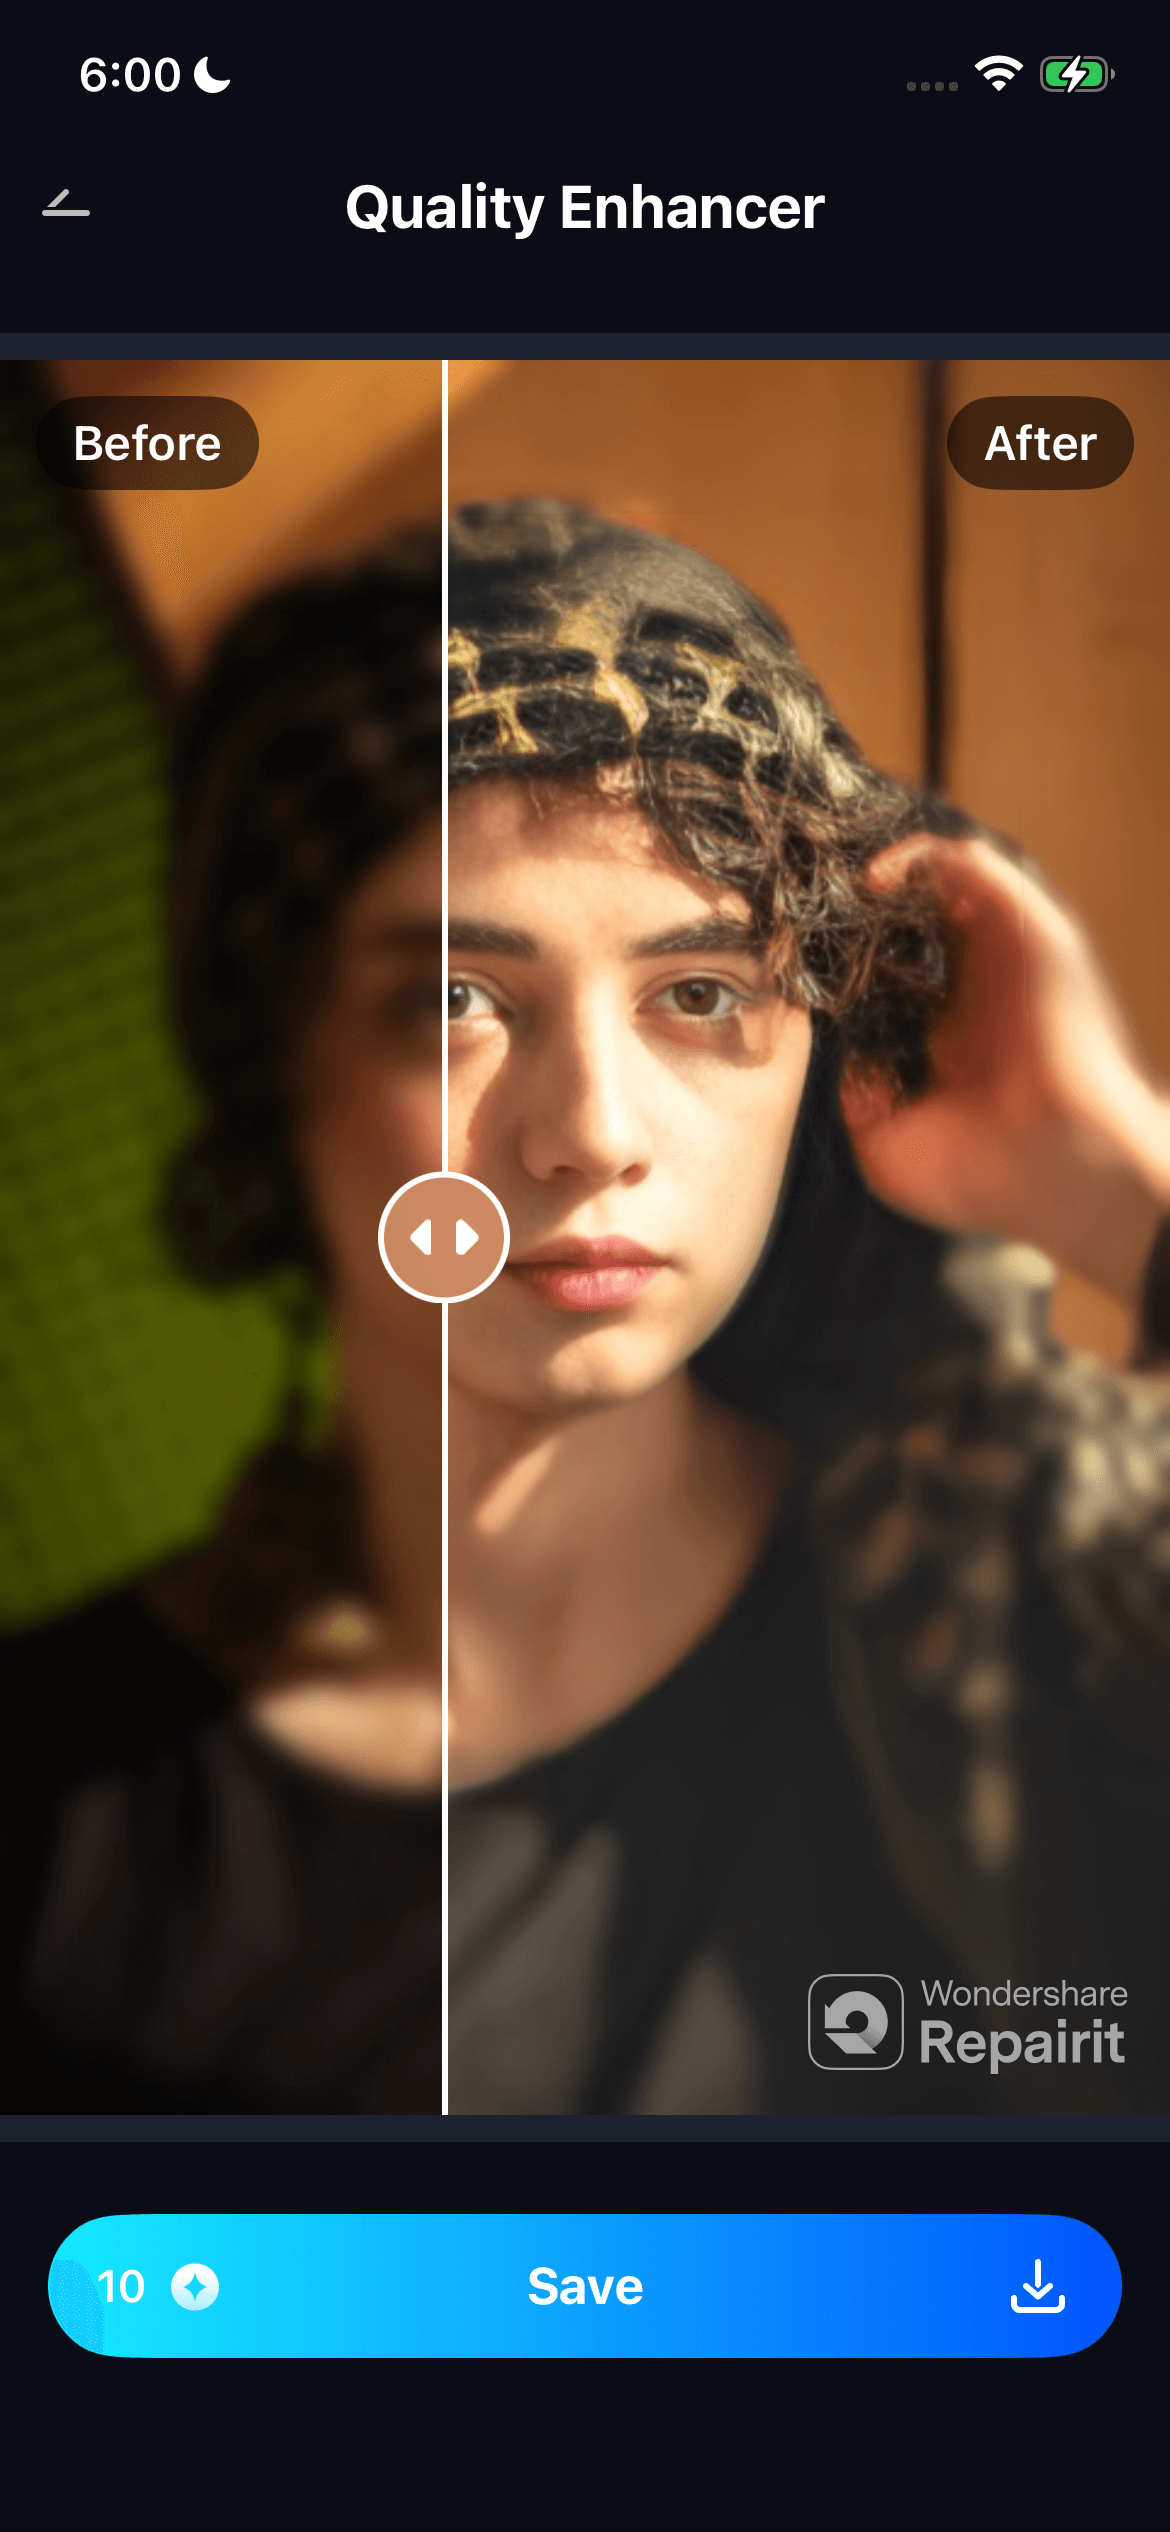
Step 3. Preview and Save Enhanced Outcome
As your image is enhanced, you can preview it and hit the "Save" button to get it saved to your phone.
Part 4. Tips for Best Results When Using Unblur Image AI Tools
To make the most out of your AI image sharpening tool, follow these simple yet effective tips for optimal performance:
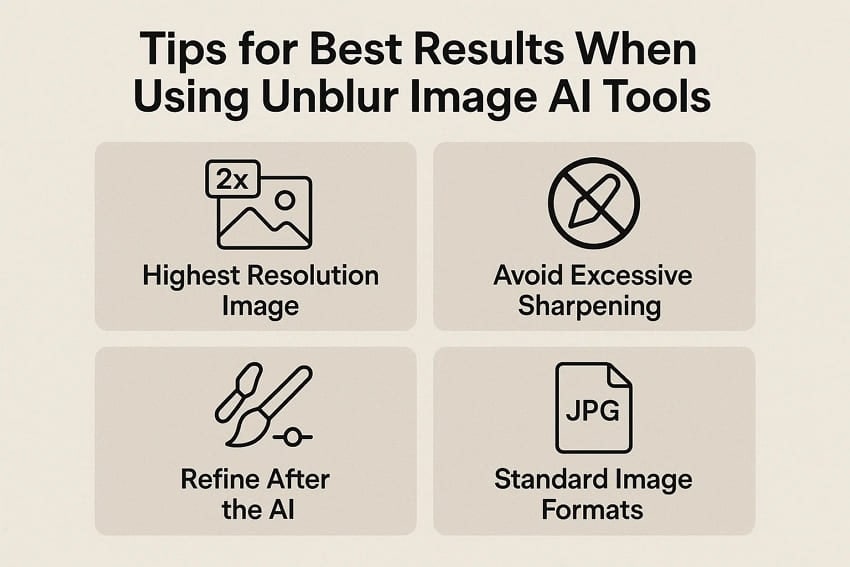
- Highest Resolution Image: AI unblur algorithms of these tools perform best when working with high-resolution input images.
- Avoid Excessive Sharpening: Most of these tools provide a slider, so one should always gradually increase that slider rather than setting it to maximum.
- Refine After the AI: Once the image has been unblurred, it is time to go over the refinements of the clarity by tweaking contrast to make it more realistic.
- Standard Image Formats: It is important to ensure that the standard image formats, such as JPG or PNG, which are readily accepted by all the tools, are used.
- Preview: Ensure you always use the comparison or preview feature to review results before saving the device.
Conclusion
Summing up, with the evolution of unblur image AI tools, people don't have to worry about upscaling their images. In this article, we have narrowed down the various desktop tools along with their step-by-step guides for your better understanding. However, we recommend using Wondershare Repairit, which provides both desktop and mobile apps to cater to all sorts of audiences.
FAQs
-
Q1. What types of blurs can AI unblur tools fix?
AI sharpened image solutions can address motion blur, out-of-focus (lens) blur, and general softness due to low resolution. These tools use advanced AI algorithms that efficiently scan these blurs and sharpen them. -
Q2. Is it possible to restore detail in old family or vintage photos?
Yes, AI unblur tools can reconstruct missing features and repair faded old images. You can opt for tools like Wondershare Repairit, which provides you with a specific old photo restoration tool. -
Q3. How does the AI decide which areas of a photo to sharpen?
These tools use advanced algorithms to analyze pixel-by-pixel blur patterns to differentiate between areas that need sharpness and smoothness. There are numerous advanced tools available, of which we recommend using Repairit, which provides 99.5% accuracy. -
Q4. Do I have to pay to use the Unblur image AI tools?
No, there are numerous tools available worldwide that provide a complete free plan or some features for free usage. However, before choosing a tool, make sure to check if the specific tool is providing you with the required feature within its free plan.
