In photographs, glasses glare occurs when lighting reflects off a person's glass lenses. Whether you used a flash or merely a bright day for your photo session, glasses glare may be an unexpected and distracting element to your image. However, you have a variety of solutions to remove glass glare without distorting the original image.
Your photographs' important details get lost by glares and light reflections. To restore your photo to its natural quality, you need to fix the light glare. Use an online tool to fix glare on glasses in photo, and it will repair your photos just the way you want. Find below some suggestions to fix glasses glare and improve your photographs.
In this article
What Causes Glare on the Glasses in Photos?
When light bounces off the optical components of your or another person's glasses in a picture, it is known as glass glare. When you arrange a sunny photo session or use a flash to capture your photograph, this unwanted glare emerges to ruin the photos. There are more reasons such as:
- A light source that is reflecting directly into your camera lens can sometimes create glare. This frequently results in haze and lens flare. When light vertically refracts between your lens's glass parts, lens flare emerges as patterns and dots.
- Reflections and Glare are frequent issues in images taken while wearing glasses. The glasses' lenses can glare when snapping a picture because they reflect light. The image may appear dull or damaged due to this Glare, which lowers the image's general quality.
- In certain cases, the cause of the glare becomes obvious, such as when the sun is directly behind your subject. When the sun is down in the sky, such as in the early hours and later in the day, this glaring issue occurs more often.
- The light sources that bounce off the lens's surface and into the camera lens, such as sunlight, artificial lights, or a camera's flash, generate the reflection. It can be a glass Window in the distance or a person's spectacles reflecting in bright light.
To avoid this issue while shooting, try gazing far from the point of origin of the light to prevent Glare on your glasses. However, we will now discuss how to fix glare on glasses in photo generated by mirrors in a picture.
How To Remove Glare from Glasses Online?
Best Online Tool: Wondershare Repairit photo repair
Wondershare Repairit online photo repair is recognized as the most outstanding picture repair software. You can access the online tool from your PC to fix the corrupted photos. Just install the Wondershare Repairit software on your PC and repair your photos. This online software helps you to restore a corrupted image or image discrepancies with its advanced features.
All corrupted JPG, CR2, and NEF pictures can be repaired by Repairit in free of cost. The JPEG, JPG, CR3, CR2, NEF, NRW, RAF, DNG, TIF, and TIFF formats can also be online repaired by a premium user.
The picture repair software Repairit can also repair damaged pictures from camera systems, USB flash drives, hard drives, SD cards, and other storage devices used by Mac and Windows computers.
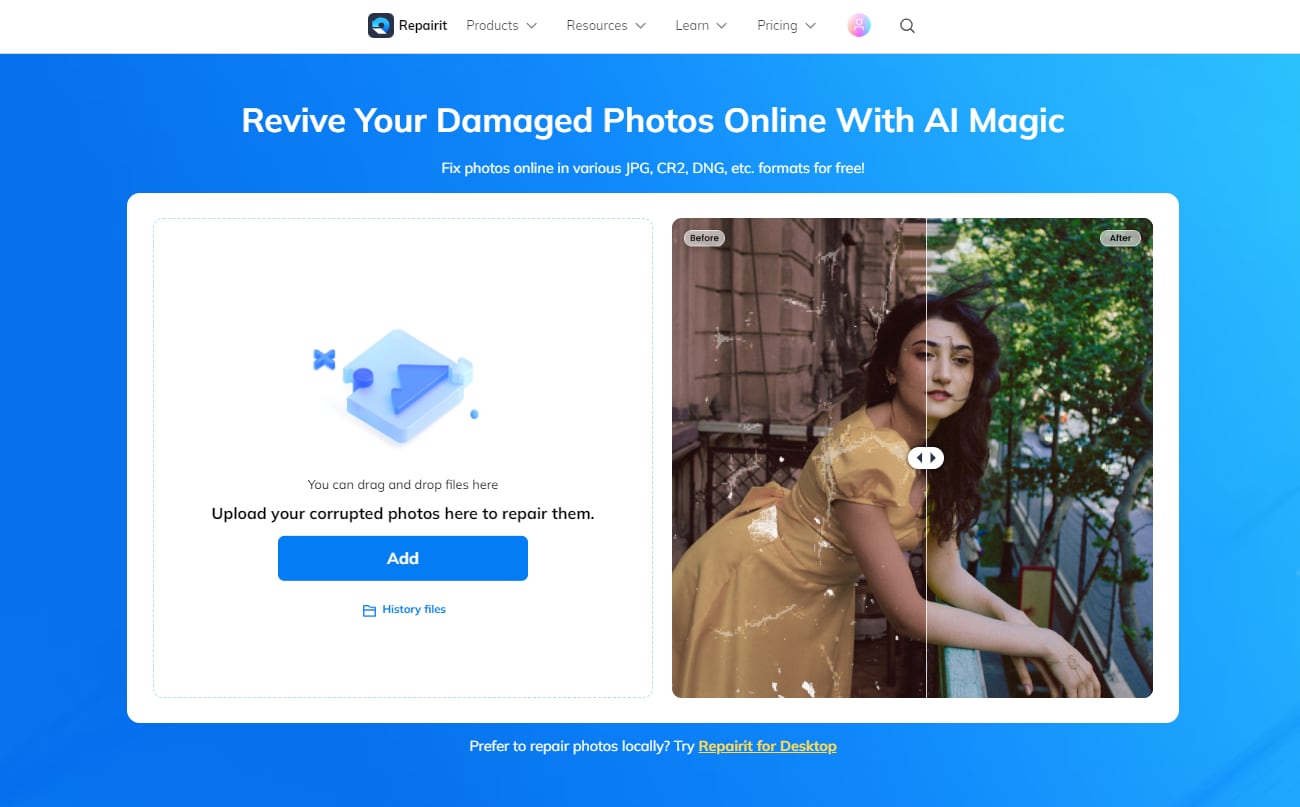
Here are 3 steps for you to know how to remove glasses glare from photo:
Step 1: Upload damaged images
First, drag your damaged photographs into the photo repair functional area or upload them by clicking the "+Add" button.
When you have finished uploading photos, the interface will display all the information about each snap.
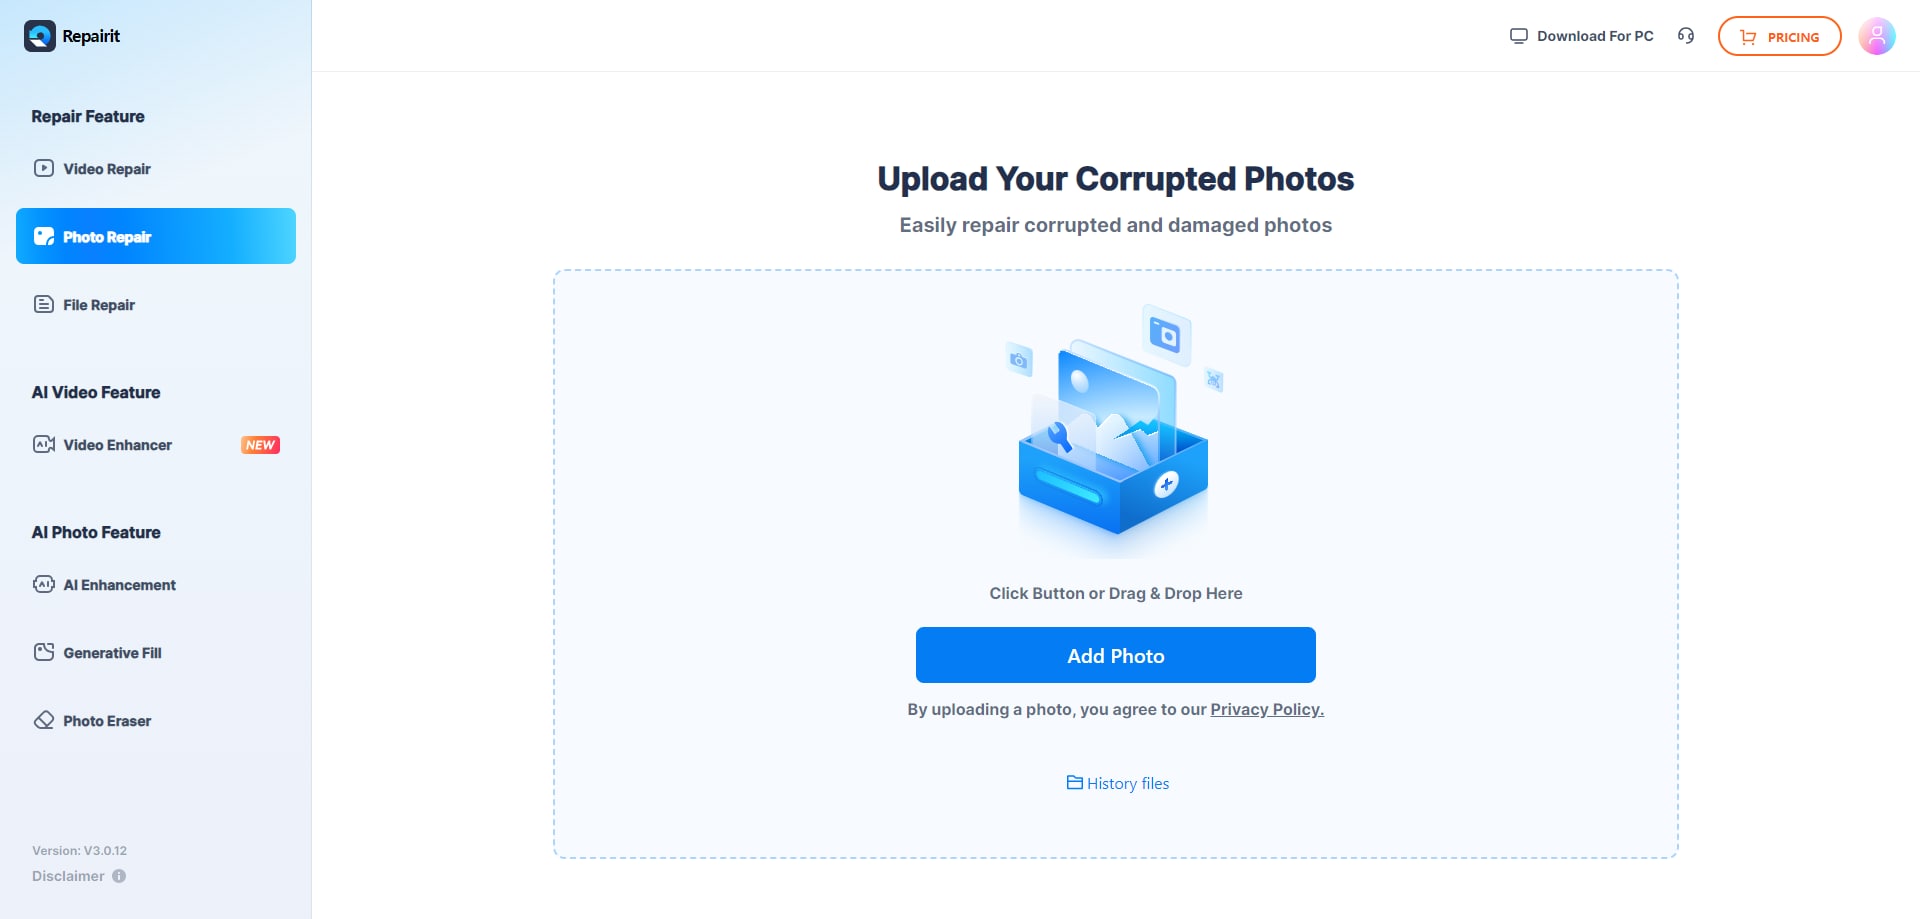
Step 2: Start the repair process.
After 1-2 minutes, click "Repair" to begin the photo repair technique.
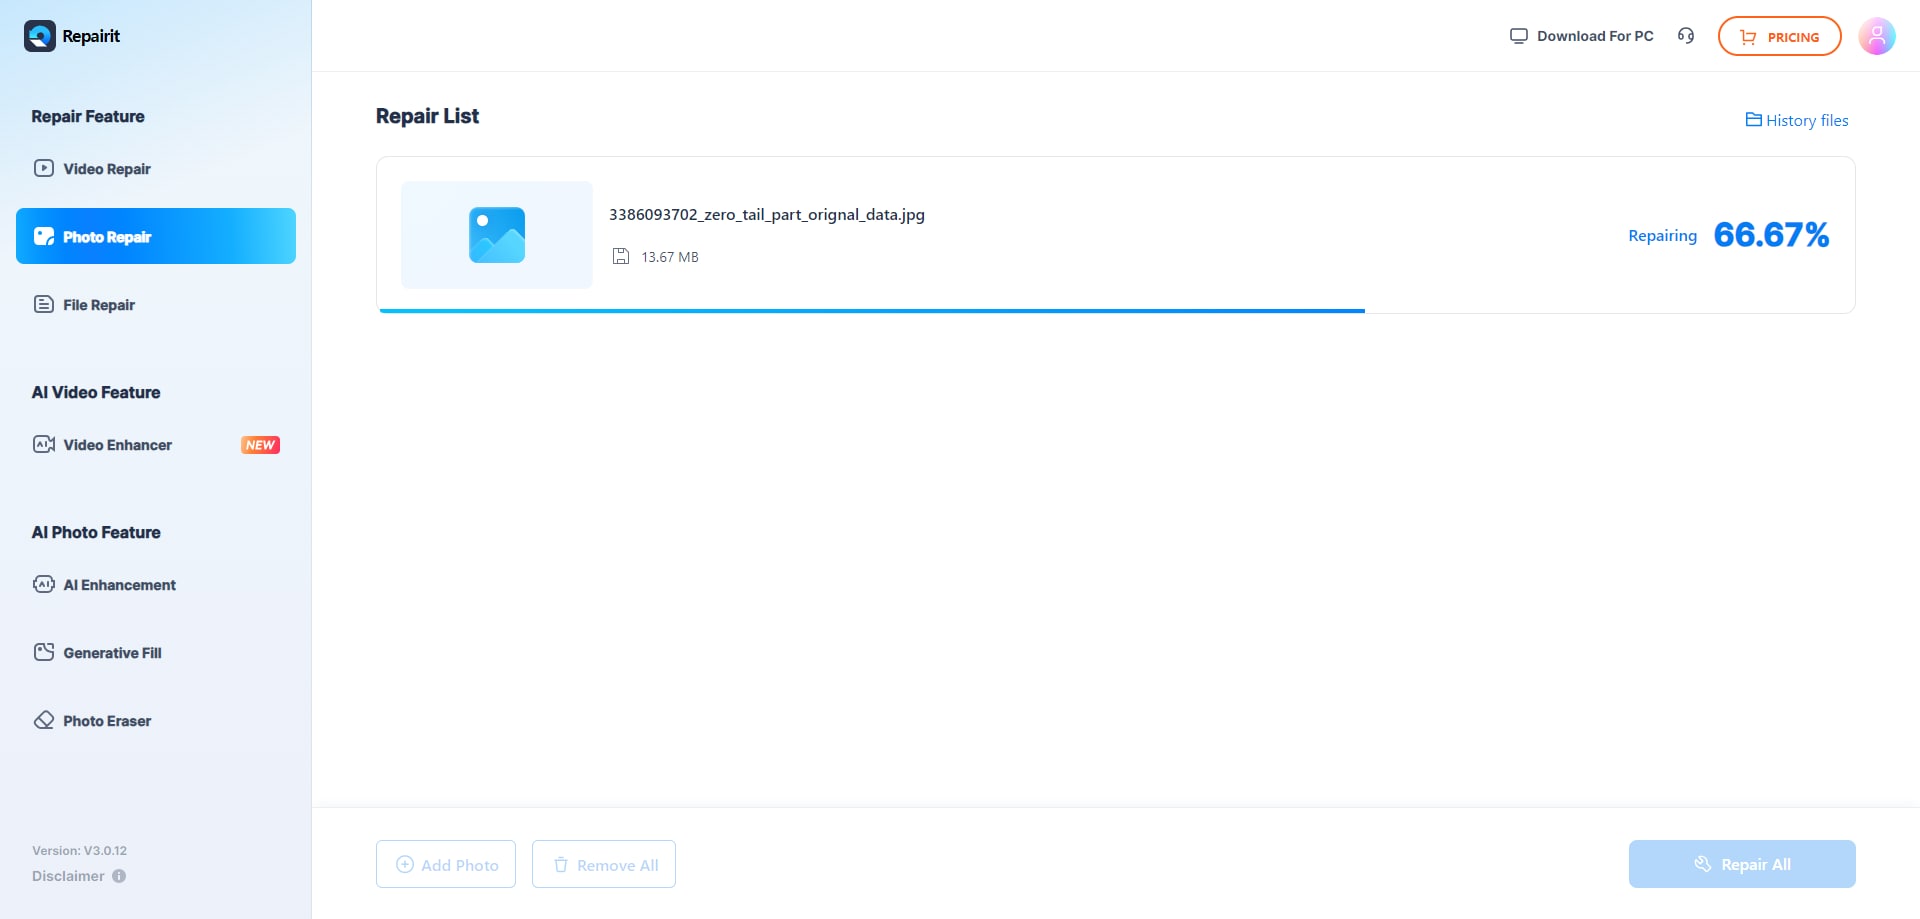
Step 3: Preview and save your photos
After completing the Quick Repair or Advanced Repair process, you may see the images and select which ones to transfer to your local computer.
To preview images, click the "preview" and the "download" icon to save them. Click "Download All" to save all restored pictures at the same time.
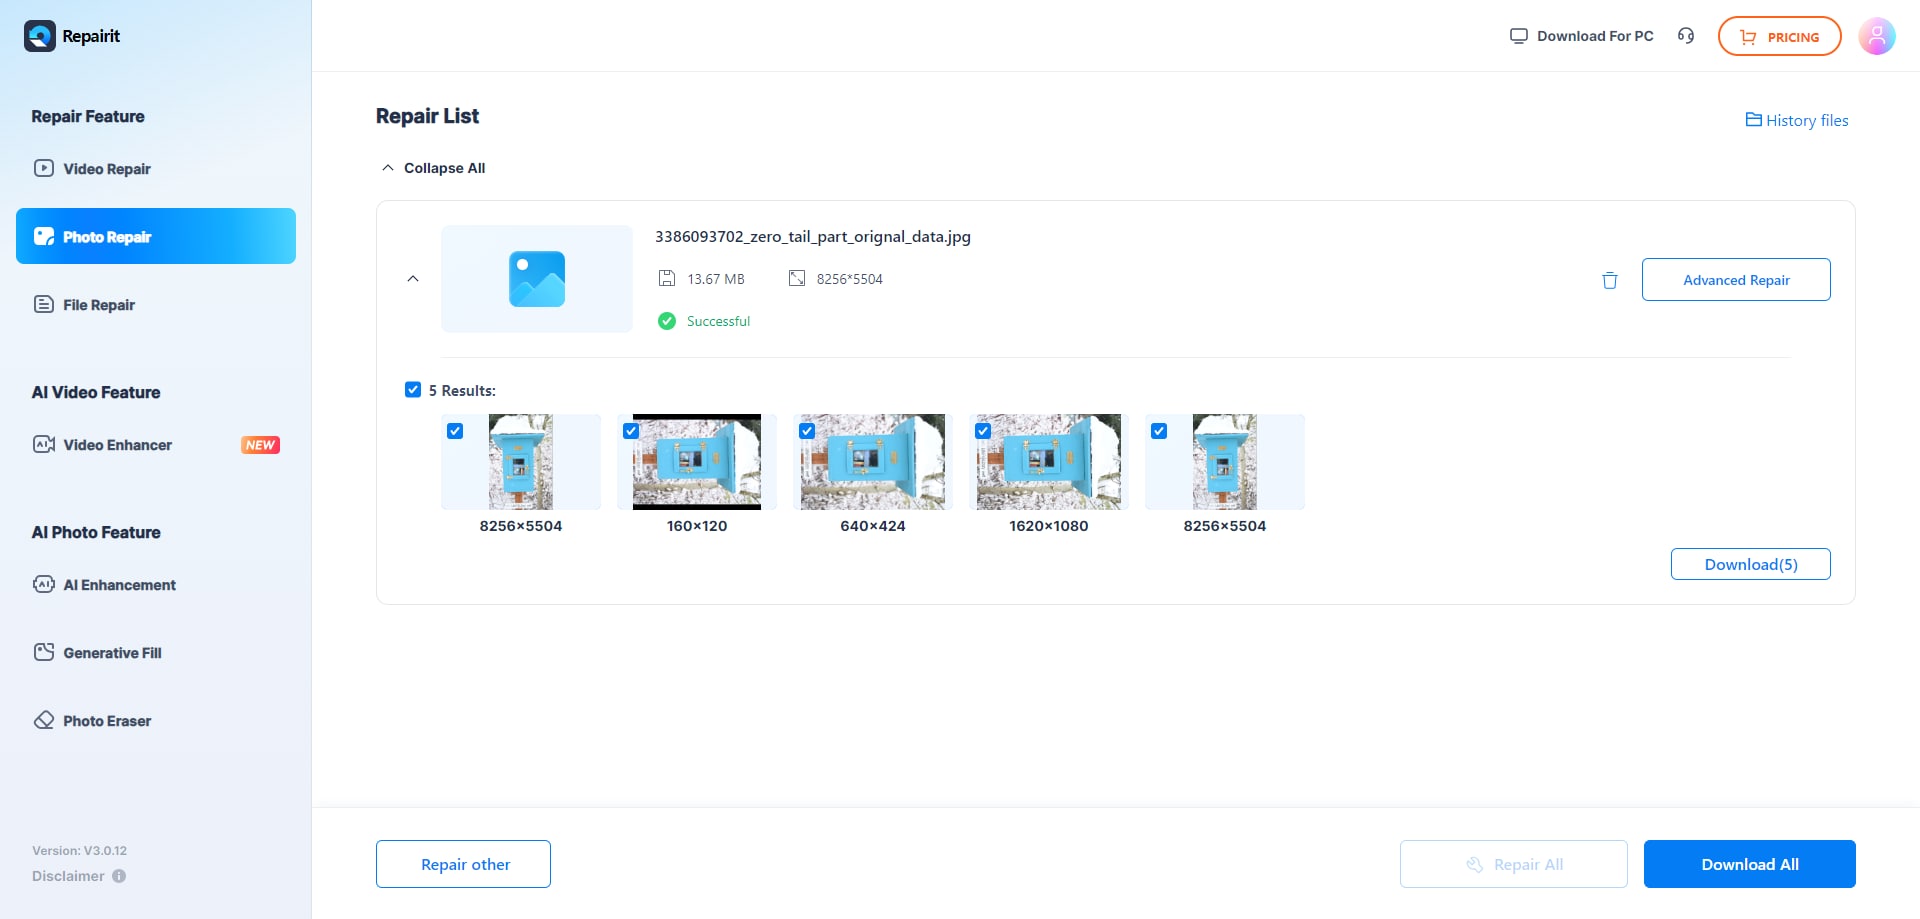
Attention:
The Repairit - Online Photo Repair supports to repair 300 files each month, and each file is no more than 300MB. If you have more photo repair needs, you can also try the deskop version of Wondershare Repairit to remove flash glare from photo, the desktop version has no limit to the size and number of the repairable files.

Wondershare Repairit - Photo Repair
Security Verified. Over 7,302,189 people have downloaded it.
-
Repair damaged photos with all levels of corruption, such as grainy photos, dark photos, pixelated photos, faded photos, etc.
-
Repair images of diverse formats, such as JPG, JPEG, PNG, CR3, CR2, NEF, NRW, etc.
-
Repair critically damaged or corrupted photos available on SD cards, phones, cameras, USB flash drives, and more.
-
Repairit has a quick and advanced repairing mode. You can use either depending on the level of corruption the photos has undergone.
-
The "AI Image Upscaler" feature can enlarge the repaired photos to 2X, 4X, and 8X.
-
Intelligently restore old/scratched photo and colorize black and white photos with various AI effects.
-
No limit to the number and size of the repairable photos compared with the online version of Repairit.
-
Support Windows 11/10/8/7/Vista, Windows Server 2003/2008/2012/2016/2019/2022, and macOS 10.12~macOS 14.
Online Photo Editing: Snapseed
It is very common to get reflections and Glare on your photos. However, you may quickly eliminate glass glare by using Snapseed for editing throughout post-processing. Find below five steps of how to get rid of glare in glasses from your photos.
Step 1: Open the image, then enlarge the glare
- Open the Snapseed app and your Photo.
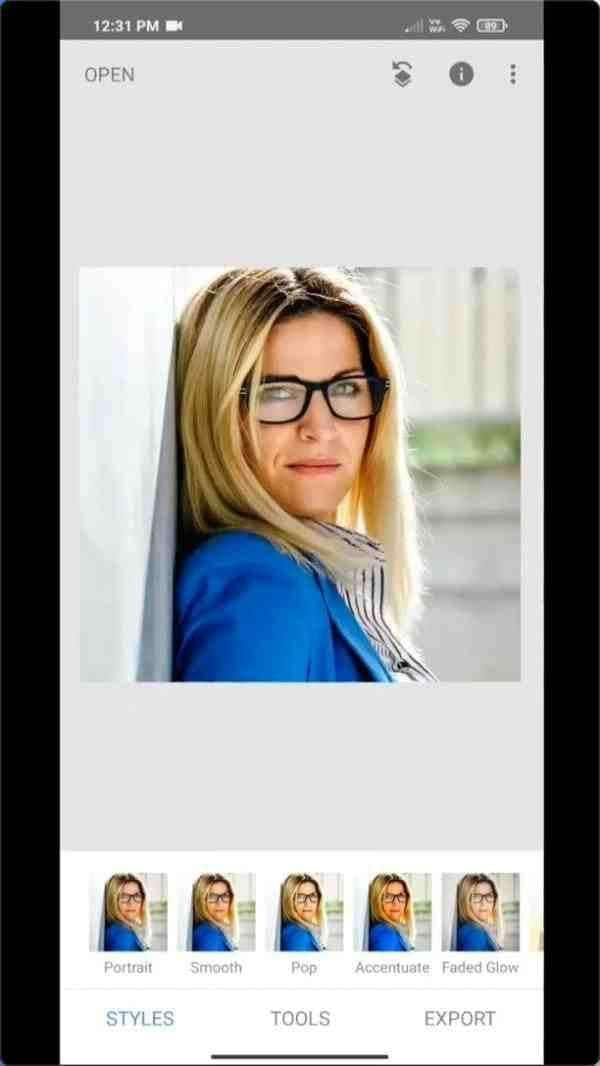
- To observe the Glare, now zoom in on it.
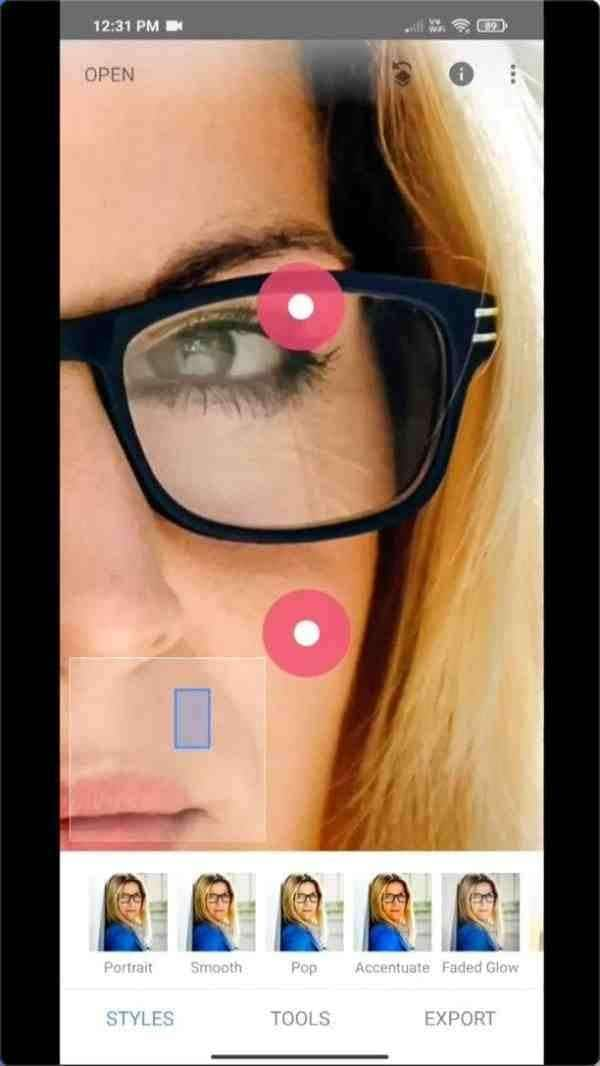
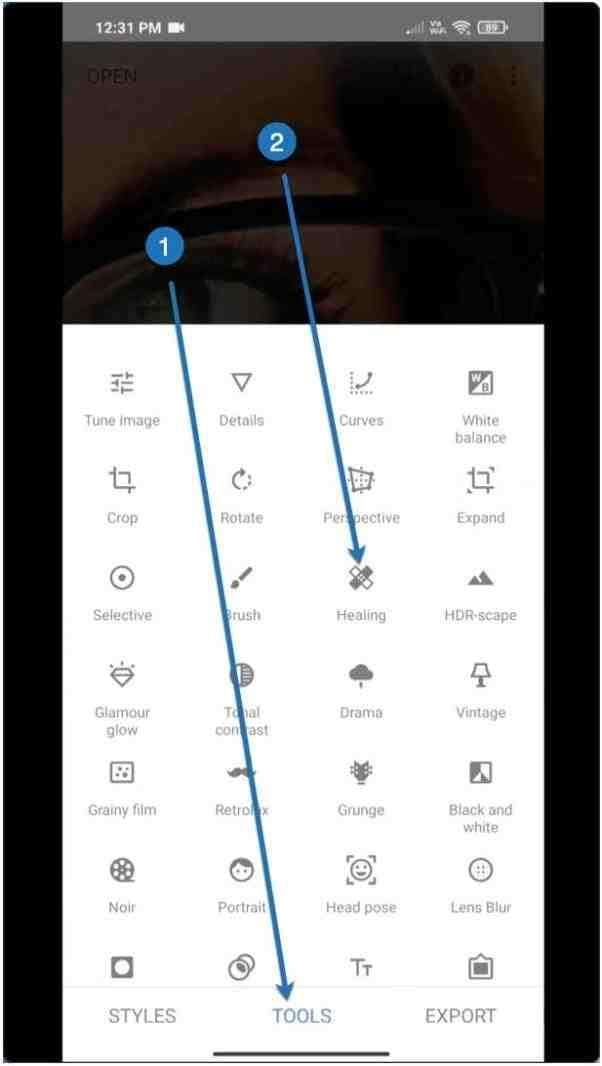
Step 2: To eliminate the glare, use the healing tool
- Select Healing under Tools.
- Now begin dragging your finger across the reflection to eliminate the glasses' image from a picture.
- See the GIF below.
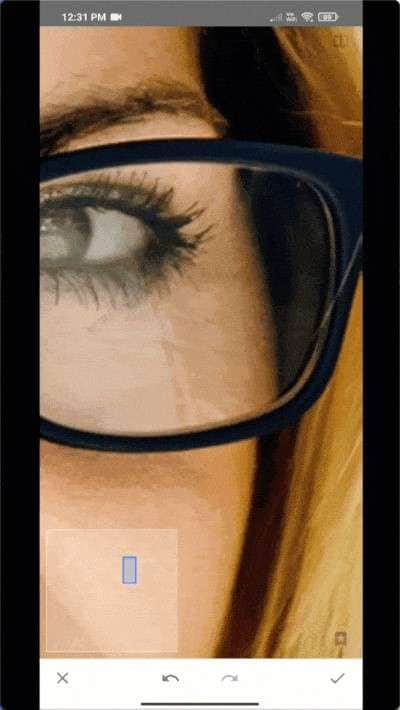
- Continue to do it.
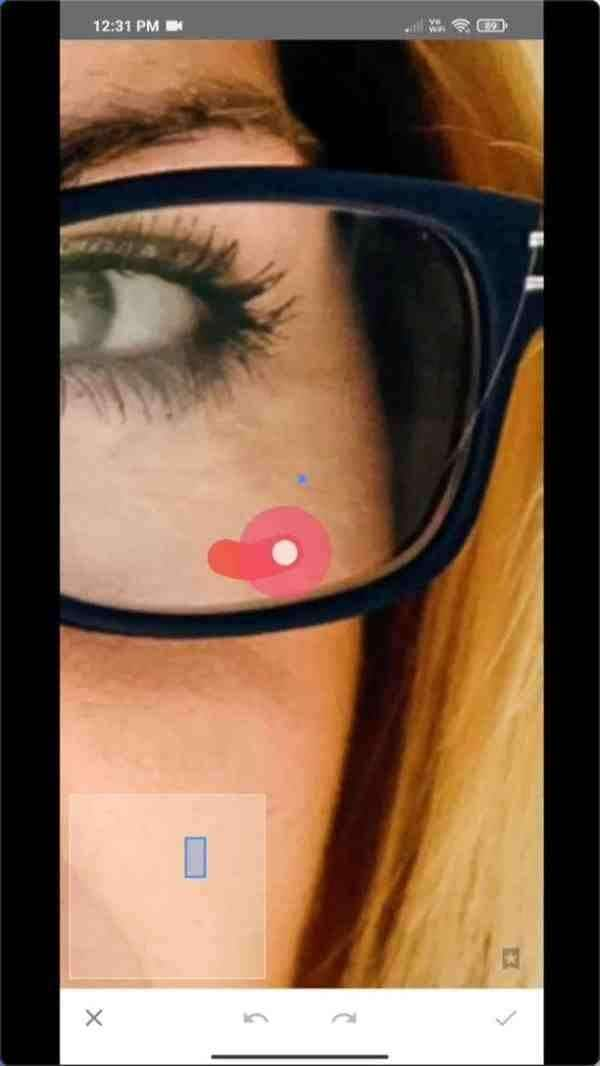
Step 3: Also, take off the glare from the other glass
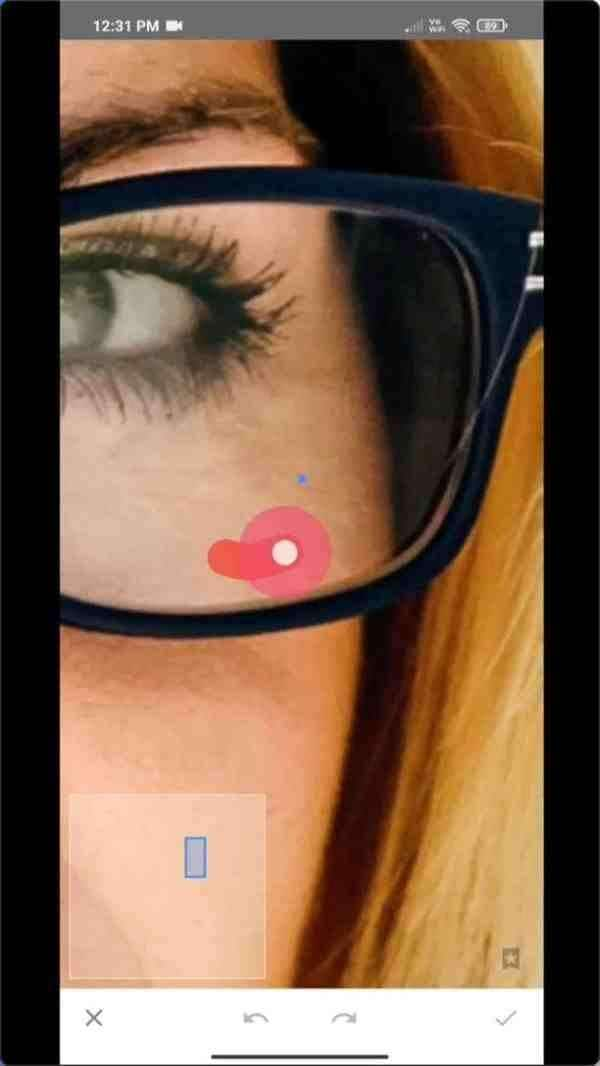
Remove the Glare from the other glass in a similar manner.
Step 4: Adjust the mirrors so they seem natural
You can eliminate the Glare, but the glasses still do not seem real. To make it appear genuine, you may adjust fundamental variables like contrast, brightness, etc.
- Select Tune picture under Tools.
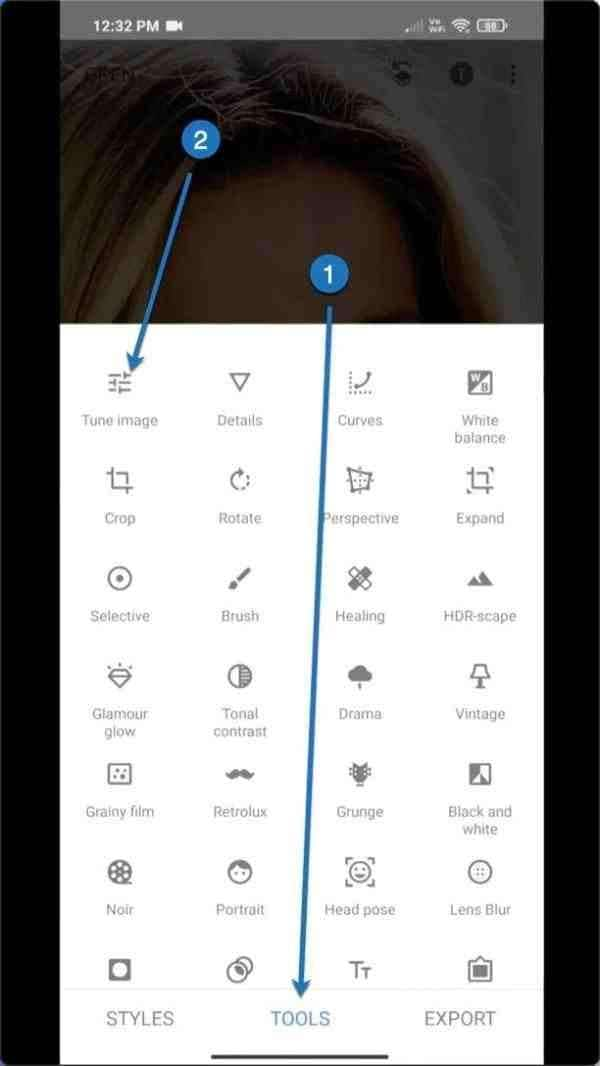
Make this the new setting. For users, this method works. You should use an alternate location, or you can duplicate these.
- Luminosity: +5
- Compare: +50
- +2 for saturation
- +2 Ambiance
- Features: -13
- Darkness: –27
Except for the spectacles, disregard everything else. Check out how the glasses now appear.
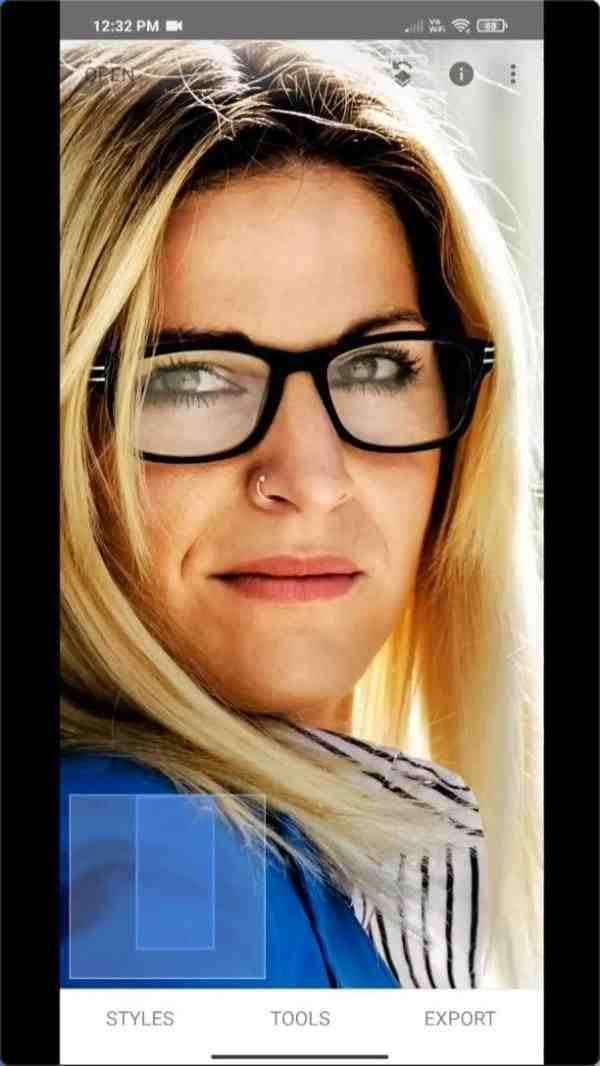
Step 5: Remove the tune from all components
- On the Layers icon, tap.
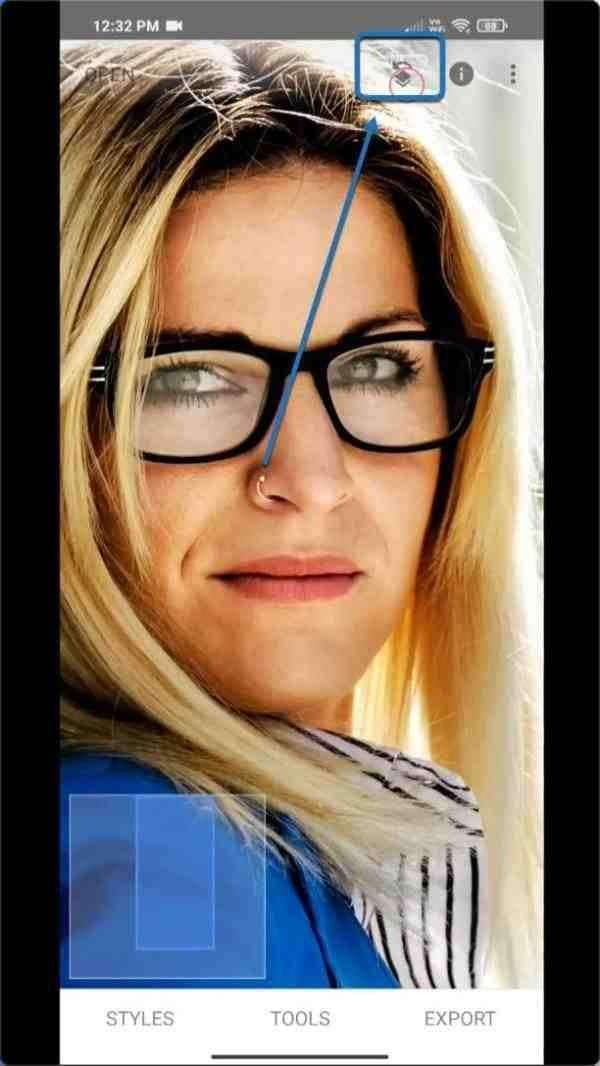
- Next, choose view edits.
- Then press this button.
- Slide your finger slowly across the eyewear. The glass will become briefly crimson as a result.

- Look at GIF.
- Do the same for the additional one as well.
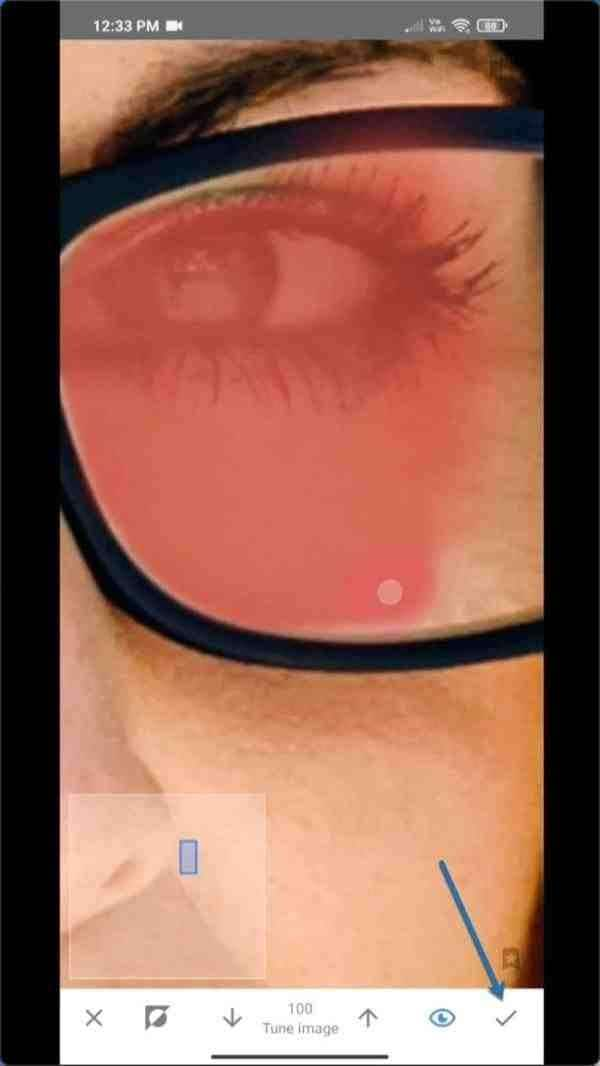
- After that, click this.
How to Avoid Glare on Glasses in a Photo?
There are several ways available to how to remove glare from glasses in photo without degrading the original. Here are a few pointers to assist you in clearing the glass glare problem.
1. Change Your Camera Position
A flat surface reflects light in the same direction that it strikes it. The reflected light is no longer an issue if you tilt your camera in a different direction.
Often, moving a bit to the left or right or up or down will produce the result you want. Keep an eye on what's occurring with the rays as you travel. Some of the impacts that the glare is having could be worth keeping.
It's certainly possible to block the glare by placing your subject or a different element of your composition in front of it. You can try setting up your camera such that something in your composition obstructs the unattractive brightness.
2. Shade Your Lens
A lens hood made specifically for this use is included with many lenses. Sometimes they might not offer adequate coverage to keep the light source from penetrating your lens. You have to think outside the box at this point.
To prevent the light, place your left hand directly in front and over your lens. You may also use a cap or whatever else you have access to or have somebody else hold to protect your lens.
3. Use a Polarizing Filter
A polarizer may provide brighter, more vibrant colors, lessening shadows and Glare. Try spinning an oval polarizer until the Glare goes away if you see it on the water's surface, some greenery, pebbles, or even a shop window. If you photograph a sunset, consider using a half-polarized filter.
With this filter, you may keep the brilliant colors by placing the non-polarized part over the entire sky and the polarized side over the region with Glare. Vertically polarized light is the radiation that reflects off horizontal surfaces, like the roadway, the lake, or the snow.
Vertically positioned polarizing filters will reduce Glare while still letting in much light. Your camera's polarizing filter decreases sparkling surfaces.
4. Set Your Exposure for the Highlights
Using backlight in your photographs may also avoid lens glare from glasses. You may minimize Glare by positioning the light source beneath your subject. Consider filtering the light if bright sunshine generates Glare in the close-up or profile photographs. You may quietly filter bright sunlight by bringing a diffusion device or even an enormous white sheet.
You can use a reflector or refill flash to lighten any deep shadows to let some light out onto your objects. While photographing a group of glaziers, the backlighting technique was ideal. Just behind them, the sun was sinking in the right-hand corner of the shot.
Even though Glare presents a difficulty, knowing how to deal with and solve it can help you avoid missing out on great photo possibilities due to poor lighting. Consider these suggestions, then mount up with some additional patience and head out.
Conclusion
Glare on glass in photos can be very disgusting, especially when it is a memorable photo. Use a tool to fix glasses glare in photo, and it will edit them without any of your work on your part.
Another method for reducing eyeglass glare is using an iPhone. You may follow the tutorial in the article above. It is simple to achieve this by eliminating the Glare from the eyeglasses on mobile phones.
FAQ
-
How to remove light Glare from photos in Photoshop Elements?
Choose Camera RAW Filter under Filter at the window's top. To choose the haze you wish to eliminate, use the Brush tool. Adjust the Dehaze slider in the Effects tab to the correct position until the light levels of the selection are consistent with the rest of the image. -
How to remove glasses glare from photos on iPhone?
Removing the Glare of a photo using an internet program is simple. Just upload the image and utilize the Removal tool in the app to remove that distracting Glare. -
What other apps can I use to remove glass glare from photos?
Although it removes Glare quite well, this program makes many more promises than just that. All the required selfies, picture editing, and beauty skills are available in one online application.


 ChatGPT
 Perplexity
 Google AI Mode
 Grok
Grok

