
Looking for an answer for how to invert a picture on Android? On your Android device, inverting a photo can be an easy way to create fascinating visual effects or experiment with different approaches. If you want to add a touch of surrealism or improve the overall composition, user-friendly tools make the process quick and easy. These apps provide a simple user interface with a few clicks to invert the colors of your photographs. Inverting a photo on Android allows you to change its appearance, emphasize contrast, and explore new creative possibilities. All from the convenience of your smartphone or tablet.

In this article

Part 1: Why You Might Want to Invert the Colors in Photos
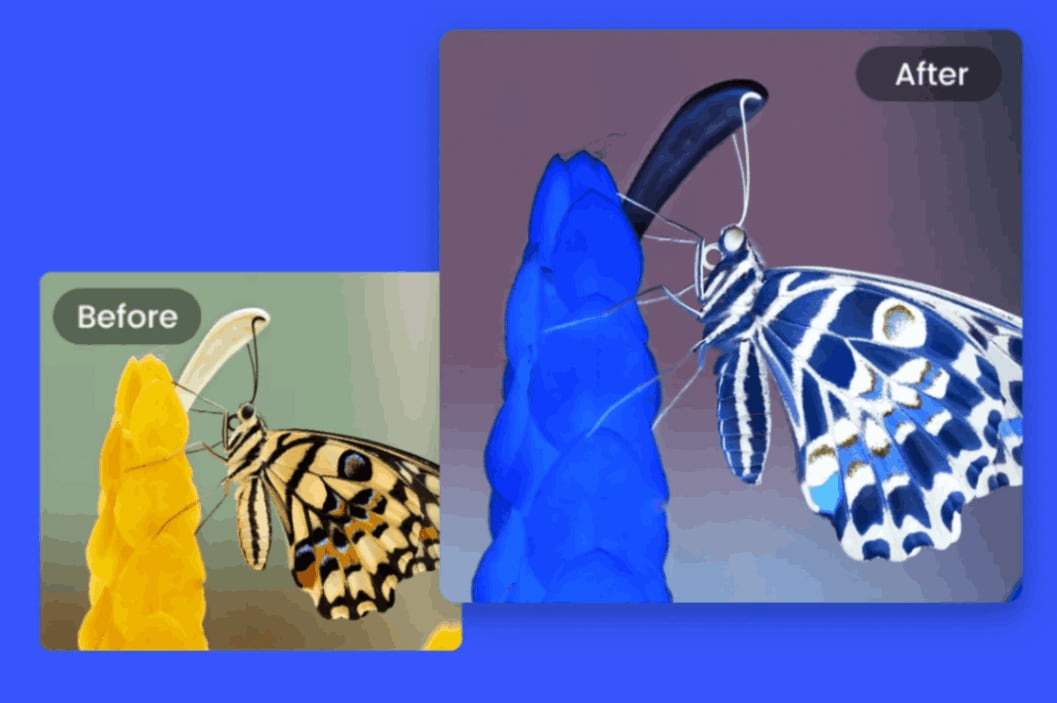
You can invert the colors in your images for various reasons.
Reasons for Inverting Colors in Images:
- Aesthetic Purposes: Inverting colors is sometimes done for aesthetic reasons, resulting in interesting and entertaining images.
- Assisting Color Perception: Color inversion can aid individuals who perceive colors differently, including those who are color-blind.
Benefits for Color-Blind Individuals:
- Addressing Color Blindness: Color inversion is beneficial for people with color blindness, helping them perceive colors more accurately.
- Enhancing Color Interpretation: Inverting colors can enable color-blind individuals to see colors they might not have seen before.
Enhanced Contrast and Features:
- Impact on Contrast and Features: Color inversion affects not only the colors in an image, but also its contrast and distinctive features.
- Aid for Low Vision: This can be useful for people with low vision, providing improved visibility by darkening light zones and reducing eye strain.
Blue Light Reduction:
- Eye Strain Reduction: Inverting colors, which darkens light zones, helps lower blue light and reduce eye strain, benefiting individuals with visual sensitivities.
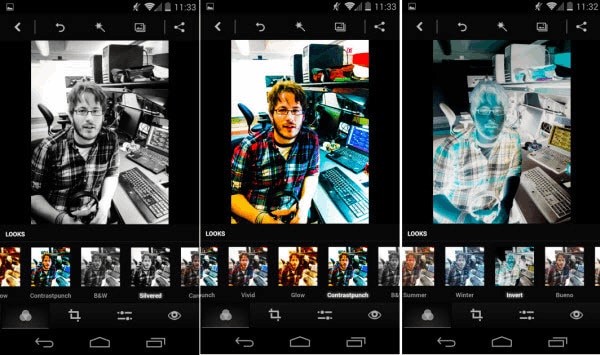
Part 2: How to Invert Colors on Android Using Inbuilt Apps?
Follow these methods to invert photo colors on Android using the built-in apps:
Step 1: Launch the "Gallery" or "Photos" apps.
Step 2: Look through your photo albums for the image you want to reverse.
Step 3: Tap on the image to see it in full size.
Step 4: Look for the "Edit" or "Adjust" option, typically represented by a pencil or a slider icon. Tap it to activate it.
Step 5: Once in editing mode, you should see a variety of editing tools or filters.
Step 6: Locate and touch on the "Filters" option or icon.
Step 7: Navigate through the available filters until you encounter the "Invert" filter.
Step 8: To apply the "Invert" filter to your photo, tap on it.
Step 9: After applying the filter, you can change the intensity or strength of the inversion if that option is provided.
Step 10: Once you're happy with the inverted colors, click the "Save" or "Done" button to save the changes.
Part 3: How to Invert Colors on Android Using Third-Party Apps?
App 1: Snapseed

Follow these instructions to invert a photo on android in Snapseed for Android:
Step 1: If you haven't already, download the Snapseed app from the Google Play Store.
Step 2: On your phone, open the Snapseed app.
Step 3: From your device's gallery, tap the "Open" button or the ""+"" icon to select the photo you wish to edit.
Step 4: After loading the photo, touch on the "Tools" icon at the bottom of the screen.
Step 5: From the list of available tools, pick "Tune Image."
Step 6: Several adjustment choices will be available under the Tune Image tool. Locate the "Saturation" slider and slide it to the left to "-100.."
Step 7: Scroll down to find the "Negative" slider. To increase the inversion effect, move it to the right. You can customize it to your satisfaction.
Step 8: When happy with the inversion, click the checkmark or "Apply" button.
Step 9: Finally, at the bottom of the screen, hit the "Export" button to save the inverted photo to your device.
App 2: Adobe Photoshop Express
Follow these methods to invert photographs on Android using Adobe Photoshop Express:
Step 1: On your device, launch the Adobe Photoshop Express app.
Step 2: Select a photo from your gallery or camera roll by tapping the ""+"" button.
Step 3: Choose the image you wish to flip from your gallery.
Step 4: After importing the photo, tap the "Edit" button on the screen.
Step 5: Click the "Adjustments" icon in the editing toolbar. It usually consists of a slider or a square with sliders inside.
Step 6: Navigate the modification choices until you reach the "Effects" section.
Step 7: Click "Effects" to expand it and display more effects.
Step 8: Locate and tap on the "Negative" effect.
Step 9: Using the given slider, adjust the intensity or strength of the inversion.
Step 10: When happy with the inverted colors, click the checkmark or "Apply" button to activate the effect.
Step 11: Finally, click the "Save" option to save the inverted photo to your gallery.
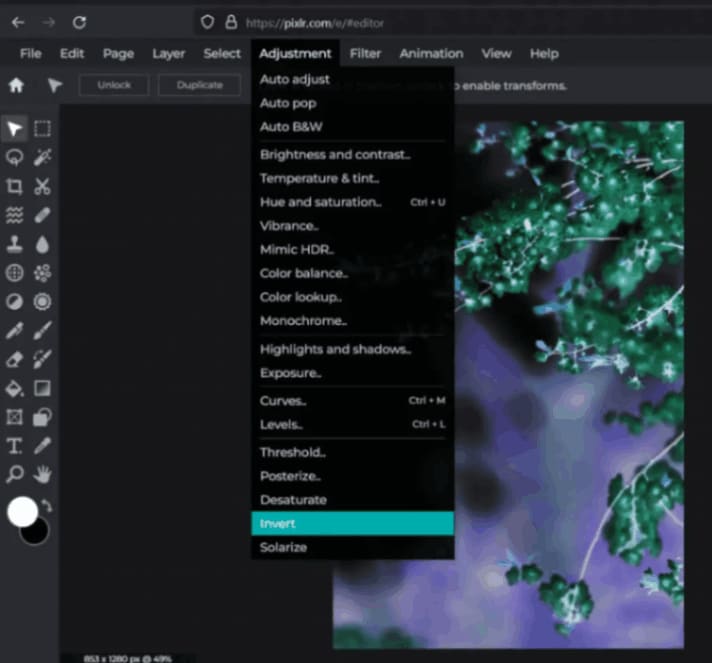
App 3: Pixlr

Follow these instructions to invert photographs on Android using the Pixlr app:
Step 1: On your device, launch the Pixlr app.
Step 2: Choose the image you wish to reverse by tapping the "Open Image" button. You can select an image from your gallery or use the camera to take a new photo.
Step 3: Click the "Adjustment" icon after opening the image. It usually appears as a half-filled circle.
Step 4: Scroll through the available tools in the adjustment choices until you reach the "Invert" option.
Step 5: Select "Invert" to apply the color inversion to your shot.
Step 6: If desired, use the slider or extra parameters to change the severity of the inversion.
Step 7: When happy with the outcome, click "Apply" or "Save" to save the inverted photo.
Step 8: If prompted, choose a location to store the photo and the desired file format (e.g., JPEG, PNG).
Step 9: After saving, you may find the inverted photo in your gallery or among the saved photographs in the Pixlr app.
Part 4: How to Invert Colors on Android Using Online Photo Editors:
Editor 1: Fotor Online Editor
Follow these instructions to invert photographs on Android using Fotor Online Editor:
Step 1: Tap the "Edit a Photo" icon on the homepage.
Step 2: You will be asked to upload a photograph. Select the photo you wish to reverse from your device's gallery by tapping the "Upload" button.
Step 3: After uploading the photo, it will appear in the Fotor Online Editor.
Step 4: Locate and click the "Effects" button on the left sidebar.
Step 5: Navigate through the available effects until you come across the "Invert" effect.
Step 6: To apply the "Invert" effect to your photo, click on it.
Step 7: Using the slider that displays, you can alter the severity of the inversion.
Step 8: Once you're happy with the inverted colors, click the "Apply" or "Save" button to save your changes.
Step 9: You will be asked to select a save location and a file format (JPEG, PNG, etc.). Make your choices and press "Save" to save the inverted photo to your device.
Editor 2: PhotoEditor.com

Follow these instructions to invert photographs on Android using an online photo editor like PhotoEditor.com:
Step 1: Look for an opportunity to upload or import a photo on the page. Tap it to select a photo from your device's gallery to invert.
Step 2: After uploading the photo, the online photo editor will launch, displaying numerous editing tools and settings.
Step 3: Look for an option named "Adjustments," "Filters," or something along those lines. To access the adjustment options, tap on it.
Step 4: Look for a "Color" or "Tone" area under the adjustment options.
Step 5: Look for an "Invert" or "Negative" option in the color or tone column. To apply the inversion effect to your photo, tap on it.
Step 6: If the inversion effect has additional options or sliders, you can change them to reach the desired outcome.
Step 7: When you're happy with the inverted colors, look for the "Save" or "Download" option on the photo editor's interface.
Step 8: Tap the button to save the flipped image to your Android device.
Editor 3: Pixlr Online Editor

Follow these instructions to invert photos on Android using Pixlr Online Editor:
Step 1: When the website loads, there will be options to open a picture. To open an image from your device, select the option.
Step 2: Go through your photo albums and choose the image you want to reverse. Tap it to launch Pixlr Online Editor.
Step 3: Look for the "Adjustment" menu or icon after opening the photo. It usually takes the form of a slider or a series of tools.
Step 4: Select "Adjustment" from the menu to see numerous adjustment choices.
Step 5: Among the modification options, look for one labeled "Invert." To apply the inversion effect to your photo, tap on it.
Step 6: After applying the inversion, you can fine-tune the settings by altering the brightness, contrast, or saturation.
Step 7: Once you're happy with the inversion and other changes, search for the "Save" or "Download" button to download the inverted photo to your device.
Step 8: Save the photo to a location on your device, give it a name if required, and then hit the "Save" or "Download" option.
Part 5: Methods Comparison
| Method | Installation Required | Editing Features | Ease of Use | Limitations |
| Built-in Tools (Gallery / Photos) | No | Basic color inversion | Very easy | Limited editing options and less refined inversion quality |
| Third-Party Apps (Snapseed, Photoshop Express) | Yes | Advanced color adjustments and effects | Moderate | Requires installation and may include unnecessary features |
| Online Photo Editors (Pixlr, Fotor) | No | Wide range of editing tools including color inversion | Easy | Requires stable internet connection and limited offline access |
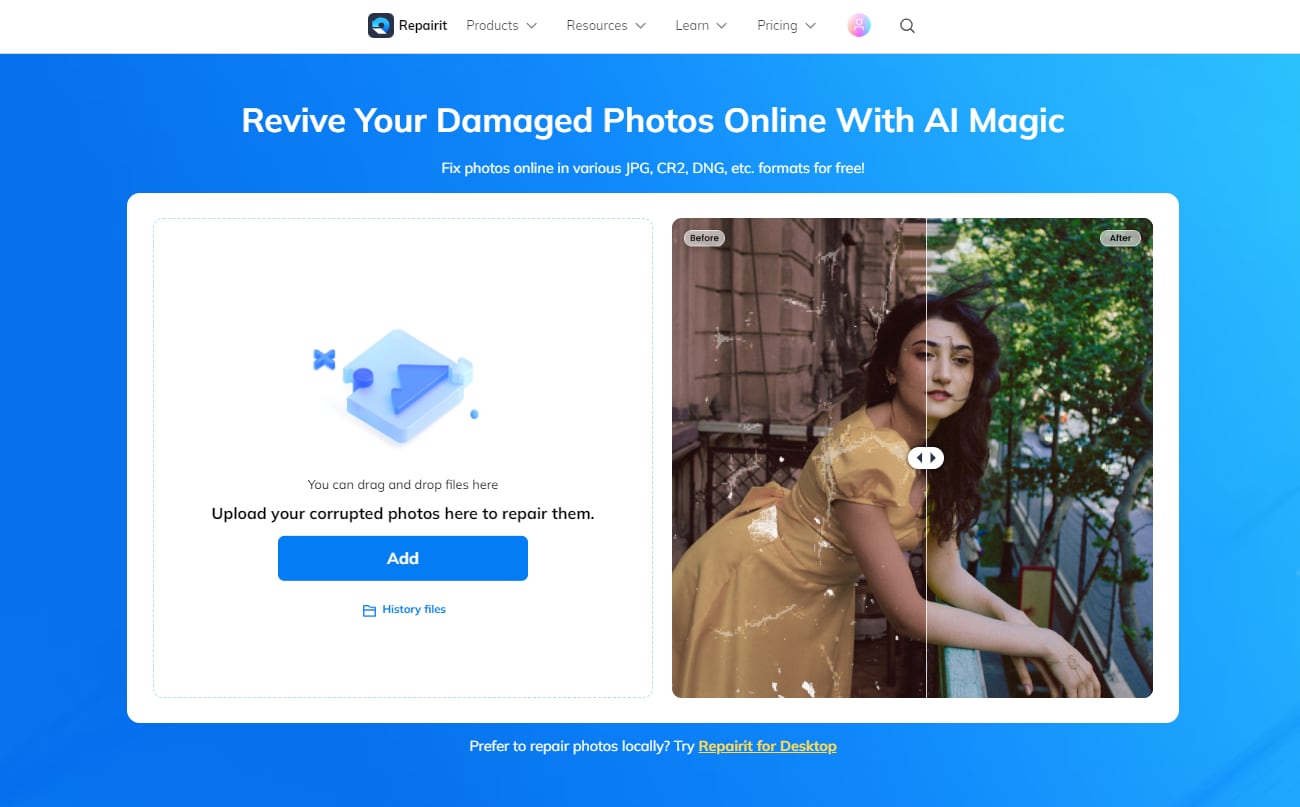
Bonus Tip: Use Repairit Online Photo Repair If Your Photos Are Corrupted
Repairit online photo repair is an online image repair service that quickly restores damaged or corrupted photographs. Here are some excellent features of this online tool
- Quick Restoration: Repairit swiftly restores damaged or corrupted photographs, saving valuable memories.
- User-Friendly Design: Its user-friendly interface ensures easy and convenient access to the service.
- Powerful Algorithms: Utilize powerful algorithms to assess and fix damaged image files by uploading them to Repairit.
- Restore Original Quality: Repairit can help restore images to their original quality, even if the issue is file corruption or wrong formatting.
- Say Goodbye to Damaged Photos: With Wondershare Repairit's online photo repair service, say goodbye to damaged or illegible photographs and restore your treasured memories.
Use Repairit to Repair Your Corrupted Photo Now
 Security Verified. Over 7,302,189 people have downloaded it.
Online Photo Repair Instructions from Wondershare Repair
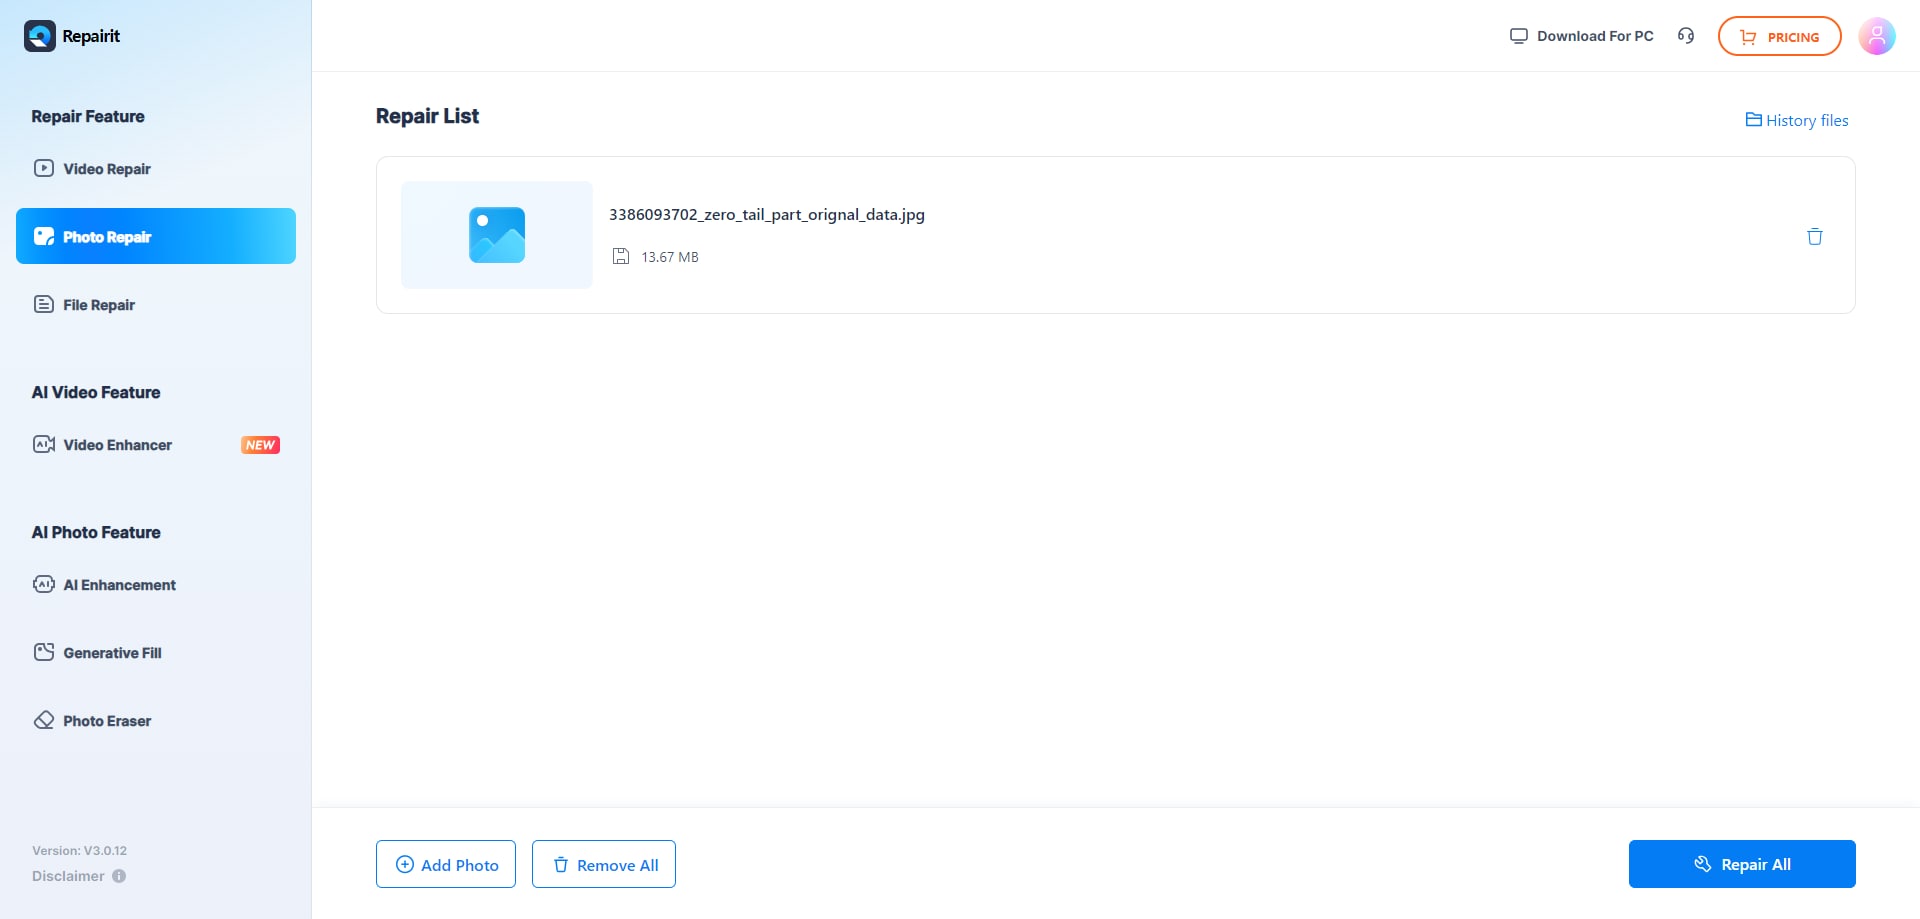
Step 1: Upload a photograph.
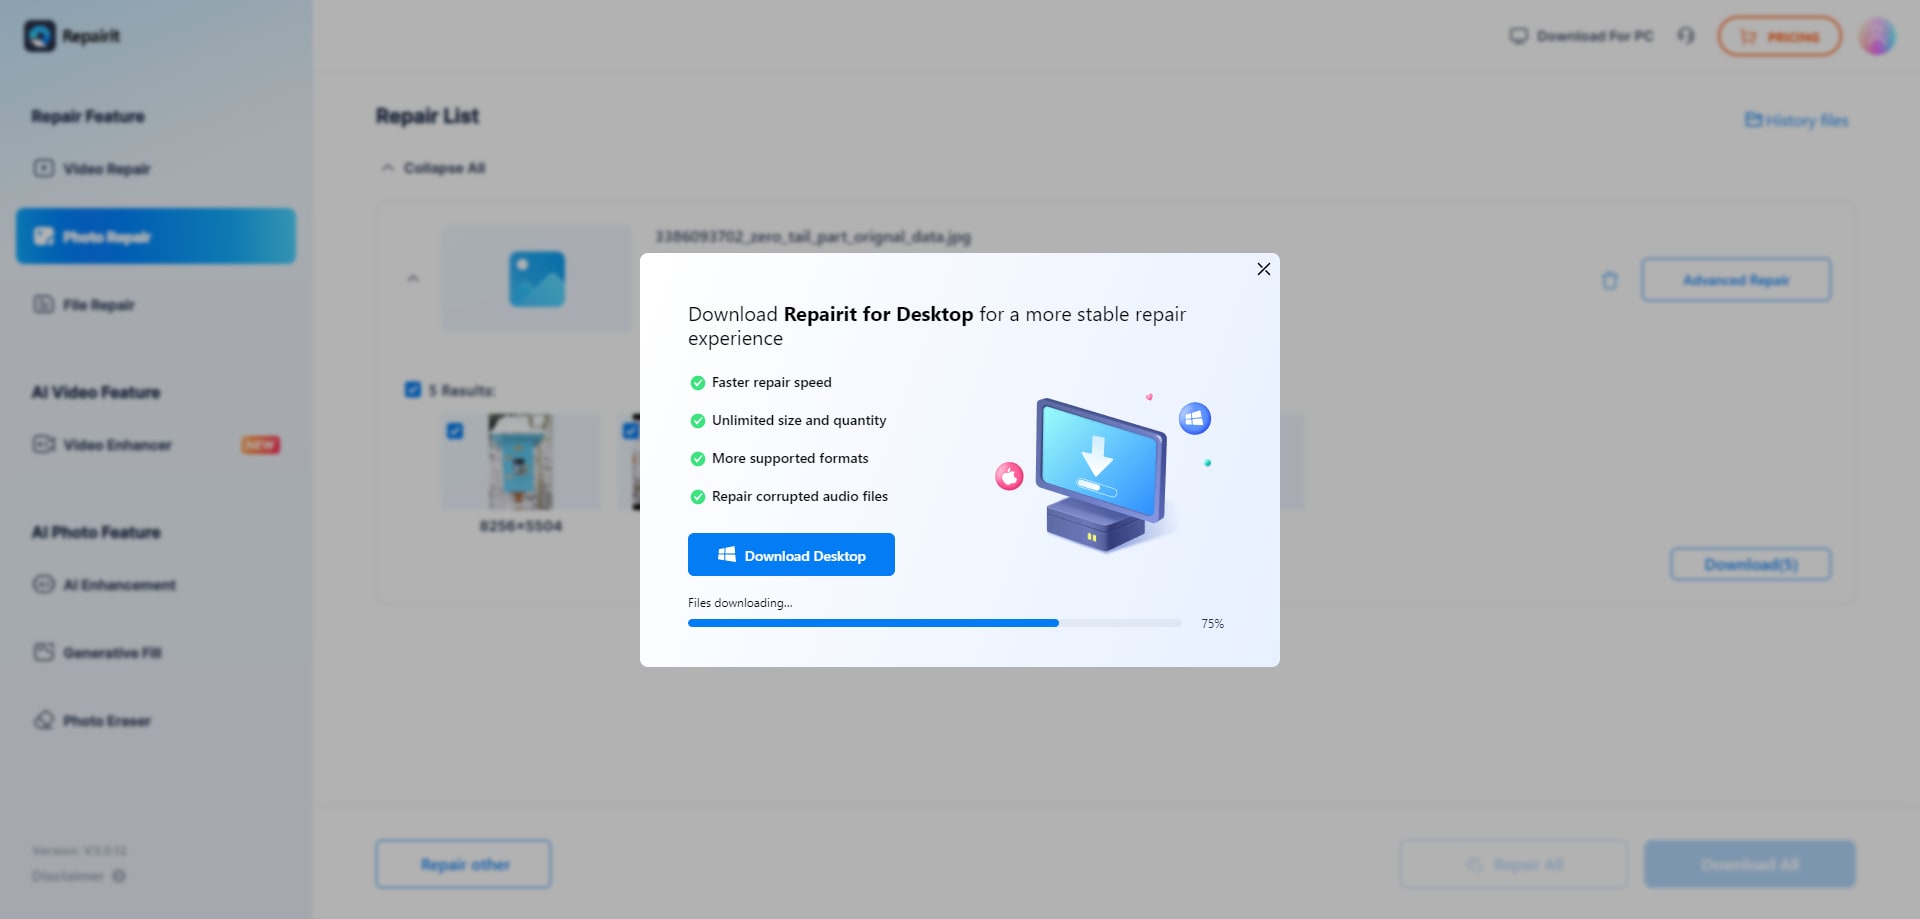
First, drag your damaged photographs into the photo repair functional area or upload them by clicking the "+Add" button.
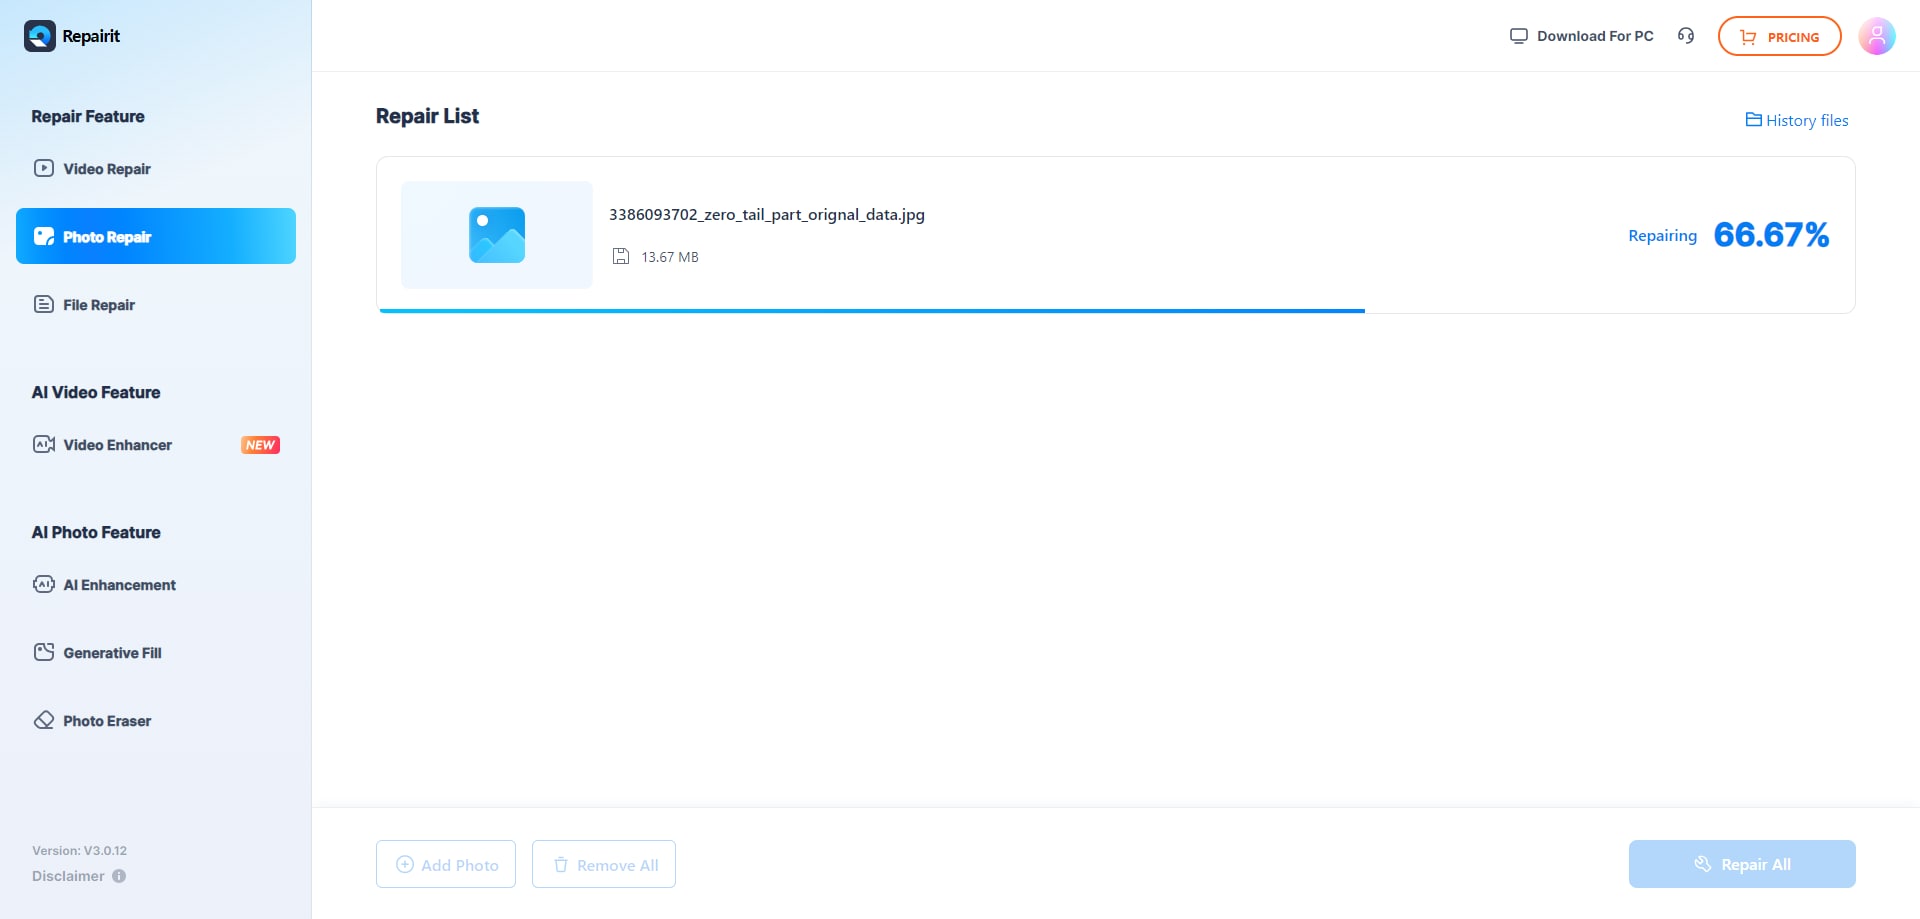
Step 2: Start the Repair Process
After uploading the corrupted photos, the interface will disclose all of the photo's metadata. Wait for the process to complete before clicking "Repair" in the lower right corner.
Advanced Repair is required to repair seriously damaged images if they cannot be corrected. It's straightforward. Then click on "Upload Sample Photo." The sample image was captured using the same camera and format as the defective images.
After about 1-2 minutes, click "Repair" to start the advanced photo repair process.
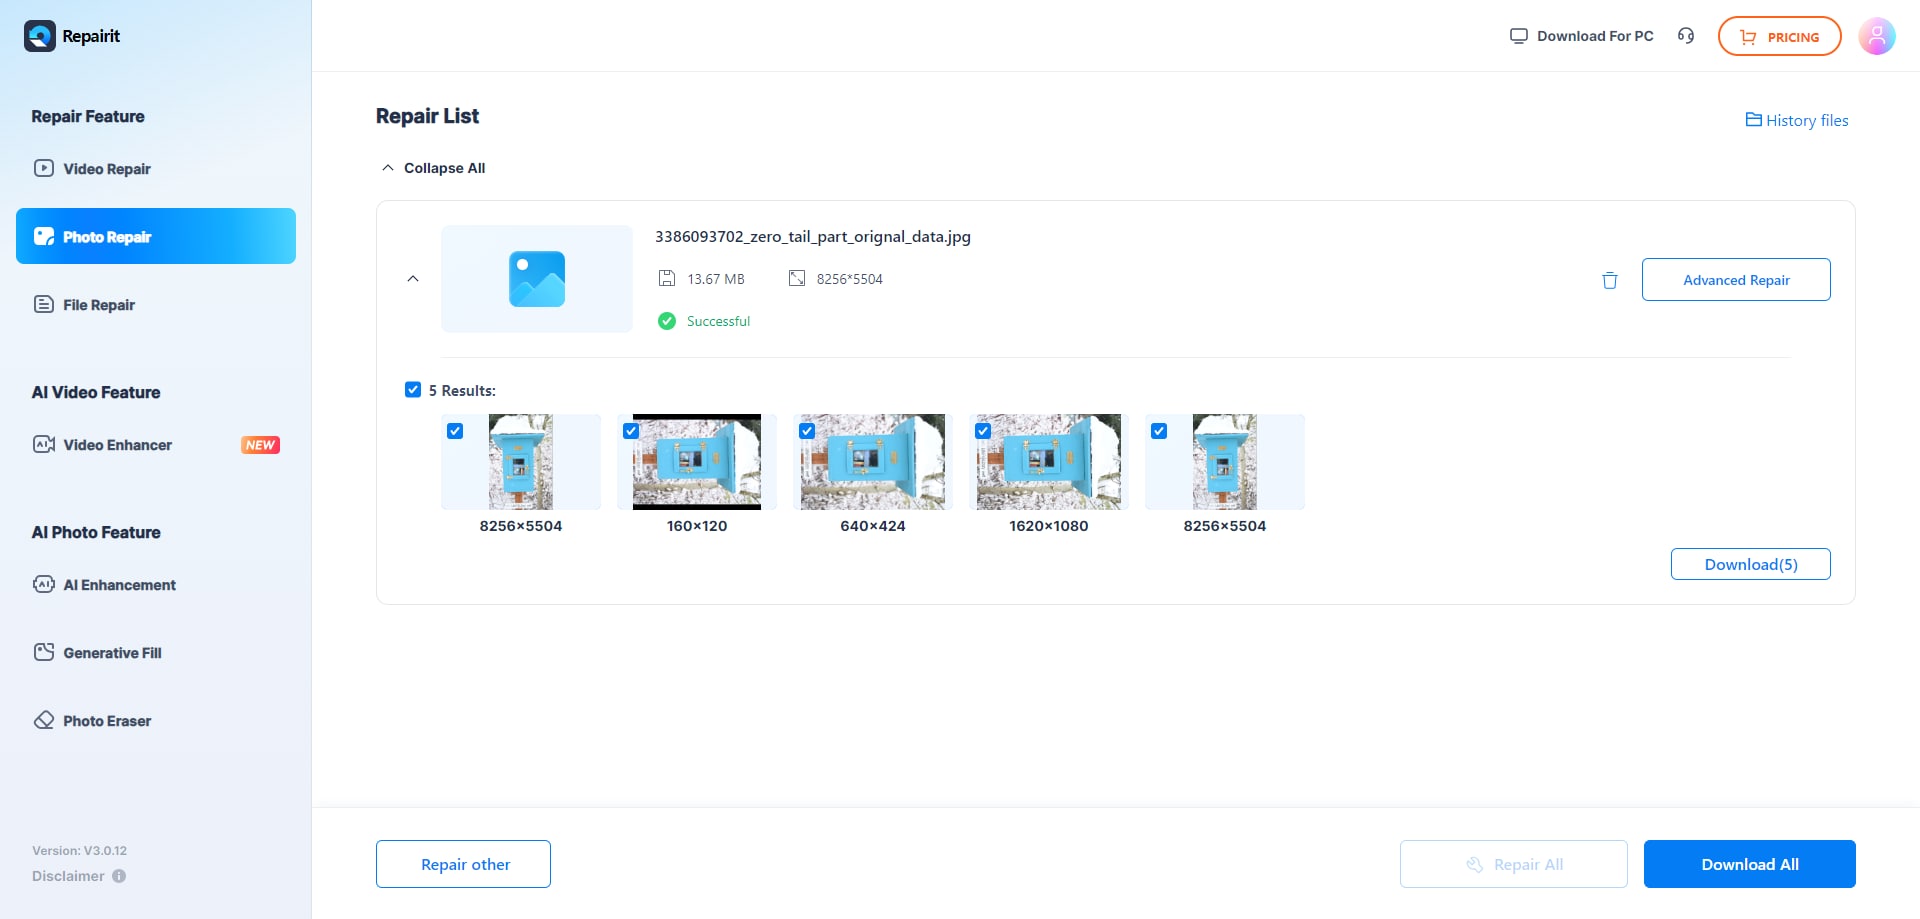
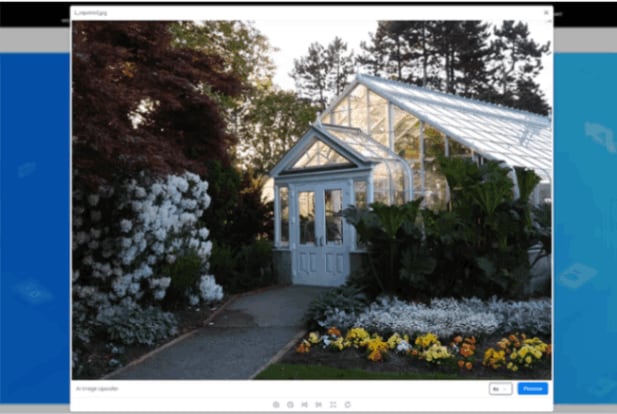
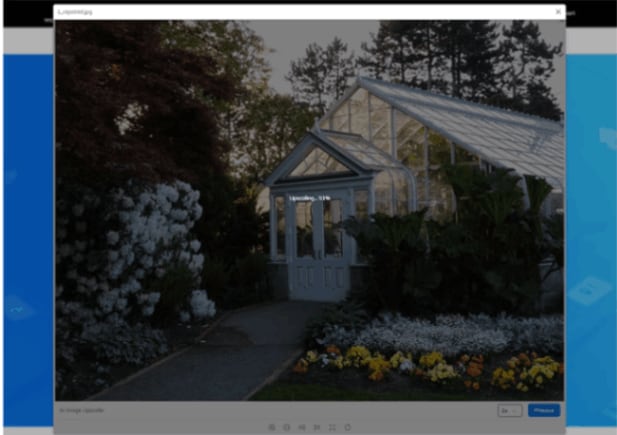
Step 3: Preview and save the image
After completing the Quick Repair or Advanced Repair process, you can see the images and select which ones to transfer to your local computer.
To preview videos, click the "play" icon, then click the "download" icon to save them. By clicking "Download All" simultaneously, you can save the restored photographs.
Step 4: Upscale the Repaired Image
It may also help you enlarge the patched photographs with the new "AI Image Upscaler" feature before downloading them; click and view your fixed photo, then select the process option "2x", "4x", or "8x", and then click the "Process" button.
Repairit will begin upscaling your image using AI technology.
Step 5: Save the AI Upscaled Image
After you've completed the AI photo upscale procedure, select the upscaled and corrected images from the results and click "Download All" to save them locally.
Conclusion
When you invert a photo on Android, it is a straightforward way that can be accomplished via the device's accessibility settings. You may quickly get the required appearance and explore the artistic possibilities of your photographs by activating color inversion.
If your images become corrupted or destroyed, you must have a dependable solution to recover and fix them. Wondershare Repairit is a recommended picture-fixing app for Android. It has an easy-to-use interface and extensive recovery capabilities, allowing you to restore and repair corrupted photographs easily. You may restore access to your important memories and ensure your images remain undamaged and useable using Wondershare Repairit.
