
Since printouts of photographs are so appealing, most people treasure retaining them as keepsakes. Additionally, memories associated with digital photographs fade from consciousness after a while. One of the most common human failings is forgetting some of life's most significant memories. As a result, you ought to print any photos that hold special meaning for you.
You will learn how to enlarge an image for printing from this instruction. We will take you through the requirements for printing photographs and the most effective tools for enlarging photos before printing.
In this article
Why Is Enlarging an Image Useful?
Reorganizing can happen when you are adjusting for distortion of the lens or rotating a picture, whereas image scaling is required whenever you need to change the overall amount of pixels. You must increase the number of pixels to view more information when you zoom in on an image.
What Are the Ideal Sizes to Print a Picture?
Knowing the proper size for the picture you wish to utilize is crucial when designing for print. Nothing is harder than printing out your work only to discover that the picture is pixelated or skewed. Find out the primary printing sizes and what each is suitable for:
- 4 x 6 inches.
- 5 x 7 inches.
- 8 x 10 inches.
- 8.5 x 11 inches.
- 12 x 18 inches.
- 18 x 24 inches.
- 24 x 36 inches.
Choose a digital image with a resolution of 7200 x 10800-pixel values for extra-large prints for the greatest quality. When making a picture this big, use a 3:2 aspect ratio.
How to Enlarge an Image to Print?
You will get a pixelated picture if you magnify a photo incorrectly. We will walk you through the process using the five most common techniques.
Method #1. Enlarging a Picture for Printing in Photoshop

Among the most commonly used software tools for enlarging photos is Adobe Photoshop. When you expand photographs, the program's image size function offers a way to improve clarity and preserve key information. Use Photoshop to expand an image by following the instructions shown below.
Step 1 Open your photo.
Step 2 Choose an image's size.
Step 3 A dialog window for image size will appear.
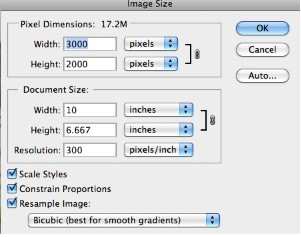
Step 4 Adjust the document size, resolution, and pixel dimensions.
Step 5 Choose the Resampling Method after that, and then click OK.
The last action to do is this. To select the correct radius, move the slider. Changing the preview will result in an improved edge.
Method #2. Enlarging a Picture for Printing in Lightroom
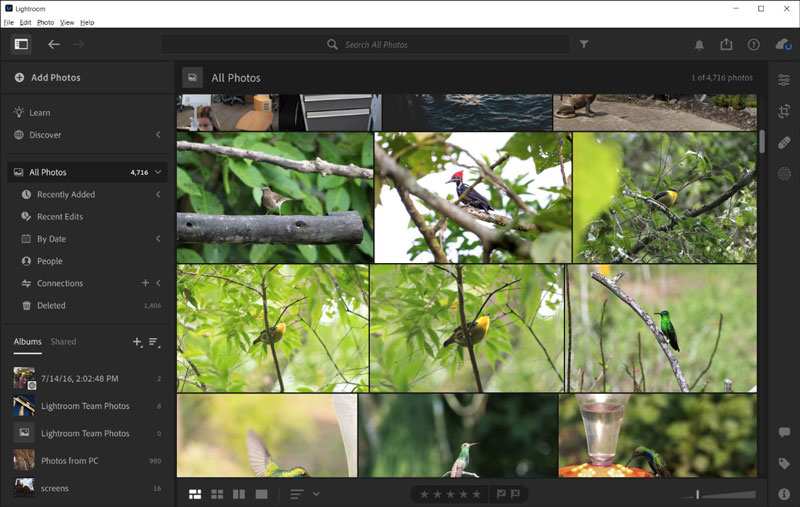
You must know that Adobe Lightroom offers a Super Resolution function if you have never utilized it. This function can treble the size of photographs. The best thing is that it does not impact the image's quality. If you wish to use Lightroom to expand a photo, follow the following procedures.
Step 1 Open the picture in the Lightroom processing program.
Step 2 To upload a picture from your computer, select Import from the menu.
Step 3 Choose the photo you want to resize, and then File > Export.
Step 4 Set your preferences and modify your image's dimensions, including the height and width.
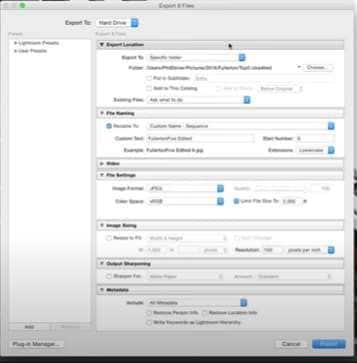
Step 5 To save the image, select the Export option.
The software uses machine learning techniques to improve the quality of the photos. Do not overlook the opportunity to preview the improvements using the special window. Select the Enhance option if you prefer the outcome. Along with the original image, you will get a DNG file.
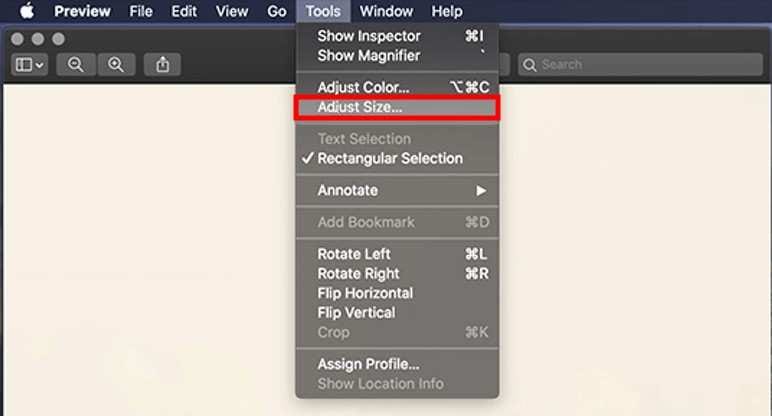
Method #3. Enlarging a Picture for Printing in Preview
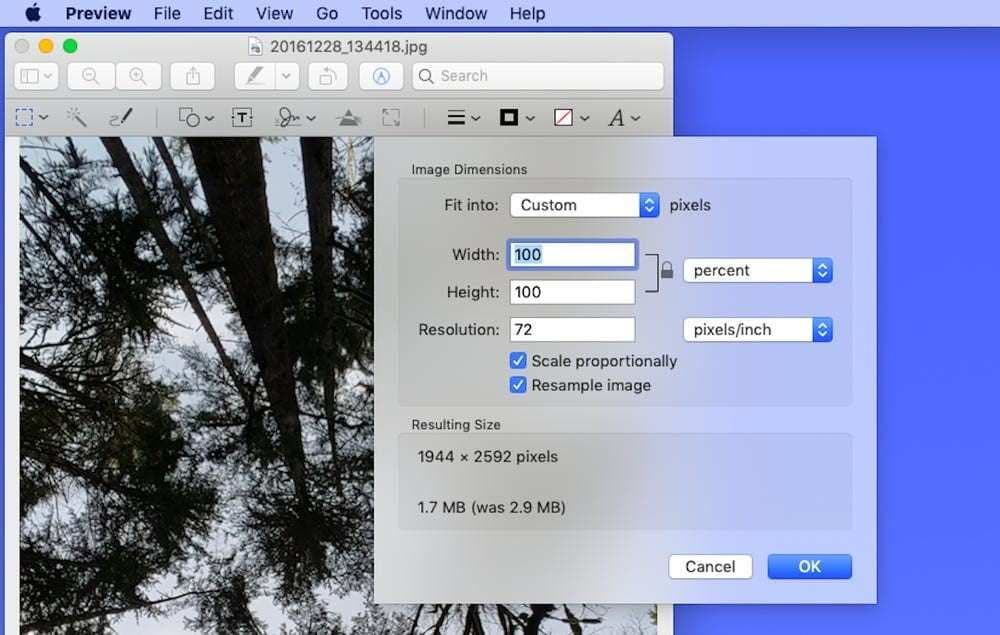
On your PC, there may already be free photo scaling software that can alter DPI and set up images for printing. In fact, because of how user-friendly this tool is, tutors regularly use it to show pupils how to print pictures.
Step 1 Open the image

Step 2: Open the Size Adjustment Window.
Step 3: Select inches and pixels.
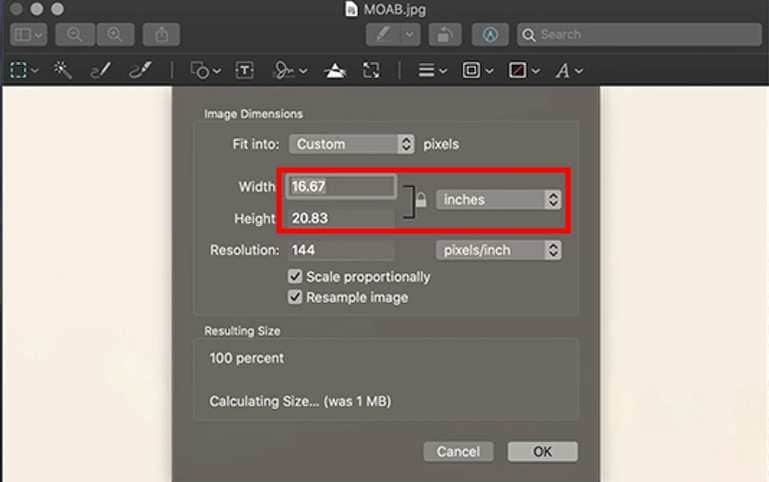
Step 4: Resize the image to your choice.
Set the pixel density to 300px/inch and uncheck "Resample Picture.” It will automatically produce the maximum width and height values. You may export the file if you are happy with the results.
You can determine how much one can enlarge an image without losing quality once the application displays the maximum Height and Breadth at 300 DPI. Of course, choosing whether value or size is more crucial is entirely up to you.
Method #4. Enlarging a Picture for Printing Using PixCut
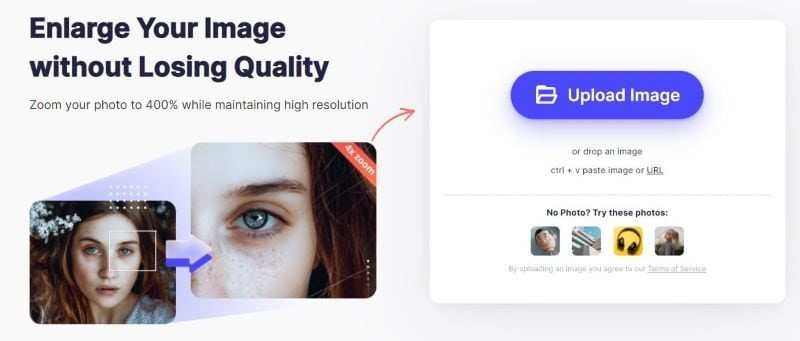
With the help of the free application PixCut, you may expand photographs without sacrificing their quality. The greatest part: You may increase the image's size by up to 400%. To find out how to expand a picture for printing using PixCut, follow the instructions below.
Step 1 Visit the official website.
Step 2: Select the Upload Picture option to upload a picture from your device. You may also drag or copy the image you want to resize, then paste it. The image will automatically expand due to the technology. It has a 400% zooming capability for photos.
Step 3: You may download your photo when PixCut has completed enlarging it.

Since PixCut uses Automatic AI, it is more successful than other online enlargement applications. In essence, this constitutes one of the greatest aspects that distinguish PixCut from its rivals. Additionally, it is quick, ensuring that you conserve time while expanding a photo.
Method #5. Enlarging a Picture for Printing Using Windows Paint
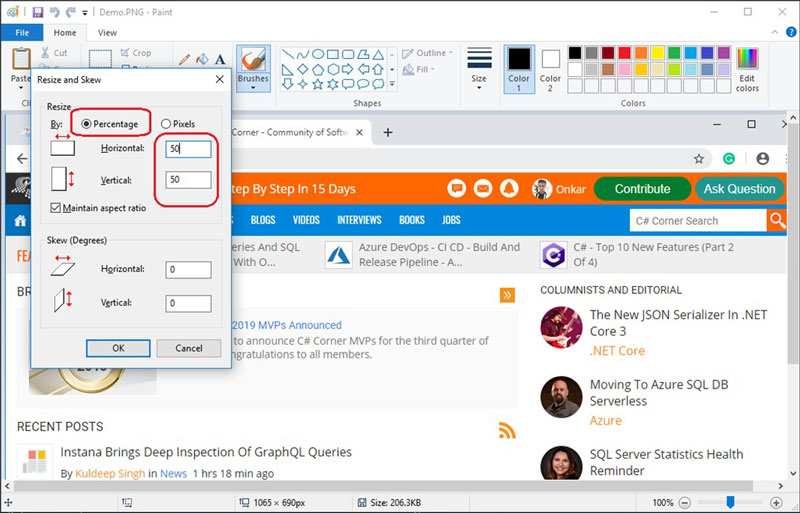
Following the instructions below will let you resize an image using Paint before printing:
Step 1 Type "paint" into the Windows search bar.
Step 2 To run the software, double-click on it.
Step 3 For uploading the image to Paint, select the Open button after finding it on your computer and selecting it.
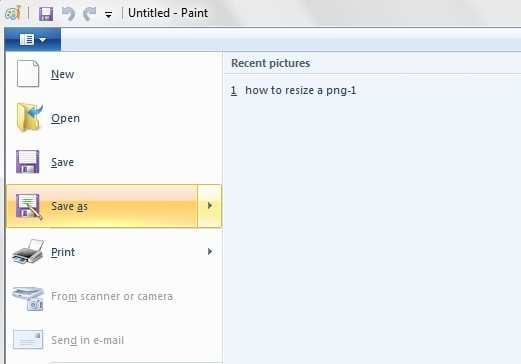
Step 4 Select the Skew Logo and Resize option from the home menu.

Step 5 The quality, width, and height are all adjustable.
Step 6 In Paint, you may include a caption by using the Text tool.
Step 7 Select Save As after clicking the main tab.
Step 8 Then choose JPEG, give the image a succinct descriptive designation, and save it.
Bonus Tool
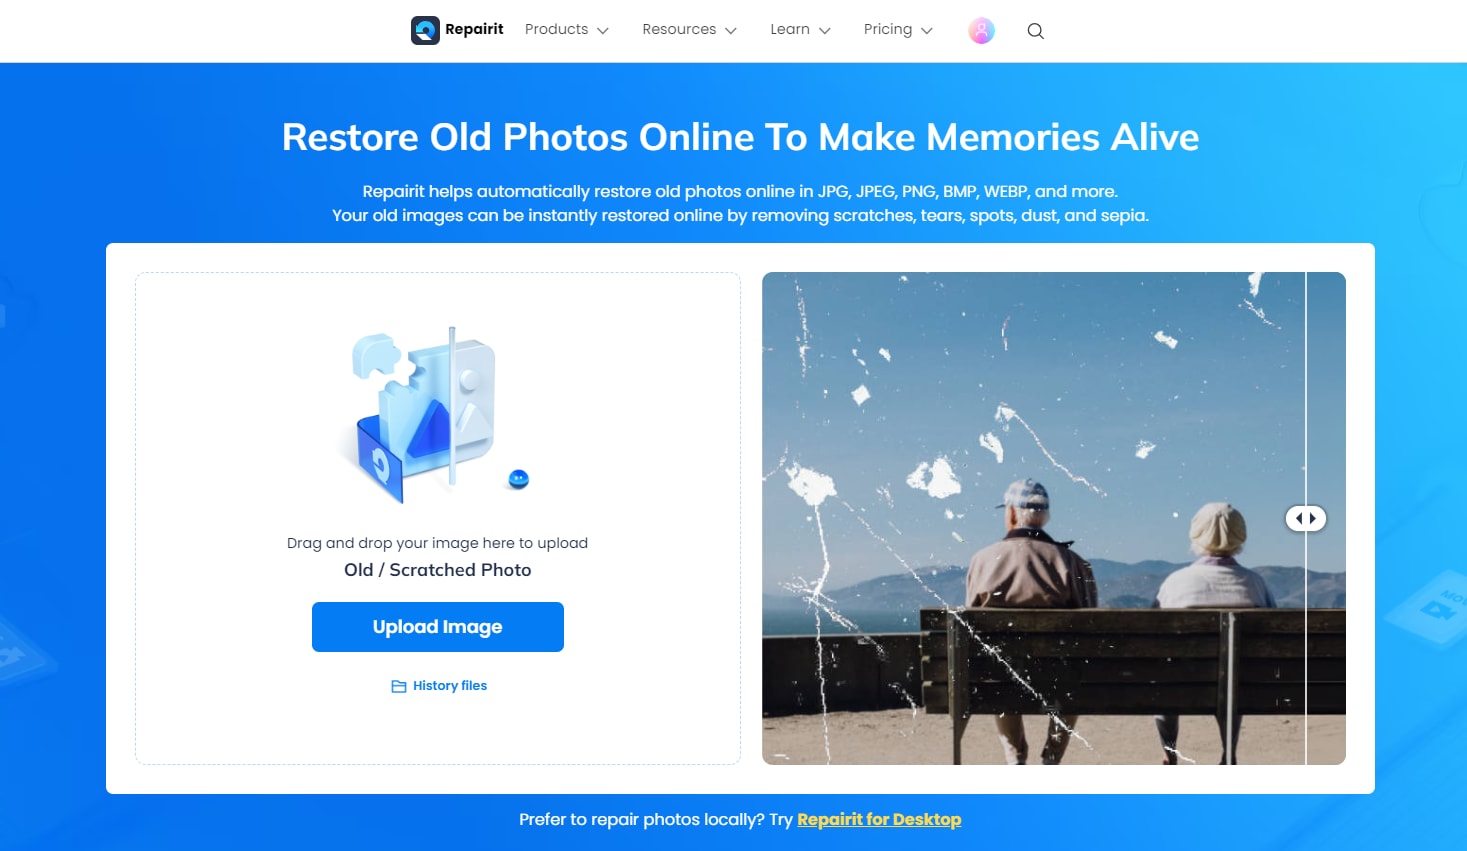
Photos may help you remember wonderful memories of yourself, those you care about, a location, or many things. So, now you are aware of how to expand a photo for printing and for more adjustments in image you can choose Repairit Online AI Old Photo Restoration. This tool is free to use and boost the colors in your photographs. Also, you may fix your corrupted images with the Repairit Online Old Photo Restoration. This will also help you to remove scratches and return clear and unbroken images. Gratefully, the online AI Photo restoration tool can help you achieve great results without installing any application.
Things To Keep in Mind to Enlarge an Image to Print
When you wish to print an image, you need to consider several things. First and foremost, it all depends on the photo caliber you are utilizing. If you want to prevent issues with picture printing, excellence comes first.
- The Quality of the Picture: When using a low-quality photograph, you should consider the shot's quality. Smaller photos might be difficult to deal with since they risk seeming blurry. Check to make sure that the perfect outcome is attained as a result.
- Sizes of the Print You Desire: The total amount of pixels every inch on an image directly impacts the printing dimension of the image. Make sure the image you choose satisfies the following criteria:100-150 DPI. Over 300 DPI: 150-300 DPI.
- Make Your Photos Sharper: You may use the sharpening technique to expand your image for print. The best aspect is that you have a variety of options at your disposal to improve the print image quality. The most common of these techniques is wearing an unfocused mask. You have to create a copy of your photo and blur it out compared to the original. This section combines the two versions. The outcome will be an enhanced, crisp image.
- Avoid Printing JPEG formats: Since certain features are lost when a picture is enlarged in JPEG files, many people dislike them. JPEG files can be difficult to work with because you risk losing important image elements. In addition, JPEGs were created to display well online.
- Use an Advanced Computer: A powerful computer may increase your image's quality through hardware improvement. Additionally, enlarging a photo takes up a lot of space on a computer.
Conclusion
It is important to properly prepare the photographs before expanding them for printing. Consider things like file formats, ratios, and color preferences. Ensuring that the information within stays comprehensive is one of the key advantages of considering these things.
To expand a photo for printing, follow the directions above. The precise instructions guarantee that you can expand photographs without sacrificing quality.