Suppose you have a fantastic digital camera, capture pretty snaps at a birthday party, and can't wait to show your friends and family. Yet, when you do, you discover that every man and woman has red eyes and looks like a vampire. At that moment, how would you feel? Of course, you would become upset. Isn't it? But you know what? Red eyes in photographs are a common issue that anyone can fix now. Do you want to know how? Then read this article explaining how to remove red eye from photos online and providing tips on avoiding them.
In this article
Part 1: Why Does Red Eye Appear in Photographs?
Redeye in photographs can happen for some reasons. It typically occurs when you take a picture in a dark setting. As a result, you have to use the flash, which is how red eyes appear in photographs. It occurs when the red retina at the back of our eyes reflects the camera flash. The camera captures a person with red eyes due to this reflection entering the lens. Redeye appears more frequently during the night when our eyes are completely open as we adjust to the dim light.
Now that it's clear why red eyes appear in photographs, the next question is how to remove them. To find out the answer, read on!"
Part 2: How to Remove Red Eye from Photos Online?
Modern technology makes it easy to remove red eyes from photographs. Now, several red eye photo editor tools remove red eyes in pictures online. Are you interested to know what those redeye remover online tools are? Then, read below!
1. Fotor
The first redeye photo editor online is Fotor. With only a few clicks, you can easily remove red eye from images using Fotor. It also offers many other helpful features, including effects, stickers, text, and HDR, to help you take the finest photos. The entire process is straightforward when you want to eliminate the redeye effect.
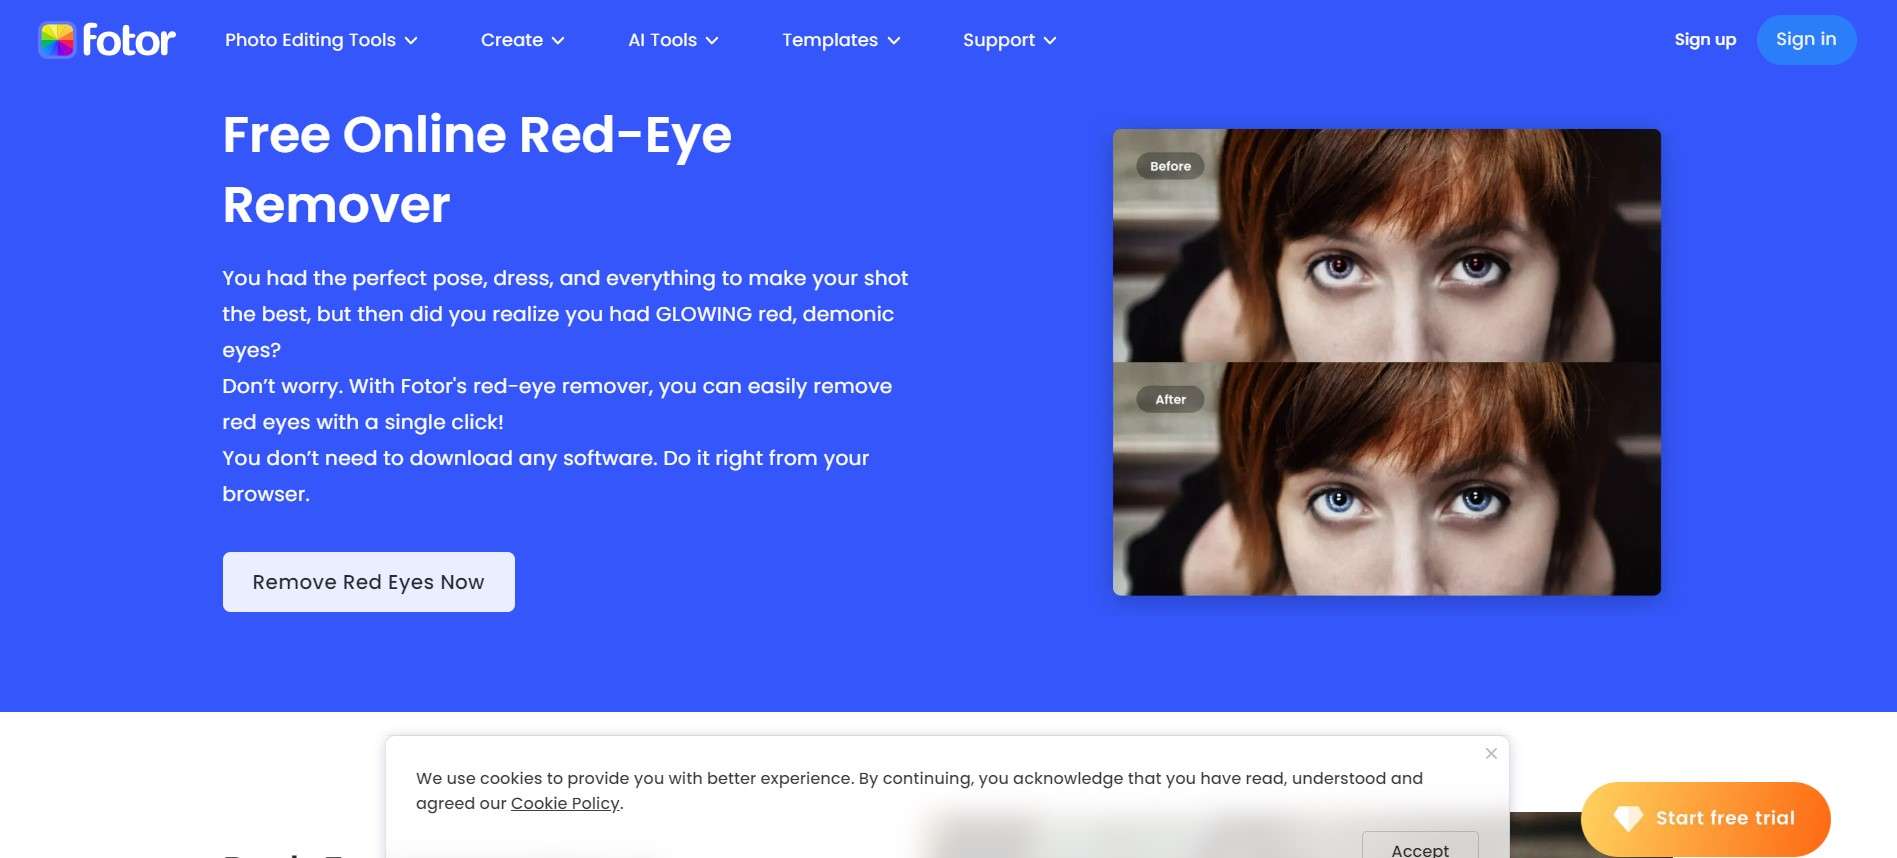
Follow the steps listed below to fix red eye online:
Step 1: Open a browser and go to the tool's official webpageStep 2: To upload a photo for Fotor to change, click the "open image" option.
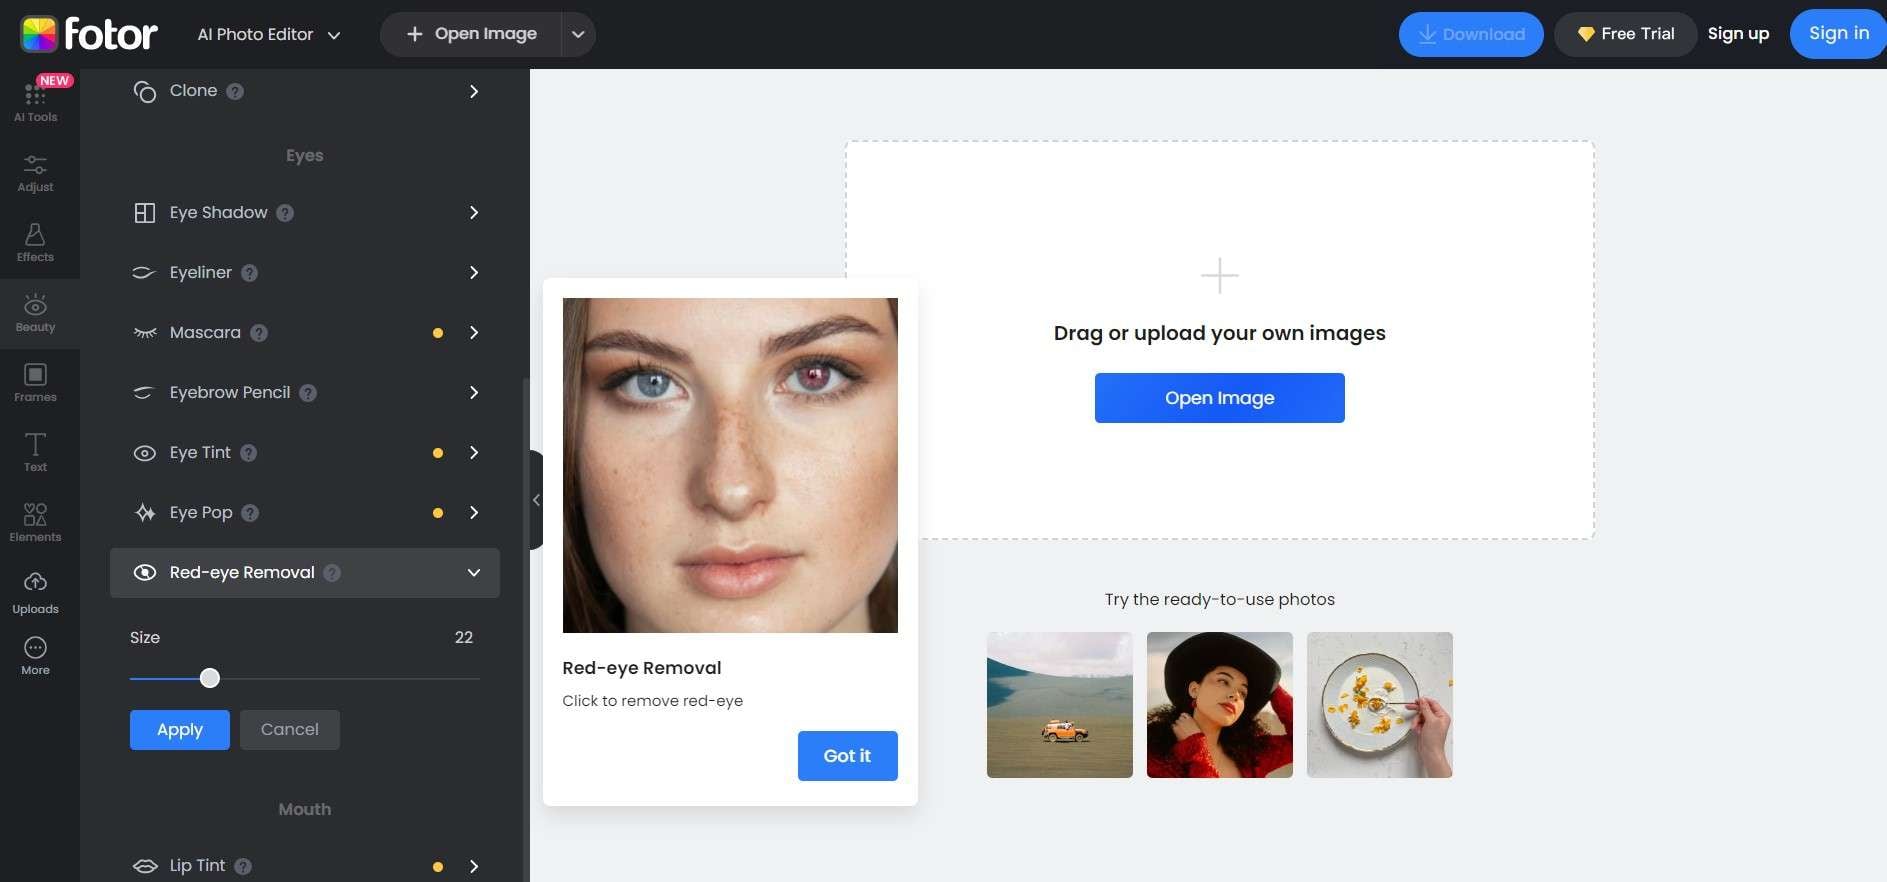
Step 3: Highlight the red area of the eyes. Then, select "Redeye Remove” under Beauty.
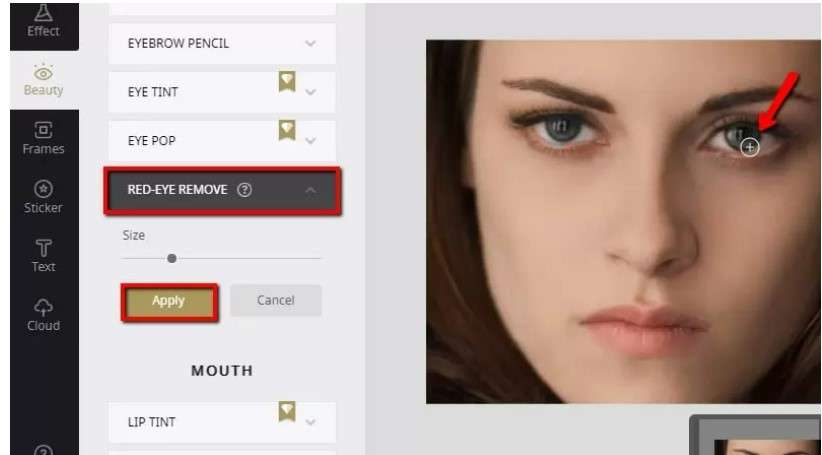
Step 4: Click "Apply" to finish processing the picture.
2. FixRedEyes.com
The next redeye remover online is FixeRedEyes.com. It contains an automated function that searches for red eyes in photographs and removes them quickly using the drag tool. The steps that you must take in FixRedEyes to remove the red eyes from pictures are as follows:
Step 1: Visit fixredeyes.com.
Step 2: The "Browse files" button is in the screen's bottom right corner.
Step 3: Find the file that contains the image you want to use. Then, upload the image into FixRedEyes after choosing it.
Step 4: To pick the area of the image where the redeye effect is present, use the redeye region selector." />
Step 5: Click the "Fix it" button to remove the red eyes.
Step 6: If you're happy with the result after repairing, you can download the edited image. To do so, select the "Download" option on the right side of the screen.
3. LunaPic
Lunapic is yet another solution for red eyes. It is accessible through web browsers and is free to use. No sign-up is needed!

Let's discuss how to fix red-eye online.
Step 1: Visit the Lunapic website.
Step 2: Select Adjust > Redeye Reduction from the menu."
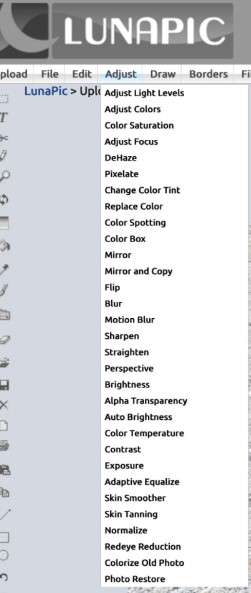
Step 3: Select “Choose File” to upload the blurry photo." />

Step 4: Trace a box around the eye and select "Fix Redeye."
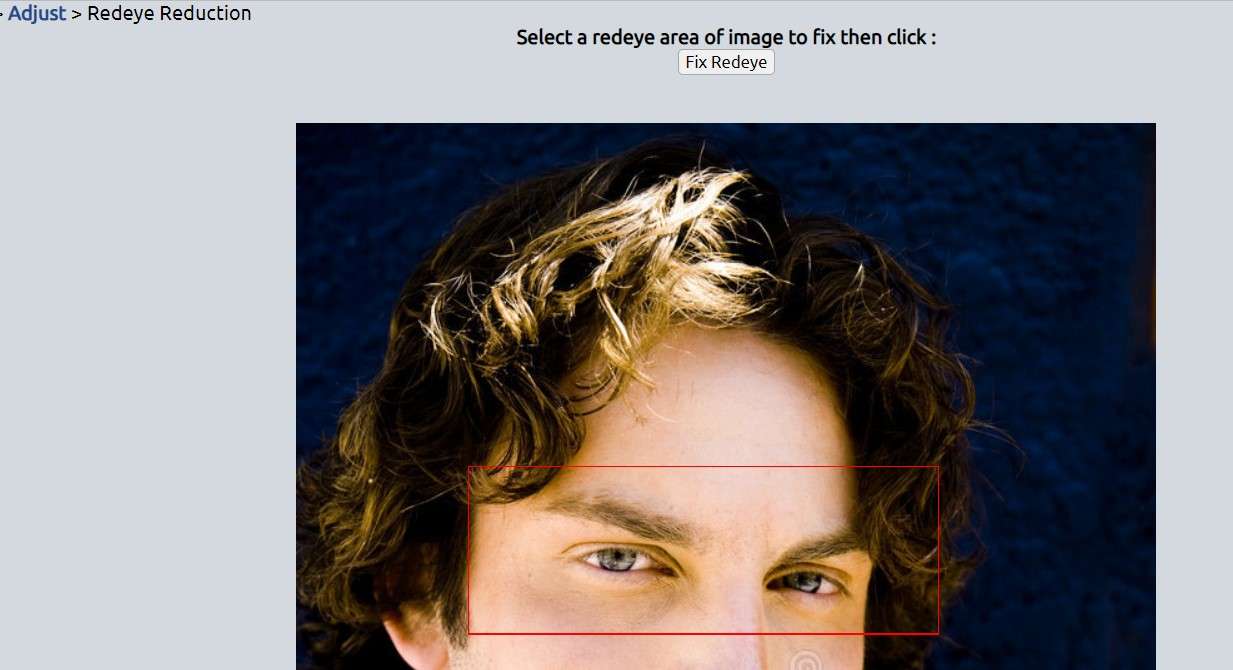
Step 5: Right-click the image to save it after eliminating the redeye effect.
4. iPiccy
iPiccy is one of the top redeye remover apps available for online removal. This app has many more entertaining features like a meme maker, bokeh effect maker, color correction tools, and more." />

To remove redeye from a photo online, follow the steps mentioned below:
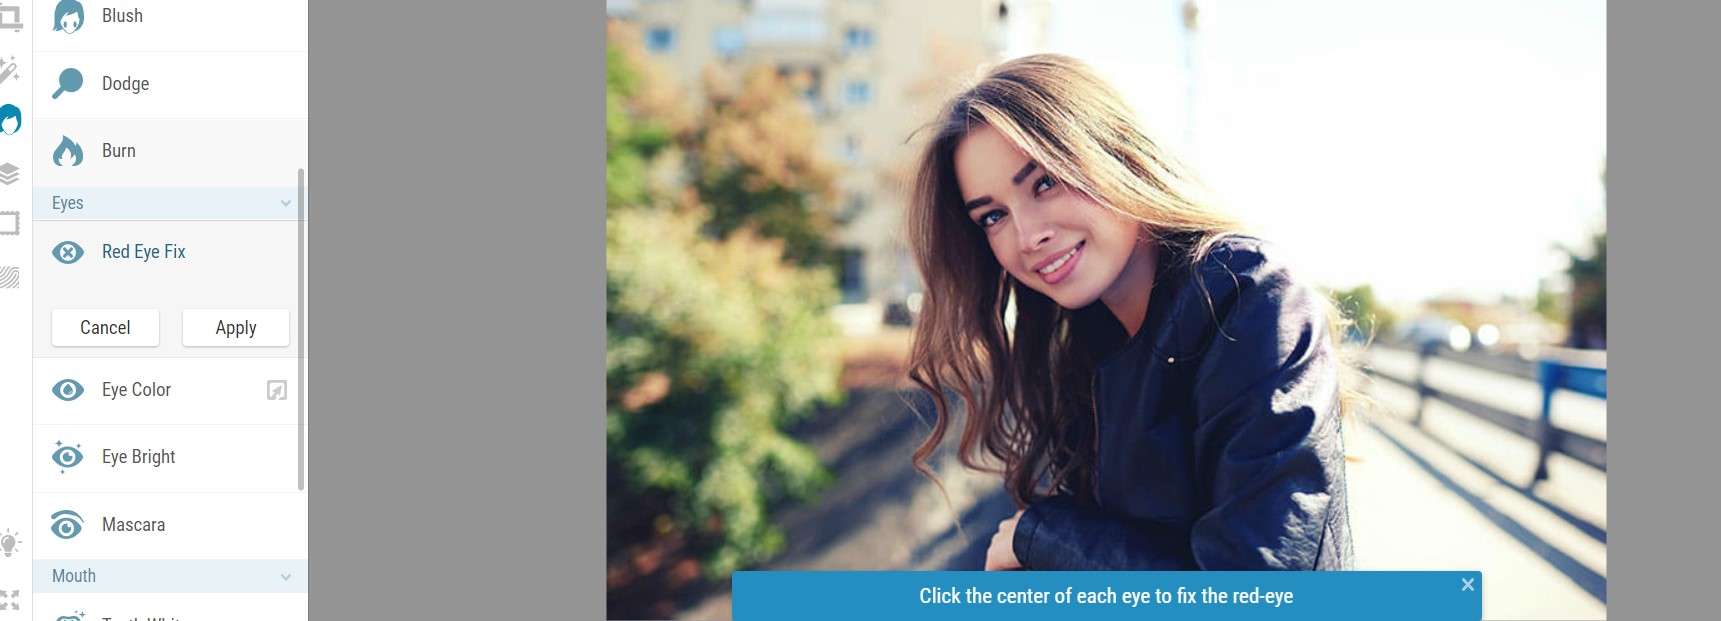
Step 1: Go to the editor, and click the Retouch button."

Step 2: Then choose the Red Eye Fix option. Mark the locations, and you're done.
Part 3: Camera Tips to Avoid Red Eye in Photographs
If you don't want to cope with red eyes or wonder how to remove them, there is something for you. Here are some tips that will help you avoid red eyes in photographs.
Tip 1: Brighten the Settings
When the surroundings are dark, the chance of redeye increases. The darkness also causes pupils to dilate, increasing the possibility of a redeye impact. So, brightening the setting by adding additional light to the dull room can help you avoid red eyes in your images.
Tip 2: Don't Look Directly at the Camera
Attempt to look away from the lens when photographing at night or in low-light situations. This stops your eyes from being hit directly by the flash. Looking away from the digital or smartphone camera reduces the possibility of red eyes in your photographs."
Tip 3: Activate the Anti-eye Feature
Using the anti-red-eye functionality is another thing you might consider. Today, most smartphones include this feature, which contributes to the brief light flashes produced when a photo is taken. Your eyes close due to this motion, and the camera snaps the picture before it can open again.
Bonus: How to Repair Corrupted Pictures?
How would you feel if you had shot a stunning photo but had been tampered with? Naturally, you would feel bad. But I do have some fantastic news to share. Do you know what? You don't have to feel bad since Wondershare Repairit has created an online photo repair option. It fixes your damaged images in a couple of minutes.
I am sharing several outstanding features that make fixing photos offline or online easier.
- You may recover the damaged photographs in their most excellent quality and resolution using it.
- It swiftly repairs damaged photos from CDs in Mac and Windows computers and other storage units.
- It can assist in restoring the photographs' original quality, whether they are pixelated, have grey areas, or cannot be accessed.
- You may fix many photographs at once.
Steps to Repair Corrupted Images
This online tool is quite simple, with three simple steps that can be completed in a few minutes. Let's look at how to repair damaged images with Wondershare Repairit.
Step 1: Add Photo
Go to the official Repairit Photo Repair website. Then, choose the photo you want to fix by selecting "add files". This button is located in the center of the screen.

Step 2: Repair Photos
You may move on to fixing the photographs if you successfully add them. To start the repair process, click repair in the upper left corner of the screen.

Step 3: Preview and Save Repaired Photo
When fixed, Wondershare RepairIt enables you to see the photos to check that the issue has been resolved. If you still need to, you may always use advanced repair to ensure the problem is fixed. However, if your images have returned to normal, click "save" and choose where to store them.
You only need to do it. Your photographs are now damage- and corruption-free as the process is finished.
Conclusion
Nowadays, many cameras make environmental adjustments automatically to reduce red eyes. But it still happens sometimes, and you have to cope with it. This article describes how to remove Redeye from photos online. You also learn to avoid red eye in photographs with the tips above. Additionally, you may use Wondershare Repairit to fix your pictures if they have been corrupted due to trying to remove redeye.


 ChatGPT
 Perplexity
 Google AI Mode
 Grok
Grok

