Only some of us have outstanding skills when it comes to photography, and it can be challenging to achieve the perfect picture. Nevertheless, if the result of your efforts differs from what you expected, you can still make it look professional and attractive with the help of a great photo editor.
If you don't want to settle for anything less than perfection, Snapseed is an excellent choice for editing your photos. It is a reliable solution that is widely used and can help you make even a mediocre image look stunning.
With this tool, you can easily take an ordinary photo and make it extraordinary. To help you make the most of the Snapseed red-eye removal and editing tool. This article provides an overview of its key features and tips to help you create flawless pictures.
In this article
How Does Snapseed Work?
Snapseed is a mobile app allowing users to take photos, apply filters, and share them on social media. Perfect for both seasoned and casual photographers alike, Snapseed contains sophisticated features for more experienced users and intuitive controls that make the program a fun and easy way to spruce up pictures.
Edit a photo from your library or take a new one easily using the photo editing app. From the Looks tab, you can instantly adjust the saturation with a simple thumbnail click and red eye removal Snapseed. To make more modifications, the Tools tab has many features, such as healing brushes, filters, textures, frames, and lighting effects.
Use the Perspective filter to fix misaligned lines and control the brightness levels with the Curves filter. Once done, select the Export button to save the image or share it with your friends. Backtrack and undo any changes you make if you are not satisfied. With the intuitive interface, editing photos and red eye removal Snapseed is simple and enjoyable.
How To Change The Colour Of Eyes On Snapseed?
To change the color of the eyes on Snapseed, you can use the Curves filter to adjust the color of the eyes. To do this, tap the Selective Adjust filter and place a Control Point on each eye. You can then adjust the color to desaturate it, making it appear blue. Below are some step-by-step guides to changing the Snapseed red-eye removal.
For Android
1. To start using Snapseed, unlock your device and launch the app.

2. To change the eye color of a photo, click the plus button and select the image you want to edit. Then, choose the edit option and use the eye color filter to adjust the color to your desired shade. Save the changes.

3. Go to the tools section.
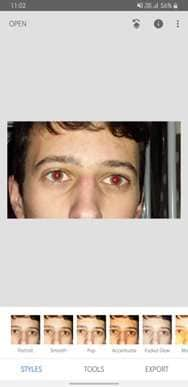
4. Visit the Curves option.

5. To change the eye color, tap the editing icon and select a color from the available options for red eye removal Snapseed.
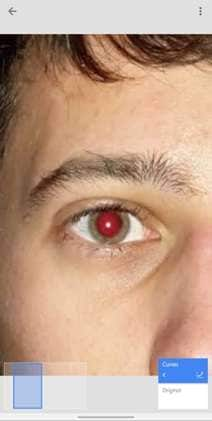
6. Adjust the hue and saturation of the photo to change the color.
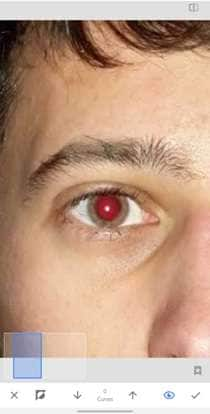
7. .If you have chosen the correct color, save the alterations.
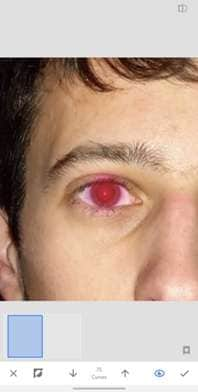
8. To view past document edits, press the "Edit History" icon and then select "View Edits."
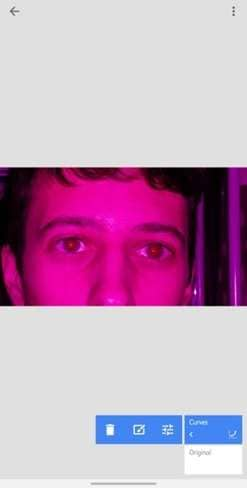
9. To adjust the curves on the screen, click on the blue Curves symbol first. Then press the icon in the center of the screen to open the Curves window. You can select the curve points from here and adjust them as desired for red eye removal Snapseed.

10. Cover the eye area where you want to alter the color by applying a new layer of paint.
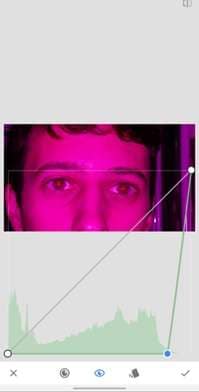
11. Press the marked arrow, then set the number of curves to zero and fill the pupils with black.
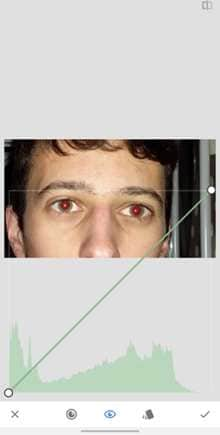
12. Once the two items have been combined for red eye removal Snapseed, select the checkmark in the bottom right of the screen and then the arrow in the top left.
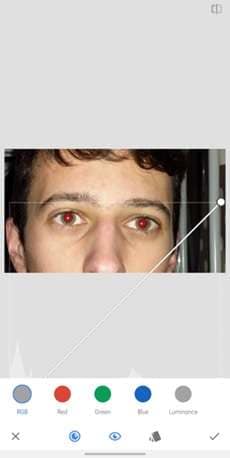
13. You have successfully altered the hue of the eye.
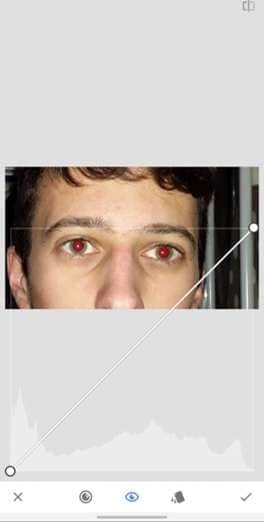
For iOS
1. Begin by unlocking your device and launching the Snapseed app.

2. Click on the photo you want to change, and then select the edit option from the menu that appears. Snapseed red-eye removalwill allow you to adjust the image, such as cropping, changing the orientation, or changing the color.

3. Access the Curves tool by going to the Tools menu.

4. Navigate to the 'Recolor' menu and choose the color of your choice to color the eyes.
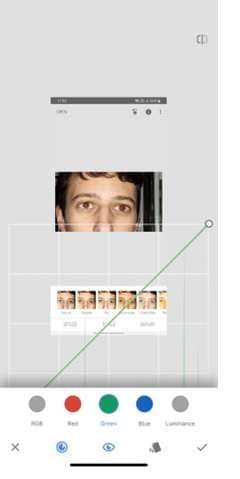
5. You can alter the color by relocating the point indicated on the line.
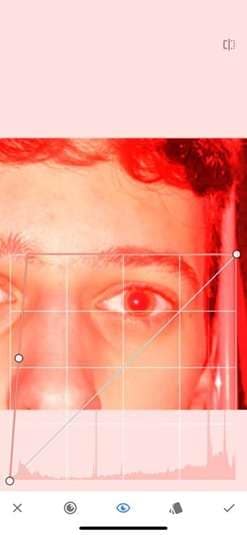
6. Once you have selected a color, press the OK button.

7. Click on the Edit History icon and then select View Edits to get a list of changes made to the document.

8. Navigate to the settings page and select the option located in the center.

9. Shift the size and paint the eyes in any color you like in the Snapseed red-eye removal.
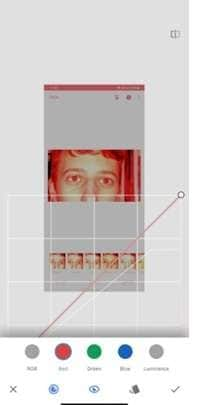
10. When you have finished your paraphrasing, click the checkmark to check it, then the back arrow to return to the previous page.
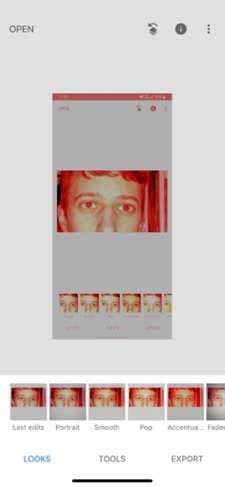
11. You have successfully altered the hue of the eye.

Bonus: Repair Damaged and Corrupted Photos with Repairit Online Photo Repair
If you find that your pictures have become corrupted, Wondershare Online Photo Repair can help to repair them quickly and easily. This online tool makes it simple to eliminate any issues your photographs might have, and it can be accomplished in three simple steps that can be completed in just a few minutes.

Repair is an efficient photo repair program that can restore photos that have been damaged from a variety of sources, such as Mac and Windows computers, USB flash drives, memory cards, digital cameras, and more. The program can fix pixilation and grey areas and open those photos that can't be accessed. Advanced repair also lets users save severely damaged images by providing photo templates.
Tips To Avoid Red Eyes In Photos
If you're looking to avoid the issues of having red eyes or seeking ways to address the problem effectively, there are strategies that you can use to help. You should get familiar with the various methods available for reducing and preventing eyes from developing redness.
Keep The Surroundings Bright:
If you want to avoid red eye in your photos, make sure to brighten up the environment by adding light to the room. It will reduce the size of the pupils in your subject's eyes and decrease the chances of a red-eye effect.
Do Not Look Directly In The Camera
When photographing in dim lighting, turn your gaze slightly away from the lens. It will avoid capturing the reflection of your eyes in a flash, thus reducing the chances of producing a photo with red eyes.
Enable The Anti-Red Eye Feature:
Another feature you can try is the anti-red-eye feature available on many smartphones. This setting emits a quick flash of light once the picture is taken. The flash causes the pupils to shrink, allowing the camera to capture the shot quickly before the eyes dilate again, and the red-eye effect is removed from the photos.
Conclusion
Do you want to give your photos a professional and stylish look without spending hours editing them? Look no further — with the Snapseed red-eye removaland editing tool, you can quickly transform your images into works of art. This tool ensures that red-eye doesn't ruin your pictures, and you can adjust the settings automatically to fits your desired look. Besides that, this article provides helpful tips for mastering the tool and insight into its leading features. Give your images that extra creative spark with the Snapseed editing tool!
FAQ
-
1. How do you get rid of red eyes on Snapseed?
To start, unlock your device and launch the Snapseed app. Tap somewhere on the display to select the picture you'd like to alter. Access the tools menu, then pick the Curves feature. Tap on the labeled menu and choose the hue for your desired eyes. Adjust the curve options to ensure the new color looks suitable next to the background. Finally, save the picture. -
2. How do you fix red eyes manually?
You can manage it manually by using the Color Replacement option. You can open the photo and zoom in on the red eyes. Select the Color Sampler option to click on the iris area where the hint of the natural color is visible. Then, select the Brush tool with the Color Replacement and set the two colors as the foreground and background colors. Adjust the brush size to the size of the iris and brush over the red area until the red color is replaced with the natural color. -
3. How do you make your eyes whiter in Snapseed?
If you want to add a white eye color to your photo, tap on the image. Then, use a vertical swipe to select the eye's Spotlight, Smoothing, or Eye Clarity parameters and a horizontal swipe to enhance them. The eyes Spotlight tool will brighten the eyes and darken the surroundings, allowing the focus to be on the eyes of the person in the shot. There is also the Smoothing tool which helps to soften out fine lines and wrinkles around the eyes. Finally, the Eye Clarity tool will increase the contrast and bring out the colors in the eyes. -
4. Why is one eye red in a photo?
The Red-eye effect in photos gives the appearance of red pupils in colored photographs and occurs when a subject looks directly into a camera and a flash is used in a dimly lit environment. While it can indicate a more serious eye problem, this is rare. To avoid this effect, use a flash diffuser, turn off the red eye reduction mode, have the subject not look directly at the camera, or use a bright enough background light.


 ChatGPT
 Perplexity
 Google AI Mode
 Grok
Grok

