
Glare is a common issue in photography. Shiny highlights have an aesthetic effect and enhance your photographs, mainly portraits. But glare is a flaw that spoils the photos. So, how will you deal with this problem? Any idea? I have good news for you. Now you may eliminate blurring and any other flaws by using various methods. What are those methods? Are you interested to know? If yes, then read this article. This article will guide you on how to remove glare from a picture. After that, I will also share some tips with you on how to avoid glares while taking pictures. So, let's begin!
Table of Contents
Part 1: Why Do the Photographs Have Glare?
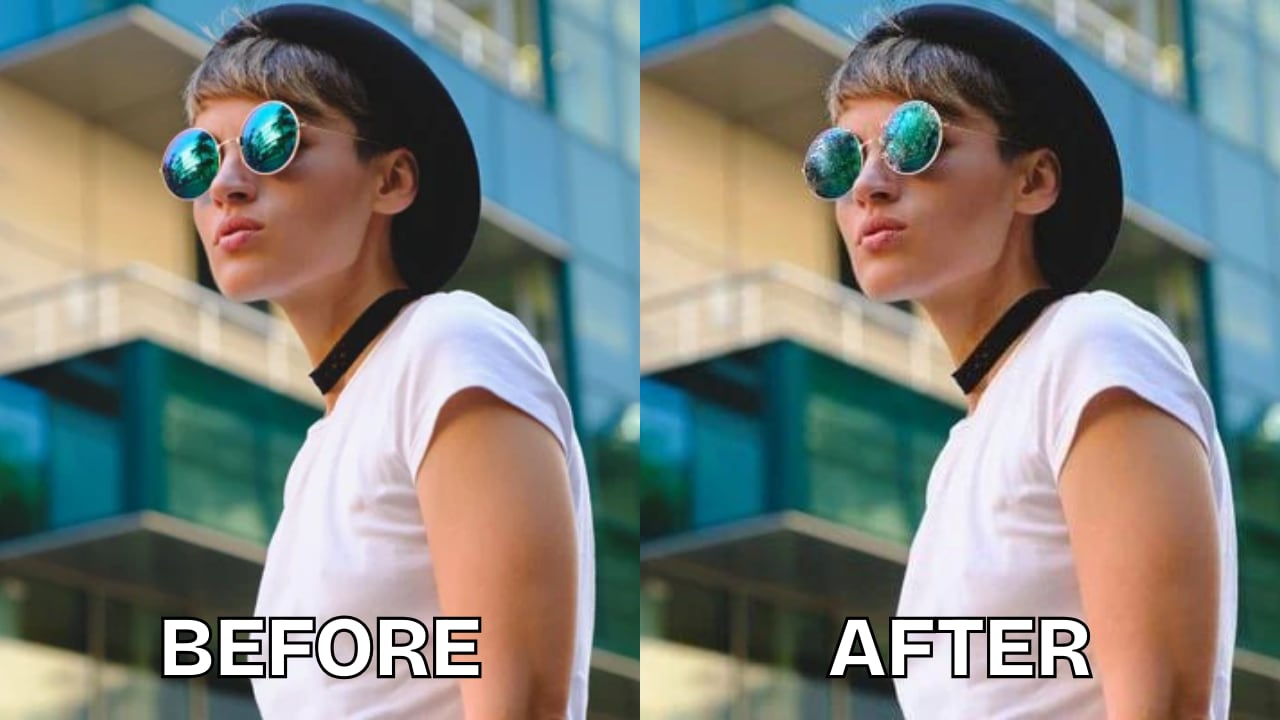
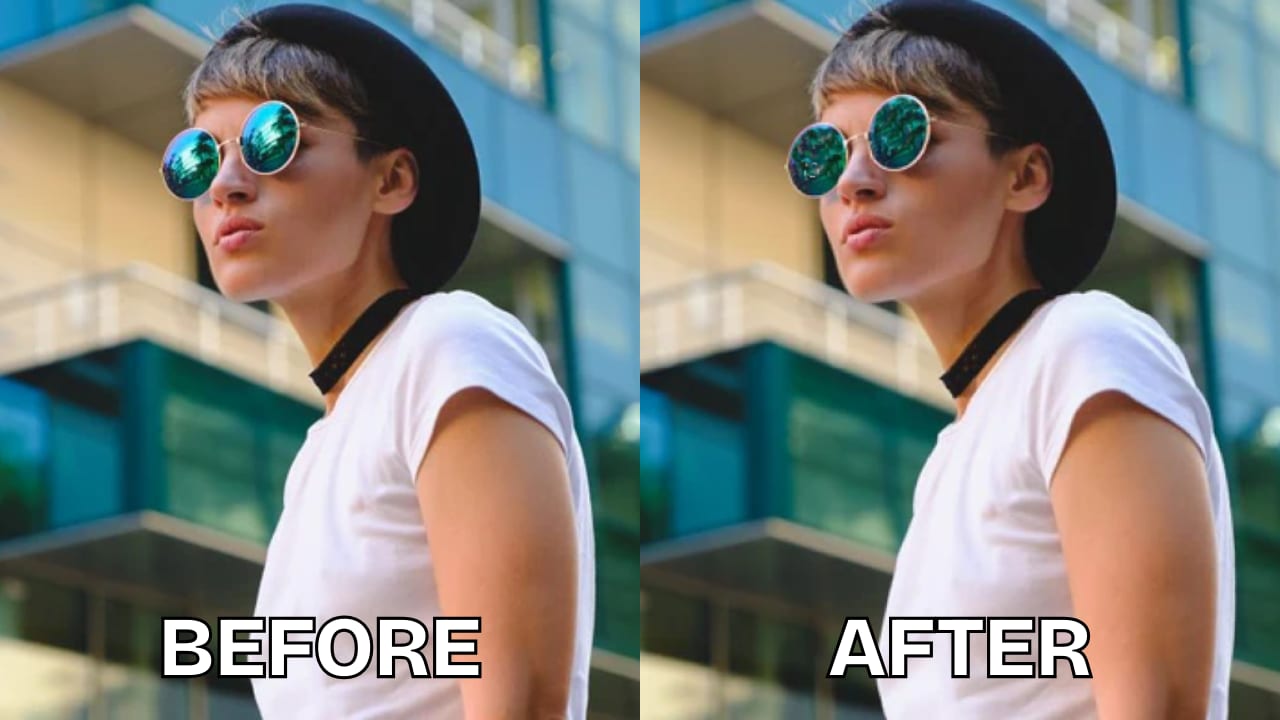
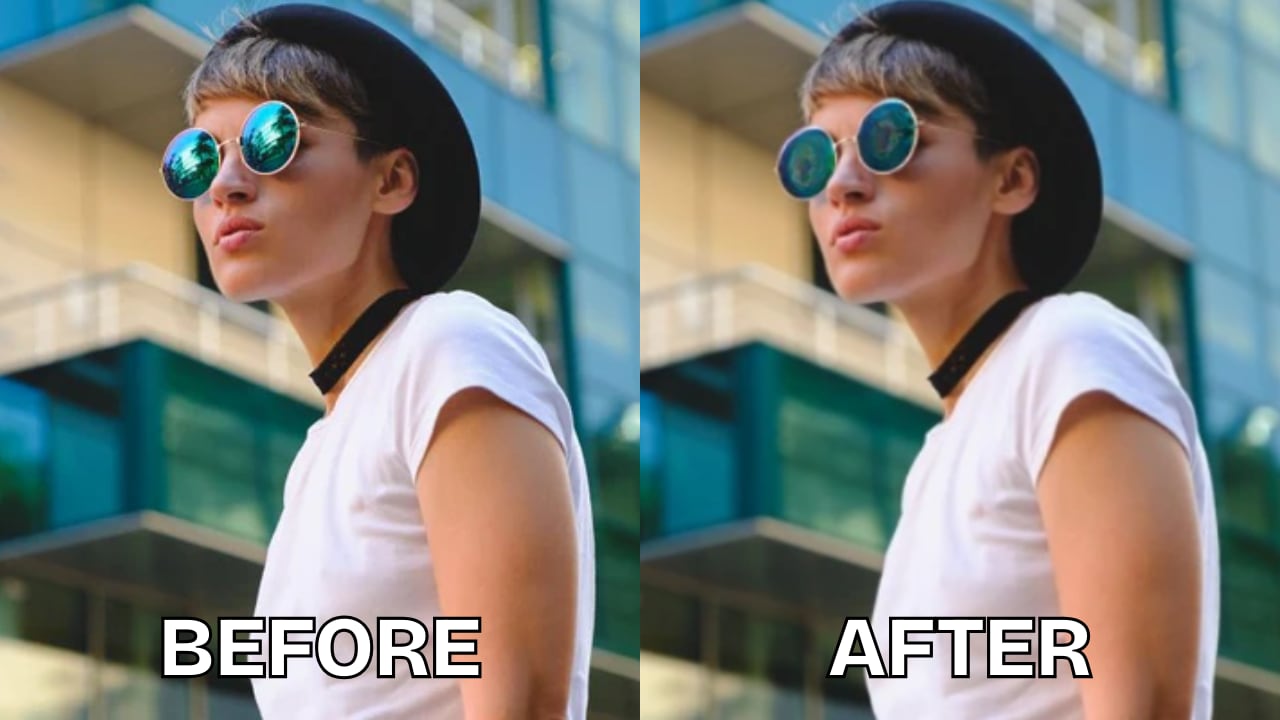
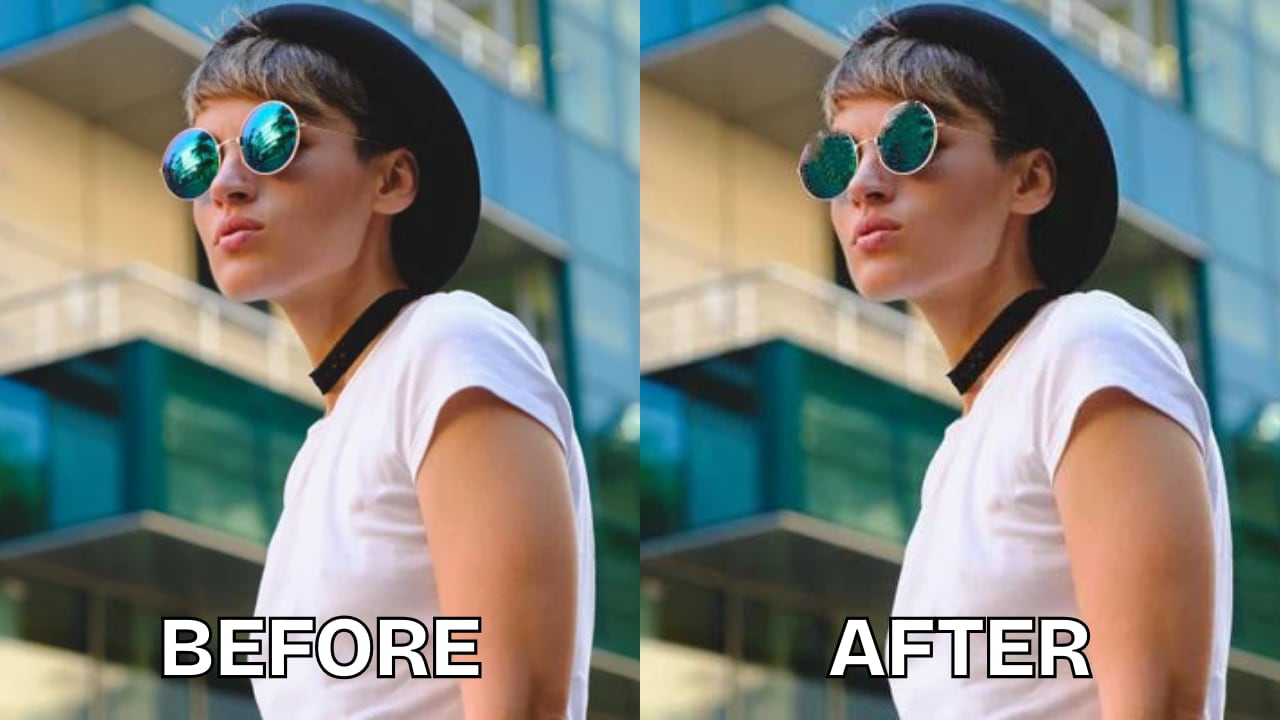
Glasses glare happens when light reflects off your or another person's glasses in a picture. When you use a flash or take a picture in the sun, this unwanted and distracting addition to your image is created.If you're struggling with distracting light reflections, you may need a reliable glare remover to eliminate these imperfections. Fortunately, there are tools available, such as a glare remover online free, which can help you remove light glare from photo online free.
Some common causes of glare include:
☀️Sunlight reflections. Glare often happens outdoors when the sun reflects strongly off surfaces like glasses, car windows, water, or metallic objects. Details in the picture may be obscured by the brilliant white spots created by these reflections. Adjusting your position or using a lens filter can help reduce this issue.
💡 Artificial indoor lighting. Overhead lights, spotlights, or lamps can cause glare that appears as unwanted bright spots in photos. This is especially common in indoor portraits or event photography, where lighting is hard to control. The issue can be reduced by moving a little or dimming the brightness.
⚡ Camera flash. Using direct flash can cause intense glare when the light bounces back from reflective surfaces like mirrors, windows, or glossy items. This results in washed-out areas or “white patches” in photos. Using diffused flash or bouncing the light at an angle helps avoid this.
🎥 Shiny objects. Items such as polished furniture, jewelry, or plastics reflect light directly into the lens, producing strong glare. These bright reflections can distract from the subject and ruin image balance. Positioning objects differently or adjusting the light source usually helps.
📸 Shooting angles. Glare also depends on the angle of the shot, especially if the subject is facing a powerful light source. Shooting directly toward the light often results in overexposure and loss of details. Changing your angle or using shading techniques can dramatically reduce glare.
By understanding these causes, you can anticipate glare before shooting and apply the right techniques, like adjusting camera angles, diffusing light, or using editing tools later, to keep your photos clear and visually appealing.
Part 2: Remove Glare from Photos Online
1. Repairit Photo Eraser [ADVANCED]
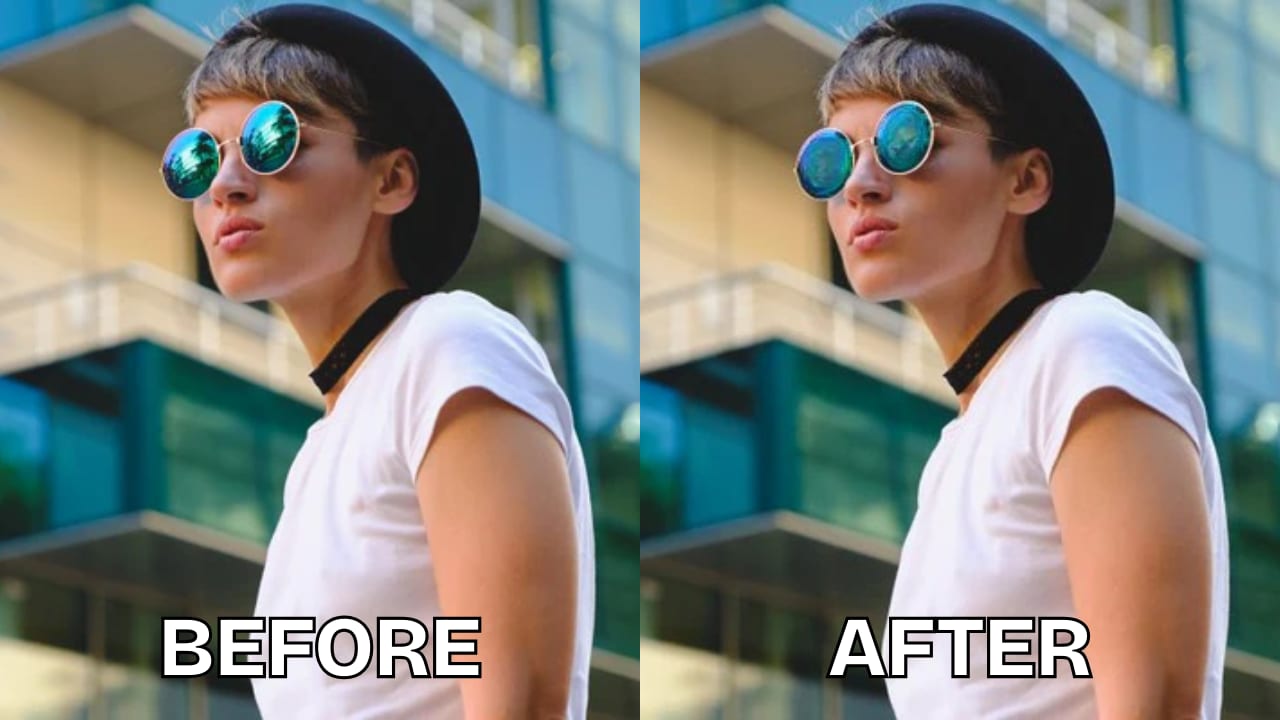
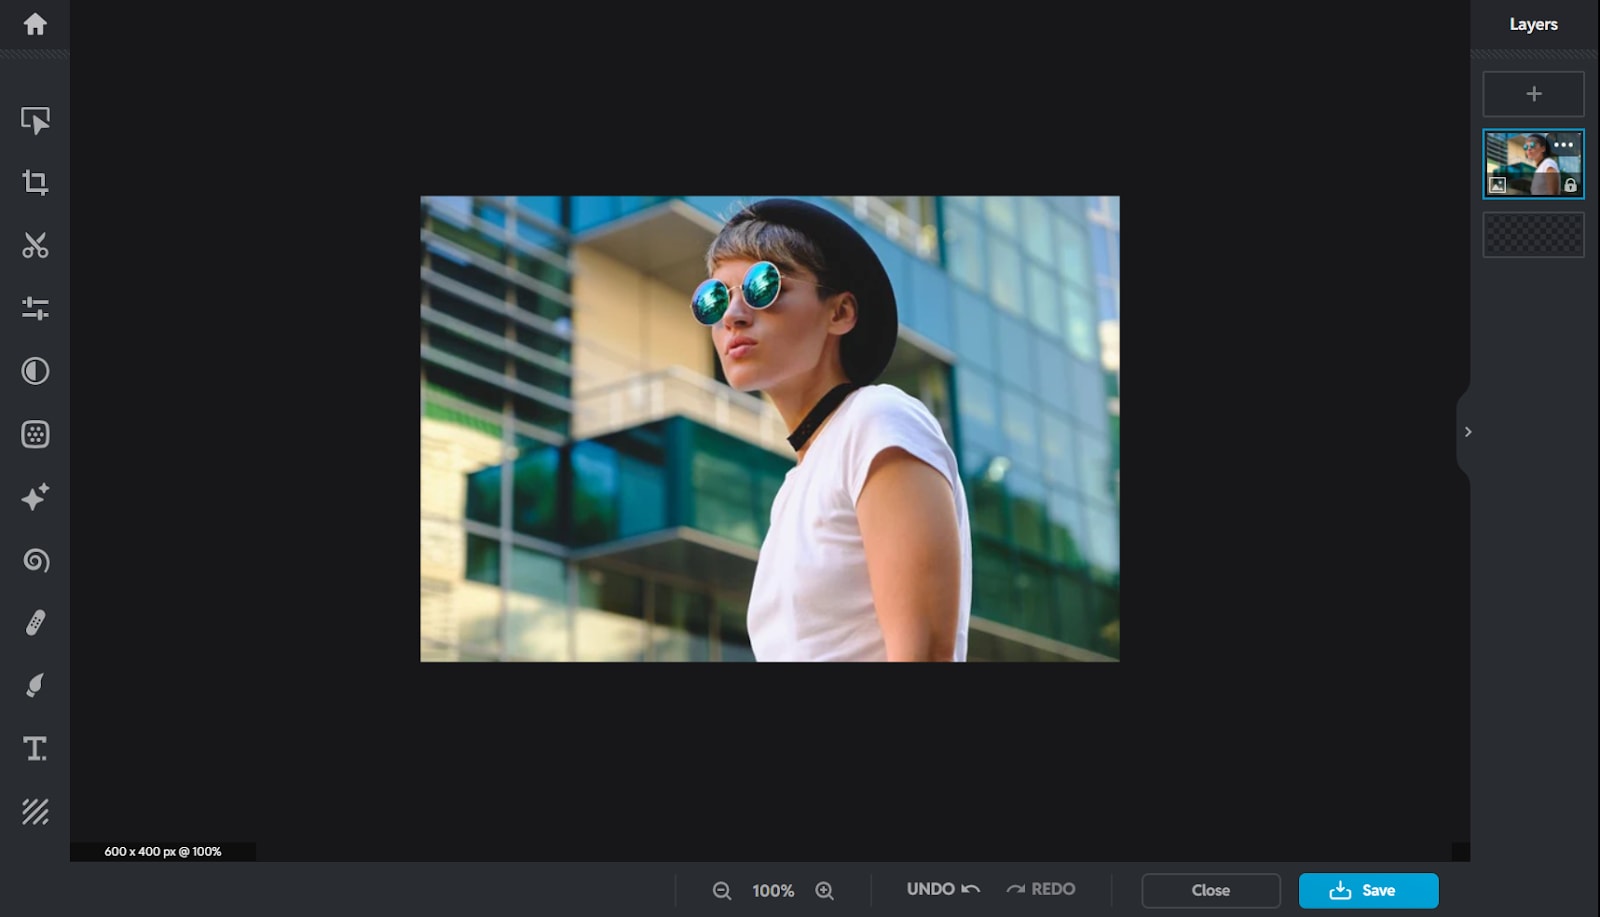
Repairit Photo Eraser provides an innovative solution to a common photography problem—glare. This AI-powered online tool utilizes advanced artificial intelligence technologies to identify and remove unwanted glare from any photo, restoring the image to its intended clarity and beauty. With just a few clicks, you can effortlessly enhance photos, making it an essential tool for both amateur and professional photographers looking to perfect their shots.
I am sharing some remarkable features that simplify your online photo enhancement.
- Remove glare from photo, complete the detailed elements of the photo with AI.
- Brighten portraits, accurately focuses on faces, and recognizes individual facial features, bringing unparalleled detail and realism to your photos.
- Optimize color balance, sharpen blurry edges, uncover hidden details to improve the quality of the photo.
Steps to Remove glare from photo Online
You need to follow only three steps to remove glare from photo online. And the steps are as follows:
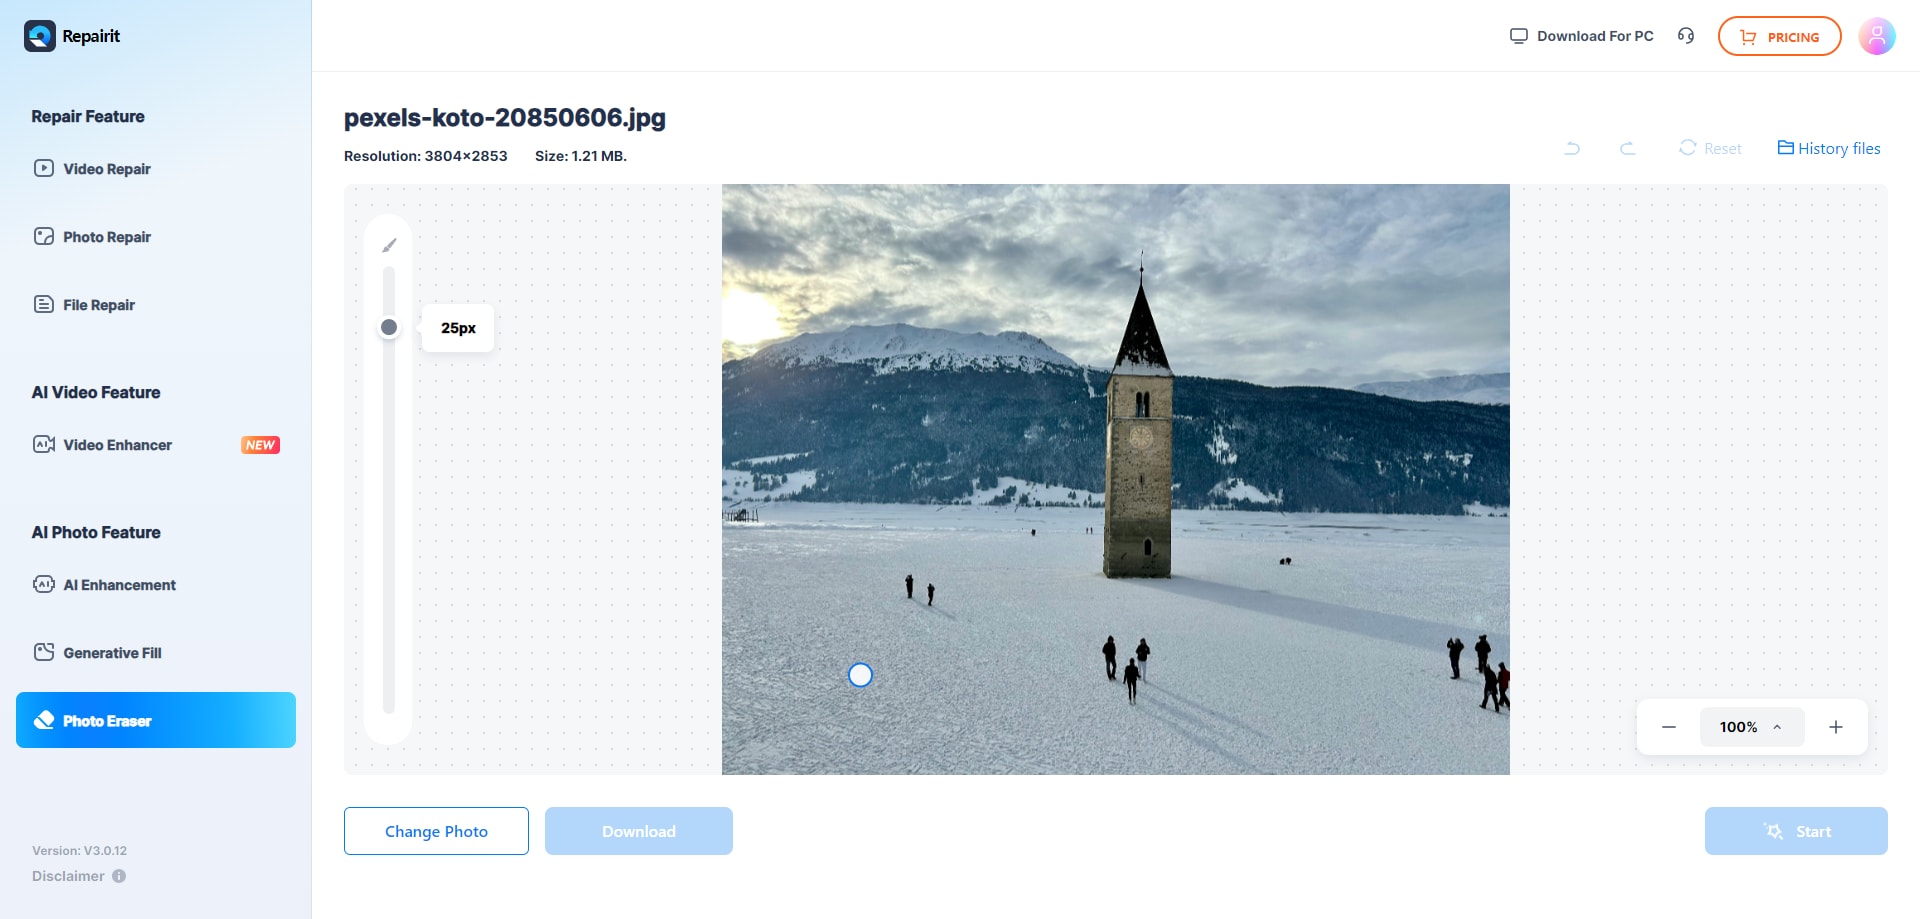
Step 1: Upload the Photo
First of all, visit the official website of Repairit Photo Eraser, click the 'Add Photo' button in the centre of the screen to upload your photos.

Step 2: Start Photo Eraser Process
Mark the area or glare you want to remove using the brush.
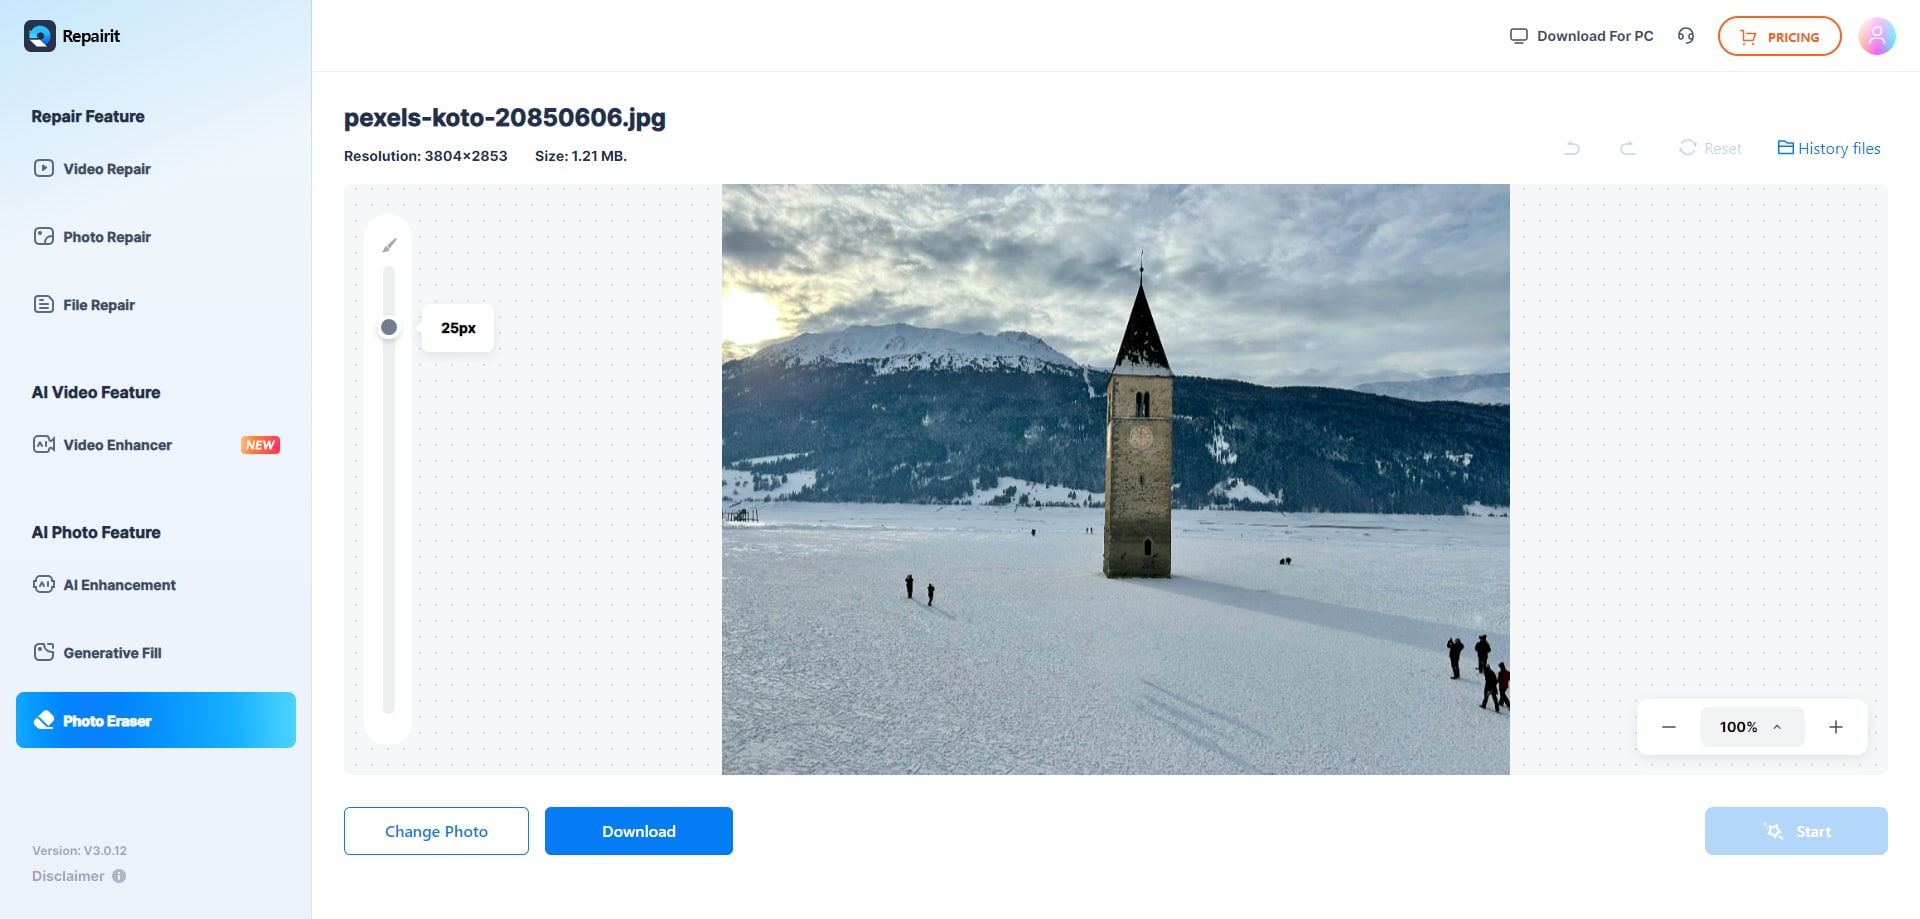
Step 3: Preview and save
When the erase process completes, you can preview and save the enhanced photographs.
Use Repairit to Enhance Your Photos Now
 Security Verified. Over 7,302,189 people have downloaded it.
2. Snapseed (Mobile App)
Snapseed is a free mobile app that’s perfect if you’re just getting started with photo editing. It gives you quick, easy tools to fix glare and lighting issues right from your phone. If you want a simple way to clean up your photos without any hassle, Snapseed is a great place to start.
Key Features:
- Free mobile app available for iOS and Android
- Includes “Healing” and “Tune Image” tools for glare removal
- User-friendly interface designed for fast edits
Why Use Snapseed:
Snapseed is perfect if you want a free, portable way to fix glare right from your phone. It lets you edit photos on the go without the need for any desktop software.
Steps to Remove Glare From a Photo:
Step 1. Upload the Photo. Open Snapseed and import your glare-affected photo.

Step 2. Use Healing or Tune Image. Select the “Healing” tool to remove small glare spots or “Tune Image” to adjust brightness and highlights.
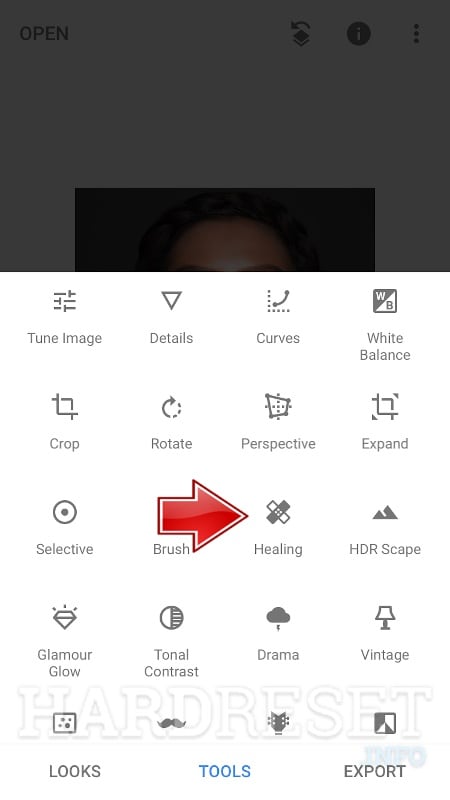
Step 3. Save the Photo. Once satisfied, export and save your edited photo.
3. GIMP (Desktop Software)
GIMP is a free desktop photo editor made for those who want more control over their edits. If you're comfortable with detailed photo retouching, it offers powerful tools to help you remove glare and fix lighting issues with precision. It’s a solid choice if you’re looking for something more advanced than basic editing apps.
Key Features:
- Completely free and open-source
- Advanced tools like Clone Stamp and Healing Brush
- Supports multiple file formats and layers for precise editing
Why Use GIMP:If you have some editing experience and want professional-level glare removal without the cost of Photoshop, GIMP is a great choice. It offers powerful tools that give you full control over your edits, all for free.
Steps to Remove Glare From a Photo:
Step 1. Upload the Photo. Open your glare-affected image in GIMP.
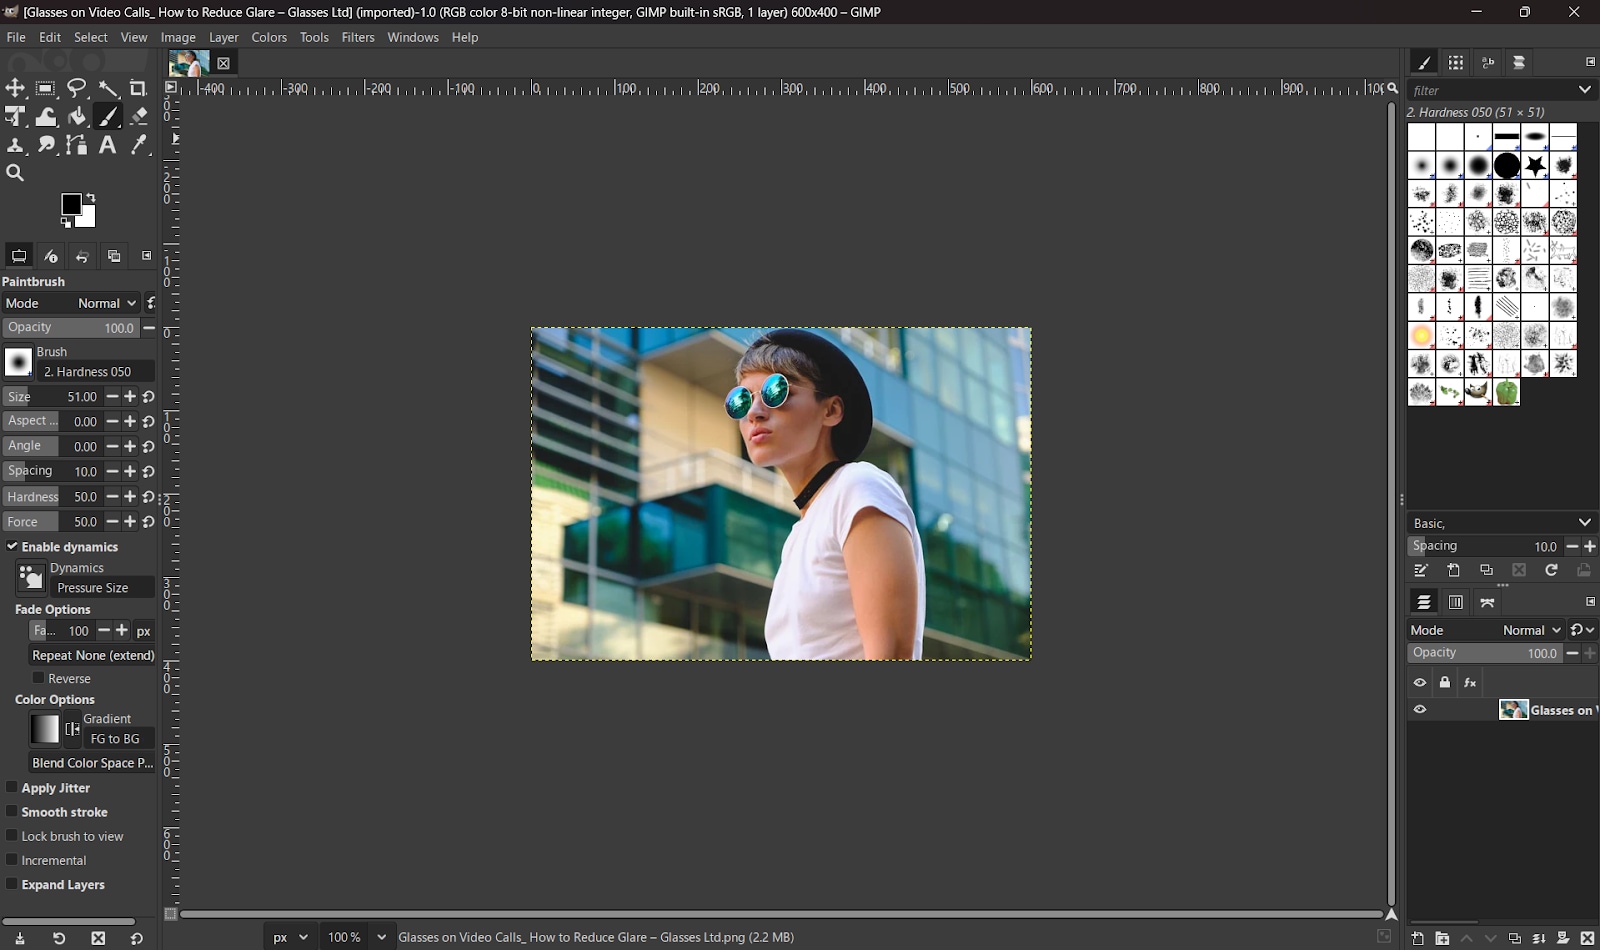
Step 2. Retouch the Glare. Use Clone Stamp or Healing Brush to blend out glare spots.
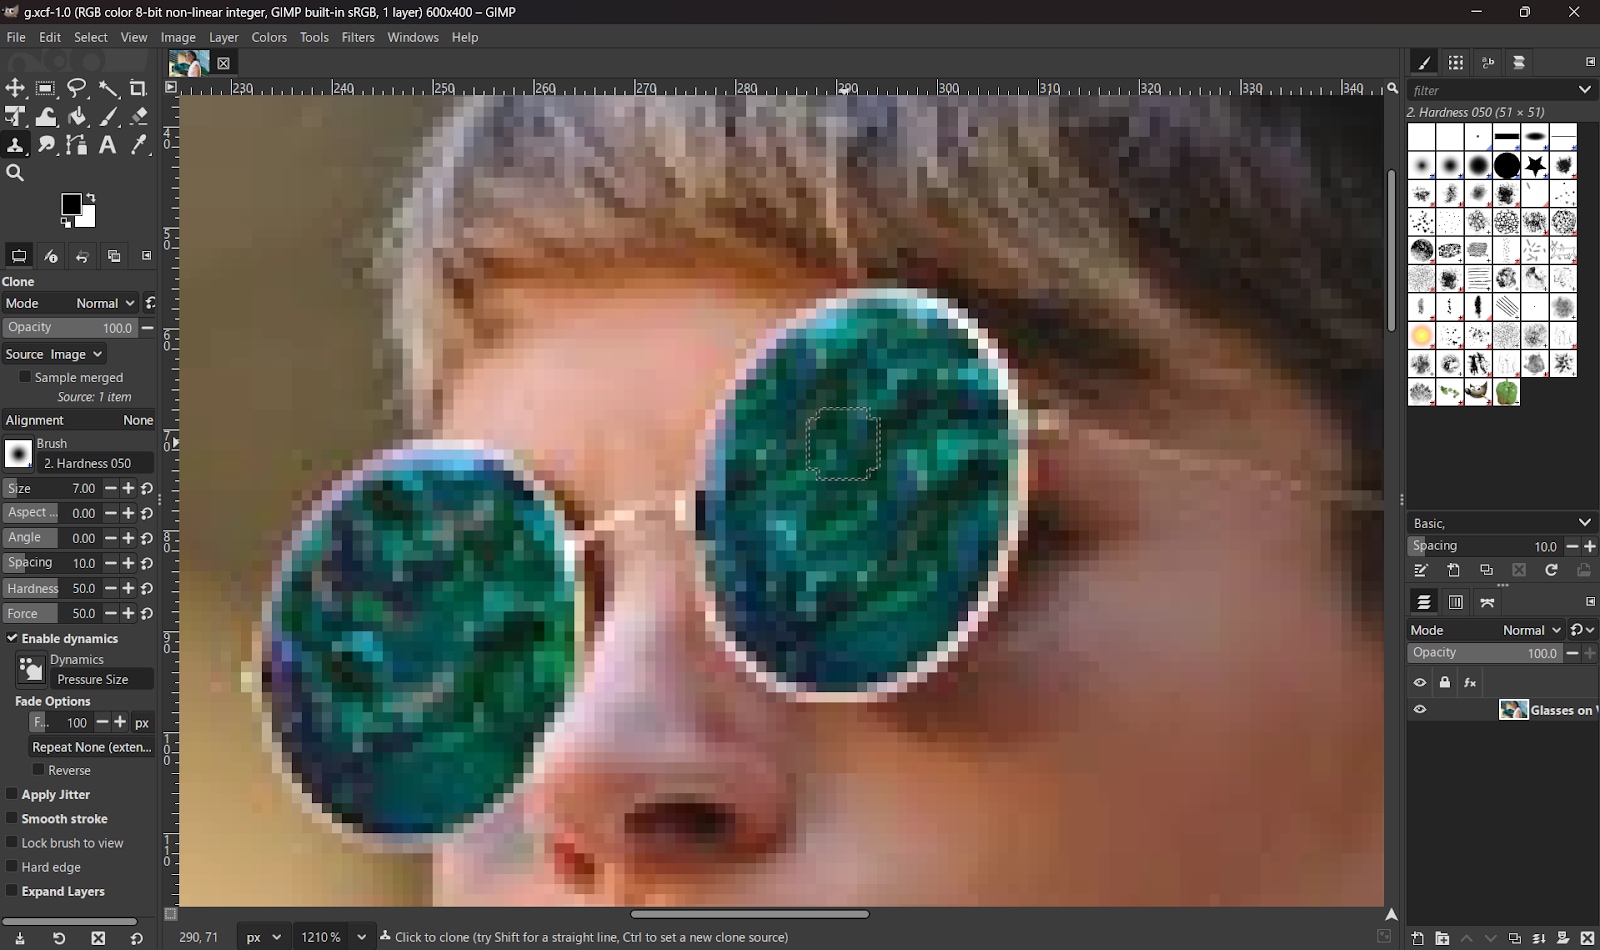
Step 3. Save the File. Export your photo in your desired format once the edits are done.
4. Fotor Online Editor
Fotor is a handy web-based photo editor that makes fixing glare quick and easy with no need to install anything. Just upload your photo and start editing right away from any device. It is perfect for those moments when you want fast results without any fuss.
Key Features:
- Online-based, no downloads required
- Tools for adjusting brightness, highlights, and exposure
- Simple retouching options for glare correction
Why Use Fotor:Fotor is perfect if you want quick glare fixes without the hassle of installing software or learning complicated tools. It’s simple, fast, and works right in your browser.
Steps to Remove Glare From a Photo:
Step 1. Upload the Photo. Visit Fotor’s website and add your photo.

Step 2. Adjust the Settings. Use brightness, highlights, and exposure sliders to minimize glare.

Step 3. Save the Photo. Download your edited image directly from the platform.`
5. Pixlr (Online Editor)
Pixlr is an online photo editor that combines simplicity with powerful features to help you reduce glare and improve the overall quality of your images. It’s a convenient choice for anyone looking for effective editing without the complexity.
Key Features:
- Free and web-based—works directly in your browser
- Includes “Heal” and “Retouch” tools for glare removal
- Supports multiple file types and quick edits
Why Use Pixlr:Pixlr is a great choice if you want quick and easy glare fixes without the need for expensive software or bulky desktop programs. It offers accessible tools right in your browser, making editing simple and convenient.
Steps to Remove Glare From Photo:
Step 1. Upload the Photo. Go to Pixlr’s editor and open your glare-affected image.
Step 2. Retouch Glare. Use the Heal or Retouch tools to reduce glare and balance light.
Step 3. Save the Photo. Export your glare-free photo to your device.
You might be cleaning up a quick selfie or restoring a special memory. Either way, glare removal tools can help make your photos look clearer and more natural. With options ranging from mobile apps to desktop software and online editors, you can choose what best fits your editing style and workflow.
Part 3: How to Avoid Glare in the Photos?
Until now, you have learned how to remove glare from a photo online and repair corrupted photos. But if you are facing the problem of photo glare again and again, you can get rid of this problem. Do you want to know how you can do so? Then read below some tips that I have come up with for you. These tips will surely help you to avoid glare in the photos.
Tip 1: Change Your Angle - Take a few steps to the right or left, then raise or lower the camera to shift the angle if the light is hitting your camera lens directly.
Tip 2: Shoot During the Right Time - When the sun is still out, it might be preferable to photograph in the morning or during cloudy conditions. So, if you like the place but the harsh light makes it unusable, return a little later and try again.
Tip 3: Use a Lens Hood - Use a lens hood. Hoods are excellent for keeping direct sunlight from reaching the front element.
Tip 4: Use a Diffuser in Direct Sunlight - Bring a diffuser or a large white paper sheet if you shoot in direct sunlight. It will help you in softening the light.
Conclusion
Glare is a common problem in photography, often caused by sunlight, indoor lighting, or reflections from shiny surfaces. These bright spots can distract from the subject and make details harder to see, but the good news is that there are many ways to fix this issue, ranging from simple adjustments like lowering exposure or highlights to using specialized editors that remove glare with greater precision. By applying these methods to remove glare from photos, you can easily reduce light reflections, improve image clarity, and enhance the overall quality of your photos.
FAQs
-
What is the easiest way to remove glare from a picture?
For quick fixes, you can use mobile apps or online editors with healing and retouch features. If the glare is more severe, desktop software or advanced AI-powered tools may work better. -
How can I prevent glare when taking photos?
Try adjusting your shooting angle, avoiding direct light sources, using diffused lighting, or positioning your subject away from reflective surfaces. -
Do free tools work as well as paid ones?
Free tools can handle basic glare fixes, but for complex issues or high-quality photos, advanced software usually gives better and more precise results.
