Introduction:
Our lives have become intertwined with technology, and our computers play a vital role in connecting us with the world and facilitating virtual experiences. Whether we're preserving cherished memories, participating in virtual events, or staying in touch with our loved ones and colleagues, having a properly functioning camera on our Windows 11 device is undeniably crucial.
In this blog post, we have covered some common issues that can cause the Windows 11 camera not working issue and guide you through some simple troubleshooting steps to get it back up and running smoothly.
In this article
How to Fix the Windows 11 Camera Not Working Issue
To get started, work your way down with these potential fixes for Windows 11 camera troubleshooting.
Solution 1: Reboot your PC
Rebooting allows your computer to start afresh and can provide a clean slate for your camera to work properly. It's a simple yet effective method that is worth trying before diving into more complex troubleshooting steps.
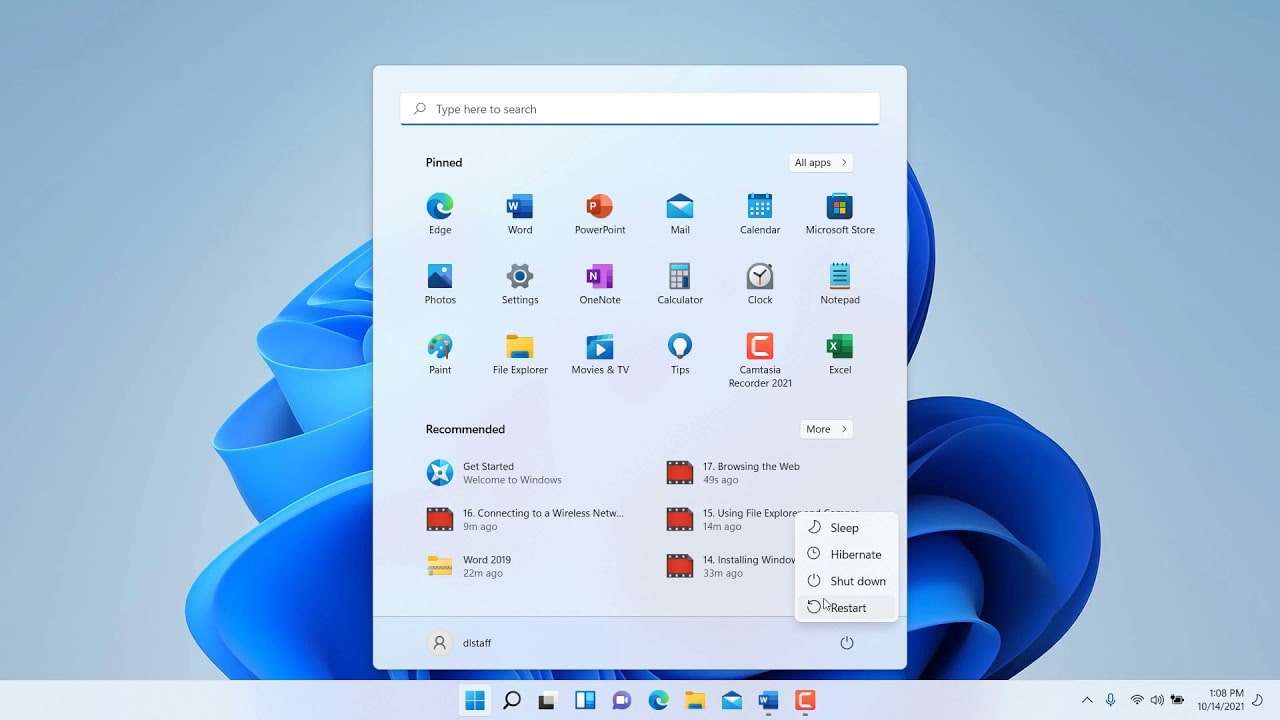
When you restart your computer, it clears temporary files and refreshes system settings, potentially resolving any software glitches that might be affecting your camera functionality. So, if you're facing camera issues on your Windows 11 device, give it a shot and reboot your computer and check if this hack helps in resolving the issue.
Solution 2: Check the Physical Connections
If you're using an external webcam with your Windows PC, it's essential to make sure all the physical connections are solid. Take a moment to inspect and ensure that the cable is securely plugged into your device, providing a reliable connection. Sometimes, a loose or faulty connection can cause camera issues.
To give it an extra nudge, you can try switching the USB ports. Sometimes, a different port can provide a better connection and get your camera back on track. It's a simple trick that might just do the trick and have your camera up and running smoothly again.
Solution 3: Update the Camera Drivers
Here comes another simple yet effective workaround to fix the Windows 11 camera not working issue. Outdated, faulty, corrupt, or missing camera drivers can also interrupt the camera’s functioning. Hence, it is important to keep the device drivers up-to-date.
Follow these steps to install the latest update of camera drivers on your Windows PC.
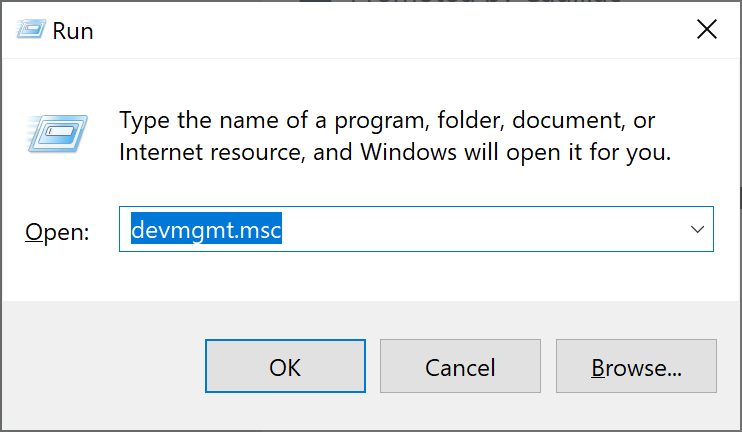
Press the Win + R key combination to open the Run dialog box. Type “Devmgmt.msc” and hit Enter to open the Device Manager app.
In the Device Manager window, select “Camera”. Now, right-click on the installed camera device and select the “Update Driver” option from the context menu.
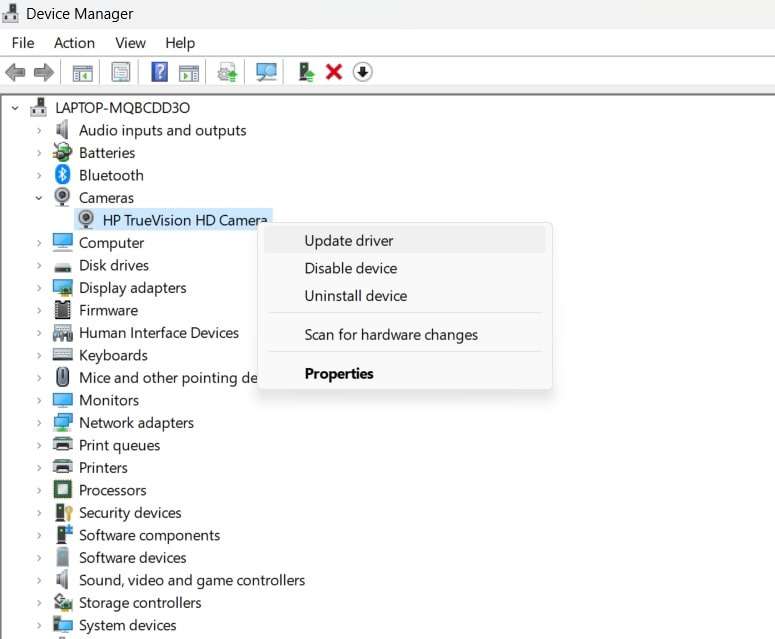
Follow the on-screen instructions to update the camera drivers on your Windows PC. After updating the drivers, reboot your computer and check if the issue has been resolved. Windows 11 camera driver issues are a common trigger why you may have to face the dreadful black screen.
Solution 4: Review the Privacy Settings
Recently updated to Windows 11? Well, there might be a possibility that the camera has insufficient app permissions to function properly. To check the privacy settings for the camera, you can follow the below-listed steps:
Tap on the Windows icon and select “Settings”. Head to the “Privacy and Security” category. Scroll down through the list and tap on “Camera”.
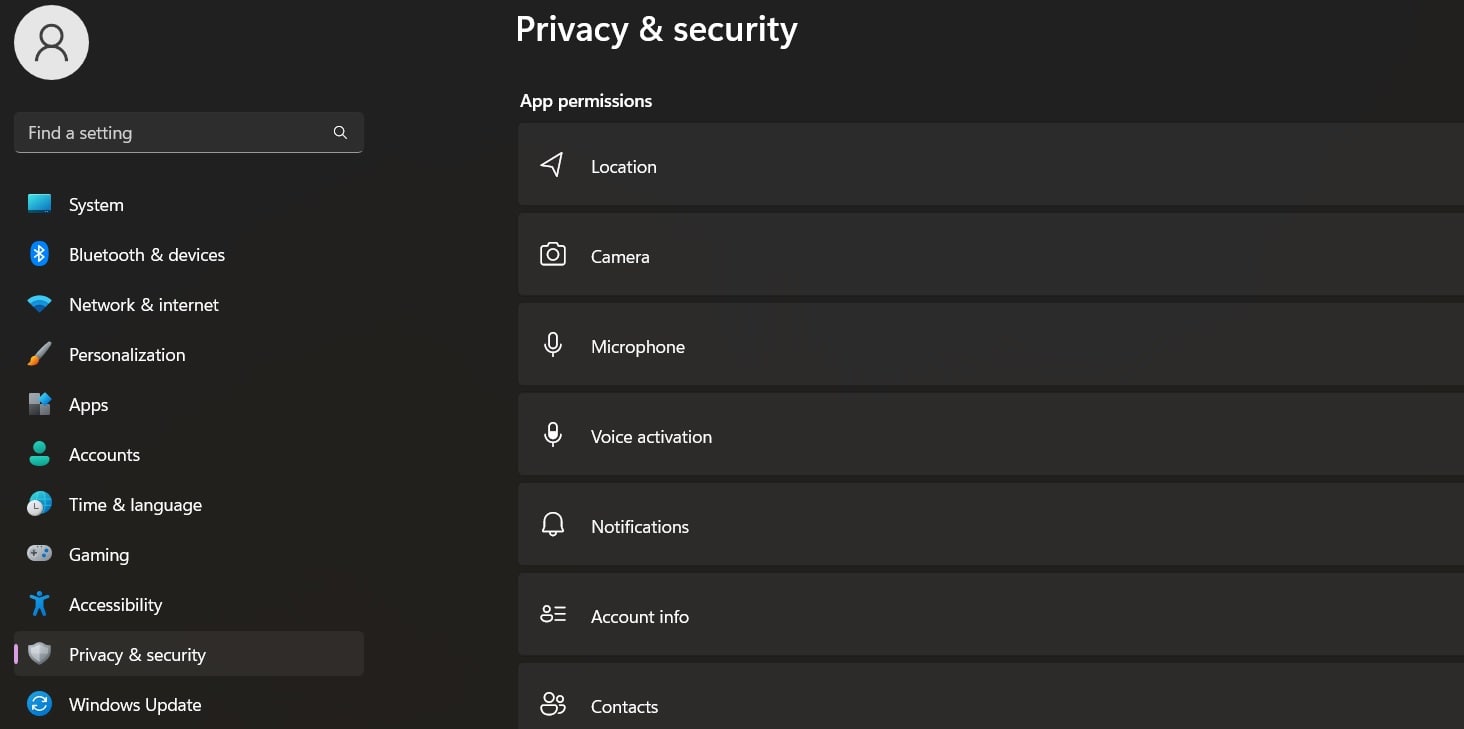
Now, enable the “Camera Access” option and make sure all the apps have access to the default camera.
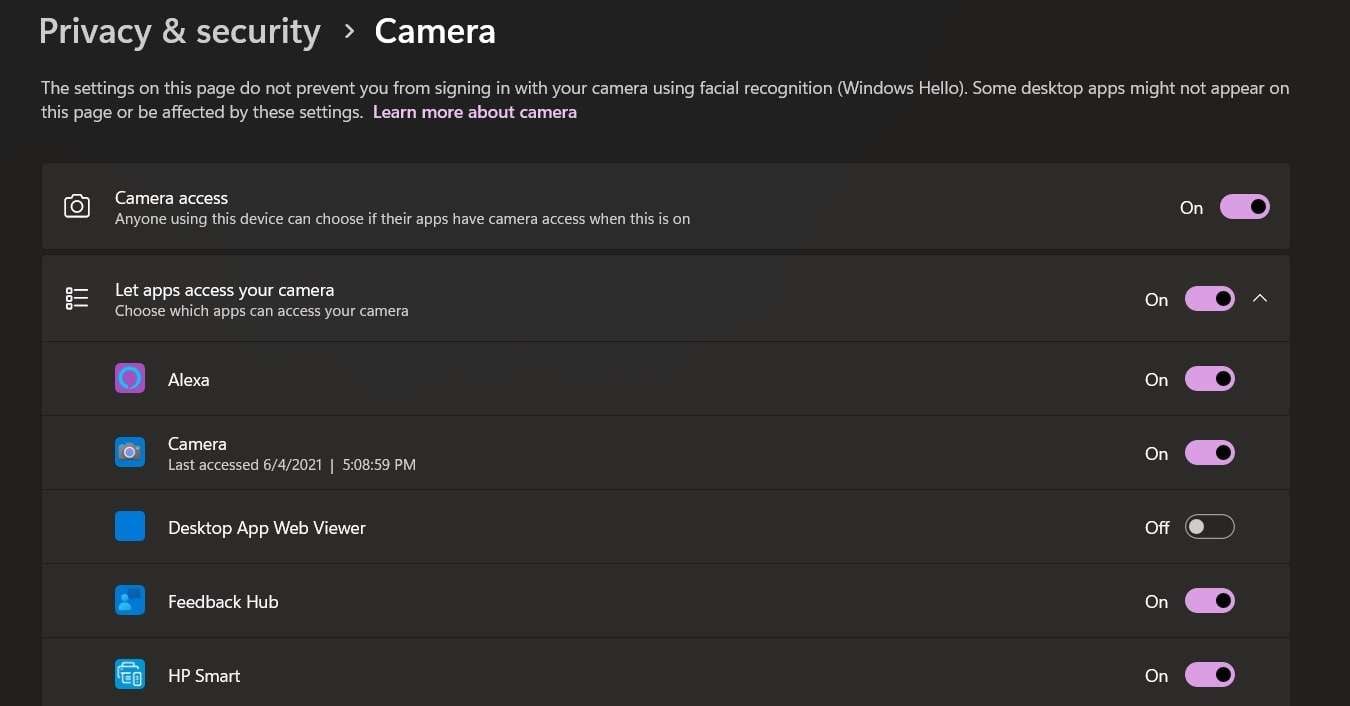
You can manage privacy settings for individual apps as well by simply toggling on/off the respective options.
Solution 5: Disable the Antivirus Software
Sometimes, antivirus software can interfere with the proper functioning of your camera on Windows 11. While antivirus programs are designed to protect your system, they can occasionally misinterpret certain camera processes as potentially harmful and block them.
To see if your antivirus software is causing the camera issues, you can try temporarily disabling it as a part of Windows 11 camera troubleshooting Most antivirus programs have an option to temporarily turn off their protection. Refer to your specific antivirus software's documentation or settings to locate this option.
Once you have disabled the antivirus software, restart your computer and check if the camera starts working. If it does, then it's likely that the antivirus software was indeed the culprit. In that case, you can explore the software settings to add exceptions or exclusions for camera-related processes, ensuring that they are not blocked in the future.
Solution 6: Reset the Camera
If you're still encountering the Windows 11 camera not working issue, resetting the camera settings might just do the trick. Resetting the camera essentially restores its settings to the default configuration, potentially resolving any software conflicts or misconfigurations that could be causing the problem.
Here's how you can reset the camera on Windows 11:
Open the Settings app and head to Apps> Installed Apps. Look for the “Camera” app in the list and tap on the three-dot icon placed next to it. Select “Advanced Options”.

On the next window, hit the “Reset” button.
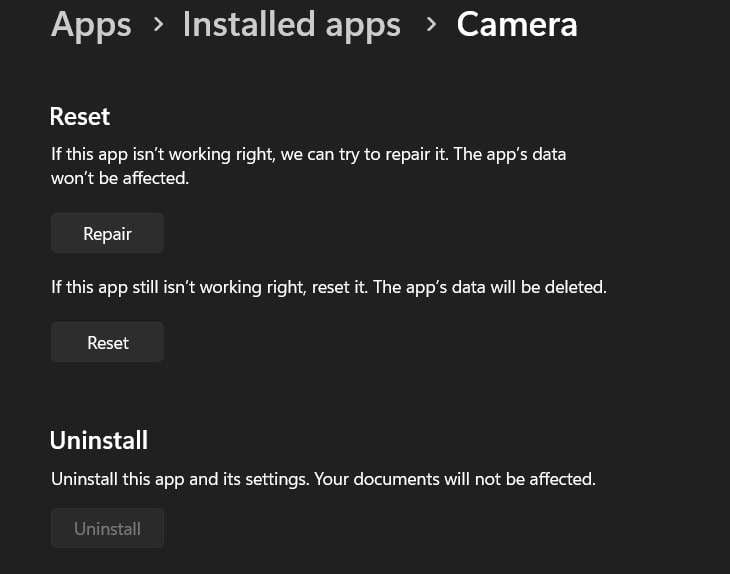
A confirmation pop-up will now appear on the screen. Tap on “Reset” to proceed. After resetting the camera, restart your Windows PC and check if the issue persists.
Solution 7: Run the Camera Troubleshooter
When facing camera issues on your Windows 11 device, running the built-in Camera Troubleshooter can be a helpful step in identifying and resolving the problem. The troubleshooter is designed to automatically detect and fix common camera-related issues.
Here are the steps to run the Camera Troubleshooter on Windows 11:
- Press the Windows key + I on your keyboard to open the Settings app and switch to the "System" tab.
- Scroll down and select “Troubleshoot” and then tap on “Other Troubleshooters”.
- The complete list of Windows built-in troubleshooters will now appear on the screen. Look for “Camera” and hit the "Run" button placed next to it.
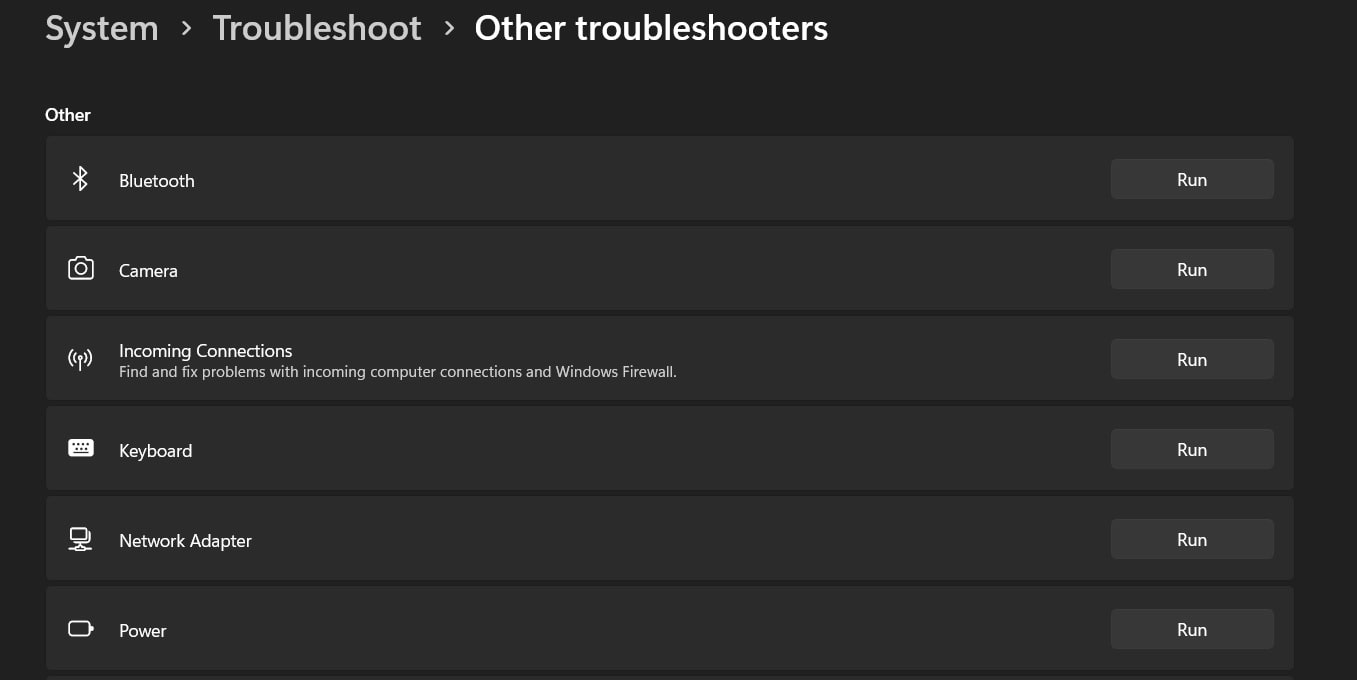
- The troubleshooter will now scan your system for any camera-related problems.
Running the Camera Troubleshooter can help pinpoint the root cause of the problem and guide you toward a resolution. It's a convenient built-in tool that is specifically designed to tackle camera-related issues on Windows 11.
Solution 8: Update Windows
Keeping your Windows 11 device up to date is crucial for optimal performance and resolving various software-related issues, including camera problems. Latest updates often include bug fixes, security patches, and improvements to system components, which can address compatibility issues and enhance the overall functionality of your device, including the camera.
To update Windows 11, follow these steps:
- Open the Settings app on your Windows PC and select the "Windows Update" option from the left sidebar.
- In the Windows Update window, hit the "Check for updates" button. Windows will now search for available updates.
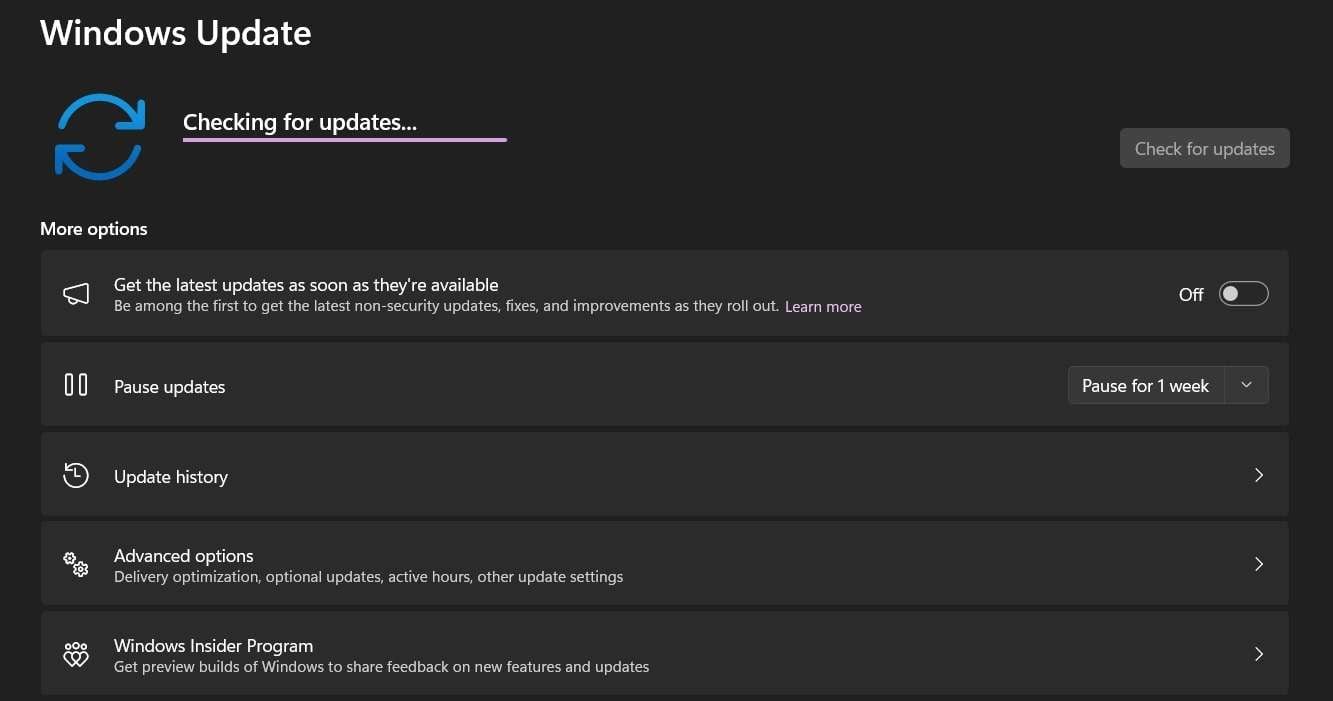
- If any updates are found, click on the "Download" or "Install" button to initiate the update process.
- Wait for the updates to download and install. Your computer may need to restart during the process.
After updating Windows, restart your computer and check if the camera issue has been resolved. Windows updates often include fixes and improvements that can address camera-related problems by updating drivers, and system components, or resolving conflicts with other software.
Enhance Your Images Like a Pro: Wondershare Online Photo Repair
Do you have a collection of corrupt and damaged photos on your device that needs to be fixed? We have a solution for you! Wondershare online photo repair tool is a free and easy-to-use application that can be used to repair corrupt or damaged photos. This nifty online image repair tool supports all damaged photos in JPG, CR2, and NEF formats.
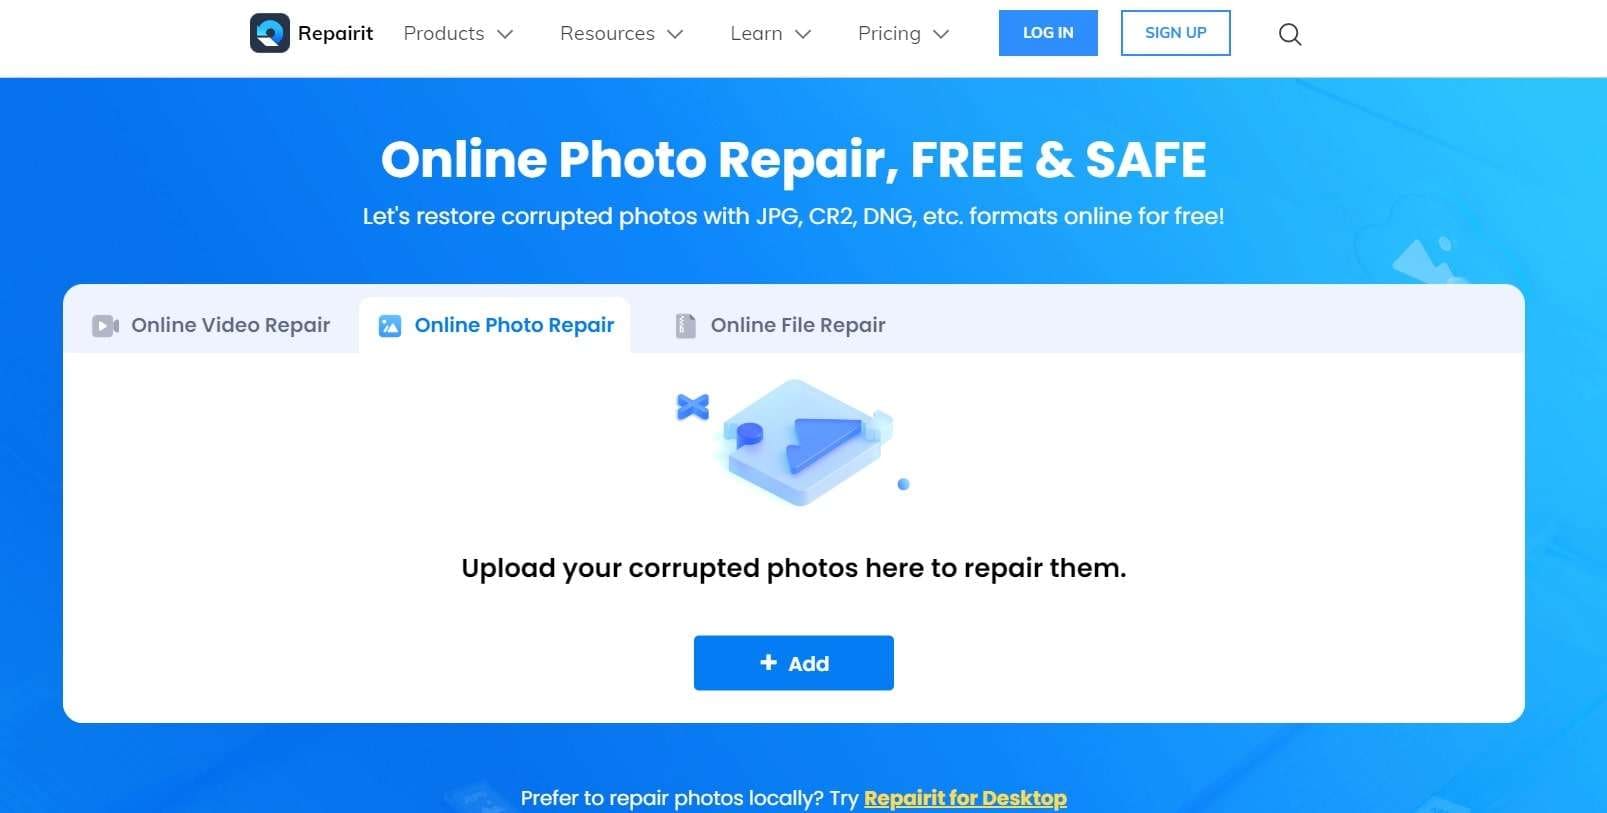
To use the tool, simply upload your damaged photos to the website and click on the "Repair" button. The tool will then scan your photos and attempt to repair them. Once the repair process is complete, you will be able to download your repaired photos.
The Wondershare online photo repair tool is a great way to fix corrupted or damaged photos. Here comes the best part. Wondershare Online Photo Repair tool offers a high ease of accessibility and can be used from any web browser. The tool is also free to use, so there is no risk in trying it out.
Here are some of the features of Wondershare online photo repair tool:
- Repairs all damaged photos in JPG, CR2, and NEF formats.
- Supports the JPEG, JPG, CR3, CR2, NEF, NRW, RAF, DNG, TIF, and TIFF formats for premium users.
- Easy to use.
- Free to use.
Conclusion
So there you have it! This wraps our comprehensive guide on how to fix the Windows 11 camera not working issue. We've explored some common troubleshooting solutions in this post to tackle camera issues on your Windows 11 device. From checking physical connections to resetting camera settings, disabling antivirus software, running the Camera Troubleshooter, and updating Windows, these steps can help you get your camera back in action.
Hopefully, the solutions we've discussed have helped you overcome any camera issues you were facing.
FAQ
-
Why is my camera displaying a black screen on Windows 11?
Outdated or incompatible camera drivers can prevent proper communication between the camera and the operating system, leading to a black screen. Updating the camera drivers or reinstalling them can often resolve this problem. -
How do I fix the "No camera found" error on Windows 11?
Windows 11 camera driver issues can lead to this issue. You can use any of the above-listed methods to perform troubleshooting and fix the camera within no time. -
Why is my camera not working after upgrading to Windows 11?
Possible reasons include incompatible or outdated drivers and incorrect camera privacy settings. Update the camera drivers and check the privacy settings to resolve the issue.


 ChatGPT
 Perplexity
 Google AI Mode
 Grok
Grok

