

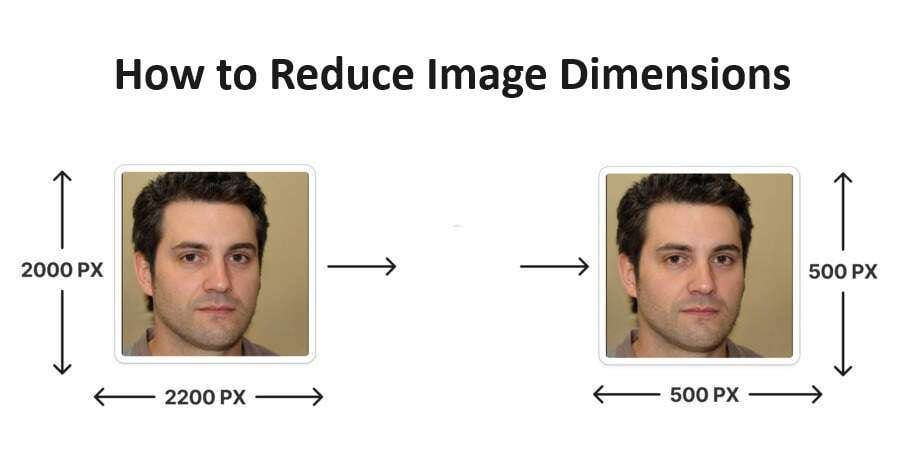
Remember the good old days of Facebook’s cover photos, which had to be 851x315 pixels to fit perfectly at the top of your profile? That frustrated many of us, as we manually cropped our images and slid them around to fit Facebook’s specific cover photo requirements.
Today, intelligent and automated image dimension resizers do most of the work, allowing users to reduce image dimensions seamlessly within a few steps.
This guide will explore these photo dimension reducers and show you how to use them. So, stick around and learn how to change image dimensions online, on a smartphone, or via a professional desktop dimension changer.
In this article
Part 1. Why Reduce Image Dimensions?
From social media posts to business marketing, there are endless reasons to reduce image dimensions. Some of the most common ones include the following:
- Websites – Whether you’re developing a site or adding product images to an e-commerce platform, most websites have specific image requirements regarding formats and dimensions to reduce server storage space, improve load times, and save network bandwidth.
- Social Media – Like the abovementioned Facebook cover photo requirement, other social media sites are also guilty of this. While they’re not as strict as Facebook, image dimension resizers still matter here, especially with all the different aspect ratios for regular posts and stories.
- Printing – Design studios, offices, marketing departments, and others regularly compress images with dimensions to fit their printers’ capabilities and create high-resolution, high-quality prints from digital photos.
Whatever your reason for compressing image dimensions, it’s a valid one, and with a massive number of tools that can convert photo dimensions, you’ll have a breeze doing it.
Part 2. How to Reduce Image Dimensions Using Editing Software?

While powerful and equipped with dozens of other valuable image editing tools, professional desktop image editors like Adobe Photoshop are often unnecessary for simple image dimension edits. You can get away with using free, built-in tools like Photos on Windows or Preview on macOS.
We’ll use Photos as an example and show you how to reduce the dimensions of any image with it:
Step 1: Right-click a picture, tap Open With, and select Photos.
Step 2: Press CTRL + . or tap the Edit image button at the top of the screen.
Step 3: Click Free at the bottom of the page to select predefined aspect ratios or manually reduce image dimensions.
.tep 4: When done, tap CTRL + S to save the changes.
It’s worth noting that the Preview app on Macs can do the same tasks. However, it also has a bulk processing feature, allowing users to edit image dimensions on multiple pictures simultaneously.
Part 3. How to Reduce Image Dimensions Online?
As the world moves to cloud computing and web-based apps, there’s also an inflow of free online image dimension changer tools, making them a worthy alternative to desktop programs and image editing software. Examples of such web apps include ReduceImages, Simple Image Resizer, and Adobe Express.
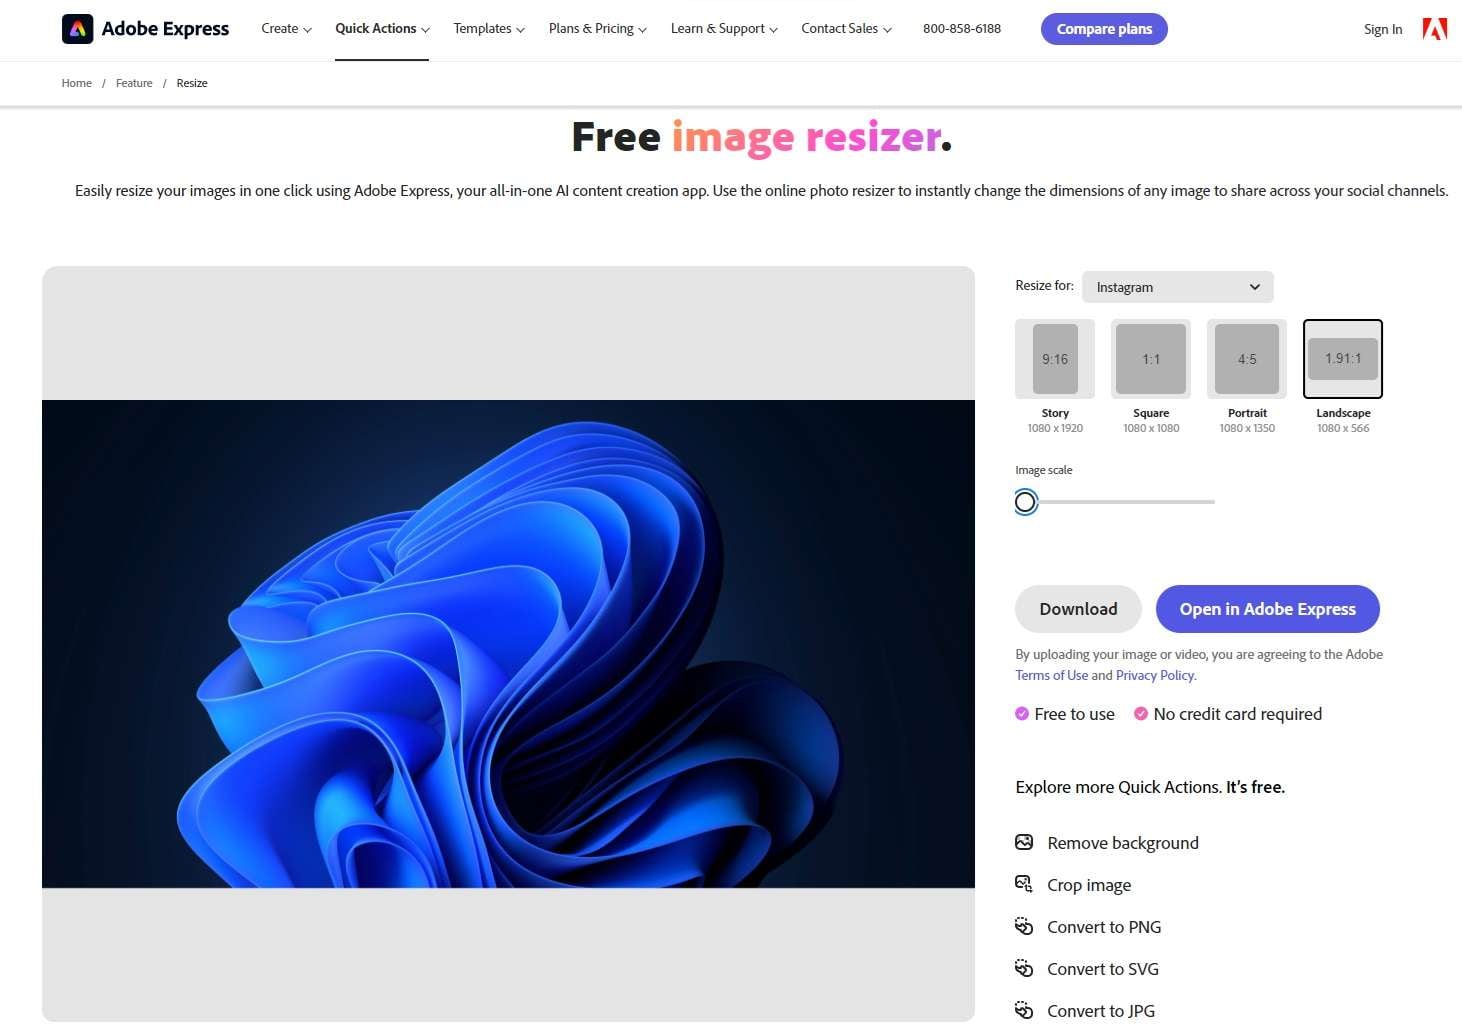
Let’s take Adobe Express as an example and see how to reduce image dimensions online with it:
Step 1: Head to Adobe Express’ website and tap Upload your photo.
Step 2: Select an image and tap Open.
Step 3: Under the “Resize for” submenu, select a specific social media app, Standard, or Custom.
Step 4: Choose an existing preset or manually input the width and height in pixels.
Step 5: Tap Download to save the image to your device.
A quick online search will lead you to dozens of other online image dimension reducers, so if the abovementioned tools don't fit your requirements, you can find what you’re looking for.
Part 4. How to Reduce Image Dimensions Using Mobile Apps?
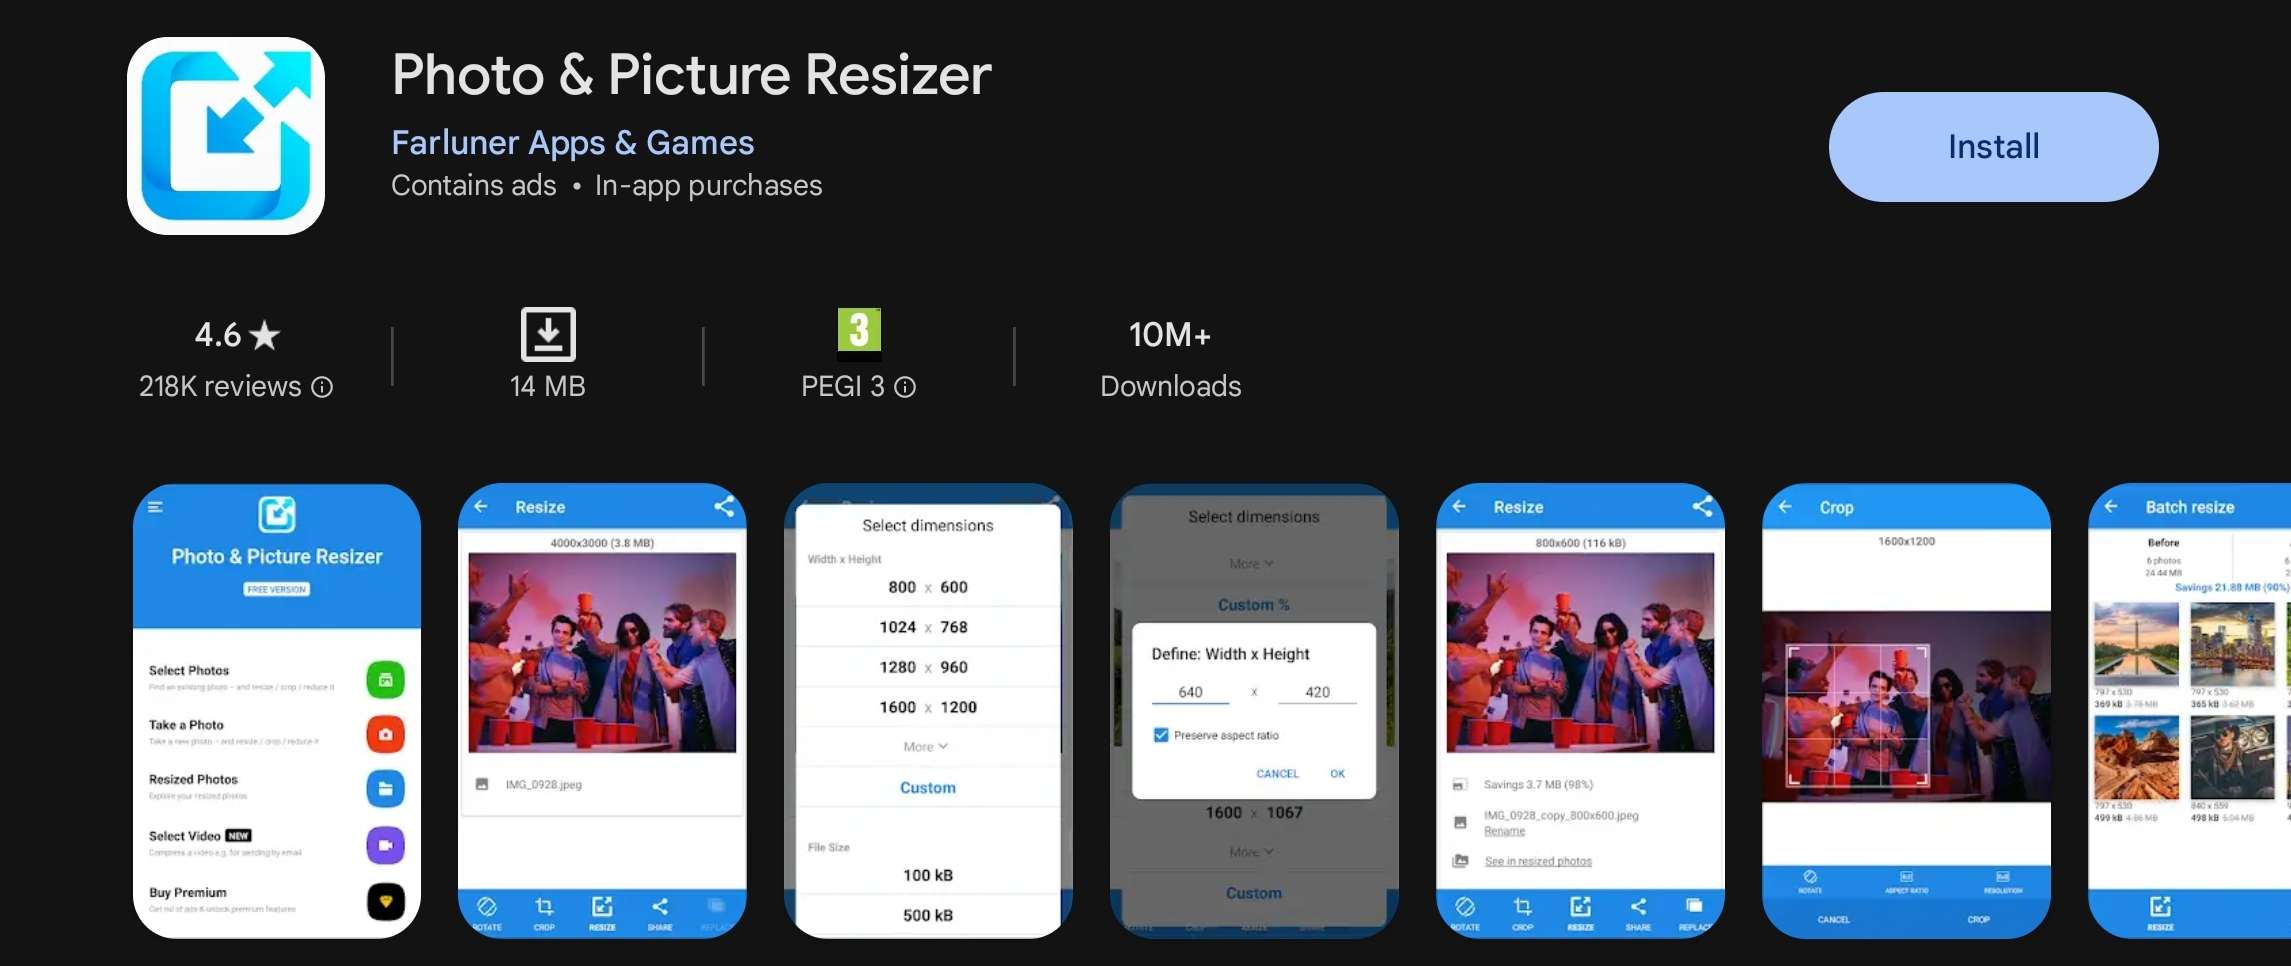
As smartphone users make a massive majority of social media apps where image resizing is common, it’s safe to assume you can also reduce image dimensions with mobile apps. You’d be right to think that, as apps like Image Size on iOS or InstaSize Photo Editor + Resizer and Photo & Picture Resizer on Android make this task seamless.
We’ll use the last app as an example:
Step 1: Open Photo & Picture Resizer on your Android device.
Step 2: Tap the Select Photos option and click an image you want to resize.
Step 3: Press the Resize button at the bottom of the screen and select predefined dimensions in Percentages or Width x Height options.
Step 4: Alternatively, manually input percentages or dimensions using the Custom option. Then, choose whether to preserve the Aspect Ratio and tap OK.
Your iPhone’s Photos app and Android’s built-in Gallery can also edit image dimensions, and they’re fantastic choices if you’d like to avoid downloading third-party tools.
Selecting the Right Image Dimension Reduction Method
As you can see, dozens of dimension changers exist, including editing software, online tools, and mobile apps. That’s why picking the right tool and image dimension reduction method can be challenging, and it’s why we’ve included a few tips to help you out:
- Consider the image’s purpose and determine whether it’s for a social media post, a website, print, or an important business marketing campaign;
- Decide what’s more important to you between the tool’s performance and image quality;
- Use image dimensions resizers from trustworthy sources and brands to ensure the safety and privacy of your pictures.
Considering these aspects will ensure you pick an image dimension resizer that fits your needs.
Ways You Can Ensure Effective Results When Changing Image Resolution
Effectively reducing image dimensions takes more than just uploading an image and making it 30 or 60% smaller. To help you achieve the best results, we’ve included a few tips that’ll make your resizing better:
- Use High-Quality Photos – Start with high-resolution original images to preserve the photo’s quality when reducing image dimensions.
- Maintain the Aspect Ration – Use landscape photos for websites with landscape requirements and portrait pictures for things like Instagram and Snapchat stories to avoid distortions when editing image dimensions.
- Pick the Right Tool – When possible, use professional image editing software, as these apps consistently achieve better results than highly simplified and basic picture editors.
While not strictly necessary, sharpening an image after resizing it is also a fantastic strategy, as it can help you avoid having blurry images after you resize them.
Part 5. How to Unblur Images After Reducing Their Dimensions?
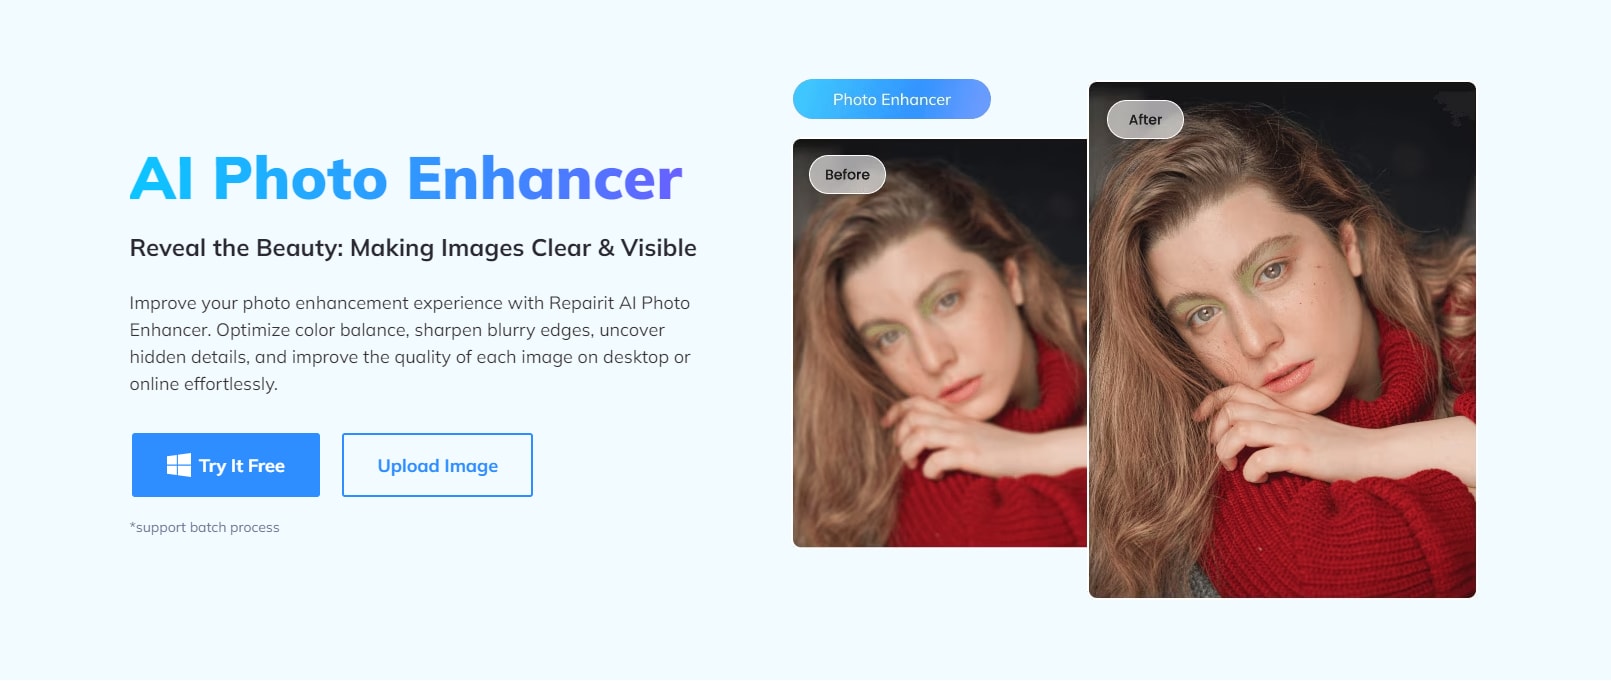
Editing image dimensions can sometimes lead to blurriness that significantly affects the quality of your photos. However, there’s still a way around this issue, and modern AI-powered tools like the Repairit AI Photo Enhancer can help tremendously.
Such an app can drastically improve your image by sharpening blurry edges, optimizing its colors, and uncovering hidden details that’ll take your portrait photos to another level.
Moreover, unblurring pictures with Repairit AI Photo Enhancer after editing the image dimensions is an incredibly straightforward process that anyone can follow. Nonetheless, we’ve included detailed step-by-step instructions for it:
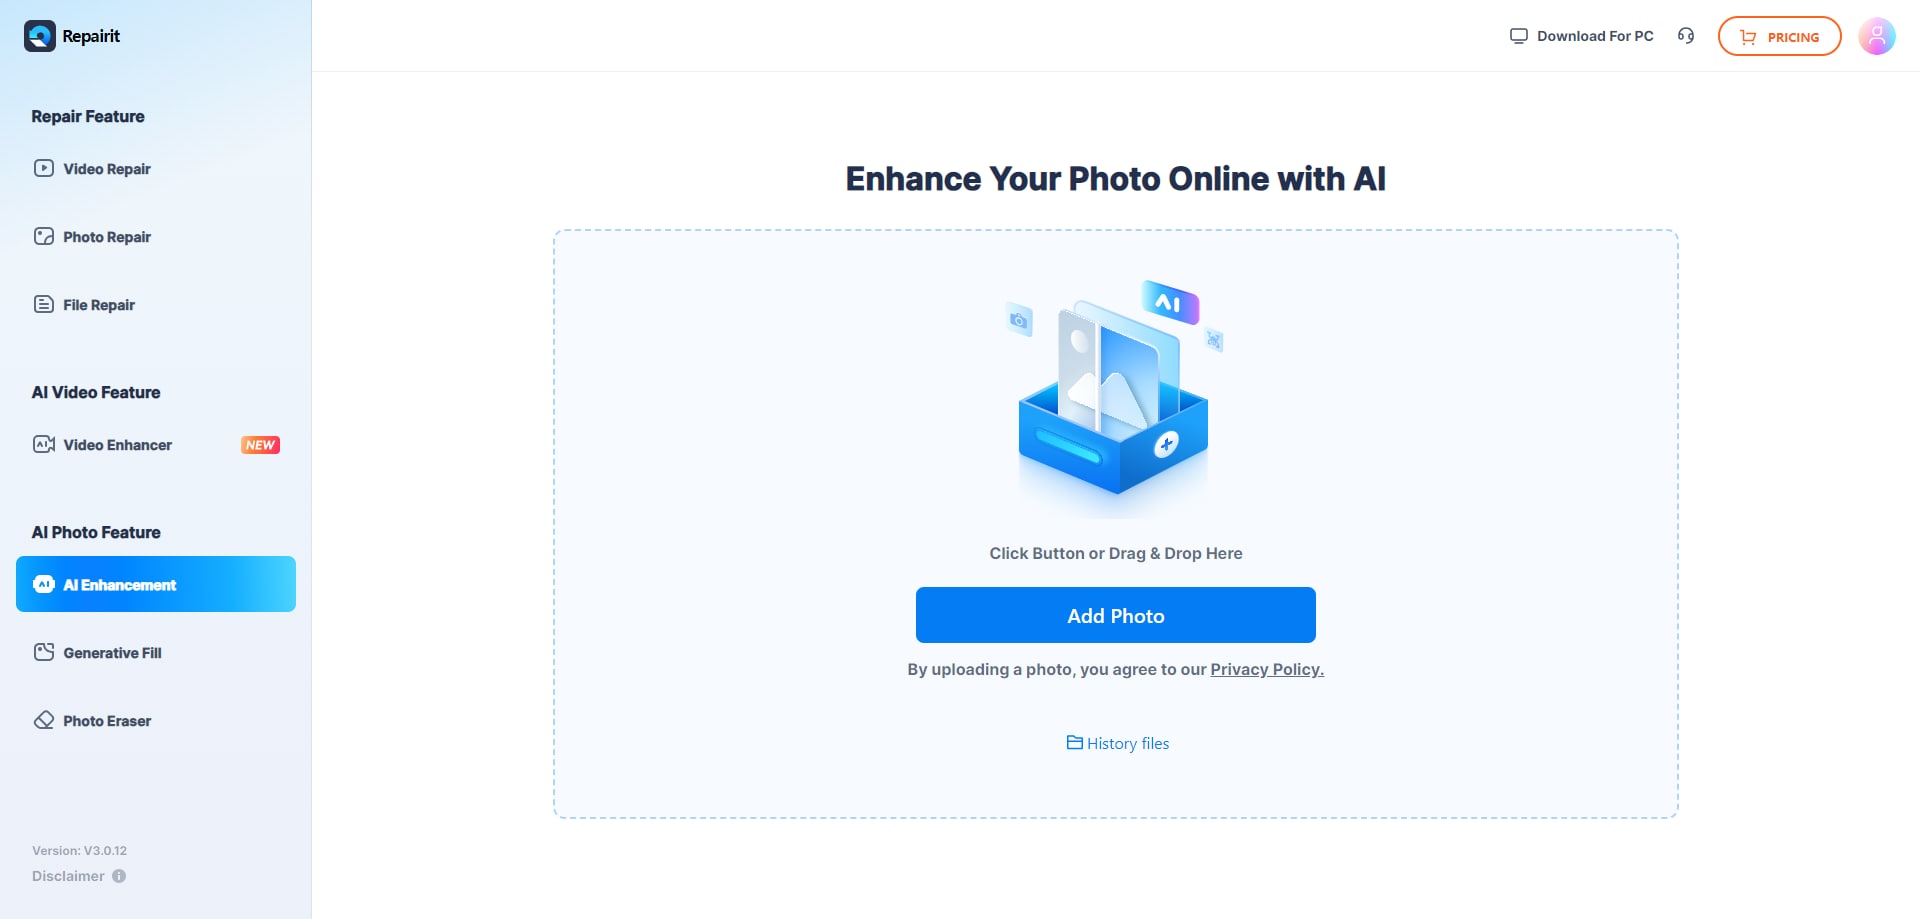
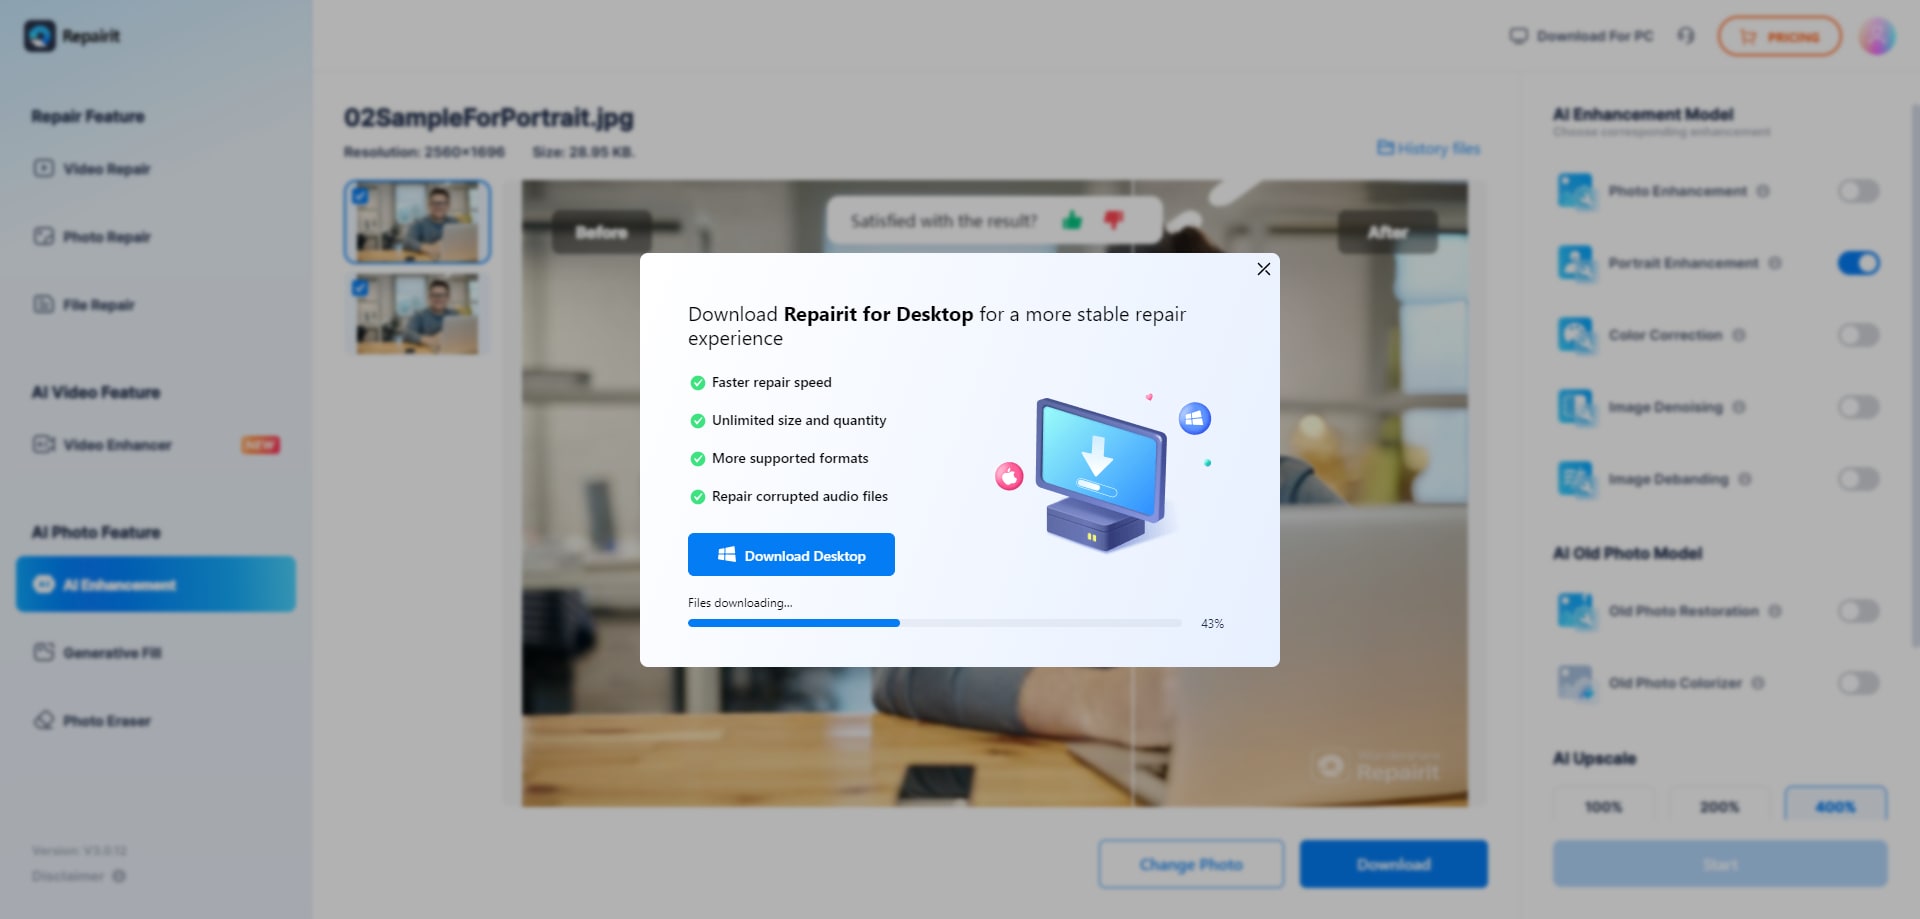
Step 1: Launch a browser, visit Repairit’s Online AI Photo Enhancement website, and click Upload Image.
Step 2: You’ll be taken to Repairit’s Online tool, where you can select AI Enhancement in the left sidebar and tap Add Photo.
Step 3: Use the AI Enhancement Model on the right and select Photo Enhancement. (You can also try the Portrait Enhancement mode if you’re fixing a blurry portrait picture.)
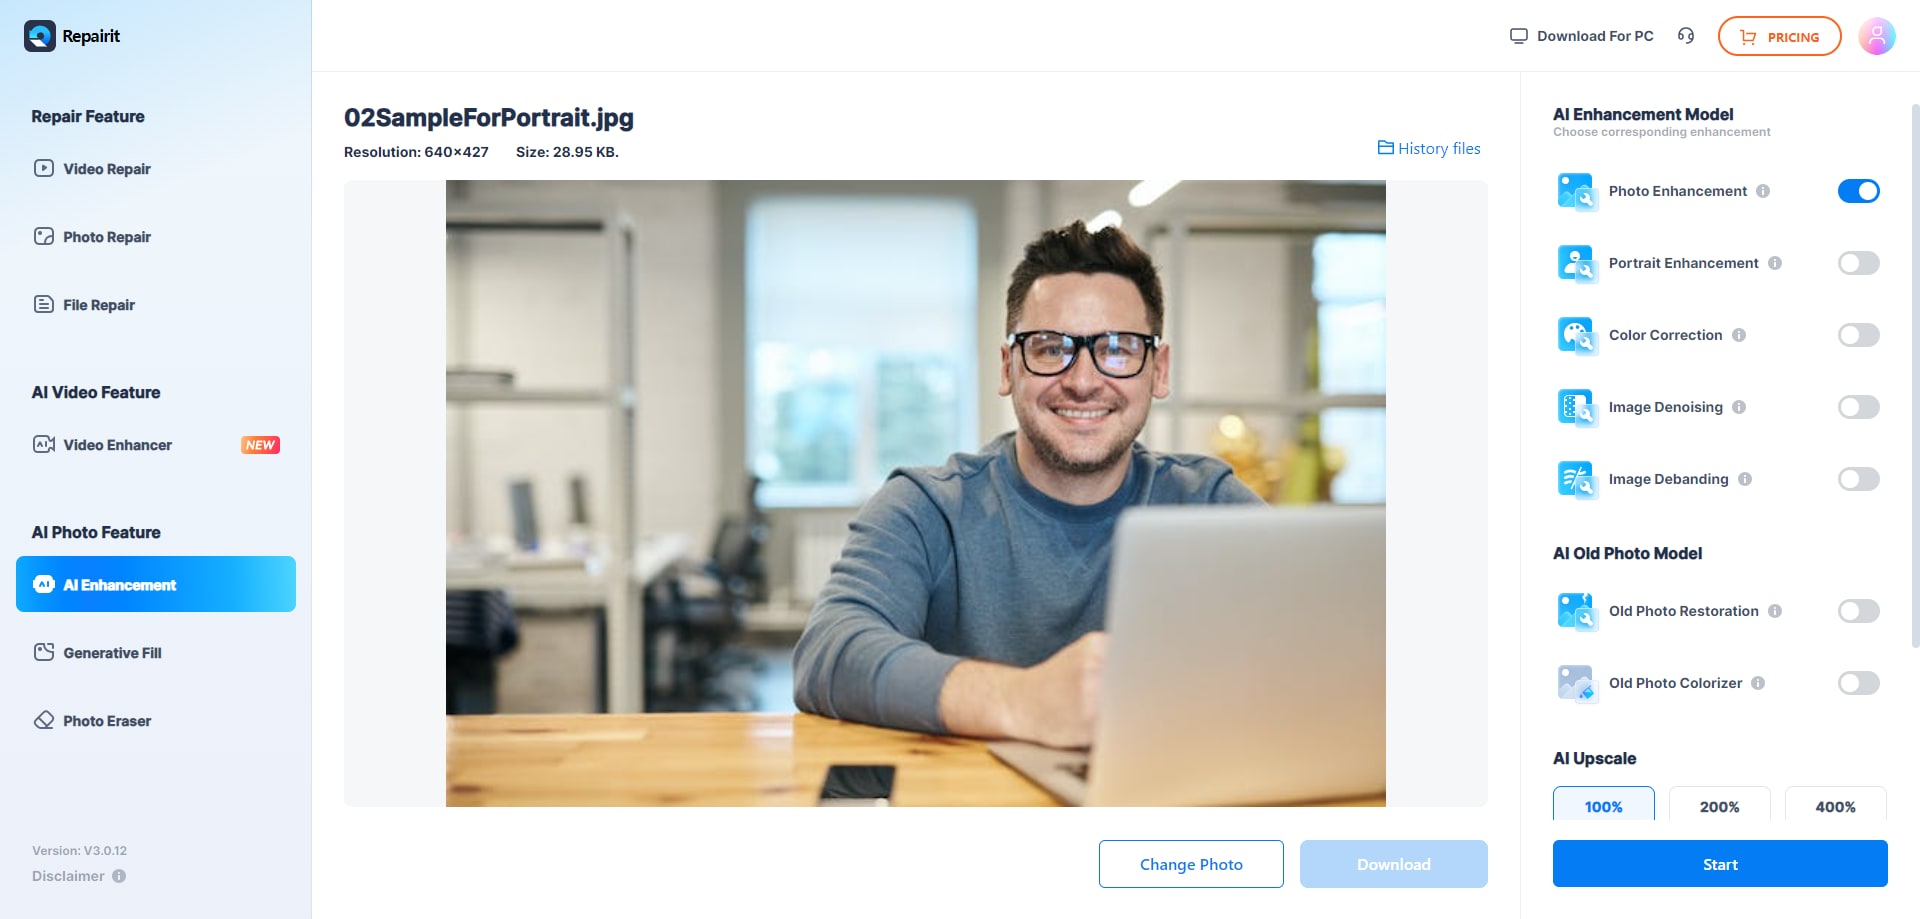
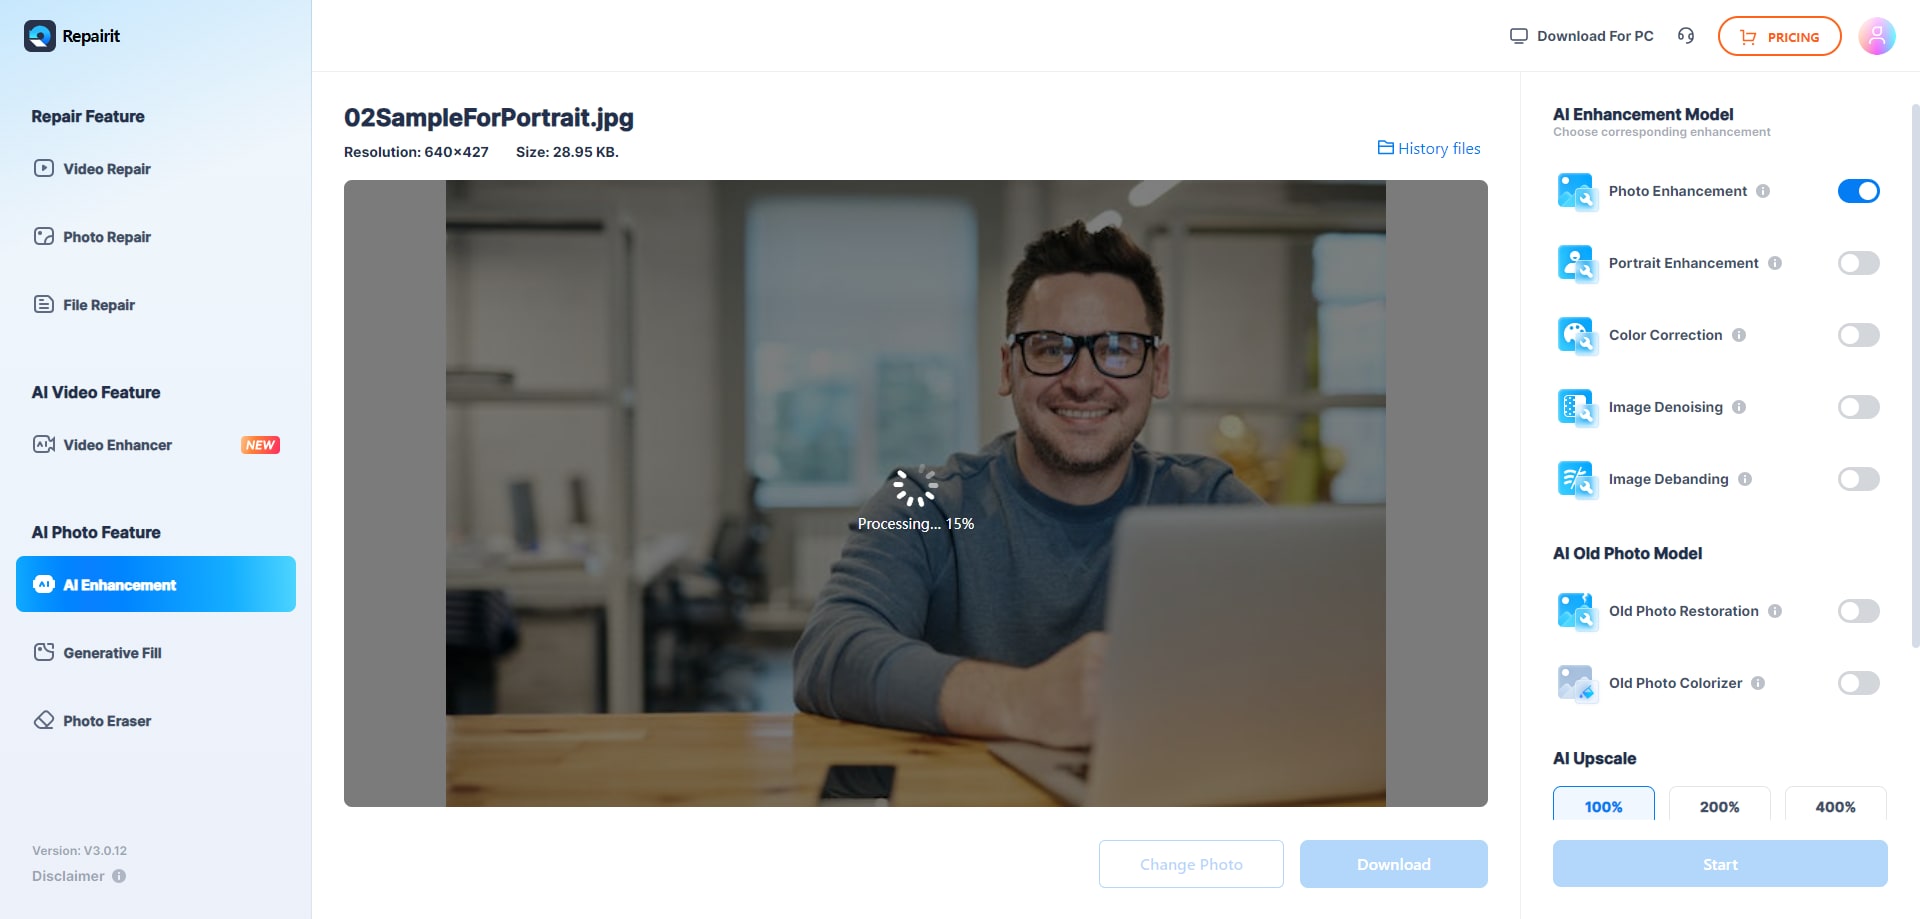
Step 4: Under AI Upscale, choose the 100%00% option to avoid increasing the image’s dimensions. Then, tap the Start button and wait for the web app to process and enhance your image.
Step 5: Once the process finishes, you’ll receive a notification stating that the image has been processed successfully. You can then preview it by checking the before-and-after with a slider.
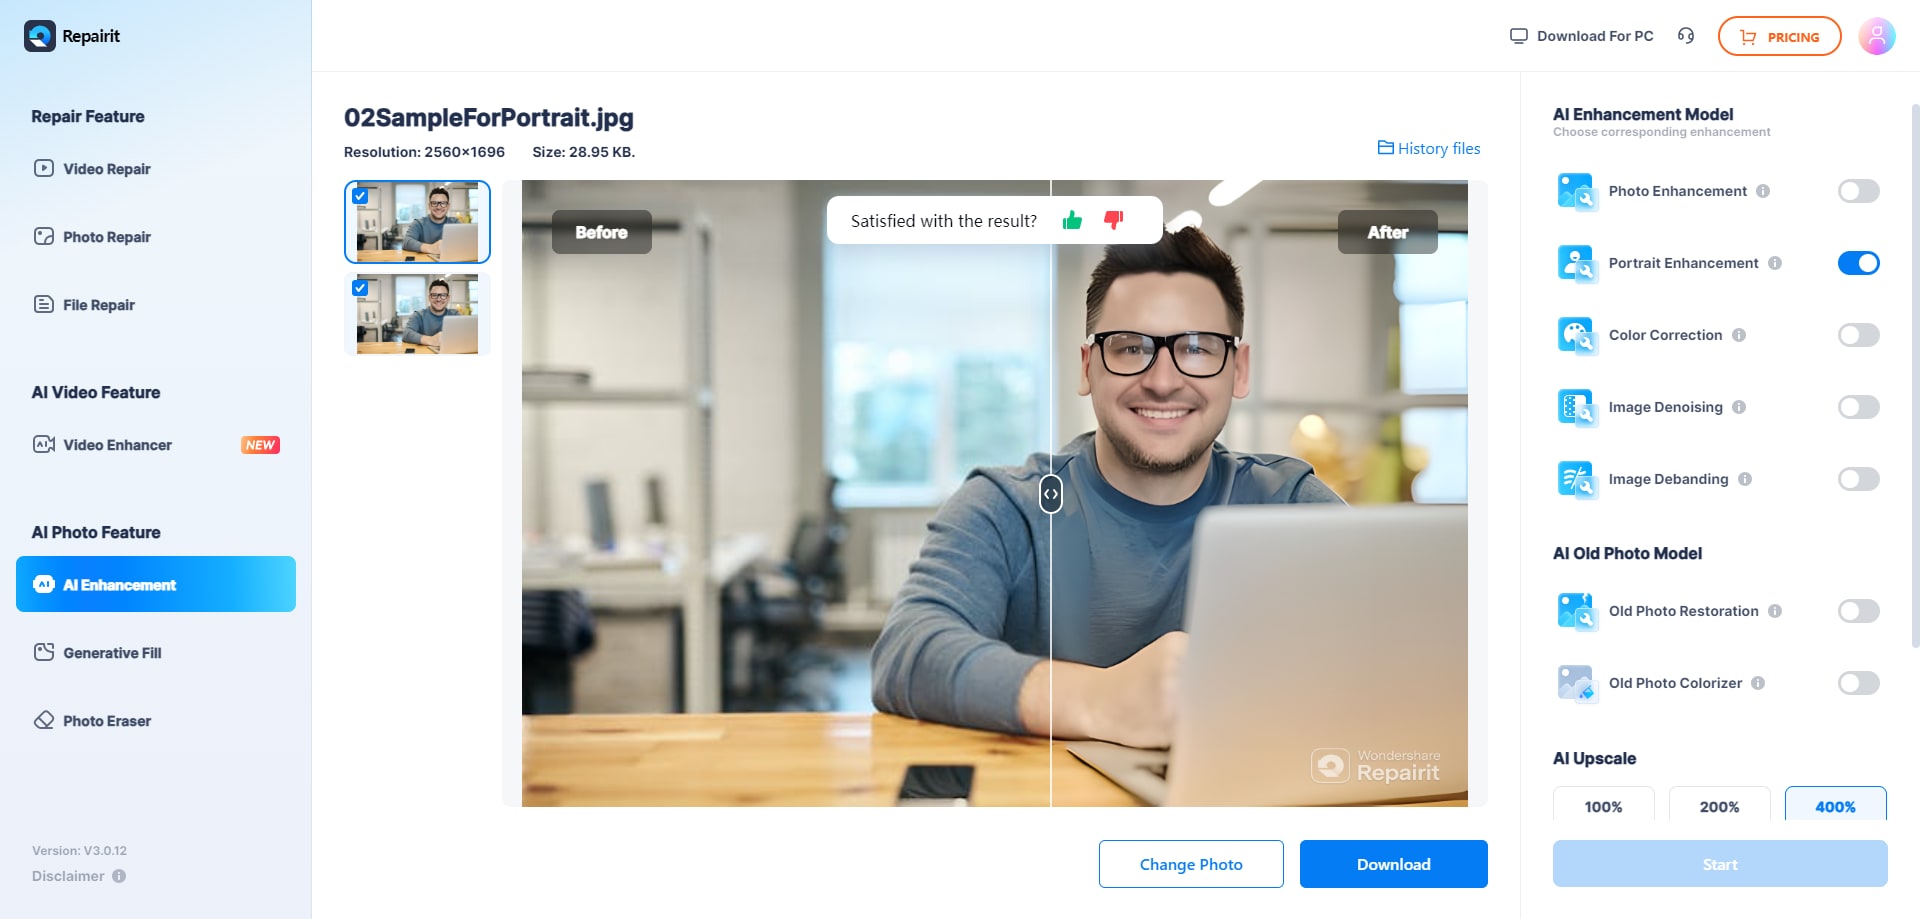
Step 6: When ready, tap the Download button to save the enhanced image to your device.
In a few simple steps, your images with compressed dimensions will regain their quality, and you’ll fix any residual blurriness.
Conclusion
Learning to effectively reduce image dimensions online or with desktop and mobile apps can be incredibly beneficial for social media posts and stories, websites, printing purposes, or business marketing. We’ve shown you how to do it with a built-in Windows tool, a web-based app like Adobe Express, and an Android app called Photo & Picture Resizer.
However, there are many other image dimensions editors, and the tool you go with will depend on what you’re trying to do with the picture and whether you value performance over image quality.
While we’ve also included tips to help you achieve effective results when reducing image dimensions, there’s always a chance of ending up with a blurry photo after compressing the image’s dimensions.
Fortunately, those situations are effortlessly resolvable with Repairit AI Photo Enhancer, which can seamlessly sharpen photos, optimize colors, and help pictures regain their original quality even after you’ve reduced image dimensions.