As a general rule, having photos in a larger size is a good thing. Heavier images tend to retain more detail, making them easier to edit and enhance. However, that does come at a cost. They’re much more challenging to manage, taking up too much space, being extremely slow to upload, and virtually impossible to share easily – especially when you want to share multiple photos simultaneously.
That’s why you need a good photo KB reducer. It can help you better manage all your photos without compromising their quality.
Explore the best photo size kb reducers in this detailed guide below.
In this article
Part 1. What Are Photo KB Reducers?
First things first – what exactly is a photo reducer in KB? Put plainly, it’s a tool that reduces the size of your image and minimizes the space it occupies in your storage. For instance, if you have a 1.2MB image, you can use this tool to compress the photo to 100KB in a single click.
However, remember that using an image size reducer without losing quality isn’t always possible. The tool you’re using will need to erase some detail from your photos to make them more lightweight. Most commonly, it will minimize the number of pixels they have. This won’t be noticeable in your minimized photo.
However, if you want to enlarge the photo after reducing its size, you might notice some blurring or pixelation. Fortunately, that’s nothing that a good photo editor cannot fix.
Part 2. Main Applications of Photo KB Reducers

If you’re not already using an image KB reducer online, you should probably consider it. It has numerous applications that could help you get a handle on your photos:
- Free up space – whether on your phone, camera, or computer, reducing the size of your images could free up quite a bit of space in your storage;
- Quicker uploads and sharing – uploading larger pictures or sending them via email could take a lot of time and increase your risks of data corruption during transfers. Reducing image file size minimizes this problem;
- Faster page loading speed – if you’re using images on your website, those that are lighter will load much faster, increasing your overall page loading speed;
- Easier add/banner/flyer creation – resizing your images to better fit your ads/banners/flyers/other marketing material will improve their quality;
- Higher-quality social media posts – most social media platforms have restrictions on file size and will compress your files if they’re too big (leading to blurry images and videos). Resizing photos before posting can reduce quality loss;
Image size reducers could prove very convenient, whether for personal or professional use; you just need to find the right tool for your needs.
Part 3. 9 Best Photo KB Reducers to Reduce the Image Size In KB
Photo KB reducers come in all shapes and sizes. You can access offline and online image KB reducers, free and paid options, and those for professional and personal use. The following are some of the top options that are suitable for a variety of applications.
1. Simple Image Resizer

It’s all in the name – Simple Image Resizer is one of the easiest tools you could use to quickly resize images without any prior knowledge whatsoever. It works with all the popular file formats and is completely free to use for personal applications.
Key features:
- Resize by percentage or dimension– reduce the size of your photo by the exact percentage using a simple slider, or specify the number of pixels for width and height;
- Resize for social media platforms – resize your photos to match the specifications on Facebook, Instagram, X, and LinkedIn;
- Resize to specific KB/MB – resize your image to 50KB, 100KB, 200KB, or 1MB.
2. Adobe Photoshop

There are only a few things that Adobe Photoshop can’t do. So, if you happen to have this program installed on your computer, you’ll be happy to know that you can use it to resize all your photos. You can set the exact width and height you want, as well as the overall image resolution.
What’s more, if you’ve decided to size down the image after applying several layers to it, you can simply select Scale Styles to ensure they’re sized down, as well.
Key features:
- Presets – choose your desired preset to resize your image;
- Auto resolution – resize your image for your preferred printing output;
- Resample – adjust the number of pixels proportionately to the image size and resolution.
3. GIMP

GIMP is a free, open-source photo editor with plenty of excellent features to offer. It’s mainly designed for professionals, meaning that there is a steeper learning curve that comes with it. However, it can still be advantageous if you have some prior experience with similar solutions.
It delivers nice image quality after resizing and enables you to perfect all your photos and get them ready for publishing or sharing with clients without much fuss.
Key features:
- Scale image – adjust the image size by width and height, or input your preferred X and Y axis resolution;
- Locked width and height – automatically retain image aspect ratio by keeping the width and height parameters locked (changing one will automatically change the other);
- Different size values – specify whether you want to change the image size by pixel, percent, inch, millimeter, point, or other value.
4. Pi7 Image Reducer

Pi7 is an image size reducer you can use for free online. There are no software downloads or lengthy installations. You simply have to visit the website, choose the feature you want to use, and then drag and drop your image to start working on it.
While it’s a simple tool, it delivers nice photo quality after size reduction. However, you will notice some quality loss if you try to enlarge your photo afterward.
Key features:
- Reduce by KB – input your preferred photo size in KB to reduce it;
- Image dimensions – overview of your original image dimensions in pixels, millimeters, and centimeters;
- Size presets – reduce the size of your image using different presets (4x6, 3x4, 2x2, and more).
5. FileOptimizer

Designed for the Windows operating system, File Optimizer is an all-around space-saver for your computer. It works with countless different file types, including images, PDFs, videos, and more. Depending on your file, it can reduce its size by up to 70%, leaving much of its quality unchanged.
Key features:
- Advanced compression – using advanced compression algorithms, you can retain much of your image quality when resizing it with this tool;
- Batch processing – resize images in batches for better efficiency;
- Backups – create backups of original files before resizing your images.
6. ImageOptim

Whereas FileOptimizer is designed solely for Windows OS, ImageOptim is designed solely for the macOS. Compatible with macOS 11 and above, it’s an efficient, easy-to-use solution that will help you increase your local storage by reducing the image size and erasing unnecessary invisible junk that comes attached with many files.
Key features:
- Automatic image optimization – as soon as you drag and drop an image, it will automatically optimize it to reduce the space it occupies;
- Junk removal – remove unnecessary details like image metadata, color profiles, and more;
- Automatic file saving – avoid creating new files and directly overwrite existing images for maximum storage efficiency.
7. Bulk Resize Photos

Bulk Resize Photos is a free, web-based solution that comes with its own browser extensions for Chrome, Microsoft Edge, and Firefox. It has several unique features and capabilities in addition to allowing you to reduce photo size online. You can also use it to crop your images, compress them, add watermarks to them, and more.
Counterintuitively, however, it doesn’t process images in bulk. You’ll need to upload and edit them one by one.
Key features:
- Reduce to specific KB – this tool is an online image size reducer in KB, so you can specify exactly how many KB you’d like your photos to have;
- Image quality slider – use the slider to specify your preferred image quality;
- Longest side adjuster – specify the number of pixels you’d like on the longest side of the image.
8. Duplichecker

As the name suggests, Duplichecker is primarily an online plagiarism checker. However, it does come with a surprising feature for image resizing. Moreover, while its plagiarism checker is a paid feature, the image resizer is completely free to use.
Key features:
- Quality adjustment – use the slider to specify your preferred image quality;
- Compress JPG to precise size – reduce image size to precisely 20KB, 50KB, 100KB, or 200KB;
- Width and height adjustment – specify your preferred image width and height in pixels.
9. ResizePixel

Last but not least, we have the ResizePixel. Another entirely web-based solution. It has a clean, minimalistic interface that ensures the entire process of resizing your images is as simple as possible. Once you’ve uploaded your image, you’ll clearly see all the editing options you have available so you can edit your photos to suit your needs and preferences with the utmost ease.
Key features:
- Fixed aspect ratio – check/uncheck the fixed aspect ratio to keep the image consistent regardless of its size;
- Mirroring – flip your photo horizontally or vertically with a single click;
- Image compression – use auto compression to retain image quality or specify your preferred image size in KB.
Part 4. How to Select the Right Image Size Reducer?
The list above contains only a few of the available tools you have access to for seamless image resizing. Considering the overwhelming number of options, it can take time to discern which one is best for you. Here’s what you should keep in mind when making your choice:
- Ease of use – if you’re a novice and just need to quickly resize a few images, you’ll want the tool you choose to be as simple and easy to use as possible;
- Output quality – resizing images will always affect their quality, but some tools are better at retaining details than others. Go for tools that minimize quality loss;
- Price – there’s no reason to pay for a tool you’ll only use a couple of times. However, if you often find yourself needing an image resizer, paying for a more advanced solution might be better for you;
- Supported file formats – most tools will work with common file formats like JPG or PNG. However, if you often work with different formats like AVIF or WEBP, you’ll want to look for tools that support it.
The best way to find out which tool is right for you is by testing a few different options. Most commonly, you won’t have to spend a dime even if you’re testing out paid solutions, as you’ll usually have access to a short free trial.
Part 5. How to Fix Blurry Photo After Reducing Photo Size to Kb?
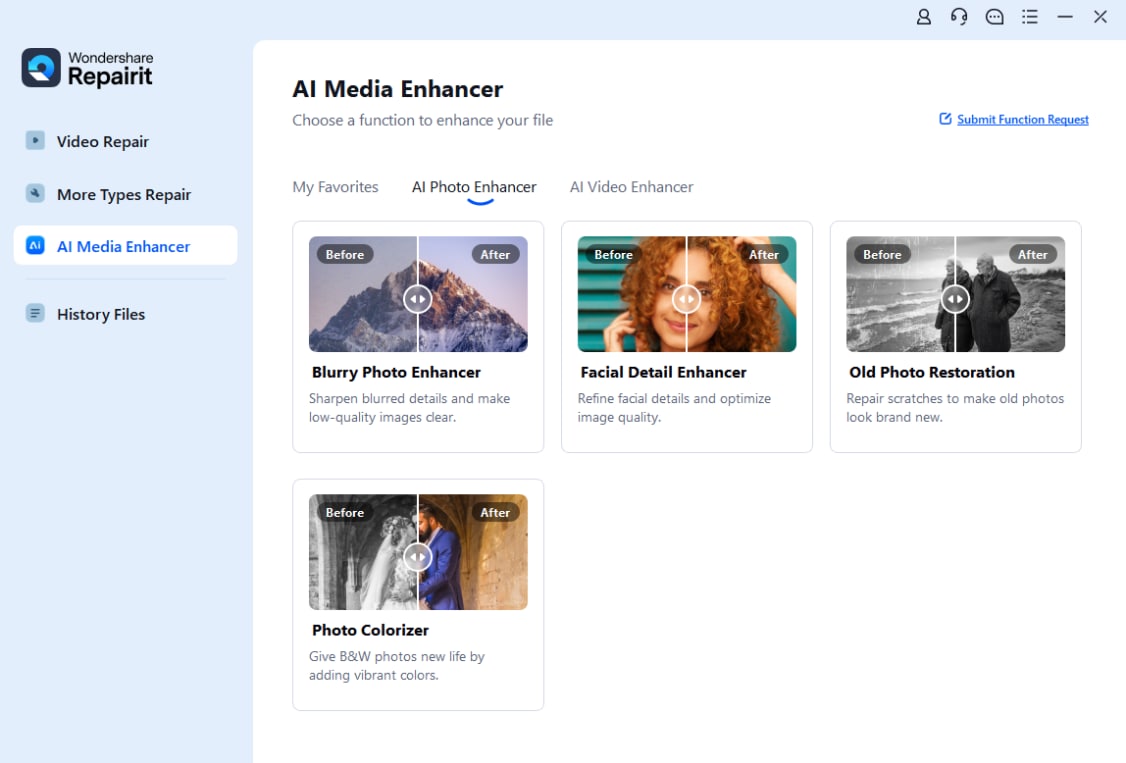
As mentioned, retaining the original image quality is virtually impossible after resizing your photos. After all, the only way to reduce the size of an image is to erase some of its data. However, if you find that the resized image is too blurry or pixelated for your liking, you can use solutions like Wondershare Repairit to enhance its quality.
Powered by next-generation AI, Repairit gives you access to countless advanced features that will help you restore and improve your photos with the utmost ease.
This tool covers everything from colorizing your photos to restoring them, enlarging them without detail loss, or anything in between.
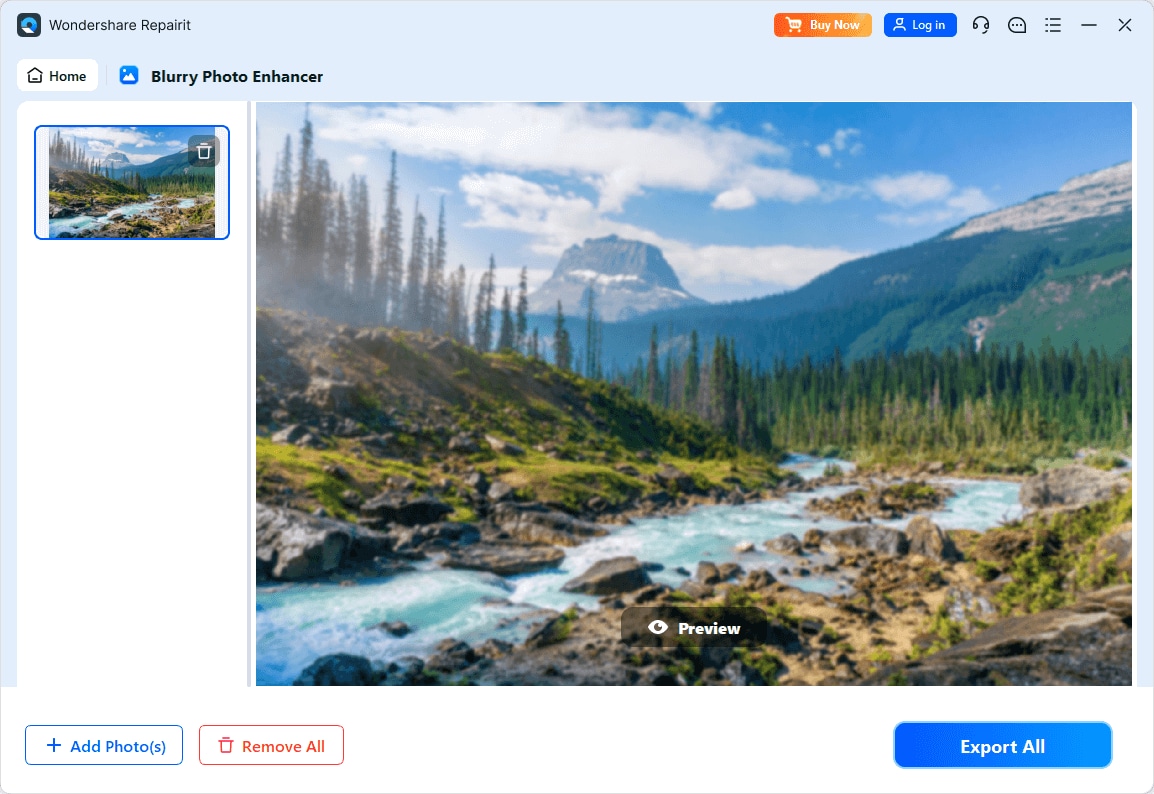
Here’s how you can fix blurry photos after resizing in Repairit:
Step 1: Download and launch Wondershare Repairit on your computer;
Step 2: Go to More Types of Repair and select AI Photo Enhancer;

Step 3: Click the +Add button or drag-and-drop your photo to upload it;
Step 4: Select General Model and specify your preferred Output Resolution;

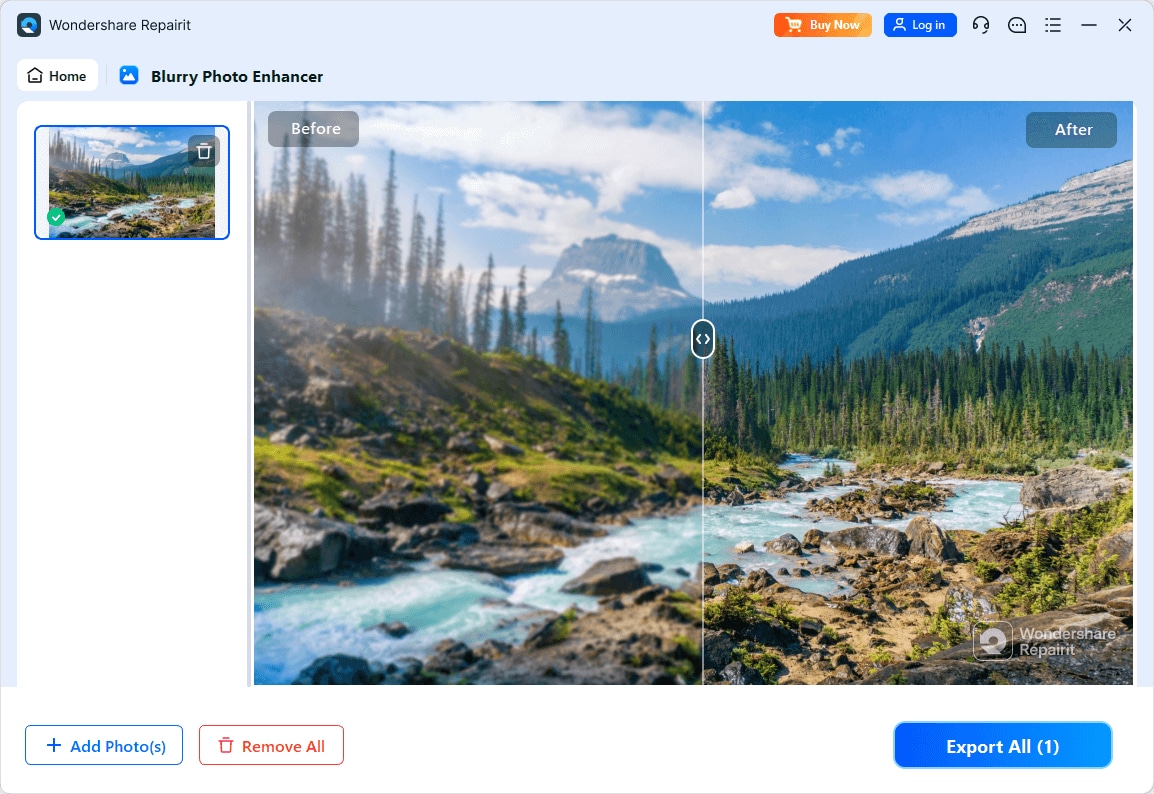
Step 5: Select Start Enhancing to remove blur or pixelation from resizing;
Step 6: Preview the results and select Save All to save your enhanced photo.

Depending on the output resolution you’ve chosen, your images might be of a larger size after enhancement. So, make sure to choose the resolution that suits you and meets your image size requirements.
Conclusion
Resizing images is a relatively straightforward process. You have access to countless online and offline image resizers that can help you reduce the size of your image and increase the available storage on your device.
And if these tools affect the quality of your photos a bit too much for your liking, you can always rely on Wondershare Repairit to enhance your resized images without issues.

 ChatGPT
 Perplexity
 Google AI Mode
 Grok
Grok

