Exposure is one of the essential elements in photography. It affects how light or dark an image appears. If your picture is underexposed, it means not enough light was captured. This makes it appear dark. But don't worry!
This article is going to explore how to fix underexposed photos. We will walk you through various methods with their steps.
In this article
Part 1. What Does it Mean by Underexposed Photos?

If we simply define an underexposed photo, it is an image that appears too dark. The primary reason for the dark photo could be low lighting during the shot. However, it can also happen when the camera settings, such as shutter speed, aperture, or ISO, don't let sufficient light reach the sensor. This makes a photo lose important details and look dark and blurry.
When the pictures are underexposed, the darker areas become hard to see. This makes the overall image look dull. So, understanding this will help you recognize what went wrong. After that, you can adjust and edit the photo to make it look clearer and brighter.
Part 2. 3 Methods to Fix Underexposed Pictures Using Software
Here, we’ll go over two simple ways to brighten up dark photos online. Just follow the steps in each method to make your pictures look clearer and more vibrant.
Method 1. Fix Underexposed Photos in Repairit (Easy & Best)
If you want a reliable and effective solution for your underexposed images, let us introduce you to Repairit AI Photo Enhancer. It lets you fix your underexposed images and overall appearance in just a click.
The AI technology automatically scans the photo and, adjusts the brightness, contrast, and improves the color balance. No need for manual editing or adjustments.
The best part? Its interface is very easy to use for every type of user. Like other available tools, it doesn't have any size or number limit. You can use this tool even for large files as many times as you want. Also, it supports both Windows and Mac. This means no matter which OS you have, Repairit has you covered!
So, download and install Repairit on your PC/laptop and explore the steps to fix underexposed photos using this tool.
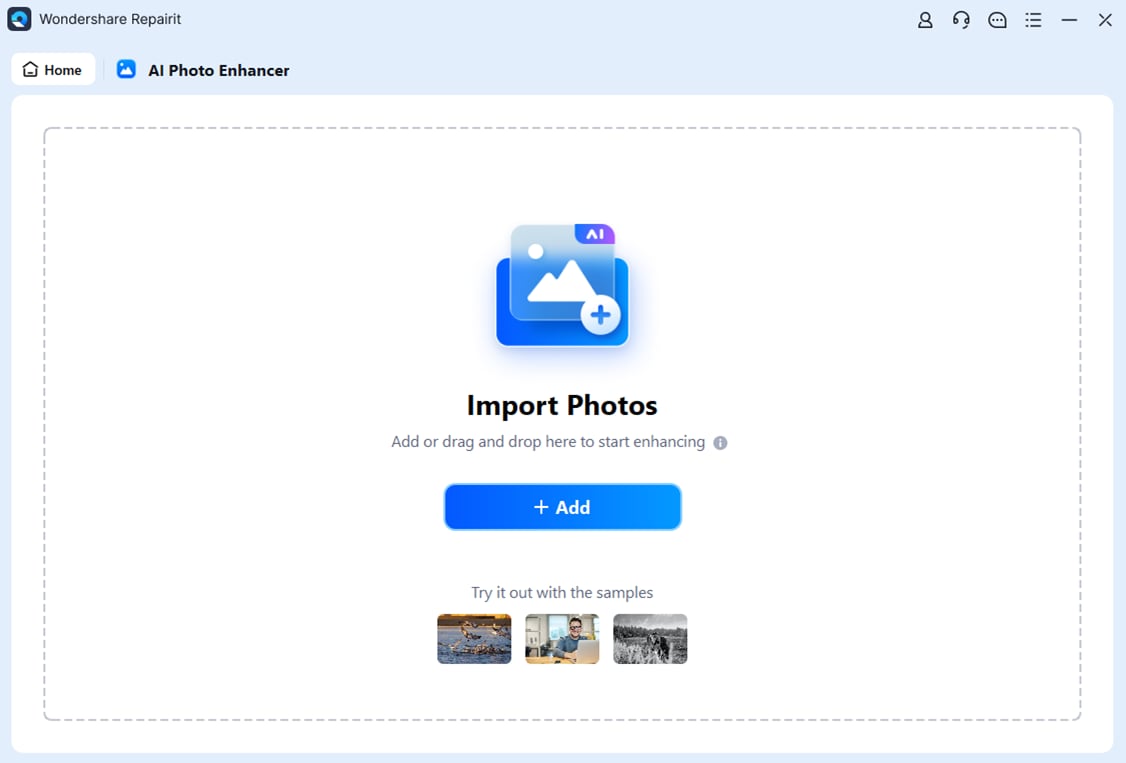
Step 1: Open Repairit on your PC/laptop. Then, click the "More Types Repair" button. Click "Start" in the "AI Photo Enhancer" box under the "AI Enhancer" section and proceed.

Step 2: Click the "Add" button and import the underexposed photo you want to fix with Repairit.
Step 3: After the photo is imported to Repair it, select the "General Model" from the options and click the "Start Enhancing" button. Repair it will start repairing the colors and brightness of your photo.

Step 4: Once the photo is ready, you can move the slider on the photo to see the difference. Click the "Save All" button to save it on your desktop.

Fix Underexposed Photos in Repairit Photo Enhancer
 Security Verified. Over 7,302,189 people have downloaded it.
Method 2. Fix Underexposed Photos in Lightroom
Lightroom is a favorite tool among photographers for brightening up dark photos. It has powerful features that make fixing underexposed images simple. Whether your photo is just a bit dark or really needs brightening, Lightroom’s editing options let you bring back light and detail. You can tweak exposure, highlights, and shadows without sacrificing quality.
The fine-tuning of a few key settings makes your photos live again. With Lightroom, you can make your photo look clearer and more lit. This software is designed for professionals. Therefore, it can be a little tricky for beginners to use it.
Here are the steps to fix underexposed photos using Lightroom:
Step 1: Launch the Lightroom software and import the underexposed image you want to fix.
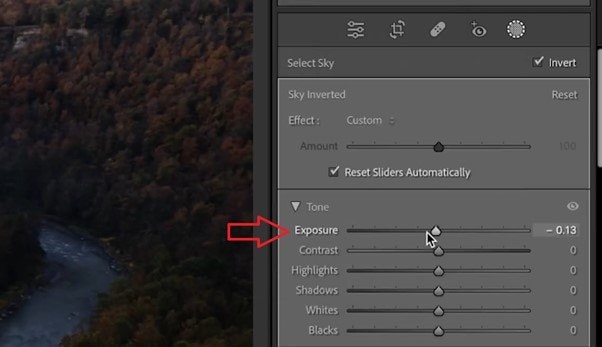
Step 2: Go to the "Develop" module and adjust the "Exposure" slider as per your liking. You can move it right or left to make the image darker or brighter. However, make sure that you don't overexpose the image.
Step 3: Use the "Highlights" slider to soften the bright areas of the image. And the "Shadows" slider to reveal details in the dark spots.
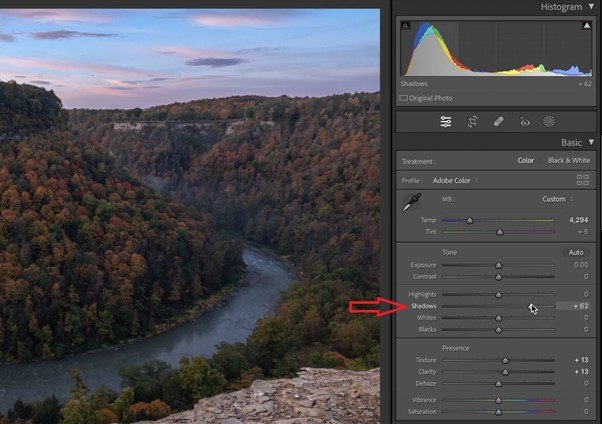
Step 4: You can also experiment with "Black" and "White" slides to enhance the image and get the results you want.
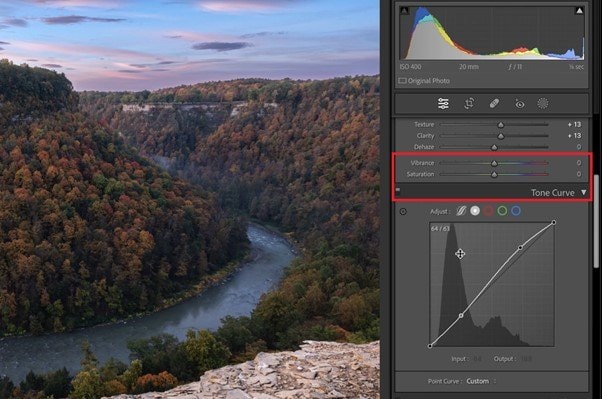
Step 5: Use the "Tone Curve" if you want to adjust the brightness and contrast precisely. It will help you manually fix different areas of the image.
Step 6: If the colors are off, adjust the Texture, "Tint,"Vibrance," and "Saturation" sliders to correct them.
With these simple adjustments in Lightroom, you can fix underexposed photos. Once you are satisfied with the image, you can export it to your system.
Method 3. Underexposed photo fix in Adobe
Adobe Photoshop is another popular editing tool with plenty of features. This tool is primarily designed for professionals, but beginners can use it for basic editing. You can use Photoshop to precisely adjust the exposure of your image. You can control light, shadows, and contrast. The good thing is that you can enhance brightness without losing details.
If you are already an Adobe user and want to fix underexposed photos in it, you can follow the steps given below:
Step 1: Open Photoshop on your PC/laptop. Then, import the dark image you want to fix.
Step 2: Now, create a duplicate of the image so you won't lose it during the editing process. To create a duplicate on Adobe on Mac, press "Command + J," for Windows users, press "Ctrl + J."

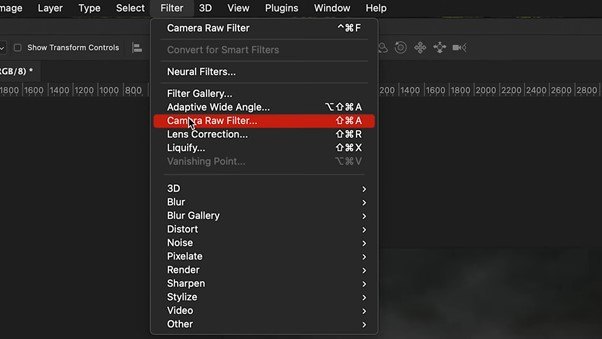
Step 3: Next, click "Filter" at the top and select "Camera Raw Filter" from the options. This will open the color grading sliders in a new window.
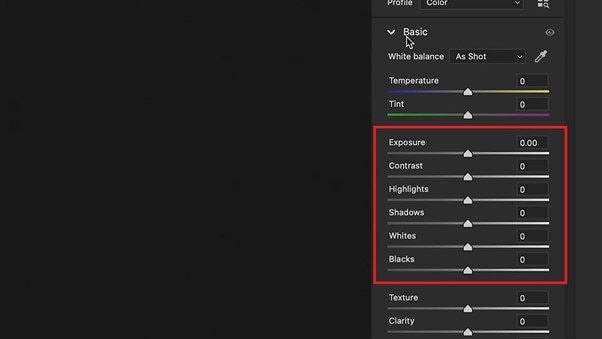
Step 4: Open the drop-down menu of the "Basic" option and adjust the "Exposure" slide. You can also play with other sliders like Contrast, Highlights, Shadows, etc, to get the desired results.
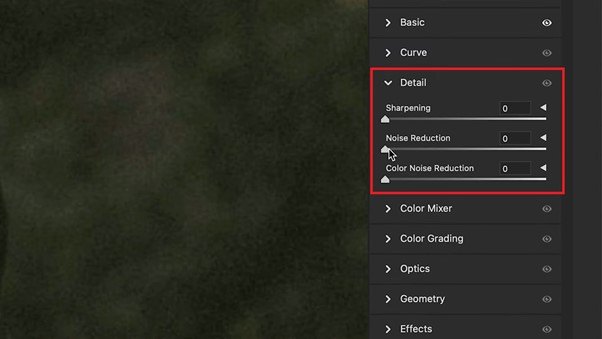
Step 5: If you feel grains in the texture of the image, you can go to the "Detail" menu and adjust the "Sharpness" and "Noise Reduction". It will enhance your image and make it look clearer.
That’s it! Once you are satisfied with the image, you can save it on your desktop. These were the methods to fix underexposed pictures using different software. However, many people don’t want to download/install the software, and they prefer to edit pictures online. Well, worry not! We have a solution for that as well. Just keep reading!
Part 3. 2 Methods to Fix Underexposed Pictures Online
This section will explore two methods to fix underexposed photos online. You can walk through these methods and follow their step-by-step guides to make your photos look better.
Method 1. Fix Underexposed Photos Online Using Pixlr
Pixlr is also an editing software like Lightroom and Photoshop, but it is a less advanced version of them. This software is available online, which means you can use it without even having to install it.
Pixlr offers a user-intuitive interface and is perfect for those new to editing. This tool can fix your underexposed photos with just a few clicks. The best part is there is no need to sign in to use this tool. You can access it directly.
Below are the steps to fix underexposed pictures in Pixlr:
Step 1: Open your browser and visit Pixler's official website. Go to the "Open AI Photo Editor" option and click "Open Image" to open your underexposed image.

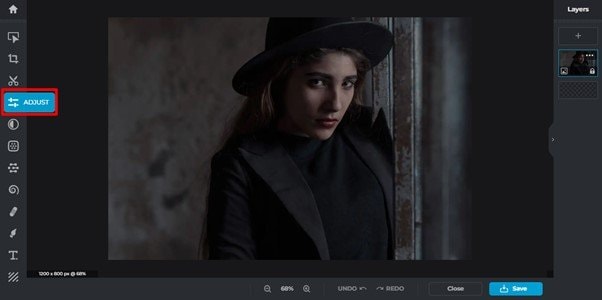
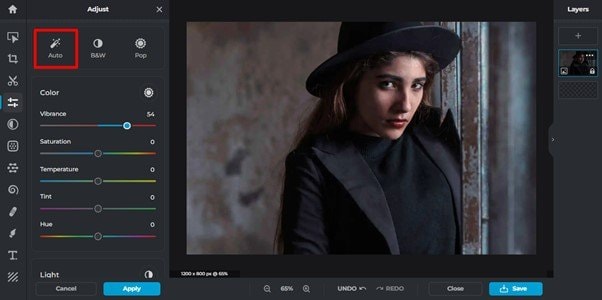
Step 2: Once the image is opened in Pixlr, click the "Adjust" option on the left menu. It will open a list of options.
Step 3: Next, you can click the "Auto" button to fix the image automatically. Otherwise, you can adjust the sliders given below and tune the photo as per your need.
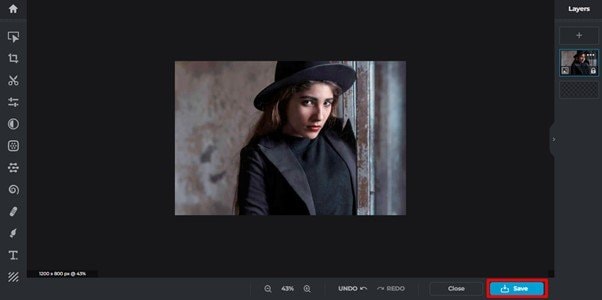
Step 4: Once you are satisfied with the image, click the "Apply" and then click the "Save" button right below the image and save it on your desktop.
Method 2. Online Fix Underexposed Pictures Using Canva
Canva is also an online and in-app tool commonly popular for graphic designing. However, you may not know that it also offers photo/video editing features. You can use Canva to fix underexposed pictures. No matter if you want to fix your personal photo or need perfect photos for social media, Canva has got you covered!
Below are the steps to fix dark images using Canva:
Step 1: Open your browser and go to Canva's official website. Here, create an account (If you don't have any) and log in.
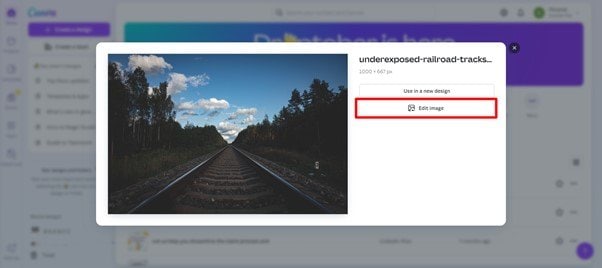
Step 2: Click "Create a design" on the Canva's homepage. Then click "Upload" and upload the photo with dark exposure.

Step 3: Once the image is uploaded, you will see the below interface. Click "Edit image" and proceed.
Step 4: In the "Adjust" option, adjust the sliders until you see the image looks like what you wish it to be. Then, click "Save" on the top right to save it.

That's it! This is how you can use online tools to fix your underexposed photos quickly. Whereas there is software like Repairit that automates the process using AI technology.
Part 4. Tips to Avoid Clicking Underexposed Photos
The following are some tips that you can follow to avoid clicking underexposed photos:
- Make sure there’s enough light before you snap your photo.
- In low light, slow down the shutter speed to capture more brightness.
- Try not to shoot with a strong light behind your subject unless there’s extra front lighting.
- Use a tripod if your shutter speed is slower to prevent any blur.
- Test and tweak your camera settings as needed to avoid dark shots.
- Use flash in dim spaces to add a bit of extra light to your photo.
Conclusion
Adjusting the brightness of an underexposed photo is not a big deal if you have got the right tools by your side. You can easily lighten the dark picture and bring back lost details. There are software like Lightroom or Photoshop and websites such as Canva and Pixlr. These techniques are fast and effective. It takes a few easy steps to achieve this now.
If you wish to fix your photos easily, Repairit is the best option. It’s a great tool for fixing damaged or low-quality photos.
FAQ
Q. Are there smartphone apps to fix underexposed images?
Yes, most smartphone apps, such as Snapseed or Lightroom Mobile, offer features to fix underexposed photos. You can easily adjust brightness, contrast, and shadows.Q. Can we fix an overexposed photo?
It’s generally easier to recover details from underexposed photos than overexposed ones. Overexposure can cause loss of details in bright areas. However, proper exposure is always the best approach.