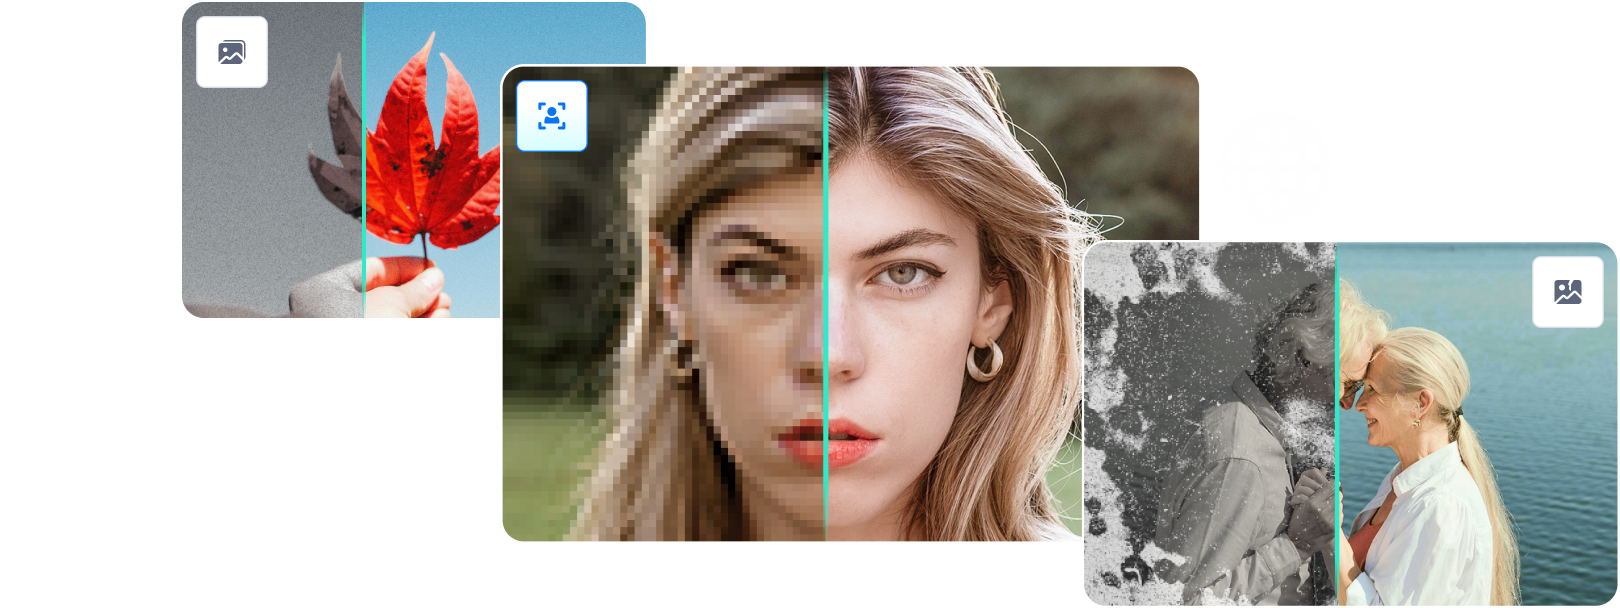

To restore color in an old black-and-white photograph, choose between automatic AI colorization and a manual editing workflow. Repairit Online is the faster option when you want AI to add natural-looking color with minimal setup, while Adobe Photoshop gives you more control when specific clothes, skin tones, backgrounds, or historical details need manual correction.
Before colorizing, scan or photograph the original at the best quality you can, keep an untouched copy, and correct severe fading, dust, or exposure problems first. AI can estimate plausible colors from visual context, but it cannot know the exact historical colors of clothing, objects, or scenery unless you provide that information manually.
In this article
Part 1. What Should You Fix Before Adding Color to an Old Photo?
Colorization works best when the source image already has readable facial features, clear edges, and balanced contrast. If an old photograph is badly faded, scratched, torn, blurry, or unevenly exposed, correct those issues before judging the colorization result.
| Old photo problem | What to do before colorization | Why it helps |
| Faded or low-contrast image | Improve brightness and contrast first | Better tonal separation gives AI and manual tools clearer visual structure |
| Dust, scratches, or stains | Clean or restore the damaged areas | Defects can be mistaken for real objects, edges, or color boundaries |
| Very blurry face or object | Enhance clarity before colorizing | Color estimation is more reliable when shapes and details are recognizable |
| Black-and-white image with good detail | Colorize directly | The source already contains enough tonal information for a first-pass result |
| Historically important photo | Collect reference colors when available | AI-generated colors are plausible guesses, not historical proof |
If the photo needs broader restoration before colorization, old photo restoration can address visible aging and damage before you add color.
Part 2. Best 2 Ways to Restore Color in an Old Photograph
The two methods below serve different users. Repairit Online prioritizes speed and automation, while Photoshop provides more manual control over individual regions and color decisions.
Method 1. Colorize an Old Photo Online With Repairit
Repairit AI Photo Colorizer is a practical choice when you want to turn a black-and-white family photo, portrait, wedding photo, or scanned print into color without manually painting individual areas. The current Repairit colorizer combines automatic colorization with enhancement and restoration options, while the broader Wondershare Repairit platform provides related photo repair and enhancement tools.
Step 1. Open the online photo colorizer and upload the black-and-white image.
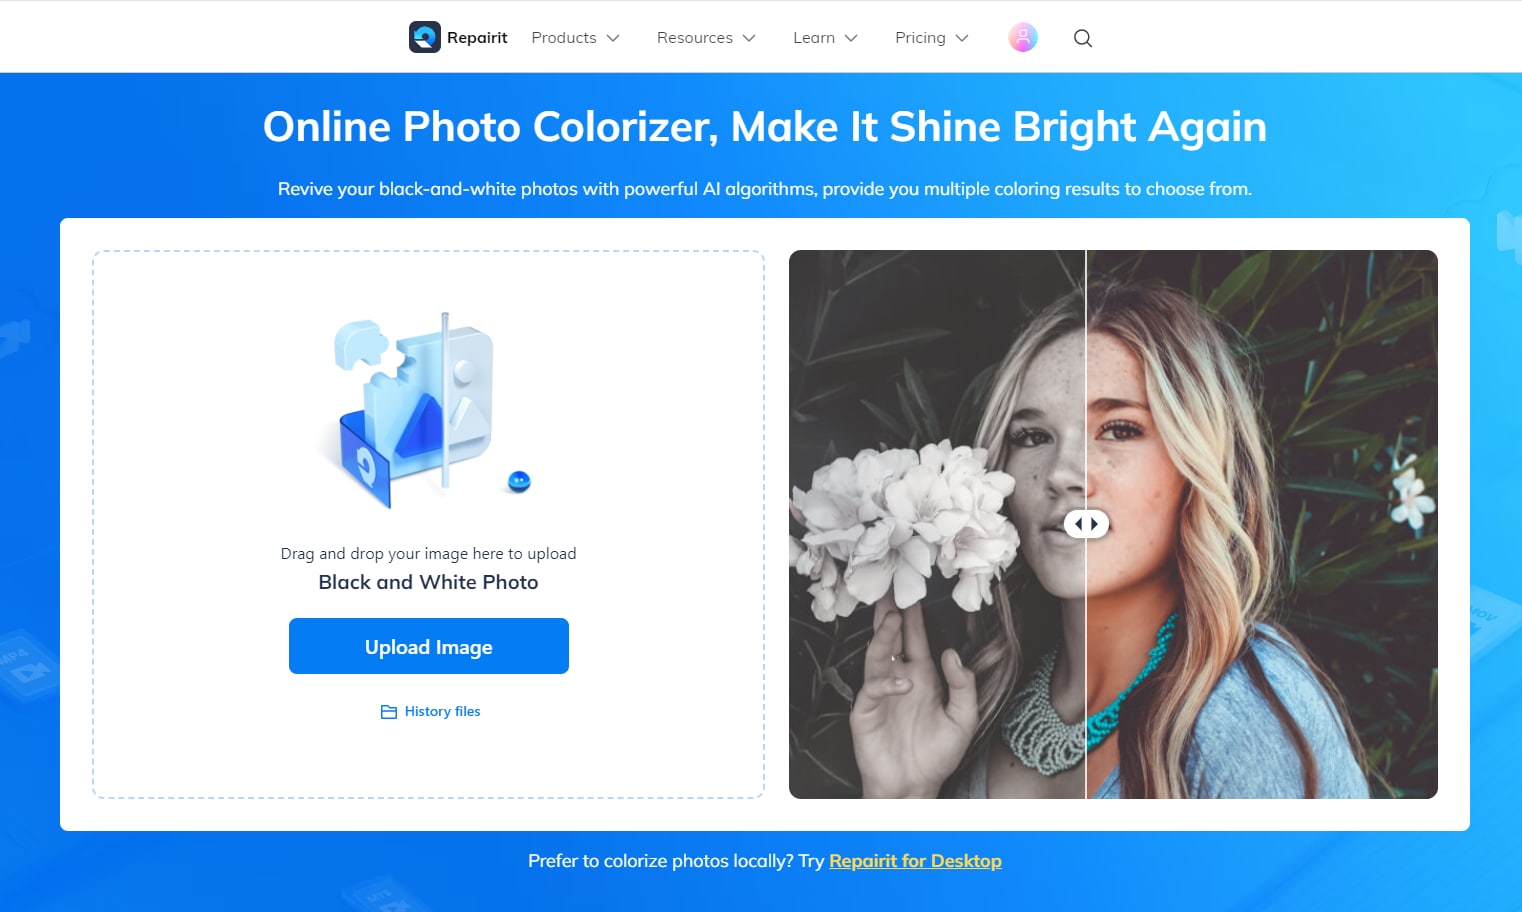
Step 2. Add the old photo to the AI enhancement workspace. Use the photo upload control to bring the image into the colorization workflow.

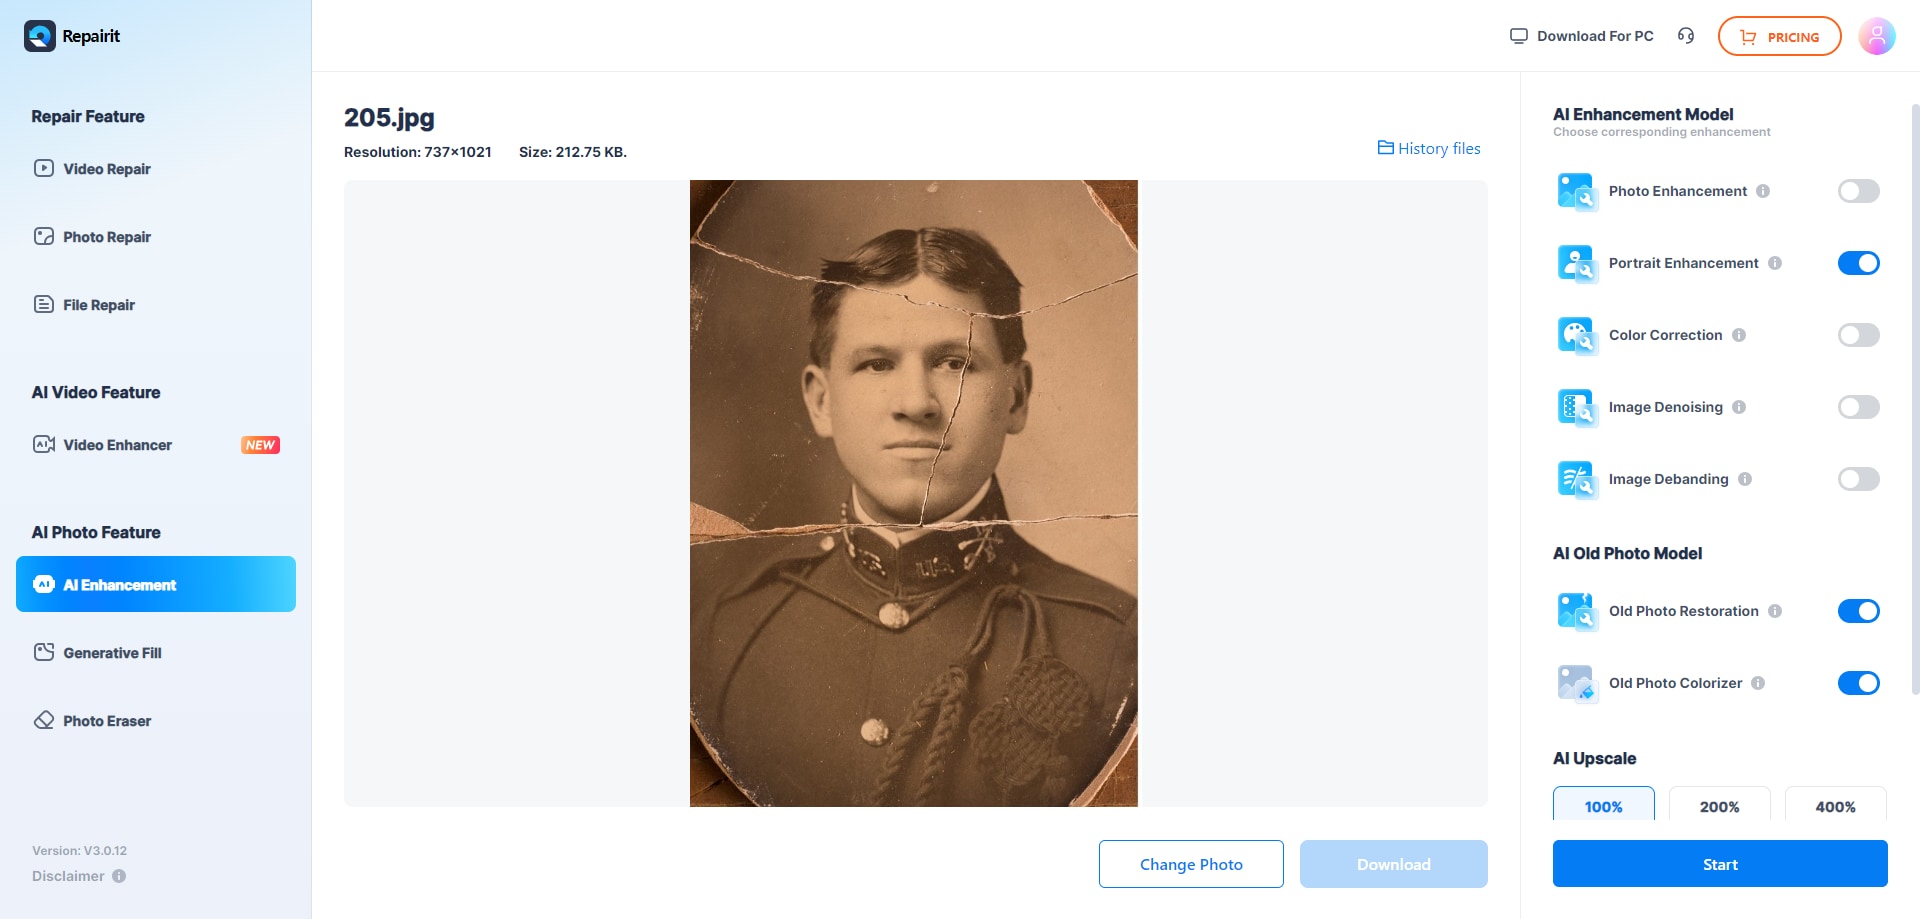
Step 3. Choose the photo colorization option and start processing. Use the available colorizer model or colorization option, then start the AI process.
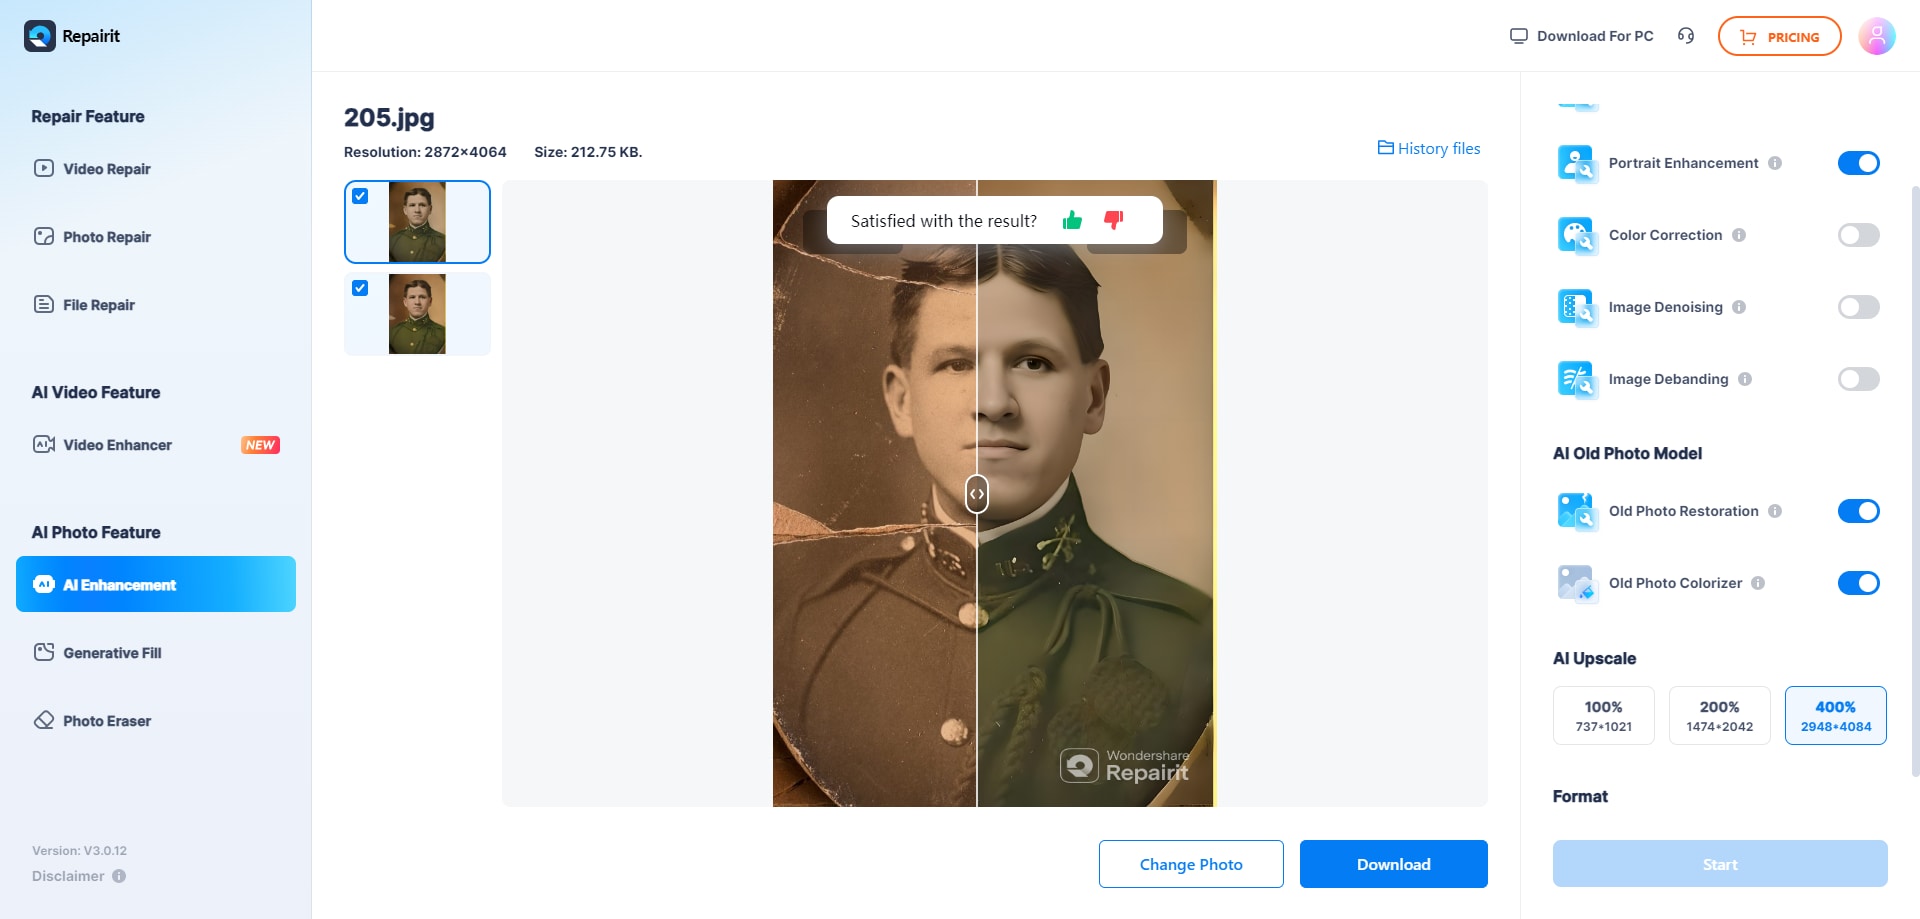
Step 4. Compare the result and download the colorized image. Inspect faces, clothing, sky, plants, and other recognizable objects before saving the final version.
Method 2. Colorize an Old Photo in Adobe Photoshop
Adobe Photoshop is better suited to users who want to guide or correct the automatic colorization. Its current Colorize Neural Filter can automatically add color to black-and-white images and lets you use color focal points when a specific region needs a different hue.
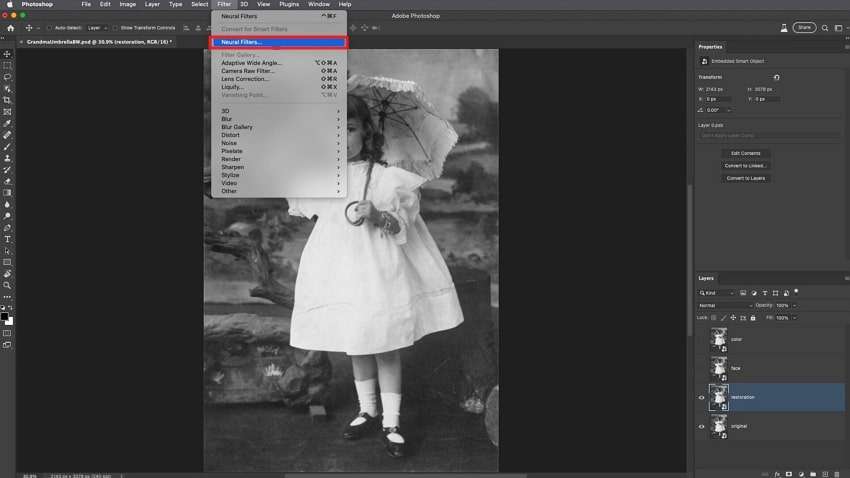
Step 1. Open the old photo and launch Neural Filters. In Photoshop, open the image and choose Filter > Neural Filters.
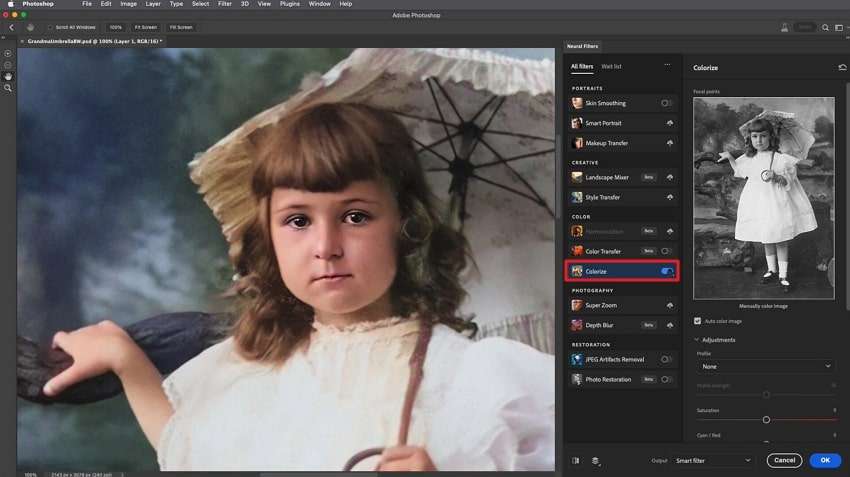
Step 2. Enable the Colorize filter. Turn on Colorize and let Photoshop generate an initial color version.
Step 3. Correct specific areas with color focal points. Select a color, place a focal point on the region that needs correction, and adjust the hue until the result fits your reference.
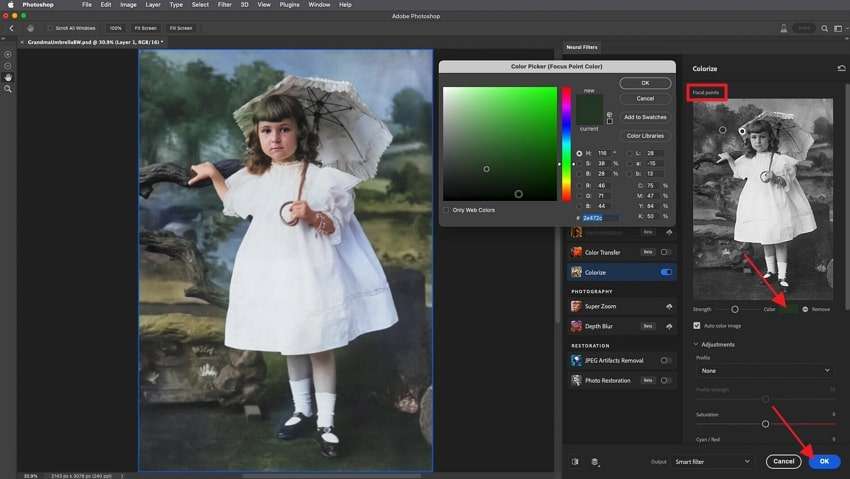
For a non-destructive workflow, output the result to a new layer or Smart Filter rather than replacing the original pixels. Adobe also recommends improving brightness and contrast first when a source image is faded, overexposed, or underexposed.
Part 3. Repairit vs Photoshop: Which Old Photo Colorization Method Should You Choose?
Choose based on how much control you need, not simply which tool has more features.
| Need | Repairit Online | Adobe Photoshop |
| Fast automatic colorization | Strong fit | Available, but requires opening Photoshop and the filter workflow |
| No editing experience | Easier starting point | More learning required |
| Manual correction of a specific object | More automated | Better control with color focal points and layers |
| Old photo also needs enhancement or restoration | Can combine colorization with related AI restoration features | Can combine Colorize with Photoshop restoration and adjustment tools |
| Historically accurate color matching | Needs external reference checking | Better suited when you have reference colors and want to correct regions manually |
| Quick family-photo workflow | Best fit for most casual users | Better for detailed retouching |
If your goal is mainly automatic colorization, Repairit's dedicated black-and-white photo colorizer is the more direct path. If the original photo has scratches, fading, or other physical aging issues as well, restore those defects before making fine color decisions.
Part 4. How to Make AI-Colorized Old Photos Look More Natural
- Start with a clean scan. Dust, folds, glare, and low scan resolution can make both colorization and restoration less reliable.
- Correct exposure first. Recover usable contrast before colorization so faces, clothing, and backgrounds are easier to distinguish.
- Check skin tones carefully. Faces are visually sensitive, so unnatural orange, red, or grey tones are noticeable immediately.
- Use historical references when accuracy matters. Uniforms, cars, furniture, flags, and architecture may have known colors that an AI model cannot infer from grayscale alone.
- Inspect boundaries. Look for color bleeding between hair and skin, clothing and background, or buildings and sky.
- Keep the original black-and-white version. Save the colorized image as a new file so the archival source remains unchanged.
- Avoid oversaturation. Many vintage photos look more convincing with restrained color than with extremely vivid saturation.

Conclusion
The best way to restore color in an old photograph depends on whether you value speed or control. Repairit Online is a practical choice for fast AI colorization and related photo restoration, while Photoshop is better when you need to correct specific colors manually or work from historical references. Whichever method you use, preserve the original black-and-white photo and treat automatically generated colors as an interpretation rather than proof of the scene's original colors.
FAQ
-
How can I restore color to an old black-and-white photo?
Use an AI photo colorizer for a fast automatic result, or use Photoshop's Colorize Neural Filter when you need more manual control. For badly faded or damaged originals, restore contrast and visible damage before judging the final colors. -
Can AI know the original colors in an old photograph?
No. AI can generate plausible colors from visual context, but it cannot know the exact historical color of clothing, vehicles, furniture, or scenery unless that information is available from another reference. -
How do I colorize an old photo in Photoshop?
Open the image, choose Filter > Neural Filters, enable Colorize, and review the automatic result. Use color focal points to correct specific areas, then output the result to a new layer or Smart Filter if you want to keep the edit non-destructive. -
Should I restore an old photo before colorizing it?
Yes when the image is badly faded, scratched, stained, blurry, or unevenly exposed. Cleaning those problems first gives the colorization tool clearer shapes and tonal information to work with. -
Which is better for old photo colorization: Repairit or Photoshop?
Repairit is better suited to fast automatic colorization with minimal setup. Photoshop is better when you need to manually correct individual regions, use reference colors, or integrate colorization into a larger editing workflow.