
Do you think it’s enough to be an expert in photography? I mean, even a seasoned DSLR user can’t guarantee a perfect photo on every occasion. Particularly, the chances of getting underexposed or dark images are always high.
But you don’t need to worry too much about them. Thanks to some advanced tools, it’s not even an issue anymore! In this article, we’ll discuss 6 software to fix underexposed photos. We’ll first introduce the tools and then give you a simple stepwise guide for using them. So why are we still waiting? Let’s get started.
In this article
Part 1. How We Tested and Picked Out All the Products Below
We tested various software on a Windows computer. This was done to make sure that the same system environment was maintained before testing. Then, using an actual underexposed photo, we evaluated each tool's performance, ease of use, and speed.
After a thorough examination, we selected the best options based on their ability to enhance the photo and their user-friendliness. This way, we ensured that our top picks offer both high-quality results and an approachable experience for users.
Out of the test process, we picked the best software to fix underexpressed photos. Among them, three software can be used to fix underexpressed photos manually.
On the other hand, one tool can do this job automatically with a single click. It is:
Then, two software can be used to fix underexposed photos online. They are
Now, let’s start with the tools that can be used to fix underexposed photos manually.
Part 2. Three Software to Fix Underexposed Photos Manually
First, we'll discuss three software that can help you fix your underexposed photos manually. We've included both the advantages and drawbacks of each tool. We've also prepared a step-by-step guide to fix underexposed photos with them.
The first tool is:

Adobe Photoshop is one of the most well-known photo editing tools. Whether you're a business owner or a professional designer, it provides a full feature set to improve your images. In our case, you can easily adjust the lighting of an image to fix underexpressed photos.
Moreover, the Generative Fill and Generative Expand features of Adobe Photoshop can add or remove content from your images. It provides a next-level control that is hard to match anywhere else. Additionally, the capabilities of Adobe Photoshop aren't just limited to underexposed image editing. You can also create animations and design layouts.

| Pros | Cons |
| Can create passport-sized or stamp-sized images. | Difficult interface for beginners. |
| Versatile in resizing images. | Not suitable for low-end PCs. |
| Advanced features for animations & graphic design. | Takes up a significant amount of storage space. |
| You can also transfer photos between different software. | Requires a monthly subscription fee, which starts at $20.99/month. |
Steps to Use Adobe Photoshop
Here is a stepwise guide to fix underexposed photos with Adobe Photoshop.
Step 1
Install Adobe Photoshop on your computer. Then launch it and import the underexposed image here.

Step 2
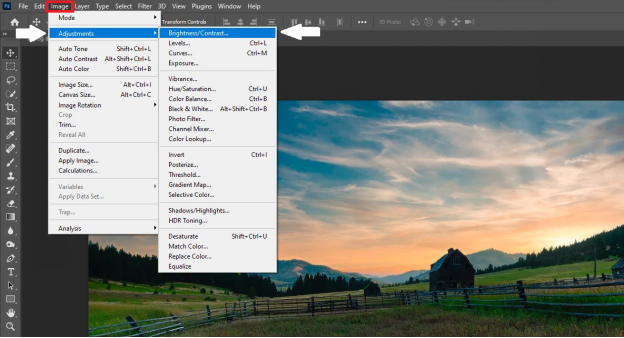
In the topmost toolbar, go to Image > Adjustments > Brightness/Contrast. Then, adjust the brightness and contrast levels as needed.
Step 3
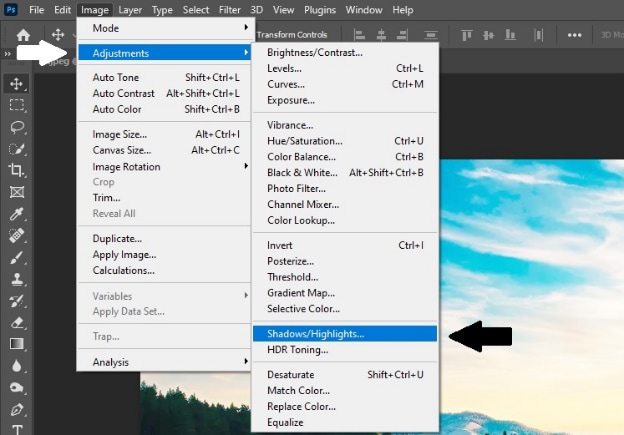
Next, go to Image > Adjustments > Shadows/Highlights. Now adjust the sliders until the darker areas appear as you'd like them to.
Step 4
Once you're satisfied with the adjustments, go to File > Save As. You can then save the modified image to your device.


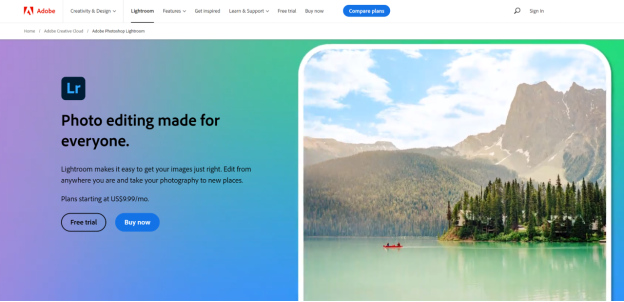
Adobe Lightroom is also designed for anyone interested in photography. However, the difference from Adobe Photoshop is that this tool provides less advanced features. On the good side, it’s light on the system and runs smoothly on any PC.
Moreover, you can use it on multiple platforms like desktop, mobile, or web. Users can easily adjust exposure, color, and other elements to fix underexpressed photos. Also, many presets allow for quicker editing by applying filters with a single click.
| Pros | Cons |
| Provides a powerful RAW image processor for correcting underexposed images. | The file management system is difficult to use. |
| Offers an extensive range of presets for quick editing. | It is not ideal for complicated adjustments that require high precision |
| Comes with a variety of filters & effects to enhance your images. | Its costs are high relative to the feature set it provides. |
| It’s easier to learn and use compared to Photoshop. |
Steps to Use Adobe Lightroom
Here's how you fix underexposed photos with Adobe Lightroom.
Step 1
Install Adobe Lightroom on your computer. Open it and import the underexpressed image that needs correction.
Step 2
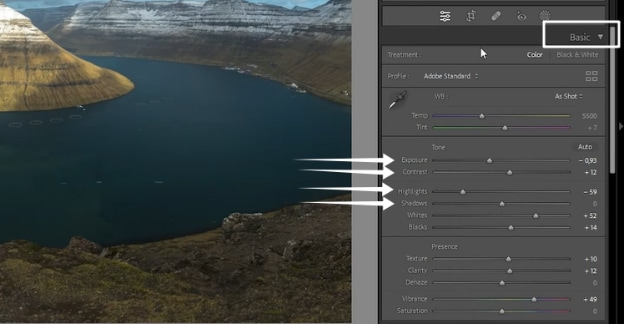
Now, you’ll see multiple options to adjust your image on the right side of your interface. Go to the “Basic” section and use the exposure slider to brighten your image. Then, adjust the Shadow, contrast, and highlights.
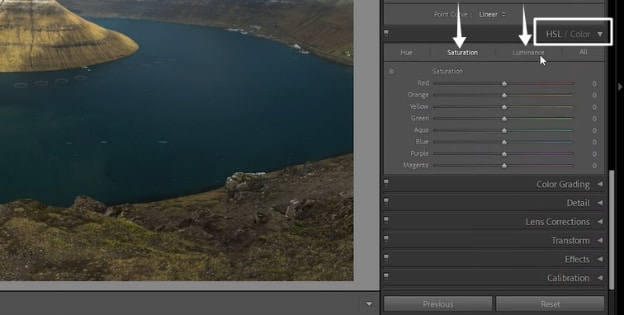
Step 3
Scroll down here and open the HSL/Color section. Here, changes the saturation of all the colors and adjust it according to your taste. Then, similarly adjust the luminance.
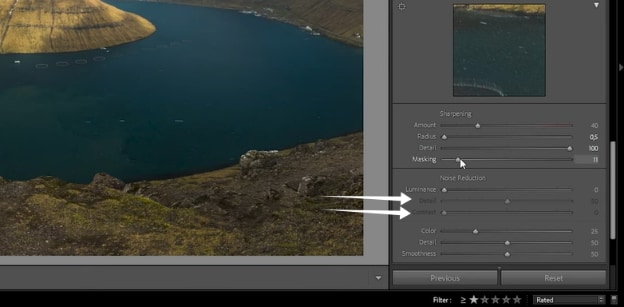
Step 4
If some areas of the image are still dark, head over to the Detail panel. Now use the Color slider to minimize any banding and also adjust the Noise Reduction settings.
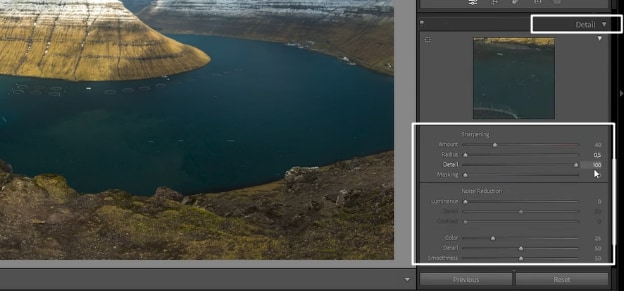
Step 5
Increase the Luminance control and fine-tune the Detail & contrast sliders to enhance clarity.
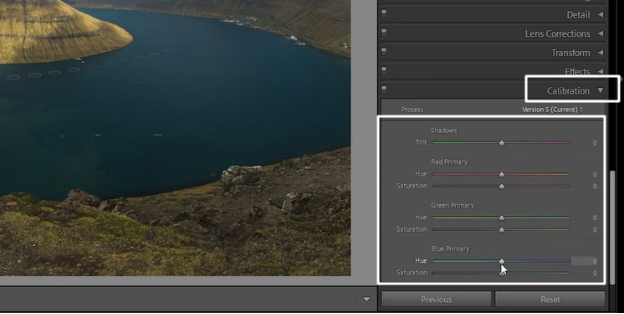
Step 6
Move down a bit again and open the Calibration section. Now, adjust the hue and saturation of your primary colors if you want.
Finally, save your edited photo if you are satisfied. If not, then play around until you get the best possible results, and then save your image.

PaintShop Pro is another powerful photo editing application that is available for Windows. It provides a versatile set of tools for editing photos and creating graphic designs.
With a focus on artificial intelligence, PaintShop Pro aims to make every photo the best it can be. Users also have access to other amazing features. These include AfterShot Lab for RAW file editing, various adjustment tools, as well as graphic design components.

| Pros | Cons |
| Offers powerful photo editing features at a lower cost than Adobe Photoshop. | The interface can be complex for beginners. |
| Also provides tutorials for better user guidance. | It may cause performance issues on your Windows system. |
| Have an automatic noise removal tool. | Limited to Windows operating systems. |
| Provides useful video effects. | |
| A single payment is offered. You don’t need to pay monthly subscriptions. |
Steps to Use PaintShop Pro
Follow this step-by-step guide to fix underexposed photos with PaintShop Pro.
Step 1
Download and install PaintShop Pro on your computer. Open the software and import your underexposed photo by clicking on "New Document." You can also use Ctrl + O as a hotkey.

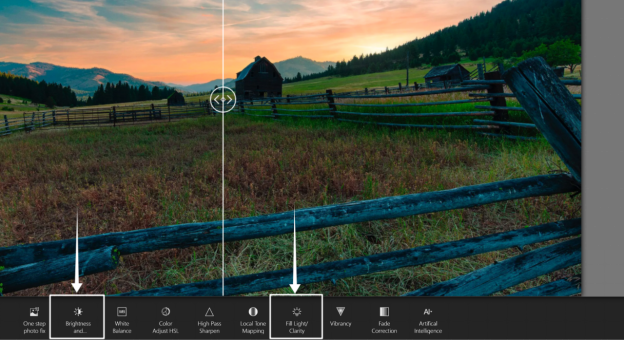
Step 2
In the bottom toolbar, use two options to fix an underexposed photo. The first is the Brightness/Contrast option, and the other is the Fill light/Clarify option.
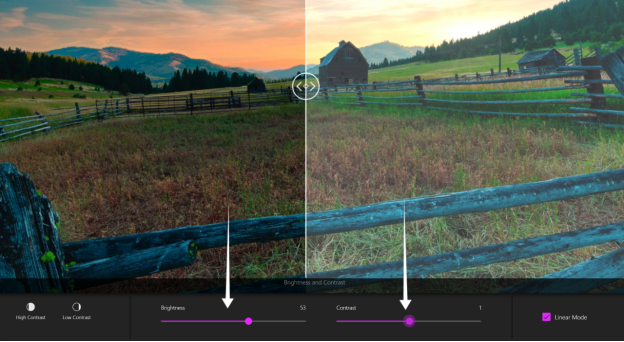
Step 3
Click on Brightness & Contrast and then move the sliders to adjust these settings.
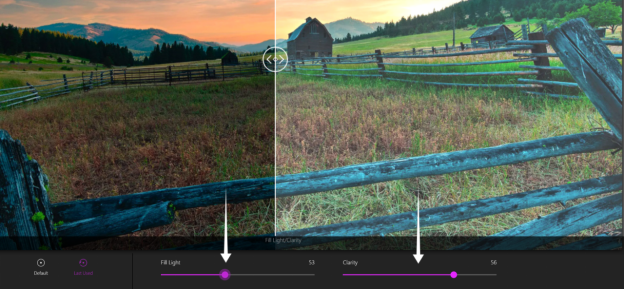
Step 4
Click on Fill Light and Clarify. Then, move the sliders to the left or right and adjust these settings.
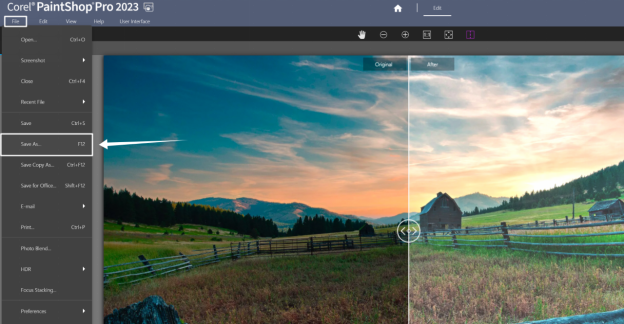
Step 5
Once you have edited your photo, you can have a look at it in the preview section. Then go to "File" at the top right corner. Now select "Save As" or use the F12 hotkey to save your adjusted image.
Now let’s make this process a bit more simple. We are now going to reveal a software that can automatically fix the underexpressed photo in a single click.
Part 3. Fix Underexposed Photos in 1-Click
Although the above tools are useful, you need to adjust every single aspect of the underexposed photo to fix it. Can’t we just fix our underexpressed photos in just a single click? Of course, we can!!! Wondershare Repairit can adjust all the aspects of your underexpressed photo to the perfect levels in just a single click.
Wondershare Repairit

Wondershare Repairit is an excellent software for dealing with various types of file issues. If you have videos, photos, audio files, or even emails that refuse to open or look distorted, just use Repairit.
Wondershare Repairit operates both online and on personal computers. Moreover, you can tackle issues across different formats and corruption scenarios.
Now, let’s look at the key features and stepwise guide of Wondershare Repairit.

Key Features of Wondershare Repairit
Here are the key features of Wondershare Repairit.
- Repairs various types of media files, including photos, videos, and audio.
- Repair photos of different formats such as JPG, PNG, CR3, CR2, NEF, NRW, and more.
- Works on multiple platforms, including PCs and online.
- Also supports data recovery from devices like SD cards, phones, and USB flash drives.
- There are no restrictions on file size or number.
- It can also recover unreadable, damaged, or deleted emails.
Steps to Use Wondershare Repairit
Here is the stepwise guide to fix your underexposed photos in just one click.
Step 1
Download and install Wondershare Repairit from the official website. Now, launch the tool.
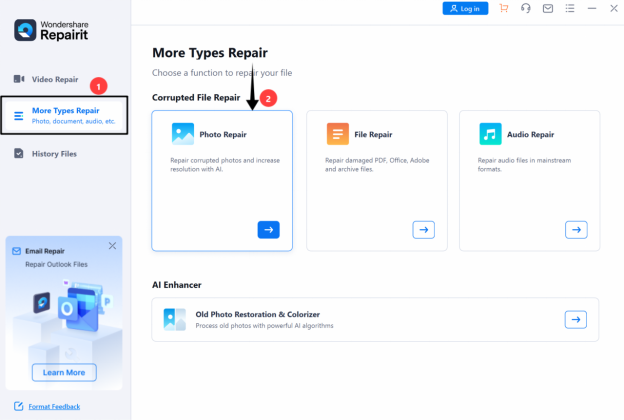
Step 2
Click on "More Types Repair" in the left vertical toolbar. After that, select 'Photo Repair' from the options on the left-hand side.
Step 3
Now click on the “Add” button and upload your underexpressed photo.

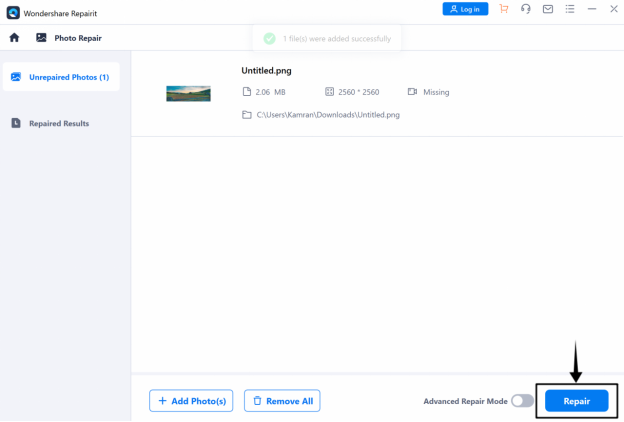
Step 4
When your photos are uploaded, their details will appear on the screen. Click on the “Repair” button now.
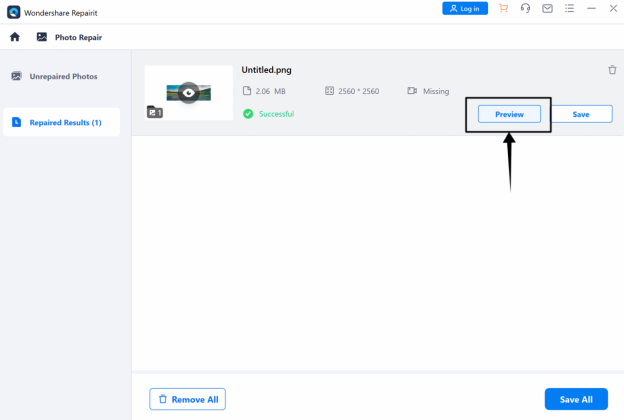
Step 5
Once the repair process is complete, a “Preview” button will appear. Click on this button to examine the quality of the repaired photos.
Step 6
If you're pleased with the results, hit the “Save” button to keep the repaired photos. If not, you can opt for the “Advanced Repair” function.
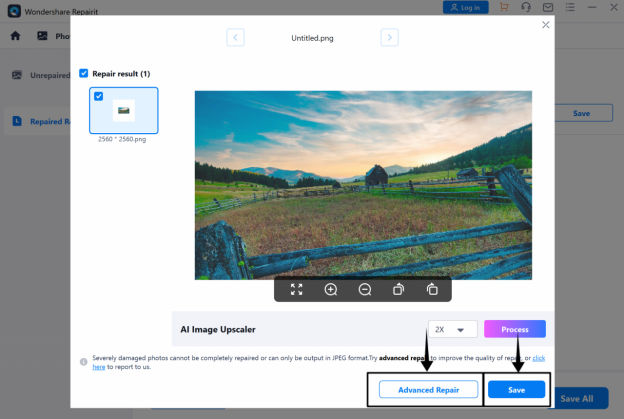
For the advanced repair, you will need to upload a sample photo taken with the same device and in the same format as the underexpressed photo.
But no matter which mode you use, Wondershare Repairit can be valuable software to fix underexpressed photos. Now, let’s move on to our last software.
Part 4. Best Online Software to Lighten Dark Photos
All the above software has a common thing in them. It’s that you first need to download them on your computer.
And that’s not something everyone wants!!! So, let’s discuss the two software that can fix underexpressed photos online.
Wondershare Repairit also provides an online tool for photo repair. This application specializes in sharpening image details, fixing corrupted files, and addressing the issue of underexposed pictures. It automated repair for a simple user experience. Moreover, the online tool also ensures the secure treatment of your uploaded photos.
| Pros | Cons |
| User-friendly interface. | After processing three photos, a paid subscription is needed. |
| Operates through any web browser. | |
| No privacy issues to worry about. | |
| Offers many solutions for different photo issues. |
Steps to Fix Underexposed Photos with Repairit Online
Here are the steps to fix underexposed photos with Repairit online.
Step 1
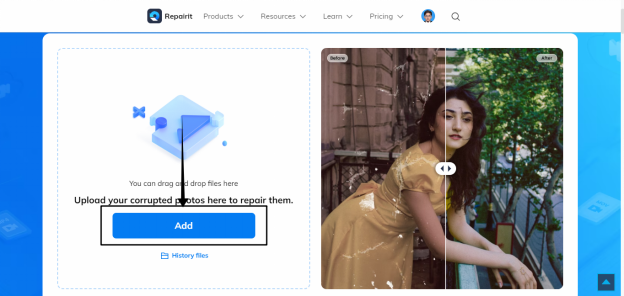
First, open Repairit Online on any browser. Then scroll down and click on the "Add" button on your screen.
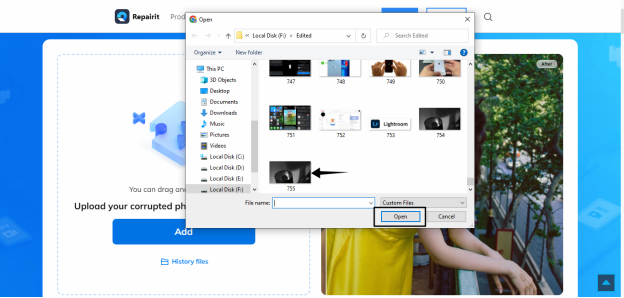
Step 2
Now browse your grained photo from the computer and select it. After that, click on the "Open" button.
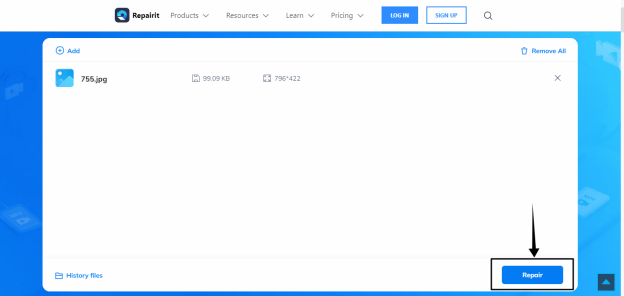
Step 3
When the photo is uploaded, click on the repair button. A repair process will automatically begin.
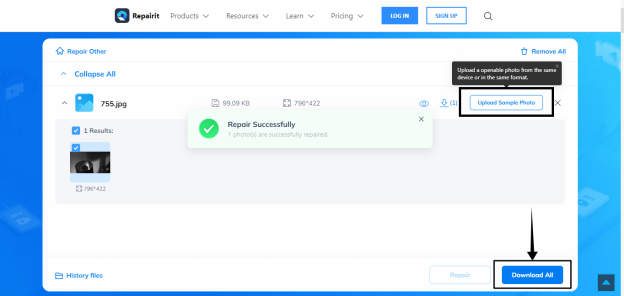
Step 4
Now, preview your repaired photo. If you think it's better, then click on the "Download All'' button. If not, then upload a sample picture in a similar format and click on repair again.
Now, let's move on to the next online tool.

With its generative AI features, Adobe Express is an excellent online option to fix underexpressed photos. Moreover, you can do a lot more than just lighten dark photos.
The software has a simple interface that is suitable for users of all experience levels. It offers free use forever, and there's no need for a credit card to start. Plus, Adobe Express can help in creating videos, PDFs, and various kinds of digital design work.

| Pros | Cons |
| No need for a credit card. | It may require a learning curve for users who are new to Adobe products. |
| A comprehensive suite of editing tools, including AI features. | |
| Built-in brand kit to keep your designs consistent. |
Steps to Use Adobe Express
Here's a stepwise guide to using Adobe Express.
Step 1
Visit the official Adobe Express website and sign up for a free account. You can also log in with your Google, Facebook, Apple, or any other Email account.

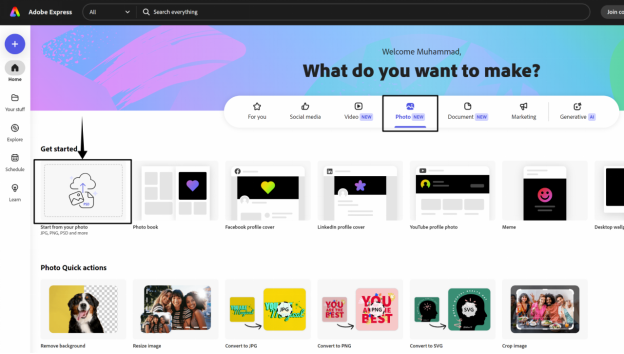
Step 2
Now, the Dashboard of Adobe Express will appear. From here, go to the photos section and click on “Start from your photo.” After that, upload your underexpressed photo from your device.
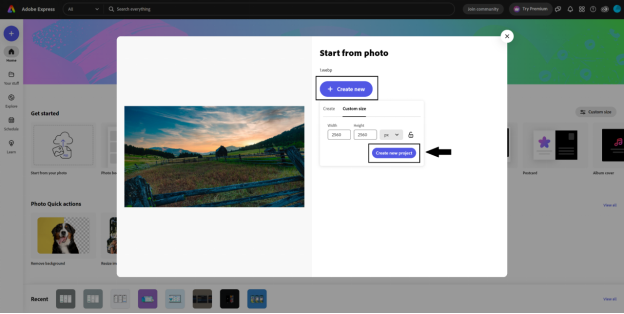
Step 3
Now click on the “Create New” button. You can either use some premade template or create a new project with a custom size. Go with the Custom Size option and create a new project.
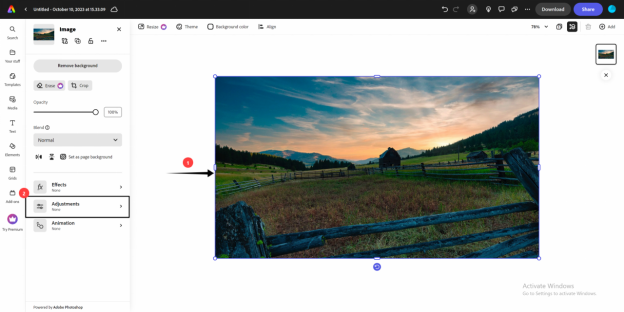
Step 4
When a new project is created, click on your image to select it. Then, go to the adjustments settings on the left side of your interface.
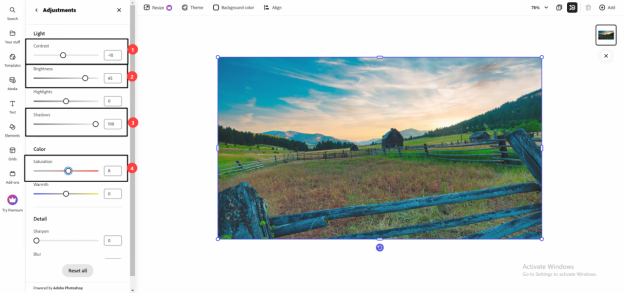
Step 5
Use the built-in tools to adjust the brightness, contrast, shadow, and saturation to your liking. Preview your edited photo and try a different combination of these settings to get a perfect photo.
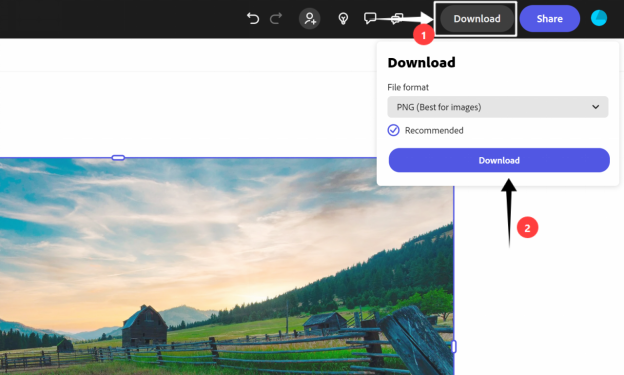
Step 6
Now, go to the “Download” button located in the top right corner. You can also select the format for your photo. Then click on “Download” again and save your photo.
Conclusion
Even for seasoned photographers, getting that perfect shot isn't always simple. This guide has shown you 6 Software to Fix Underexposed Photos. We have discussed the pros, cons, and step-by-step guides for each of these tools. We recommend Wondershare Repairit for a quick fix for underexposed images. The software automatically applies the most suitable adjustments in just one click. Moreover, you can also repair corrupted media files with Repairit.
