

Have you ever been in a situation where your memorable photos disappear from your SD card? Maybe you couldn't open the photos or see an error message? Well, you are not alone in this dilemma!
In recent years, SD card has become popular to expand the storage capacity of our smart devices. Many of us store a lot of data, especially media, in our SD cards.
However, it can be a trouble sometimes. SD cards can develop storage issues, like bad sectors, that can corrupt your photos. If you are experiencing any issues like this, you are at the right place.
In this article, we will uncover a few methods to rescue photos from bad sectors. But before starting, let's find out why bad sectors occur.
In this article
-
- Method 1. Use Photo Repair Tool - Wondershare Repairit
- Why Repairit?
- Steps to Use Repairit to Rescue Photos from Bad Sectors
- Method 2. Run the Check Disk Utility on Your Computer
- Method 3. Restore from Back Up
- Method 4. Rescue Photos From Bad Sectors Using Command
- Method 5. Reinstall the Drivers
- Method 6. Fix Bad Sectors Using Windows Troubleshooter
Part 1. Why Do Bad Sectors Occur on SD Cards?
Before jumping to the solutions of bad sector photos, we need to understand why it occurs. There can be various reasons, but Let's shed some light on the common ones.

Reasons Why Bad Sectors Occur
Here are some of the common reasons why bad sectors occur:
- Virus Attacks
Viruses are known as digital troublemakers. These malicious entities can corrupt your SD card, resulting in bad sectors. They can make your data unreadable and inaccessible.
- Power Failure
Bad sectors may occur due to power failures, like abrupt power cuts or shutdowns. When your device doesn't have enough power to save data, it can lead to bad sectors.
- Physical Damage
Bad sectors can also be caused by physical damage to your storage device. It can harm the sectors on your device, making data unreadable.
- Vast Usage
Prolonged usage of your storage device can result in bad sectors. The constant reading and writing of data wear down the sectors, making them more prone to becoming bad.
Now that we understand the reasons why bad sectors occur, let’s find out why they corrupt the photos.
Reasons Why Photos Get Corrupted in the Bad Sectors
If you've ever encountered corrupted photos, many reasons could be behind it. Let's explore them!
- Lack of Loading Data
Sometimes, your photos might refuse to load, leaving you with frustration. This can occur due to issues related to the device's firmware or the application you're using.
- Bad Sectors
If a sector where your photos are stored becomes corrupted, it can damage your data. You may face errors like "Cannot open JPG files with Windows photo viewer," photo grainy, etc.
- Logical Drive Errors
In some cases, your hard drive might encounter problems during initialization, booting, or face other logical issues. These errors can make accessing your pictures a challenge.
- Other Issues
There are a few more hiccups that can lead to photo corruption. These include missing headers, incompatible formats, or problems with the application you're using.
Now that we know the reasons for photo corruption Let's learn how to rescue photos from bad sectors.
Part 2. How To Rescue Photos from Bad Sectors
If you want to rescue your photos from bad sectors, make sure to follow the below methods. We break the processes into smaller steps so that you can easily grasp the concept.
Method 1. Use Photo Repair Tool - Wondershare Repairit
If you want a reliable and effective tool to fix your corrupted photos, let us introduce you to Repairit! It is a powerful developed by Wondershare to help you rescue photos from bad sectors.
Now, you don't need to visit tech experts to get the job done. Repairit will allow you to fix your photos in a few clicks. Let's explore what else Repairit has to offer us!
Why Repairit?
Here are the features that make Repairit the best app to rescue photos from bad sectors:
- Repairit can fix various image issues like pixelation, gray areas, or images that won't open.
- It can repair photos of a wide range of formats, such as JPG, JPEG, PNG, CR3, CR2, NEF, NRW, and more.
- You can repair up to 300 photos every month, with each photo being as large as 300MB.
- Repair severely damaged or corrupted photos from SD cards, smartphones, cameras, USB flash drives, and more.
- Repairit works on both Windows PCs and Mac OS, and it even allows easy sharing between your computer and mobile devices.
The amazing features of Repairit must have captivated you. Now, you must be wondering how to use this amazing tool. Let's find out!
Steps to Use Repairit to Rescue Photos from Bad Sectors
Before starting, download and install the Repairit Software on your computer. Then, follow the instructions given below:
Step 1: Add Corrupted Photos Into Wondershare Repairit
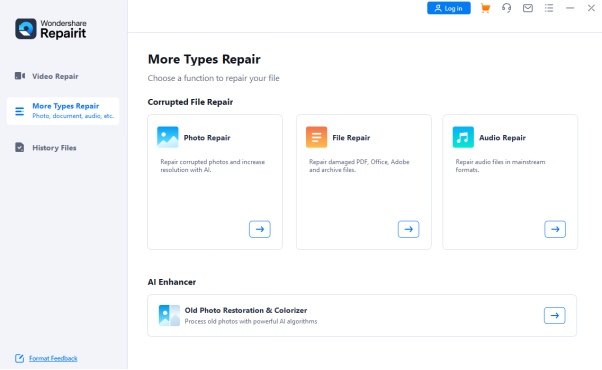
Once the installation is completed, launch the Repairit software. Click on "More Types Repair," then click "Photo Repair" or "File Repair" to repair your corrupted photos.
Step 2: Repair via Quick Repair Mode
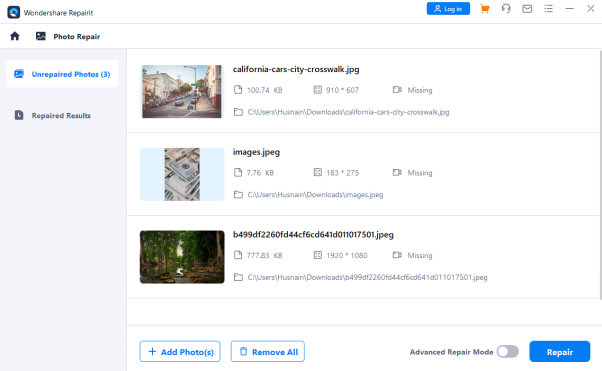
Click "Add" to add the photo. Once the photo is added, you will see a "Repair" button. Click it and wait as Wondershare Repairit starts to repair the corrupted photo via Quick Repair.
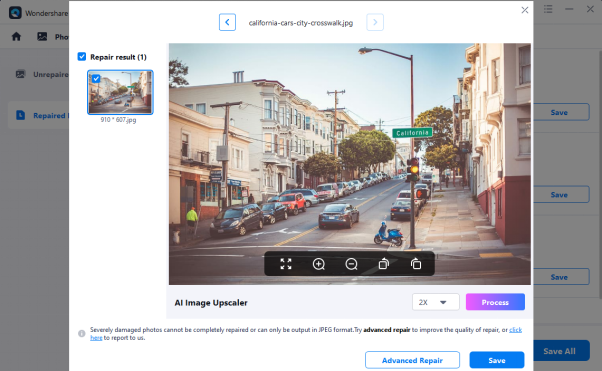
Step 3: Preview the Photos
After the repair process, click on the "Preview" button and see if your photo is fixed. If not, then you need to perform an advanced repair mode. Click the "Advanced Repair" button.
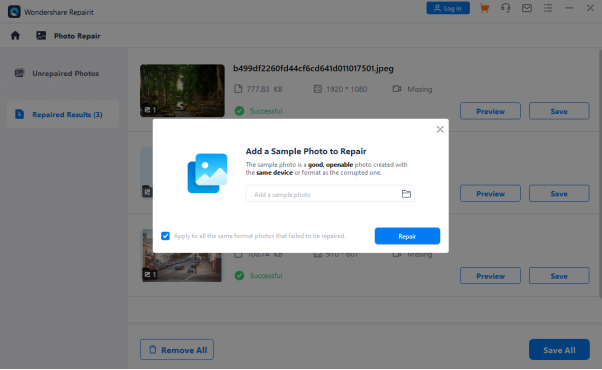
Step 4: Repair via Advanced Repair Mode
After clicking the Advanced Repair button, you will be asked to upload a sample image, upload it, and click “Repair.” The sample image should be in the same format.
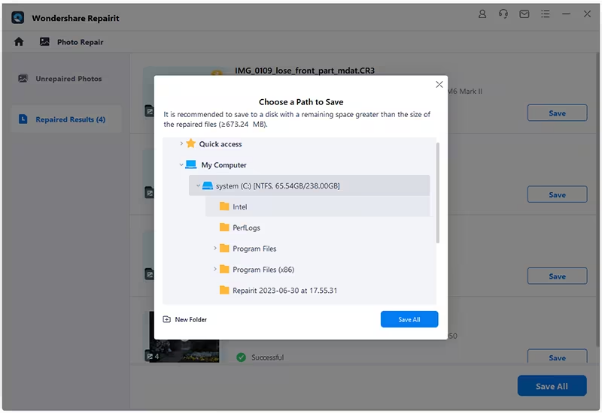
Step 5: Save the Repaired Photos
Repairit will repair your photos. Finally, to save the repaired photos on your computer, select the photo and click "Save." You can also "Save all" at once.
However, if you can’t perform this method for any reason, you can try the next one.
Method 2. Run the Check Disk Utility on Your Computer
Windows can sometimes encounter issues like bad sectors or system failures. The good news is that Windows comes with a built-in tool to handle many of these problems. You can use the Check Disk Utility on your Windows system to try and repair your corrupted photos.
Steps to Run the Check Disk Utility
To perform this, you can follow the instructions given below:
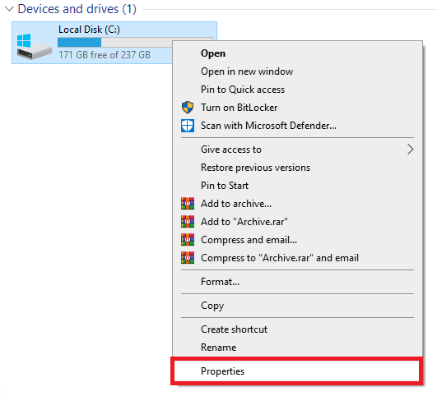
Step 1: Navigate to "This PC" or "My Computer" and select the disc you want to repair.
Step 2: Right-click on the disc and then click "Properties."
Step 3: Now, go to the Tools section and click the "Check" button.
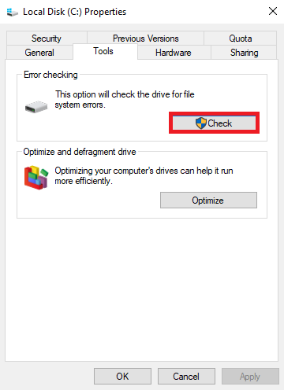
It will perform a scan and fix the corrupted files. You can restart your computer and check. If this method doesn’t work, there’s another one for you.
Method 3. Restore from Back Up
If you have a backup of your data, fixing photos damaged by bad sectors is straightforward. For example, if you have a backup on an external hard drive, connect it to your computer to restore your photos. You can also access your photos from cloud-based storage.
If you use Windows File History for data backup, you can use it to recover photos from bad sectors. Connect the backup disk, then go to your computer's Settings > Update & Security > Backup. From there, select your drive from the Back up Using File History section.
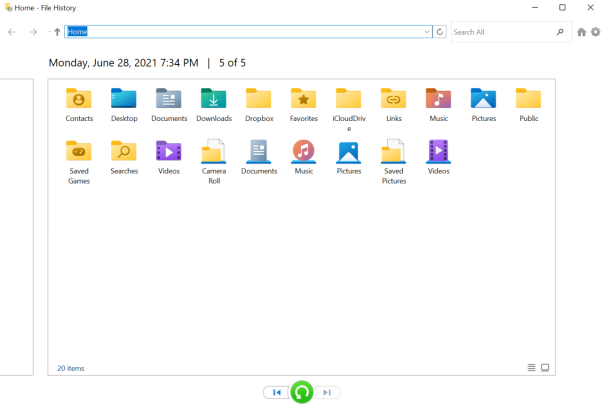
In this view, you'll find your backup data arranged chronologically. To restore your missing photos, search for them in the folders. Once you've found them, select the photos you want and click the restore icon. This action will save your photos back to your computer's storage.
If you are unable to do it, you can try the next method.
Method 4. Rescue Photos From Bad Sectors Using Command
CHKDSK, an inbuilt Windows utility command, can easily fix bad sectors on an SD card. To perform it, you can follow the instructions given below:
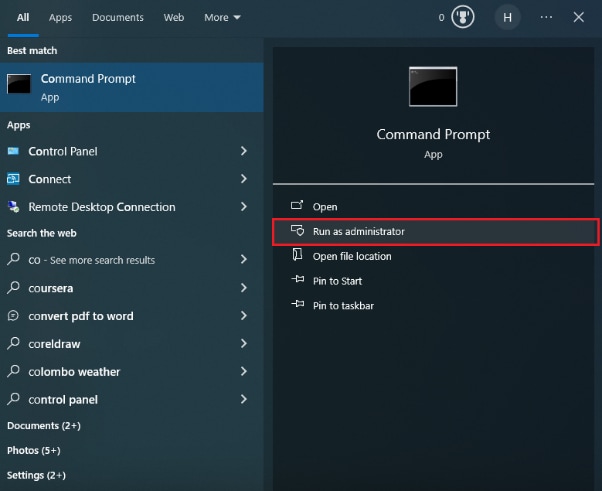
Step 1: Open Command Prompt as an administrator.
Step 2: Now, type the command "chkdsk" with the drive letter of the SD Card (such as E: or H:) and the "/r /f" parameters.
Step 3: Hit enter and wait for it to repair if there are any bad sectors or logical errors on your SD card.
If it doesn’t work, you need to perform the next method.
Method 5. Reinstall the Drivers
If, after running the CHKDSK command, your PC can't detect the SD card, you may need to reinstall the drivers. Here are the steps to do that:
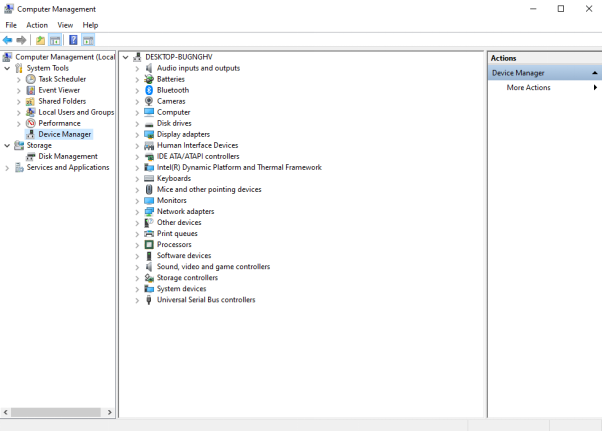
Step 1: On the desktop, right-click on "This PC" and then click "Manage" to open computer management.
Step 2: Click the "Device Manager" option in the left pane of the window.
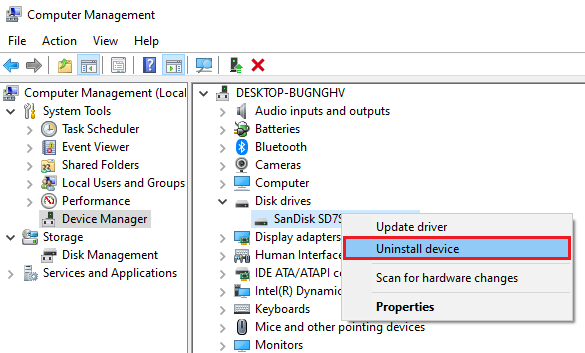
Step 3: double-click on "Disk drives" to open it. Then, right-click on your SD card's name.

Step 4: Select "Uninstall" and then "OK."
Step 5: Now, remove the SD card and restart your computer.
Step 6: Then, reconnect your SD card to the computer. Your computer can now detect the SD card.
Many users claim that this method works. If it wasn't for you, try the next one.
Method 6. Fix Bad Sectors Using Windows Troubleshooter
To fix an SD card with bad sectors, you can use the Windows Troubleshooter. This feature is designed to resolve hardware and driver problems. Here's how to repair bad sectors on an SD card:
Step 1: First, connect the SD card to your computer via any storage device or card reader.
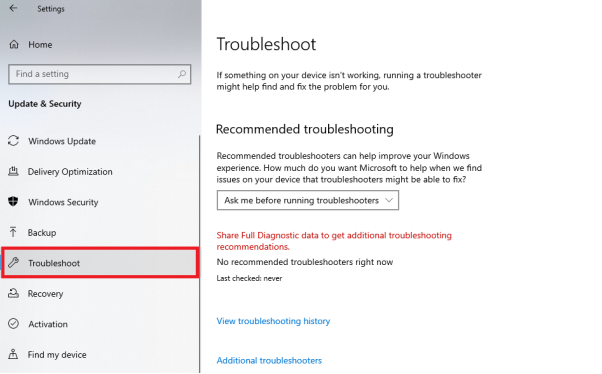
Step 2: Now, to troubleshoot, go to Start > Settings > Update & Security > Troubleshoot.
Step 3: Click Run the troubleshooter after selecting Hardware and Devices.
Step 4: Wait for the process to complete before restarting your computer.
After trying this method, the SD card problem should be fixed. However, don’t miss our bonus tip given in the next section.
Part 3. Effective Tips to Protect Your SD Card in the Long Run
If you keep your media in your SD card, it's important to keep it safe from the bad sectors. There are various tips that you can follow to protect your SD card in the long run. These tips are as follows:
- Handle with Care: Treat your SD card with care and avoid touching the metal contacts. Hold it by the edges to prevent any damage or smudges.
- Keep it Clean: Regularly clean the SD card to remove any dust or debris. Use a soft, lint-free cloth or an SD card cleaning kit to wipe the surface gently.
- Avoid Extreme Temperatures: SD cards are sensitive to temperature fluctuations. Don't expose them to extreme heat or cold, as it can cause damage or data corruption. Store them in a cool, dry place.
- Eject Properly: Always eject the SD card properly from your device before removing it. This ensures that any ongoing read/write processes are completed, reducing the risk of data loss or card corruption.
- Protect from Water and Moisture: Keep your SD card away from water and moisture. If it accidentally gets wet, remove it immediately and let it dry completely before using it again.
- Use a Protective Case: Invest in a sturdy and reliable SD card case or holder to protect your card from physical damage, dust, and accidental drops.
- Avoid Magnetic Fields: Keep your SD card away from strong magnetic fields, as they can erase or corrupt the data stored on the card.
- Regularly Backup Data: Create backups of your important data stored on the SD card. This ensures that even if the card gets damaged or lost, you still have a copy of your valuable files.
- Scan for Malware: Use reliable antivirus software to scan your SD card for any potential malware or viruses. This helps protect your data and prevents any malicious software from infecting your card.
- Update Firmware: Make sure to keep the firmware of your SD card up to date. Firmware Updates may include bug fixes and performance improvements, enhancing the overall reliability and security of your card.
Conclusion
In wrapping up this guide on how to rescue photos from bad sectors, we've covered all the essentials. We have explored the causes and also the methods to help you fix the corrupted photos. We encourage you to give these methods a try.
However, if you find that the issue lingers, consider using a helpful tool like Wondershare Repairit. Don't let bad sectors steal your cherished moments – take action today and restore your memories with ease!
