

In today’s digital age, downloading images from the internet has become fairly straightforward. However, this ease of access often brings us face-to-face with various image file types. Other image formats, like WEBP, might only be universally compatible with some applications and use cases. The WEBP format, despite its efficiency in web environments, often poses challenges due to its limited compatibility.
Recognizing this, the article aims to guide you through the simple yet essential process of converting WEBP images to JPG format. After all, JPG is a more accepted image format across many applications. This conversion ensures that your images are versatile and ready for broader uses.
In this article
Part 1. What Is the WEBP Image Format?
The WEBP image format, developed by Google, represents a modern leap in digital imagery. As a successor to traditional formats like JPEG and PNG, WEBP was designed to provide superior compression and quality characteristics. What sets WEBP apart is its ability to reduce file sizes significantly. This is done without compromising the visual quality of the image.

WEBP’s efficiency makes it particularly well-suited for the web, where quick loading times and efficient data usage are essential. This format is widely used in web development, as it helps websites load faster. It reduces the amount of data that needs to be transferred. Google platforms, including Chrome and various Google services, often use WEBP.
Additionally, many contemporary web browsers and website content management systems support WEBP due to its efficiency and quality. However, despite these advantages, WEBP’s compatibility with software outside the web environment, such as photo editors or some older web browsers, can be limited. This is why it’s essential to convert WEBP images to JPG.
Part 2. How To Convert WEBP to JPG Using Windows PC
Converting WEBP images to JPG format on a Windows PC is straightforward. Paint is one of the simplest methods involving a tool that’s been a staple of the Windows operating system for decades. This essential graphic software is available in all versions of Windows. It also offers an uncomplicated solution for this conversion task.
To use Paint as a converter, follow the steps below:
Step 1: First, navigate to the folder containing your WEBP image. Right-click on the image file and select Open with, then choose Paint from the list of programs. If Paint is not visible immediately, click Choose another app and find it there.
Step 2: Once the image is open in Paint, click on the File menu in the upper left corner. In the drop-down menu, hover over Save as. You will see several file format options.
Step 3: Among the different formats, select JPEG picture. This will prompt you to save the image in a new format. Please choose your desired location for the file, give it a name, and ensure the Save as type is set to JPEG.

Step 4: After you’ve named your file and selected JPEG as the format, click Save. Your image will be converted from WEBP to JPG and saved in your selected location.
Part 3. How To Convert WEBP to JPG Using macOS
For MacOS users, converting WEBP images to JPG format is equally straightforward, with the operating system offering a built-in solution that doesn’t require any additional software. This method utilizes the Finder’s Quick Actions feature, a convenient tool for handling various file operations directly from the Finder window.
Here are the steps for WEBP image to JPG conversion in MacOS:
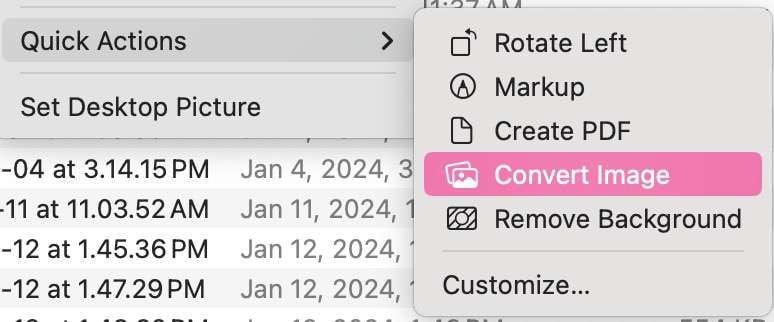
Step 1: Ensure that Quick Actions are set up for image conversion. You can do this by going to System Preferences > Extensions > Finder if not already configured. Here, check that the box for “Convert Image” is selected. This will enable image conversion options in Quick Actions.
Step 2: Start by navigating to the location of the WEBP file using Finder. It is the default file management system on MacOS. It allows you to browse and organize your files effortlessly.
Step 3: Right-click (or Control-click) on the WEBP image file. In the context menu, hover over Quick Actions. You should see an option for Convert Image. Be sure to choose JPG/JPEG on the appearing menu.
Part 4. How To Convert WEBP to JPG Using Android
Android users often encounter WEBP images, particularly when downloading pictures from the internet or web-based applications. While the Android ecosystem is known for its versatility and customizability, converting WEBP files to the JPG format can sometimes be more confusing than on a desktop OS. However, both built-in and third-party solutions are available for this task.
Converting WEBP to JPG Using Google Photos
Most Android devices come with Google Photos pre-installed. It’s a convenient tool for image conversion. Start by opening the Google Photos and locating the WEBP image you wish to convert.
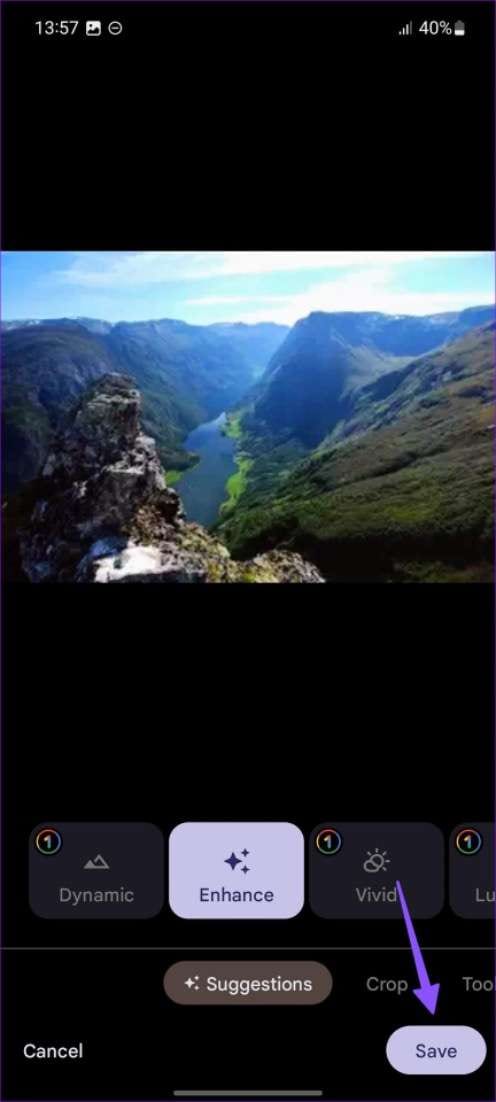
Open the image, then tap on the Edit icon (usually represented by a pencil). Make a minor edit – even just slightly adjusting the brightness will do. After editing, tap on Save. Google Photos will automatically save the edited image as a JPG file in your gallery.
You can check the format of the saved image by looking at its details in your gallery or file manager. It should now be saved in JPG format.
Using Third-Party Apps
If you prefer a more direct approach or do not use Google Photos, numerous third-party apps are available on the Google Play Store for converting WEBP images to JPG.
Open the Google Play Store and search for “WEBP to JPG converter.” You will find a variety of apps offering this service. Look for an app with good reviews and verify its permissions to ensure it’s safe. Apps like “File Converter” or “Image Converter” are popular.
Download and open the chosen app. The process typically involves uploading the WEBP file, selecting JPG as the output format, and then tapping a button to convert. The app will then save the JPG file to your device.
Part 5. How To Convert WEBP to JPG Using iOS
On iOS, dealing with various image formats, including WEBP, is common for users who frequently download or receive images in different messaging apps. Of course, iOS is known for its robust and user-friendly interface. However, not everyone may know about its ability to convert WEBP images to JPG.
Converting WEBP to JPG Using Files
The process is straightforward with the Files app (available in iOS 11 and later versions). Additionally, third-party apps offer alternative solutions for those seeking more options. Here’s how you can do it:
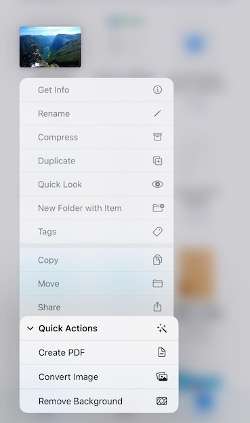
Step 1: Open the Files app on your iOS device. Navigate to the folder where your WEBP image is stored.
Step 2: Long-press or use 3D touch to bring out a menu. Tap on Quick Actions > Convert Image. Then, follow the prompts for the JPEG file format.
Using Third-Party Apps
Alternatively, the App Store provides several third-party applications tailored for those needing a direct conversion method. Search the App Store using terms like “WEBP to JPG converter.” You’ll find a variety of apps designed for this specific task.
Choose an app with positive reviews and check its privacy policy to ensure it’s secure and respects your data. Popular apps like “The Image Converter” often have high ratings and reliability.
After downloading, open the app and follow the instructions to upload your WEBP file. Select JPG as the output format and initiate the conversion. The app will then save the converted JPG image to your Camera Roll or a designated folder.
Bonus: How To Repair Corrupted Image Files
While the methods above are effective for converting WEBP to JPG, there are instances where you might encounter difficulties due to corrupted image files. This can be a significant hurdle, especially if the images hold sentimental or professional value.
In such scenarios, the best way is to use a dedicated file-repairing tool. These tools are essential for situations where corruption occurs during conversion and also serve as a reliable resource for repairing images and other file types in general.
Introducing Wondershare Reparit
Wondershare Repairit emerges as a robust solution in photo or file repairing. This software is designed to tackle various file corruption issues. It’s a valuable asset for personal and professional use. Here are some of its key features:
- Versatile repair capabilities. Repairit can fix a variety of file formats, including photos, videos, and documents. This makes it an all-in-one tool for different repair needs.
- Support for multiple file types. It supports popular image formats like JPG, PNG, and even RAW files from various camera brands, ensuring comprehensive coverage.
- Advanced technology. Leveraging advanced algorithms and AI, Repairit can restore corrupted files to their original state.
A standout feature of Wondershare Repairit is its dedicated image repair tool. This feature is specifically designed to address issues in corrupted photos, restoring them without compromising their original quality. Follow the steps below to use it:
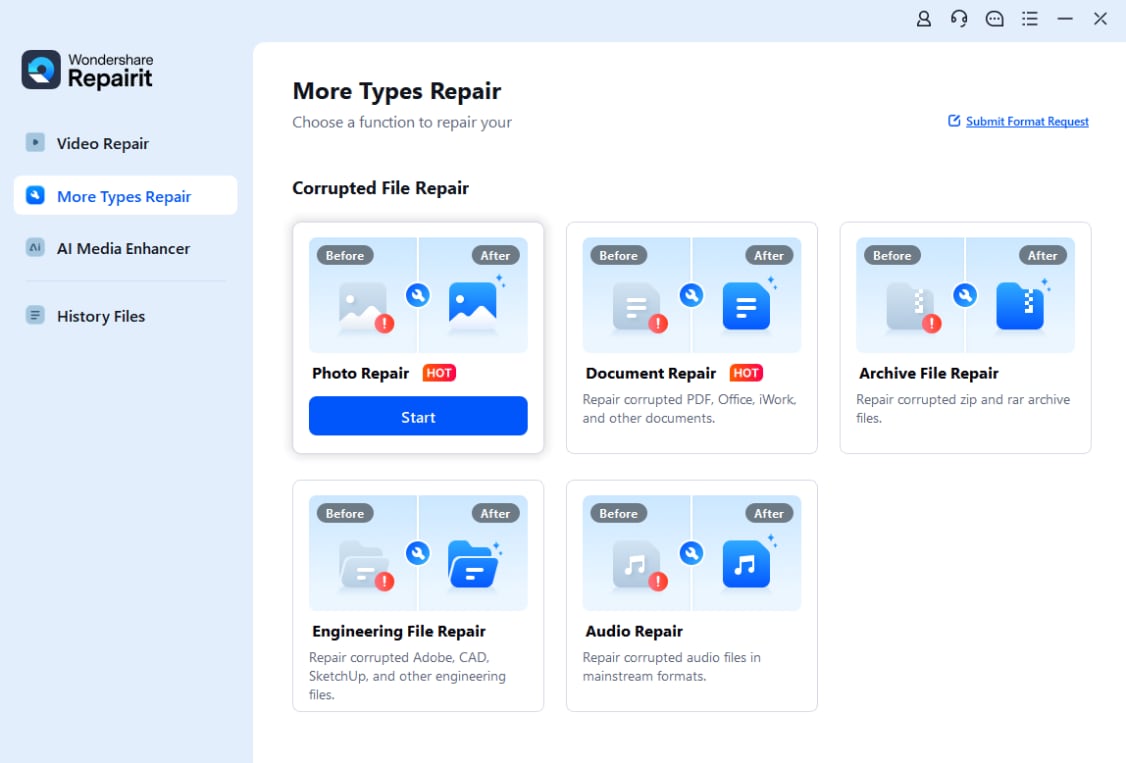
Step 1: First, download and install Wondershare Repairit on your computer. Launch the program.
Step 2: Select the Photo Repair option to begin the repair process.
Step 3: Once in the Photo Repair section, upload the corrupted images you wish to repair. Repairit allows you to add multiple files simultaneously, making it efficient for bulk repairs.

Step 4: Repairit uses AI-driven algorithms to analyze and restore damaged photos after uploading. This process is automated, requiring minimal input from the user. Upon completion of the repair process, you can preview the results to ensure the quality and integrity of the restored images.

Conclusion
In conclusion, converting a WEBP image to a JPG picture is straightforward whether you’re using a Windows PC, MacOS, Android, or iOS device. You’ve explored various methods to achieve this, ensuring your images are compatible with multiple applications and platforms. While converting formats is helpful, it’s always preferable to download pictures in JPG format initially to prevent potential quality loss.
For those instances where you encounter corrupted files or need to repair images post-conversion, Wondershare Repairit is an excellent tool, offering robust features to restore your valuable images effectively. Remember these tips and tools to manage your digital image library seamlessly.
