
Have you ever taken a photo, and the colors didn't look quite right? Maybe your picture had an overly warm, cool, or bluish tint, leaving you puzzled. This happens when your camera's white balance settings are not quite on point.
When working with IR cameras, white balance can be a common issue. Fortunately, many cameras allow you to adjust this setting before taking pictures. However, if your camera has a limited white balance range, it might result in photos with an incorrect white balance.
To fix white balance, you can adjust the white balance settings before taking photos, or you can use the DNG profile editor. Moreover, you can use Adobe Camera Raw for editing or converting your raw files to DNG format. Let's explore how to do all this!
In this article
Part 1. Overview of White Balance on DNG
Before jumping to the overview of DNG and white balance, let's understand what is meant by RAW files. Because they play an essential role in photography and photo editing. So, the RAW images are usually known as digital negatives. These images are the unprocessed data that you get from the camera sensor.
But keep in mind that not all software can handle RAW files because they're linked to specific camera and sensor manufacturers. These files preserve the original picture details, such as color and dynamic range. Now that you are aware of the RAW files, we can move forward.
What is DNG?
DNG is a type of RAW image file used in Adobe Photoshop. It was made to store image data in a format that works with many applications. While Adobe created DNG to support its software, some camera makers like Hasselblad, Pentax, and Leica also use DNG as their standard RAW image format.
What is Meant by White Balance?
White balance is like adjusting colors to make them look natural, like how you see things with your eyes. Cameras can't automatically capture and get the color temperature right. You have to set it manually before taking a picture.
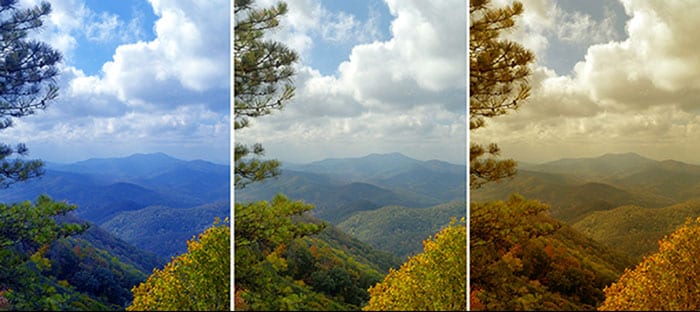
In the photo above, different white balance settings were used, and the results look quite different. If you pay close attention, one of them looks the most natural. Setting the white balance to "Daylight" helps correct the lighting effect of sunlight. But it might make the image a bit yellowish. "Cloudy" and "Shadow" settings are similar to "Auto" but a bit warmer in tone.
Using "Tungsten" for outdoor shots isn't recommended, as it can make the colors look completely off. So, if you want to know how to fix white balance in DNG images, we'll cover all the methods to keep your image quality intact.
Part 2. Methods to Fix White Balance on DNG
If you want your photos to look their best without any color issues, make sure to follow the below methods. They include how to fix white balance on DNG files, so take your time and get it right. Your pictures will thank you for it!
Method 1. Convert the Image Format
The first thing that you can do to fix white balance is convert your camera RAW file. You can convert it to DNG, and the best Software to do the job is Adobe DNG Converter. Once you register with Adobe Labs, you will be able to download the Software for free. The good thing is that it is available for both PC and Mac.
Moreover, you can also use Lightroom to export images in DNG format. It's important to note that DNG is an open-source RAW file. So, if your old version of Adobe Camera RAW is not compatible with your files, you can convert them to DNG. This way won't require you to upgrade the application.
Method 2. Adjust the White Balance Setting Before Shooting
The other thing that you can do to fix white balance is change your camera settings before capturing pictures. You can do it by following the below steps:
Step 1: Locate your camera's white balance (WB) button; most cameras have one.
Step 2: Press the WB button to access the white balance settings on the display screen.

Step 3: Choose the custom white balance setting for natural-looking images. This option is usually available in the display menu or camera menu.
Step 4: If it's in the menu, navigate to the "White Balance" " option.
Step 5: Press the " "SE" button to select it.
Step 6: Use the camera's thumbwheel to display the White Balance icon on the screen.
In this way, you can set the white balance to capture pictures with amazing colors. Let’s see how you can make it happen in Adobe Camera Raw.
Method 3. How to Edit the Photo in Adobe Camera Raw
You can also fix white balance of pictures in Adobe Camera Raw. Here are the steps that you can follow to make it happen:
Step 1: Open the RAW image in Adobe Camera RAW.
Step 2: In the top menu, locate the White Balance Tool.
Step 3: Select the eyedropper tool within Adobe Camera Raw.
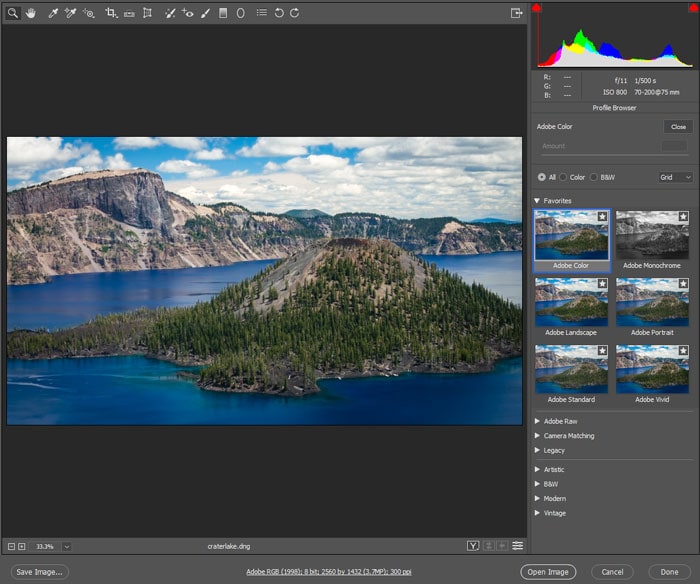
Step 4: Click on a gray area in your image.
Step 5: The settings will then be applied to adjust the white balance, and this method can also be used for color grading photos.
If you are unable to edit the photo in Adobe Camera Raw, you can give a try to the next method.
Method 4. How To Use the DNG Profile Editor
DNG Profile Editor is a photo editing software that is available for free. You can download it on your PC before you can continue with the editing process. Once it's all set and operational, you can follow the below steps:
Step 1: Open the DNG image you want to edit with the DNG Profile Editor.
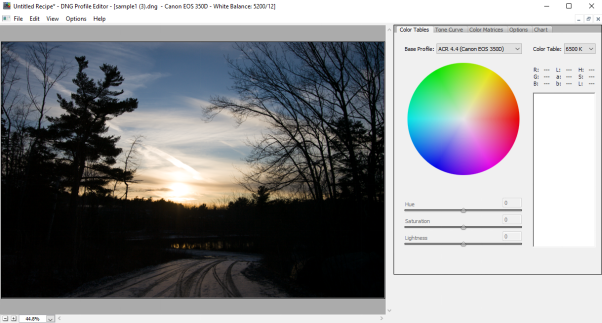
Step 2: In the application, go to the "Color Metrics" tab and select "White Balance Calibration." Set the temperature to -100 or as per your preference.
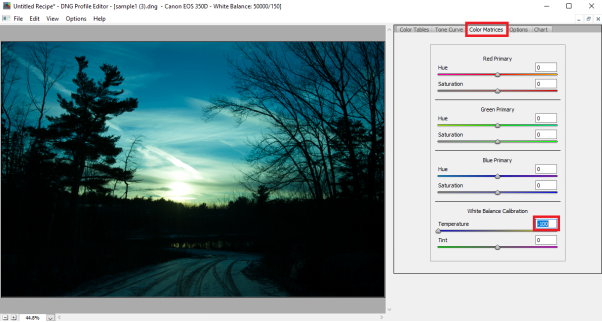
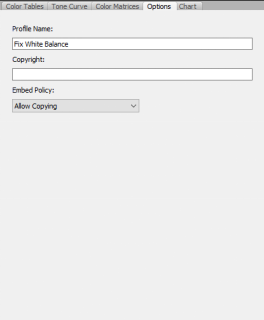
Step 3: Next, go to the "Options" section, located near the "Color Metrics" tab, and name your profile for easy reference.
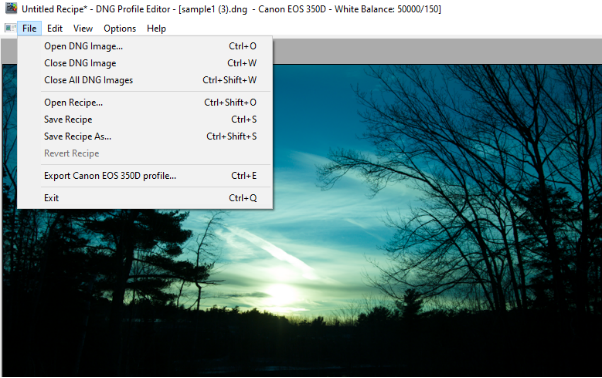
Step 4: After naming your profile, click "File" in the top left corner of the DNG Profile Editor.
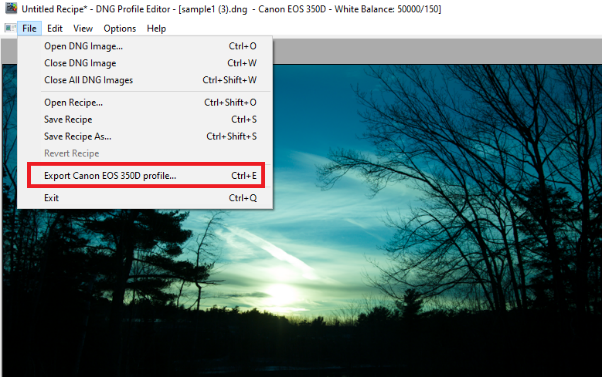
Step 5: Under the "File" tab, select "Export profile." Don't change the "save directory" as the program will choose the right one for your profile.
Step 6: Do not save the recipe; instead, close the program. This is a one-time process for each camera.
Step 7: If you've fixed the white balance on the DNG correctly, your customized profile will be available in Lightroom and Camera Raw.
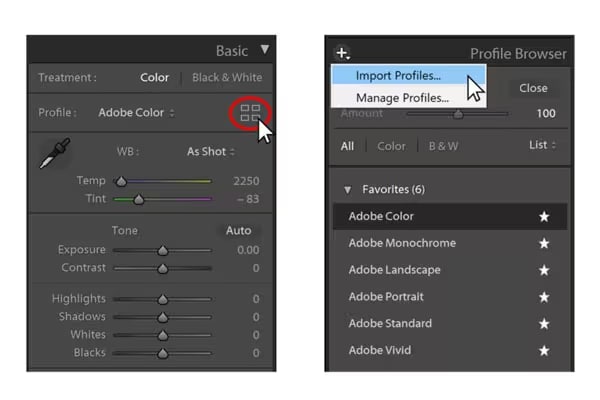
Step 8: If you find importing profiles challenging, you can use Adobe Lightroom. In the "Basic Adjustment" panel, find the Grid and click on the + sign. Select "import profile."
After successfully importing the profile into Adobe Lightroom, you'll be able to access it in Adobe Photoshop and Camera Raw. Let's walk through some important information that can help you adjust color and tone in Adobe Camera Raw.
Part 3. Noteworthy Points To Adjust Color and Tone in Adobe Camera Raw
While you fix white balance on DNG, you will explore options like Expoure, Highlights, Contrast, and more. These functions in Adobe Camera Raw ensure that your picture looks natural. Let's shed some light on each of them and see how important they can be to fix the white balance on DNG.
Editing Functions in Adobe Camera Raw
Here are some of the commonly used functions that can help you enhance your image:
Exposure:
This function is used to increase/decrease the brightness of the image. You can use the slider to alter the exposure until you get desirable image brightness.
Contrast:
You can use this function to adjust the mid-tones in your image. Increasing contrast makes the darker areas of the picture even darker while the lighter areas become brighter. On the other hand, reducing contrast affects the image tones inversely.
Highlights:
You can use the brightness tool to make parts of your image darker or brighter. Move it left to darken very bright areas and bring back lost details. Move it right to make bright areas a bit brighter and prevent them from looking too bright.
Shadows:
To correct the white balance in DNG, use the "Shadows" option to adjust the darker parts of your image. Move the slider to the right to make shadows brighter and reveal more details. If you move it to the left, shadows will get darker and prevent over-brightening.
Whites and Blacks:
This function helps you control white clipping in your image. Move the slider left/right until you get the look you want. There's also a control for black clipping called "Blacks." Moving it to the right reduces shadow clipping, and moving it to the left increases black clipping.
Recovery:
You can bring back details from overexposed areas in your image. Camera Raw can also restore colors that have turned completely white.
Full Light:
To restore details from darker areas in your image, use this function. It won't make the dark parts brighter, though.
Brightness:
You can make your image darker or brighter using the brightness settings. When you move the slider to the right, it brightens shadows and makes highlights less intense.
So, to fix white balance in DNG, start with Exposure, then Recovery/Blacks, and finish with Brightness. Afterward, review your image to see if any further adjustments are needed.
Part 4. Bonus Tips: What to do If your DNG Images Get Corrupted?
Can you correct the white balance in a DNG file? You might have tried to fix your DNG file but found it corrupted. Don't worry; there are some effective methods to make your DNG file readable again. Let's explore them.
Method 1. Repair Corrupt DNG Files Using Windows
Windows has a unique feature known as System File Checker. It is highly recommended for repairing corrupt files. You can follow the below instructions to repair corrupt DNG files:
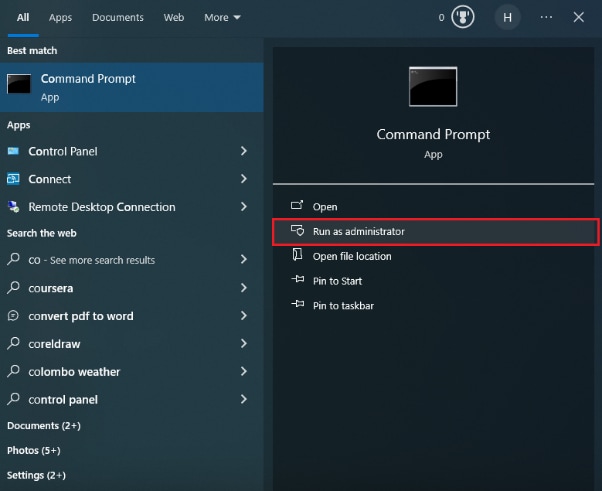
Step 1: Open Command Prompt as an administrator.
Step 2: Run the command sfc/scannow.
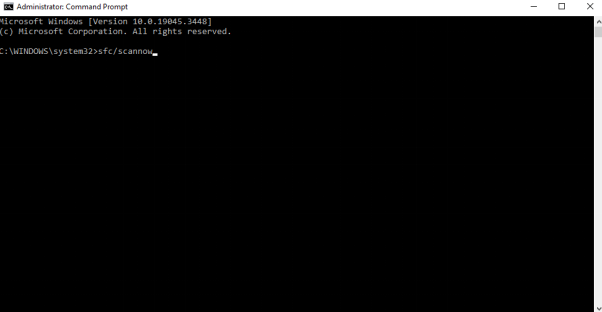
Step 3: Wait until the scanning is finished.
Step 4: Check for repair success.
Step 5: Open the repaired DNG files with the appropriate software.
Step 6: Back up the repaired files.
Method 2. Update Windows Drivers
One more reason you can't open or view your DNG file might be outdated drivers. If you're seeing errors or corruption messages, updating the drivers should resolve the issue, allowing you to open DNG files. You can follow the instructions given below to update the drives:
- Open Device Manager (Win + X).
- Right-click the device and choose "Update driver."
- Select "Search automatically for updated driver software."
- Follow prompts and restart if needed.
Method 3. Use Third-Party Application - Wondershare Repairit
You may have tried the above methods, but you still face corrupted DNG file issues. Here, Wondershare Repairit comes to the rescue. It is the most reliable and effective tool when it comes to fixing corrupt images. Recoverit has a user-friendly interface that makes it accessible to everyone.
In addition to that, it provides a variety of features that are compatible with various file formats, including DNG. Some of these features include repairing photos in batches, previewing repaired photos, extracting thumbnails, and advanced repair capabilities. You can use Repairit and get the job done in just a few simple clicks.
Steps to Fix Corrupt DNG Files Using Repairit
Before starting, download and install the Repairit Software on your computer. Then, follow the instructions given below:
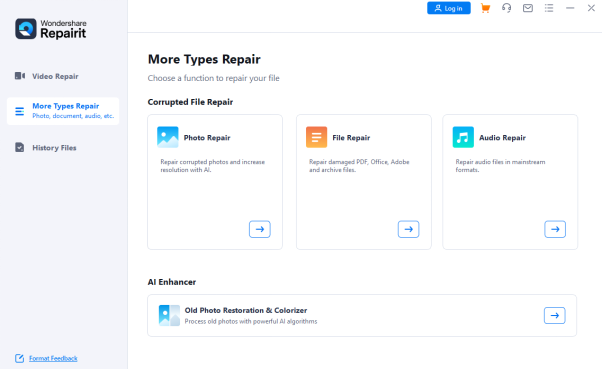
Step 1: Add DND File Into Wondershare Repairit
Once the installation is completed, launch the Repairit application. Click on "More Types Repair," then click "Photo Repair" to repair your corrupt DNG file.
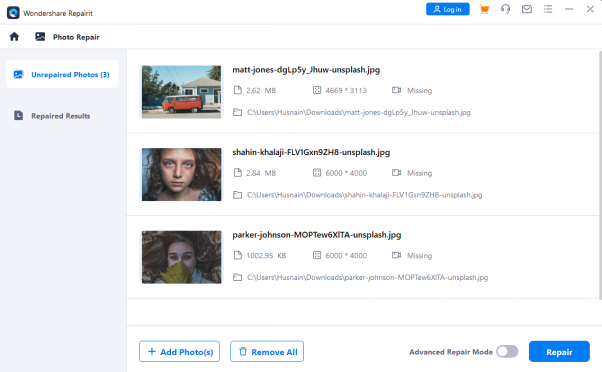
Step 2: Start the Repair Process
Click "Add" to add the image. Once the image is added, you will see a "Repair" button. Click it and wait as Wondershare Repairit starts to repair the corrupted DNG file.
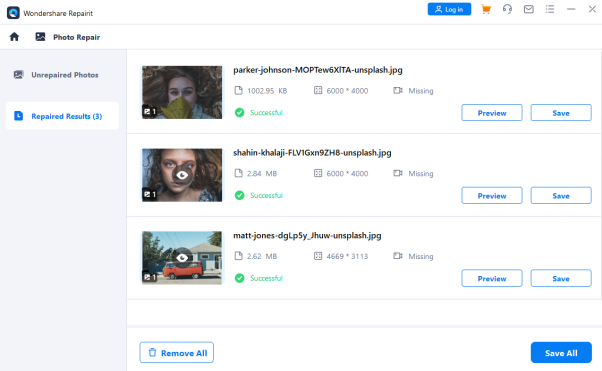
Step 3: Save the Repaired Files
Once Repairit has finished the process, you can preview the repaired file. To save the DNG image on your computer, click the "Save" button and pick a location that's easy to remember and access.
We are sure Repairit will help you get the job done Hassle-free. The best part? It doesn’t require any technical knowledge. You can use it by following the straightforward steps.
Final Thought
It may take some time to fix the white balance or the corrupted images—however, image quality matters. Try the methods mentioned above to make sure your RAW file looks good. Whether you're using Adobe Lightroom or Adobe Camera Raw, you should be able to fix the white balance smoothly.
If your DNG files become corrupted, try updating your drivers or running System File Checker. Moreover, if you want a more reliable and effective way, then go for Wondershare Repairit. It offers all the editing functions you need for photos and videos, and it comes at an affordable price.