If you have a website or are into photography, the term image compression is a common occurrence. For readers who are not aware of what image compression is and are curious about various questions such as 'What is the importance of image compression?' or 'how does it work?'. Well, this article is for you, and it will help you understand how to compress images without affecting quality. Also, it will enable you to make good decisions on the best compression approach for your needs.
Part 1: What's Image Compression and Why Does It Need?

Image compression can be defined as the simple process of minimizing, saving, and ensuring that the images are in the smallest possible size without the noticeable reduction of the quality of the image.
Here are few reasons why Image compression can be need:
-
Website Optimization: websites with the compressed images load faster and have improved responsiveness and reduce the bounce rate.
-
Downloading/Uploading: In both cases if the file is not compressed it can take longer to upload. Also some servers have file size limitations.
-
Compressed images take less space to store on the hard drive.
Now that we know the importance, let's further learn various ways to effectively compress images without compromising on the quality.
Part 2. Effective Ways to Compress Images Without Affecting Quality?
Manual Ways
Method 1: Compress Images for Website
Compressing images before you upload them on the web page or a website has a massive impact on the responsiveness of the web page since the large image sizes take too long to load.
The modern mobile phone saves photos in high resolution, and these images are too large to be uploaded on a website. Therefore, when you compress the image you make sure that you choose a reasonable resolution for your images. This is to ensure that the image you have uploaded is not too large in a way that it can slow down or make your website unresponsive.
Method 2: Shoot Photos in Compressed JPEG Format
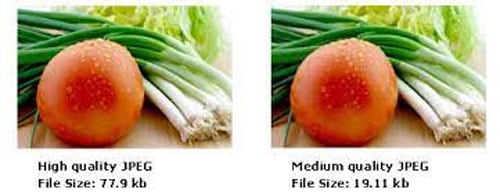
JPEG format makes use of lossy compression for displaying and saving digital images. Because of its high efficiency in compression has become a popular and most adopted image format currently. Most of the devices and software have built-in capabilities to display and read JPEG files.
Various levels of quality can be used to compress the JPEG images, which impacts the overall quality and size of the image. The lower quality conversion leads to higher conversion rates, compression artifacts, and the reduction of storage costs.
Method 3: Compress Photos Using Microsoft Word
Using Microsoft office, you can be able to add different images of all resolutions and sizes in your word document file. It also makes compression of the large files possible in a way that they can fit well in your word document. Microsoft word enables you to reduce the image's color format in order to ensure they are smaller.
To compress an image using Microsoft word is very easy; you should follow the following few steps:
Step 1: Open the target document and scroll through and click on the image that you would like to compress.
Step 2: Click on the 'Format' tab and select 'picture Tools.' Click on the option 'compress picture' in the adjusted group.
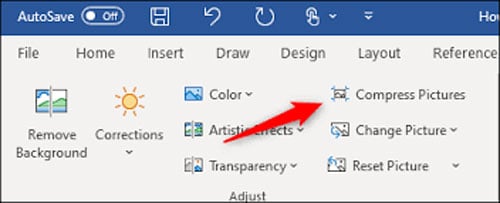
Step 3: Check the 'Apply to Selected picture only' option to ensure you compress the selected picture only.
Step 4: Click on the 'Options' and click on the 'Automatically perform basic compression on save'.
Step 5: Click on the 'Save' option on the File options to save the compressed image.
Software Ways
Method 1: Use Adobe Photoshop
This is one of the most popular image editing software used by most photographers and graphic designers to carry out their professional tasks.
Using this tool, you can be able to choose any image file format, whether a PNG or JPG, and it shows the file size of each format. It allows you to choose the file format that will output the best output. The primary benefit is that it allows you to retain the maximum possible quality of the image and simultaneously compresses it. You can also be able to try different combinations and view the preview of the image before saving the final image.
To compress or optimize your image using Adobe Photoshop, follow the following simple steps.
Step 1: First, select the image to optimize
Step 2: Click on the file option, ->Export ->"Save for the web (legacy)."
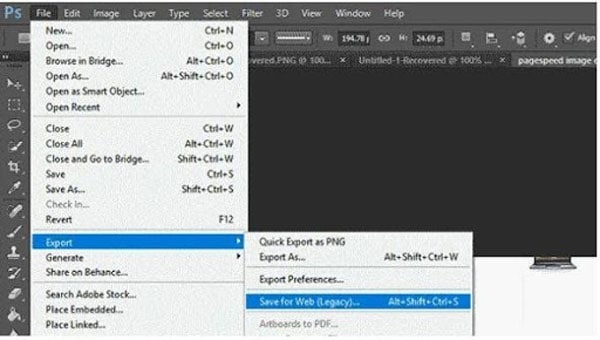
Step 3: In this step, select the JPG option from the right corner of the window
Step 4: Adjust the quality of the image according to suit your needs
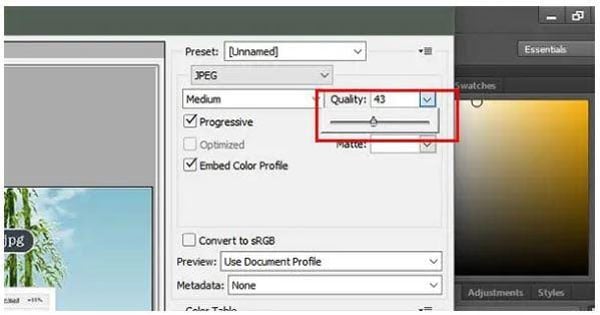
Step 5: In this tool, the images that display a lot of colors appear to be good in the JPG format, while the images with fewer colors are compressed into PNG-24 or PNG-8 formats.
Step 6: Before saving the final image file on your computer, you can be able to preview the compressed image at the left corner of this tool's preview window.
Step 7: If the compressed image meets the size and quality requirements, you can save the final image on your computer.
Method 2: Try Free Tool - TinyJPG
Unlike Adobe Photoshop, this tool is free; therefore, everyone can afford to optimize their images with it. Tiny JPG is a free image compression tool, and it allows you to compress multiple images instantly. To compress your image using this tool, follow the following fundamental steps:
Step 1: Open your favorite browser on your computer and visit the tinyjpg website.
Step 2: This will display the Tiny JPG website, and it is in this website where you upload your image to compress.
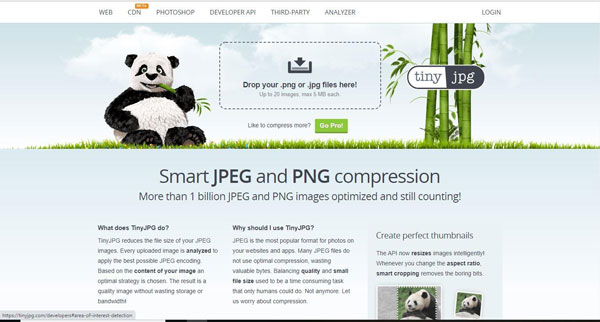
Step 3: Drop the images or click on the drop images (whether JPG and PNG format) and upload the images from your computer.
Step 4: Wait for uploading and compressing of the images to complete until the Tiny JPG displays are finished. When it displays finished, you can proceed to download your compressed images.
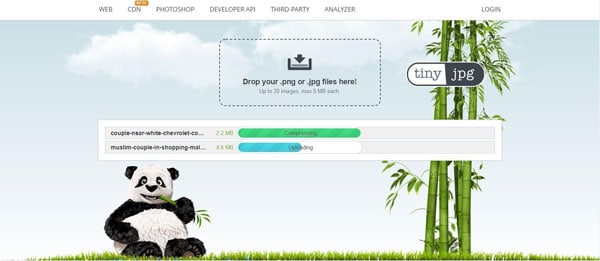
Step 5: Click on the green download all button to download all the compressed images you have uploaded, or click on the download link to download a single image.
Step 6: The Tiny JPG begins to compress the uploaded images on the cloud, and after the compression, it allows you to download the compressed image files to your phone or computer.
The main advantage of using this tool is that it allows the compression of multiple files and maintains the image's quality. However, the image to be compressed needs to be less than 100KB, mostly if it is loading multiple images instantly.
Method 3: GIMP - An Open Source Tool
This free, open-source image compressing tool fits different operating systems, including Mac, Linux, and Windows. If you would like to use this free software to optimize your images, you can follow the following simple steps:
Step 1: Select the image that you would compress and open it using your GIMP software on your computer.
Step 2: Click on the File on the tab and select the Export as an option.
Step 3: Click on the Export button, and a new window will pop up on your screen.
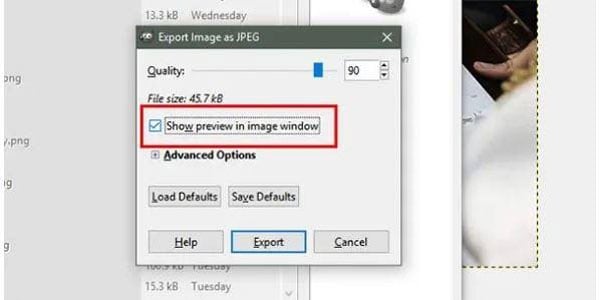
Step 4: From this pop window, you can modify the image size and quality to meet all your needs. After selecting the image size and quality, you can preview your image by clicking on the "show preview in the Image window."
You may opt to upload different types of images to identify whether you will find the best image or result. After several uploads, you will definitely get the best-compressed image product.
Part 3. If Your Images' Quality Being Affected - Try Wondershare Repairit
There are various scenarios in which an image file can stop being responsive or lose its quality. Wondershare Repairit tool can fix the corrupt files using three simple steps:

-
Repair damaged photos with all levels of corruption issues.
-
Repair images of 15+ formats, such as JPG, JPEG, PNG, CR3, CR2, NEF, NRW, etc.
-
Repairit has a quick and advanced repairing mode. You can use either depending on the level of corruption the photos has undergone.
-
The "AI Image Upscaler" feature can enlarge the repaired photos to 2X, 4X, and 8X.
-
Intelligently restore old/scatched photo and colorize black and white photos with various AI effects.
-
No limit to the number and size of the repairable photos compared with the online version of Repairit.
-
Support Windows 11/10/8/7/Vista, Windows Server 2003/2008/2012/2016/2019/2022, and macOS 10.10~macOS 14.
Step 1: Add the damaged/corrupt image files in the console panel.
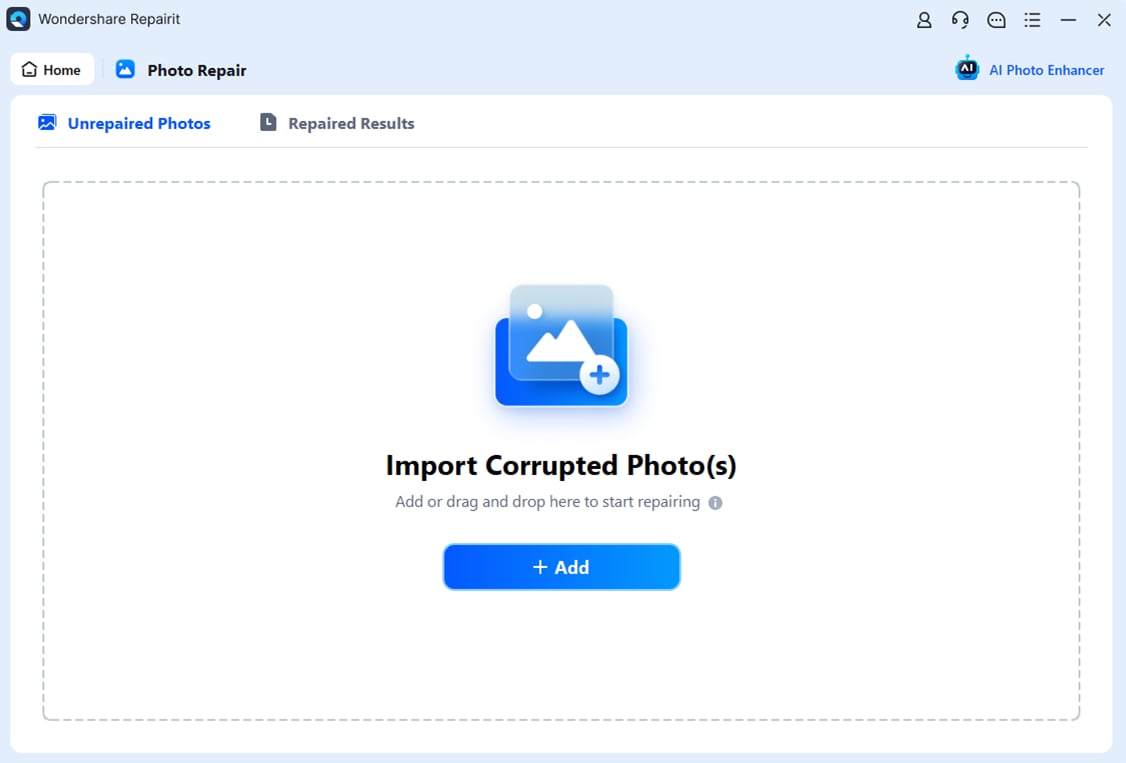
Step 2: Hit the Repair button, and the tool will do all the necessary action. You can even preview the images to know if the tool was successful in repairing the image quality.
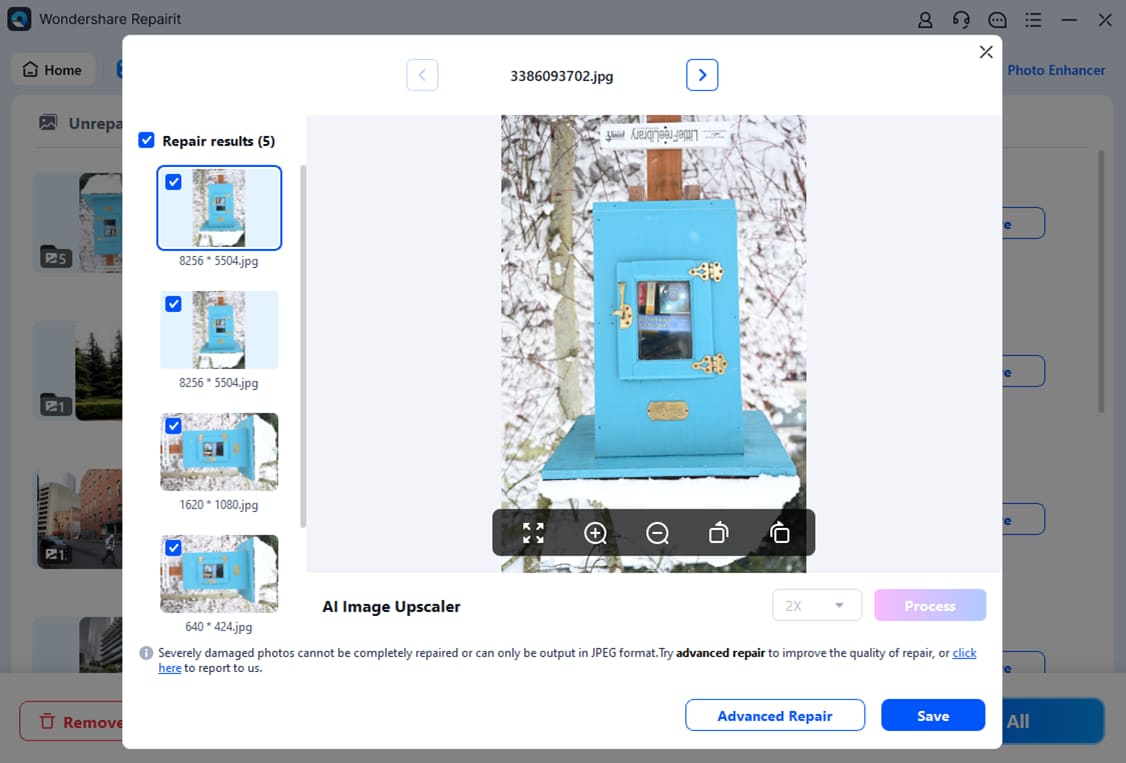
Step 3: Simply save repaired files in your desired location.
Besides, here is the video tutorial for you to deeply know this software.
Further Reading:
Here are the useful articles to help you.
1. Choose Image Compression.
2. Repair Low-resolution Photos.
3. Invalid JPEG Marker Type is Found.
Closing Words
The quality and compressed images make your brand and web page look professional and help in establishing trust with the users. Imagine having a business web page displaying blurred images and another web page with clear crystal images. A page with clear images is likely to attract a large number of viewers.
As stated if you want a quick and easy solution, Wondershare Repairit tool should be your guide. It is free to download and works well with a lot of file formats.
This article has illustrated the importance of image compression as well as how to compress images without affecting quality using different approaches and tools.
FAQs
-
How do I compress an image to 20kb?
There are various online tools that will help you cpmpress an image. Select the basic compression, click on the compress and select the size to 20KB. Download the compressed image. -
How do I shrink the file size of a JPEG?
Select the compression tool and upload your JPEG image and choose Compress now. Wait until the JPEG image is compressed. Download the compressed image. -
How do I compress photos in bulk?
Choose an online images compression tool that allows multiple image compression. Drag and Drop multiple image files. Wait until the file compression is done. Click on "Download all" to download multiple compressed files.


