It sucks when for one reason or another, your camera jams and you miss that moment. Fortunately, not every camera error warrants a trip to the repair center. With the following tips and tricks, you can get back into action in no time at all. Take a look at some of the most common Nikon DSLR camera errors and how to fix them.
Part 1. How to Fix Memory Card Errors
Error 1: Cannot Record Movie Error
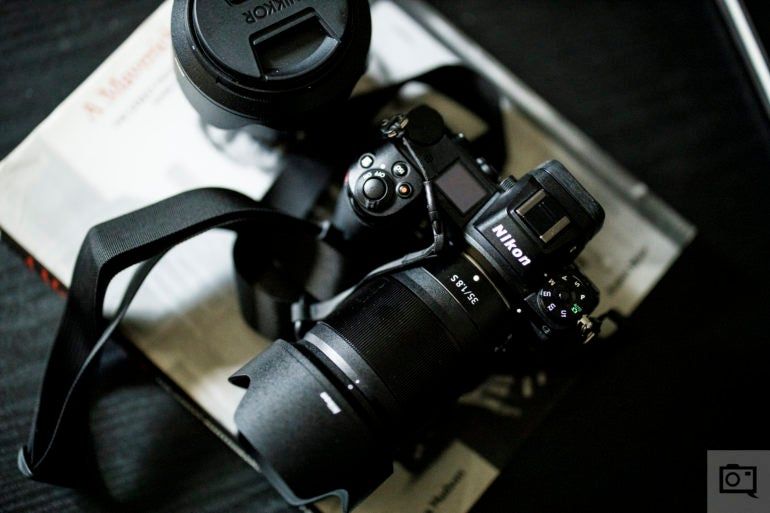
In most cases, this error will appear due to a problem with the memory card. It usually comes up when the camera is unable to transfer media to the memory card for recording purposes.
The best solution for this error is to replace your current memory card with one that has higher read and write speeds.
At times too, the error may be the result of a problem on the camera itself. However, you need to start by changing the memory card before writing it off as a camera issue.
In case the memory card change does not help, you might need to visit a repair center to get the camera checked out.
Corrupted ideos present on the SD card are important. Have a look at how to repair corrupt videos.
Error 2: Blinking "CHA/CHR" Error
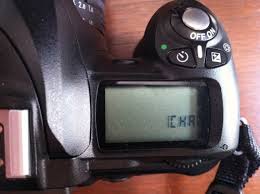
A blinking "CHA/CHR" error message is also likely the result of a memory card problem. In many cases, the problem may happen after you copy images from your card.
Fortunately, it is not hard to fix, as it simply requires an in-camera format of the memory card. In case you format the memory card and the problem does not clear, it could be an issue with the contacts.
Try cleaning the contacts on both the lens and the camera as outlined above. In case that too fails to work, it might warrant a trip to the repair center.
Error 3: No Memory Card Error or -E-
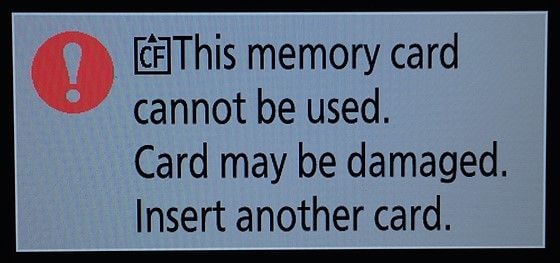
The -E- message is simply the Nikon DSLR's way of telling you that there is no memory card in the camera. That means you cannot take any photos as there is no storage facility for them. A simple solution will do the trick, simply pop a memory card into your camera.
In certain cases, you might already have a card in the camera and still get the error message. That would mean your camera is not able to read the memory card.
To resolve this, try gently cleaning the contacts on your memory card. These are metal bits that you see on the card. Check to see if the problem clears after cleaning.
In case it persists, you could try in-camera formatting of the memory card, keeping in mind that any SD card photos will get lost. If it still refuses to clear, try inserting another card to determine if the issue is your card or if it is the camera.
You would know it is a camera problem if you get the same message with a different card. And in that case, you might need to visit the repair center.
Part 2. How to Fix Lens-Related Problems
Error 1: Blinking ERR Error
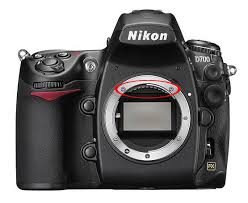
The blinking ERR code is one of the most dreaded error messages on the DSLR. Worse still, it may appear on a brand new camera. But the good news is that you can correct the error without having to visit a Nikon center.
One of the most probable causes for the problem has to do with dirt or grease either on the camera or the lens contacts, or both. If it is a brand new camera, it could be that the contacts are oily from the manufacturing process.
But if you have had the camera for some time, the probable culprits are dust particles. These might be stuck between the lens and the camera. In both cases, the solution is as simple as cleaning the affected area.
Here is what you need to do:
-
Dismount the lens and clean the contacts on both the lens and the camera. Start by turning off the camera and pressing the release button on the left side of the lens.
-
Rotate the lens clockwise to dismount and put the plastic cap back on to prevent dust from entering the camera.
-
Use a microfiber cloth and a cleaning solution to wipe each contact gently in a circular motion. But take care not to touch the glass on the back of the lens.
-
Once you are done, blow away any particles the cloth may have left on the lens.
-
Next, open the plastic cap and wipe the camera contacts from right to left. Do this quickly to ensure that no dust enters the chamber.
-
Mount the lens back by aligning the dot on the camera with the dot on your lens then rotates counter-clockwise. Test to see whether the error message has been resolved. If you still get the error message, try using a different lens to see what happens.
You might also try switching off the camera, removing the battery completely and inserting it again, and turning the camera on, which is effectively a hard reset. There will be no data loss in the process.
If you try all of these approaches and the problem persists, you would do well to visit a service center and get expert assistance.
Error 2: Blinking fEE Error
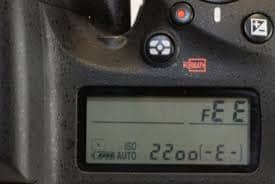
This error message can only appear on a DSLR which uses a lens with an aperture ring. It is more common on cameras with older lenses. The message appears when you have not set the ring to the minimum aperture size.
It could be that when changing the lens, you accidentally rotated the aperture ring on your lens, and thus triggered the error.
To solve this error message, simply set the lens aperture to its highest possible f-number, which is the minimum aperture. In most cases, the right position is highlighted in orange font. Once you do so, lock it in place to avoid a repeat of the same.
It would be best to let the camera choose the aperture automatically so that it shoots photos at optimum exposure.
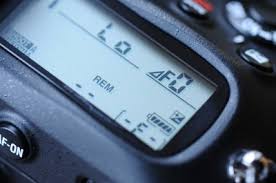
Error 3: f-or-f0-error
The most probable cause for this error code is a misplaced lens. If your camera detects that the lens is not placed as it should be, you cannot take photos.
To address the problem, simply dismount the lens, following the steps outlined above, and then remount it properly.
It could also be that you are using an older lens, which the camera is unable to detect. If that is the case, you might get the message again, however many times you dismount and remount. That could be because an older lens lacks electronic contacts and thus cannot communicate with your camera.
Error 4: Triangle with Letter "F"
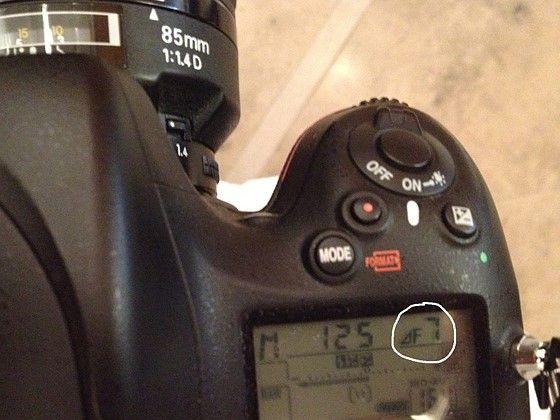
With this particular error message, the cause is usually an inability of the camera to communicate with the lens.
There may be two probable causes for this. One, it could be that dust or grime is preventing the contacts on the lenses from connecting properly with the camera. Two, it may be that the lens is not in its proper position.
Start by dismounting the lenses and cleaning the contacts on both the camera as well as on the lenses as outlined above. Next, remount the lens and ensure that it locks correctly into place according to the instructions above.
In case that fails to resolve the error code, try using a different lens to determine where the problem lies. If you are not able to solve it, visit a repair center.
Part 3. How to Fix Shutter-Related Errors
Error 1: Shutter Release Error
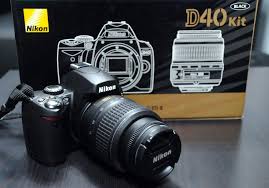
In case the shutter release on your Nikon camera gets jammed, then you will see this error message. Your camera shutter normally opens and closes when taking photos. But if it gets damaged or something gets in its way, it may not be able to move as it should, resulting in the above error message.
To resolve it, you need to check the shutter to see if there is sticky grime jamming its release. There could also be an object or particle in the way. Remove the object or clean the shutter release and check to see if the error clears.
Error 2: "Press Shutter Release Again" Error
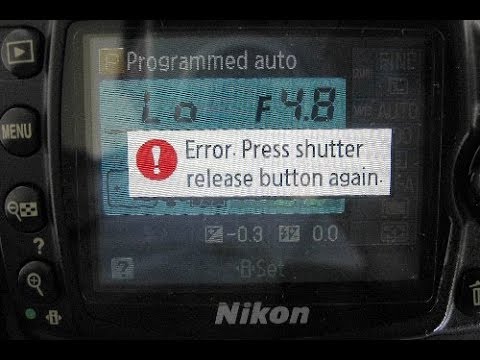
Another common shutter error will appear in the form of a command, "press shutter release again." If you experience this error, you might find that however many times you press the shutter release, your camera may not take photos.
The most common cause for this has to do with the gear motor that controls the shutter release mechanism's tripping. Over time, it might become a little tight or contaminated. That may make it rigid and impossible to turn over, and calls for a little lubrication.
To get started, turn off the camera, remove the battery, and then remove the bottom base cover plate. That will expose the gear motor which operates the shutter, which is the part that needs servicing.
Remove all the screws that hold the base cover systematically then lightly move the gear and check if it is contaminated. Using a clean toothpick, move the gear upwards until you feel friction. Stop and start moving downwards as you check for contamination.
If you are unable to see any dirt, use a magnifying glass and remove anything trapped between the teeth. Keep repeating the process at least five times, rotating, and cleaning the gear thoroughly before lubricating.
Apply a little grease while moving the gear backward and forward to ensure optimal coverage. Once again, move it at least five cycles to spread the grease until all teeth have a light cover of grease.
Once you are done, reinsert the battery and hold it in place, then switch on the camera to see if the error has cleared. Then put the cover back in place and screw it in.
Part 4. How to Fix Battery-Related Errors
Error 1: 'Information' Icon Error
![]()
Appearing as an "I" in a circle, this error can result from multiple causes. The first and most likely cause could be a discharged battery. So you might want to start by charging it before trying anything else.
A second cause could be that your memory card is either full or locked. And the solution in this case would be to transfer media from the memory card to the PC.
In case it is locked, remove the card and find a small toggle switch on the side. Slide it from "Locked" to "Unlocked" position and check to see if the error code clears.
Alternatively, it may also be that your camera noted that one of the people or animals that make the subject of the photo blinked just as you were taking the shot. If that is the case, the solution is to try taking the photo again, hoping no one blinks.
Part 5. How to Fix Other Errors
Error 1: This Image Cannot Be Deleted Error
Though this is among the simplest errors to resolve, it might be annoying if you have no idea how to do it. The message will usually appear when you try to delete an image that is protected by the software program in the camera.
To resolve the error, all you need to do is to address the root problem, removing the protection aspect from the image. Browse the photo you want to delete and once you find it, press the "Key" button to unlock it.
In case you are unable to unprotect the image, another alternative is to format the memory card. Unfortunately, this will erase all the content on your camera. Therefore, you should only consider the option if you have a backup of your media as a last resort.
No matter when you find content erased, recover your deleted photos from Nikon camera.
Error 2: Stuck on R-number

Though technically this is not an error message, it will prevent you from taking shots even when you press the shutter fully. It could be any r-number, and it shows the remaining number of photos that you can take.
The code usually appears when you half-press the shutter. Note that since it is not an error message, it should disappear when you press the shutter fully.
But in case the lighting in the room is not ideal, it will remain stuck on this code until conditions improve. It could also be that your camera has a self-timer and the message will only disappear when the timer completes.
When to Call It Quits
As you may notice, it is possible to resolve most Nikon DSLR error messages with these simple solutions. But in some cases, the problem just will not go away, no matter what solution you try. That may signal the time to visit the repair center and get an expert's input on the matter.
The camera has common errors. Video files have no exception. How can you resolve common video errors?


