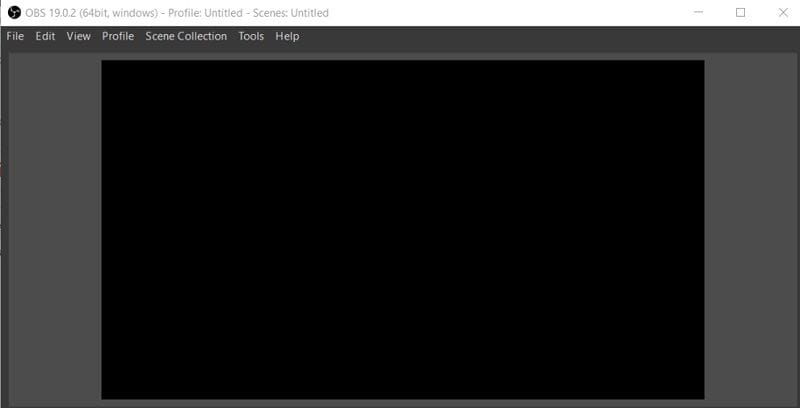
"There is something wrong with my OBS studio on Windows as it just stopped playing and has a black screen. Can someone tell me how to fix OBS?"
Commonly known as the Open Broadcaster Software, OBS is a cross-platform video recording and streaming service that runs on Linux, macOS, and Windows. While the tool has several applications, it often suffers from a few pitfalls. For instance, getting the OBS screen recorder black screen or experiencing lag in videos are some of the common issues related to it. In this post, I will help you fix these problems related to OBS studio in different ways.
Part 1: How to Make OBS Not Lag? (Causes And 7 Fixes)
A lot of times, users encounter lagging issues while recording a video with OBS or playing a video that was previously recorded by the tool. Ideally, this can happen due to different software or compatibility issues. If you wish to learn how to make OBS not lag, then you need to implement a handful of solutions.
Common causes for OBS video lagging
- Mostly, a network issue in the system causes this problem.
- Some faulty settings (like bitrate alteration) can also lead to the lagging of videos.
- There can be some syncing issues with audio and video. (Fix audio video sync problem.)
- Any hardware issue can also make your videos lag.
- Chances are that your videos could be corrupted as well.
- Your system might be running on an old or outdated driver.
- The application might be corrupt or malfunctioning.
- The system's firewall could be blocking the connection.
Fix 1: Maintain a stable network connection
If you are streaming your videos online, then you need to make sure you have a stable network connection. If the network is not strong, then some frames in your videos might be dropped which can cause it to lag. Ideally, it is recommended to go with an Ethernet connection (wired link) since it is more stable and operates faster.
Fix 2: Check Hardware damage
Just like a network issue, any unwanted hardware damage can also cause OBS videos to lag. You can check the router, the network connection, ports, recording devices, and all the other hardware components to make sure your videos would not lag while playing.
Fix 3: Fix the corrupted video using Repairit Video Repair
Chances are that your video could be corrupt or damaged, causing numerous lagging issues with it. To fix this, you can take the assistance of a dedicated tool like Repairit Video Repair. A professional DIY video repairing tool, it supports every major video format and can fix files damaged under various scenarios. You can load multiple videos and follow a simple click-through process to repair your corrupted videos in no time.
The main features of Repairit Video Repair

-
Repair damaged videos with all levels of corruption, such as video not playing, video no sound, out-of-sync video or audio, playback errors, header corruption, flickering video, missing video codec, etc.
-
Repair videos of diverse formats, including MOV, MP4, M2TS, MKV, MTS, 3GP, AVI, FLV, MXF, KLV, INSV, M4V, WMV, MPEG, ASF, etc.
-
Repair damaged or corrupted videos caused by video compression, system crash, video format change, etc.
-
Repair critically damaged or corrupted videos available on SD cards, mobile phones, cameras, USB flash drives, etc.
-
Repairit has a quick and advanced scanning mode. You can use either depending upon the level of corruption the video file has undergone.
-
Support Windows 11/10/8/7/Vista, Windows Server 2003/2008/2012/2016/2019/2022, and macOS 10.10~macOS 14.
Step 1: Load the videos to repair
Firstly, just install and launch Repairit Video Repair on your computer and load the videos you wish to repair. You can click on the "Add" button to launch a browser window or perform "Add video and start repairing".

Step 2: Repair your videos
Once the corrupted videos are loaded, just click on the "Repair" button and wait as your files would be fixed by the tool. Try not to halt the process in between if you wish to get positive results.

Step 3: Preview and save the repaired videos
In the end, the application will let you know that the repair process has been completed. You can now preview the videos to check if they are the desired results for you. Then, save the fixed video files to the location of your choice.

Step 4: Perform an advanced repair (optional)
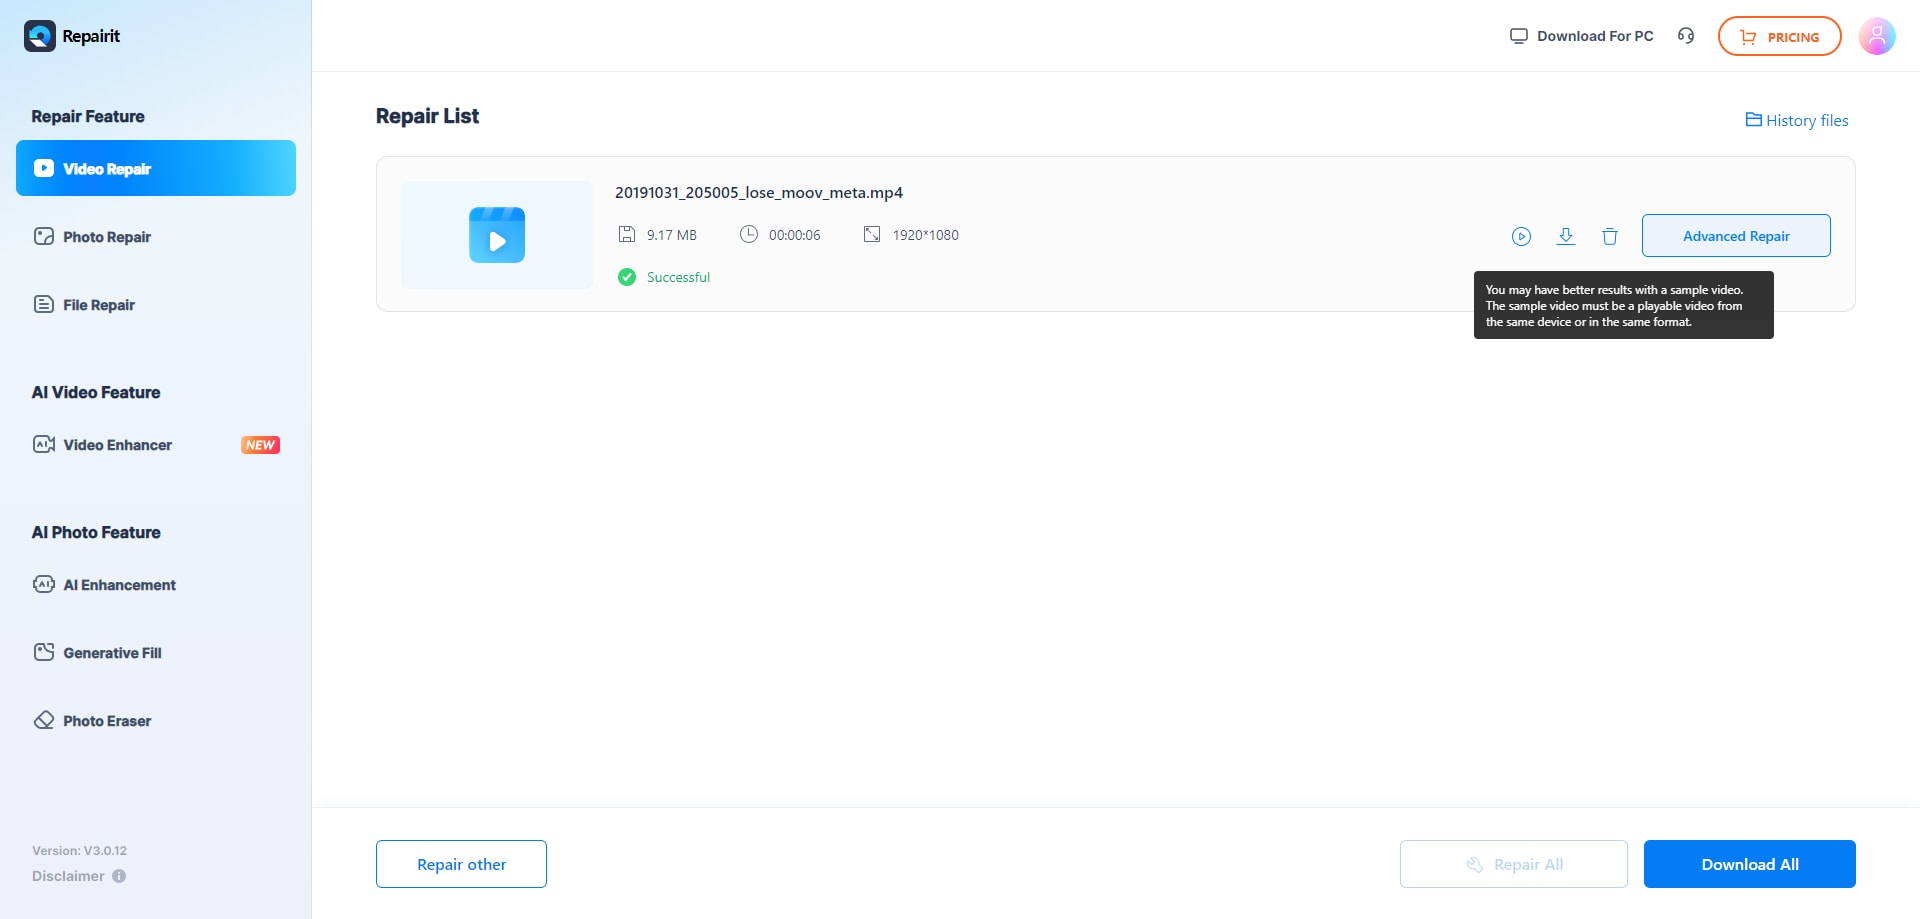
If you are not satisfied with the results of the quick scan, then you can click on the "Advanced Repair" option as well. For this, you need to load a sample video of the same format and wait for a while as the advanced repairing would take more time.

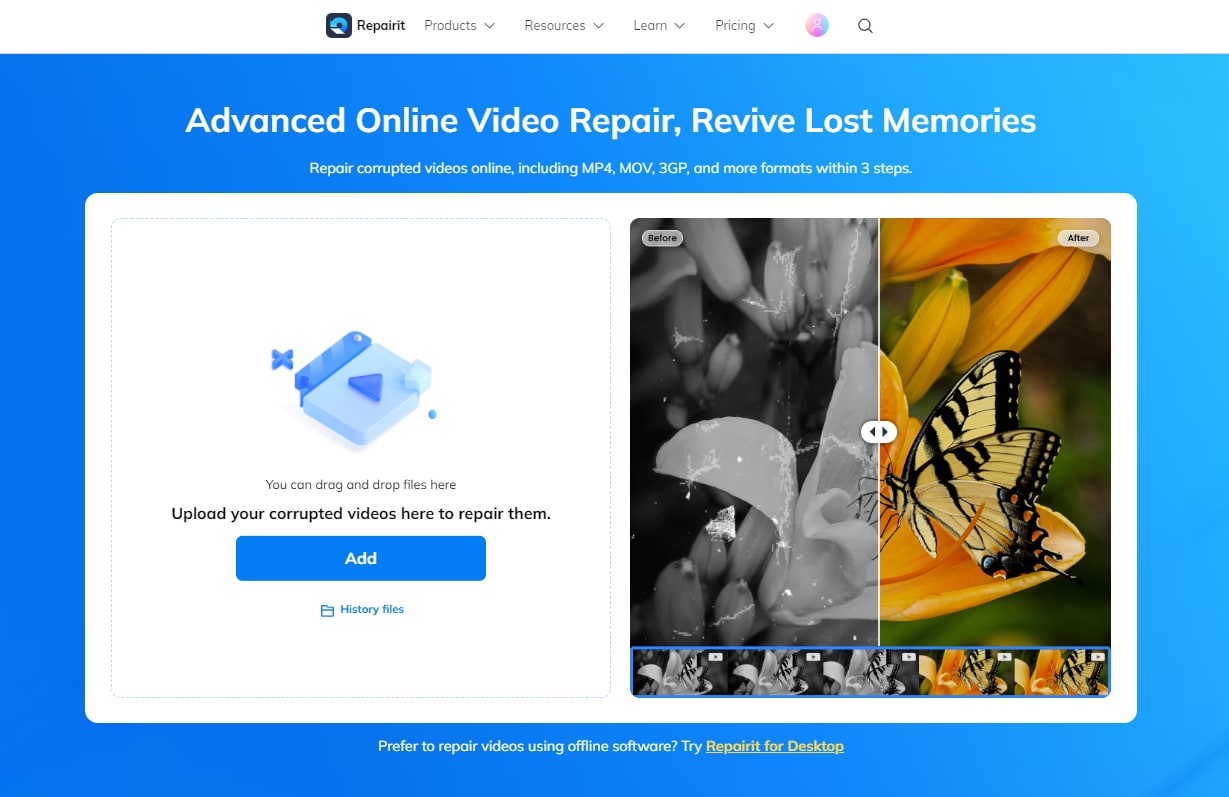
Tips: If you do not want to download software on your computer and your corrupted video is no more than 3GB, you can try the online version of Repairit Video Repair to get your video repaired online with ease.
Fix the Corrupted Video with Repairit Video Online
Step 1. Upload File
Open the Repairit Video Online page, find and click the +Add button to upload the video. You also can drag the video to the working field to upload the corrupted file.
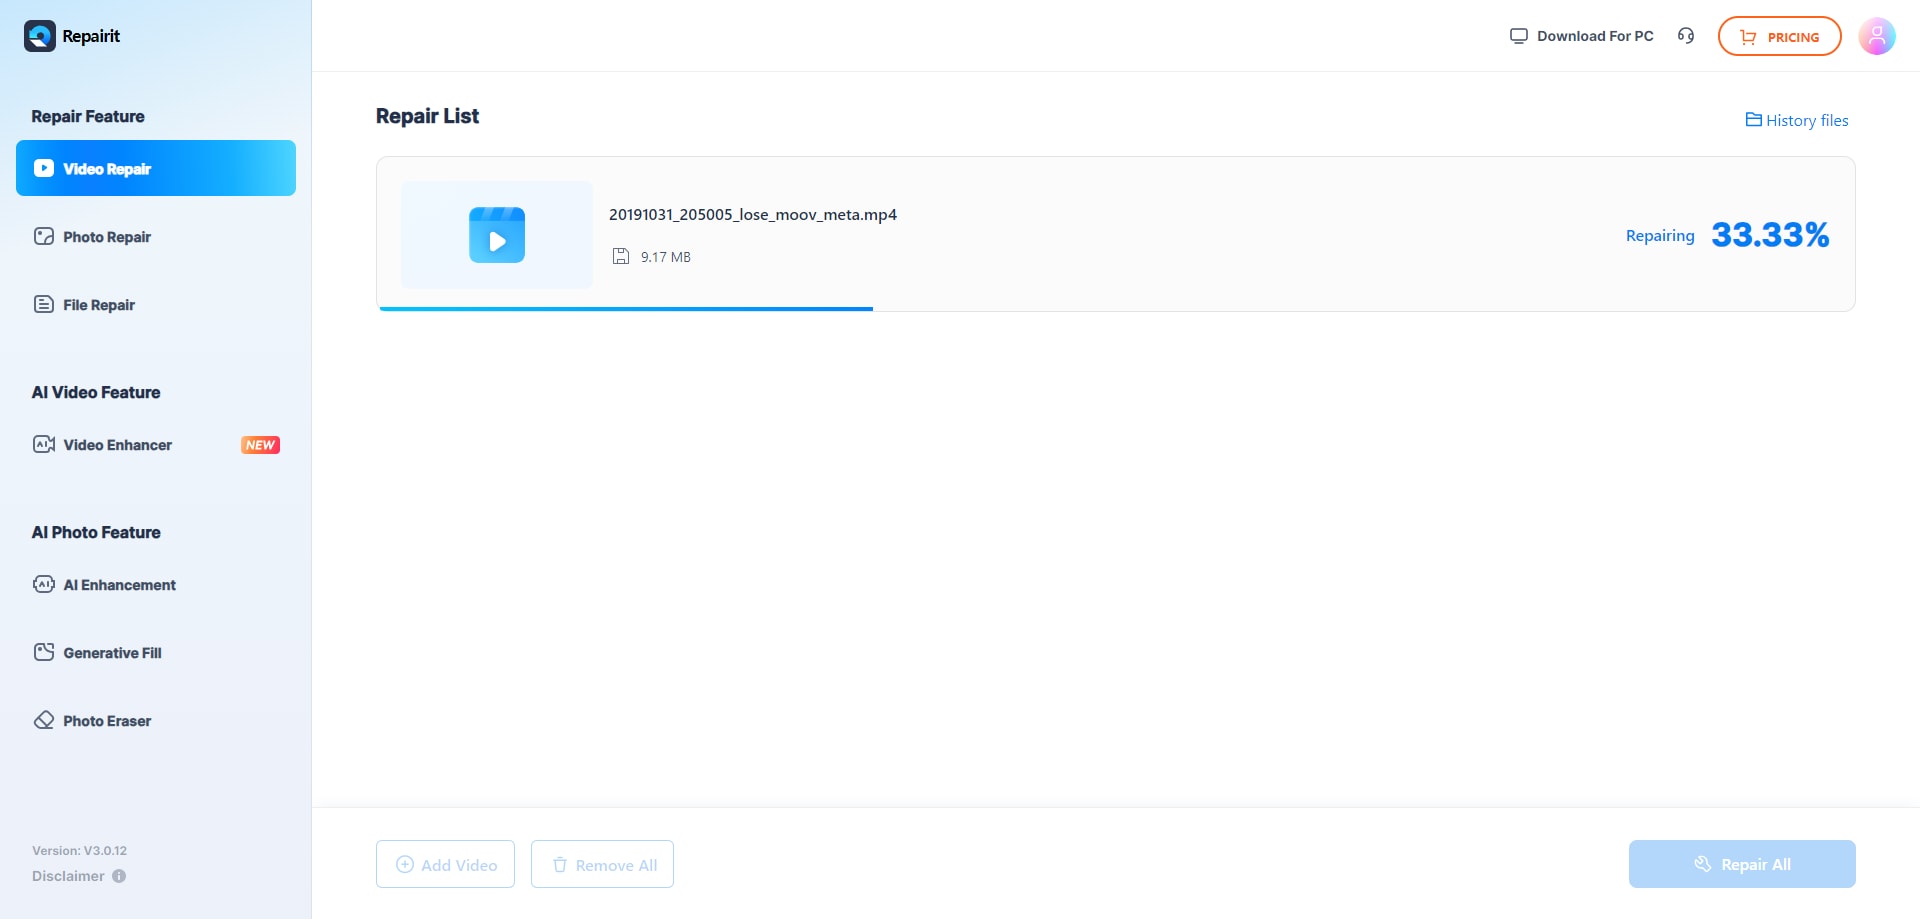
Step 2. Start the Repairing Process
After that, click Repair to start the repairing process, which will take a few seconds. If it shows that the video is repaired unsuccessfully, you can click the Add Sample Video option to start the Advanced Video Repair.
Step 3. Preview and Save
Once the repairing process completes, click the Play icon to preview the video and check whether the file is fixed successfully. If you’re satisfied with it, just click the download icon or Download All option to save the video file.
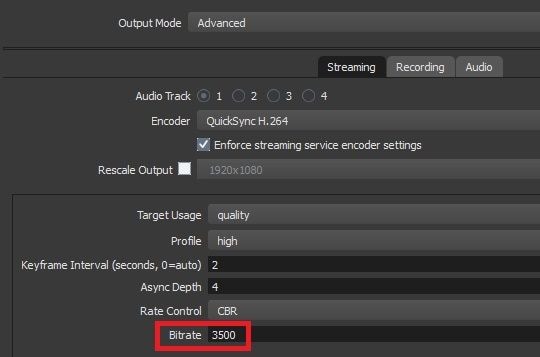
Fix 4: Change the video's bitrate
In most cases, high bitrate is used to enhance the quality of video streaming. Though, it can also increase the dropping of video frames which can cause a lag in your videos. To learn how to stop OBS from lagging, you can consider decreasing the bitrate of the video while recording. Just launch the OBS studio and go to its Settings > Advanced Settings > Streaming. Go to the "Bitrate" tab and manually decrease the bitrate to stop the frames from dropping in between.
Fix 5: Change OBS Settings according to your computer's resolution
This is something that a lot of users ignore while learning how to fix stream lag in OBS. If your computer or the player's resolution is 1080p or 720p, then you need to make some custom settings in OBS. All you have to do is go to OBS settings and visit the Output section from the sidebar. Now, make the following changes as per your computer's supported resolution.
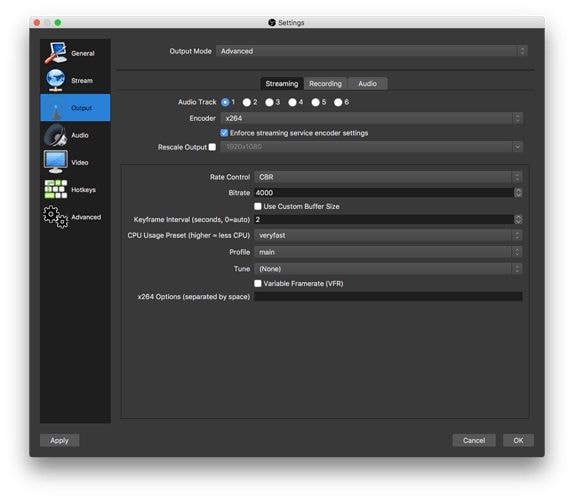
For 1080p
- Maximum bitrate should be 500,000
- Output can be scaled to 1920 x 1080 resolutions
- FPS can be in 30-60 range
For 720p
- Maximum bitrate should be 800,000
- Output can be scaled to 1280 x 720 resolutions
- FPS can be in 30-60 range
What's the best solution to restore corrupted HD videos.
Fix 6: Update or Reset the Network Drivers
If your system is running on old or outdated drivers, then you should consider updating them. For instance, if there is an issue with your computer's network adapter, then this would be an ideal fix. To learn how to make OBS not lag on your system, just go to its Start menu and look for Device Manager. You can also open it from Control Panel > Device Manager as well.
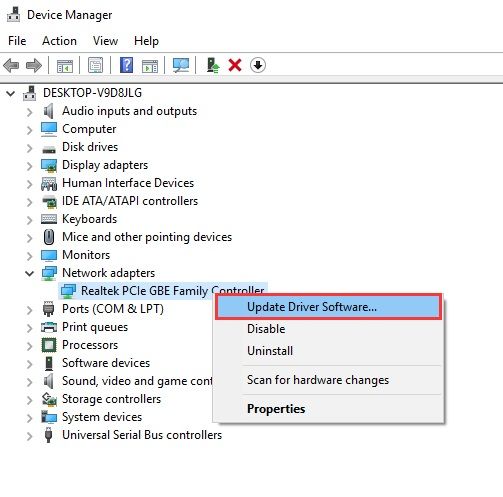
Now, just expand the Network Adapter settings, select the installed drivers, and choose to update it. You can right-click the drivers and select the "Update" option from the context menu to do it. Apart from that, you can disable the driver and enable it later on to reset it.
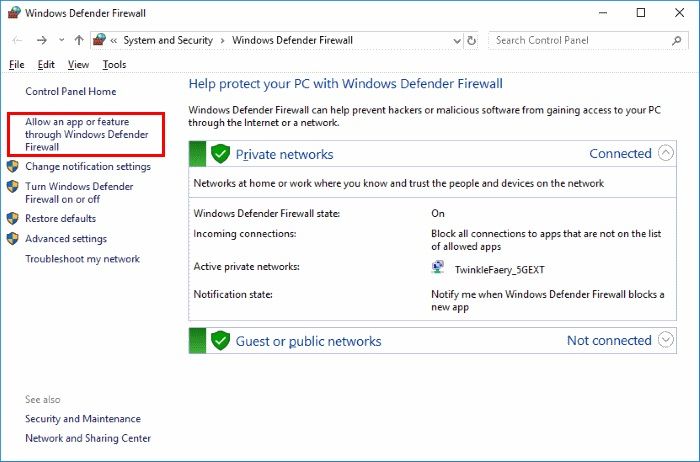
Fix 7: Check Firewall Settings to allow OBS recording/playback
Lastly, you should check the firewall settings on your computer as a strict firewall or an anti-malware tool can also block certain OBS connections. If you are not sure about the firewall settings on your system, then you can just disable the feature from Control Panel. To further diagnose it, go to Control Panel > System & Security > Firewall/Windows Defender Firewall. Now, click on the option to allow apps or features to pass through the firewall and make sure the OBS studio is allowed to run through the firewall.
Part 2: How to Fix OBS Black Screen? (Reasons And 6 Fixes)
While recording or video playback, users often complain of getting the OBS screen recorder black screen. To learn how to fix OBS black screen, you need to understand its causes and take the needed steps to fix them. Mostly, it is caused by faulty firmware or wrong settings in the application.
Reasons for getting the OBS black screen
- A change in OBS settings related to its output or bitrate.
- Compatibility issues with the video and the player/browser.
- The application you wish to record the gameplay on might have compatibility issues with OBS.
- There can be network connection problems with the device.
- You might not have the needed permissions to record videos.
- Any third-party application blocking the OBS connection
- Several other software or application-related issues
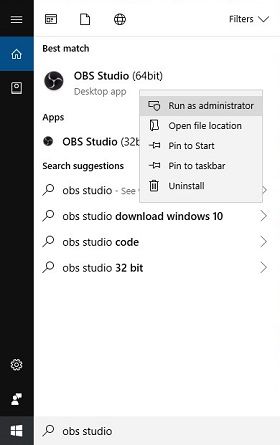
Fix 1: Run OBS as an administrator
This is the easiest way to learn how to fix the OBS black screen issue. If you have multiple user profiles on your system, then chances are that you might not have the right to perform certain actions on OBS. To avoid this issue, you can just launch OBS as an administration. Simply select its icon from the desktop or go to the Start menu and look for OBS. Now, right-click the OBS icon and choose to launch it as an administrator. You might be needed to enter the administrator credentials to open OBS on your system now.
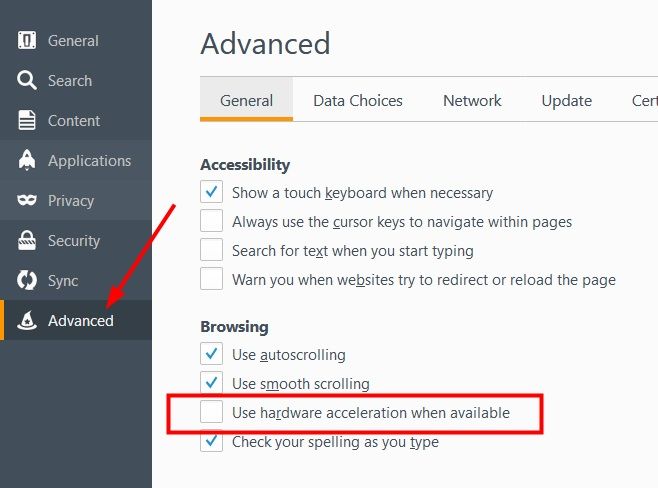
Fix 2: Disable Hardware Acceleration
Hardware acceleration is an advanced option in most browsers that put a direct load on the GPU. Though, while doing so, it can tamper with the video streaming experience on the browser and make the screen black. To quickly fix the OBS screen recorder's black screen, you can disable this feature while playing the video on a browser. Just go to its advanced settings and turn off the hardware acceleration option. You can find it listed under the advanced settings option in both Chrome and Firefox.
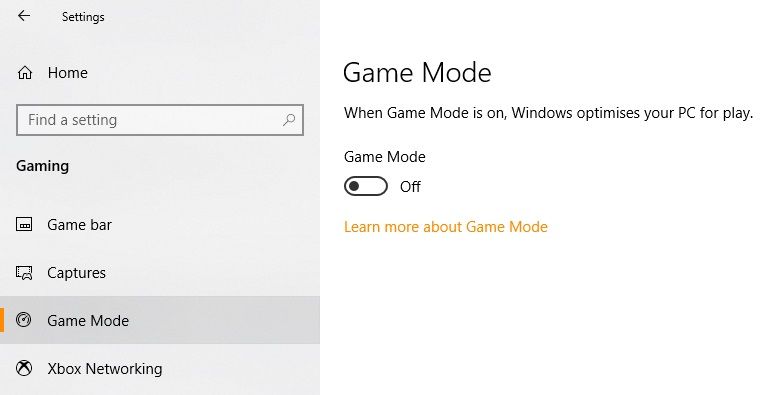
Fix 3: Turn off the Game Mode feature on Windows 10
Windows 10 has an inbuilt Game Mode feature to improve the overall gaming experience of the user. Though, if the Game Mode is enabled, then you might find it hard to record your gameplay with third-party tools like OBS. Therefore, to quickly learn how to fix OBS black screen, consider turning the Game Mode option off. Just go to your Start Menu and click on the gear icon to open Windows 10 Settings. Browse to the Gaming settings and disable the Game Mode feature from here.
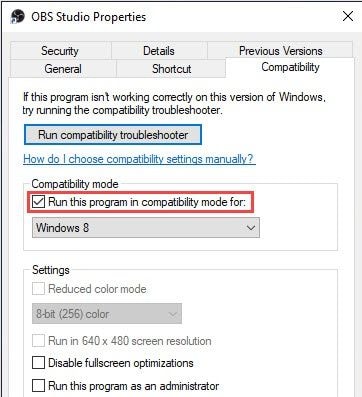
Fix 4: Run OBS in Compatibility Mode
There could be any compatibility issue for getting the OBS screen recorder black screen as well. For instance, your operating system might just be recently updated or there could be a driver-related issue. To learn how to fix OBS issues of these kinds, you can just open it in compatibility mode. To do this, right-click its icon from the desktop (or the location where it is installed) and go to its Properties > Compatibility. From here, you can turn on the option to run the program in compatibility mode.
Fix 5: Switch the GPU load
If you have two graphic cards installed on your system, then you can just switch the OBS load to fix the black screen issue on it. For instance, if you have an NVIDIA card installed on your computer, then launch the NVIDIA Control Panel and go to the Manage 3D Settings option. Under the Program Settings, go to the "Select the program to customize" field and browse the OBS application from here. Later, you can select the kind of performance (optimized or high) that you wish to implement with the application.

Fix 6: Repair the damaged video
If you think that the video has been corrupted or its meta-information is damaged, then you should consider repairing it. To do this, you can take the assistance of a professional tool like Repairit Video Repair. It is a user-friendly and extremely reliable tool that can fix all kinds of issues with a corrupted video. This includes repairing not playing videos, sound not working, black screens, blurry visuals, audio-video sync, and all kinds of issues related to videos. You can load multiple videos and follow a simple click-through process to repair your corrupted videos in no time.
Part 3: How to Make OBS Less CPU Intensive?
Open Broadcaster Software can get a bit heavy to run on your system due to its memory-extensive processes. If you would keep using OBS in the background for recording or streaming, then it can consume a large chunk of your processor. Therefore, a lot of users consider following these suggestions to make OBS less CPU intensive by making slight changes in its settings.
- Change the output resolution of the application by downsizing it to a more compatible option (like 720p).
- The ideal FPS (Frame Per Second) number should be 30, but if you increase it, make sure that you won't cross 60 FPS.
- OBS also provides a direct option to optimize the output with its "downscale" feature. Just go to its Settings > Output and mark the Output Resolution Downscale to 1.5 or 2.
- Go to the video encoder option in its settings and carefully chose a preset of the x264 encoder. For instance, the "faster" preset can consume twice the CPU utilization as compared to the "very fast" option here.
- Also consider optimizing other settings like Quick sync, AMF, and so on. You can also consider upgrading your hardware or adding a graphic card to optimize CPU utilization.
There you go! This brings us to the end of this guide on how to fix OBS black screen or video lag issues. As you can see, I have listed all kinds of solutions for the OBS screen recorder black screen. If your video has been damaged or is corrupted, then you can just use Repairit Video Repair. A highly resourceful tool, it can fix every major or minor issue related to your videos without any trouble. Feel free to give it a try for free and share this guide with others to teach them how to fix OBS black screen or video lag like a pro!