Two-pass encoding is a setting you often see in export dialogs in tools like Premiere Pro, HandBrake, and FFmpeg when preparing videos for YouTube, streaming platforms, or archiving. It matters because it can squeeze better visual quality out of the same file size, helping your footage look cleaner and more consistent even at lower bitrates.
Repair Corrupted Files To Save Your Data
 Security Verified. Over 7,302,189 people have downloaded it.
In this article
What Is Two-Pass Encoding?
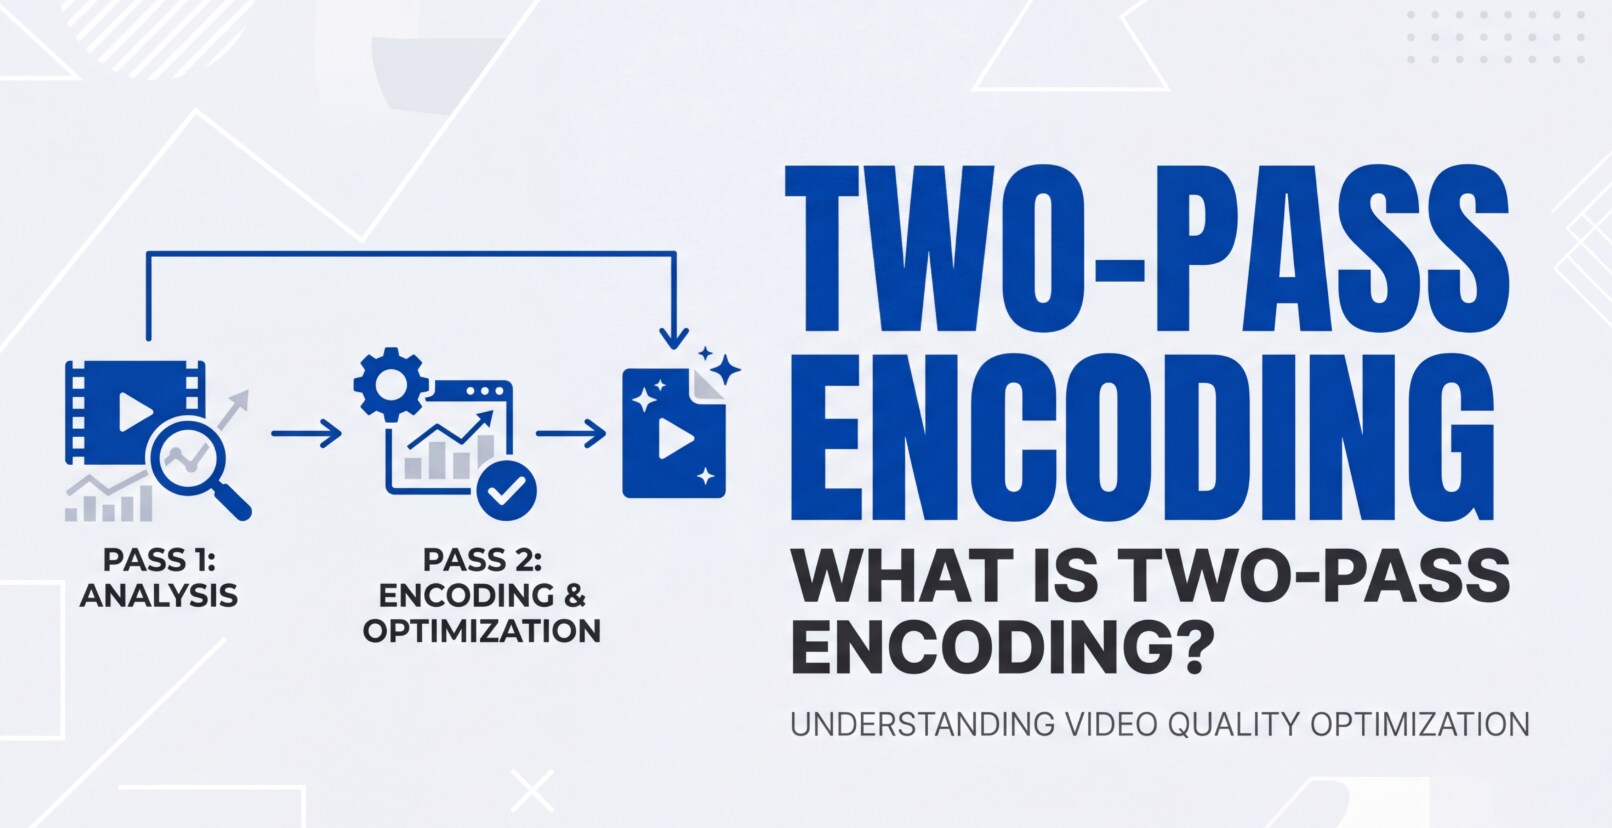
Two-pass encoding is a bitrate control strategy used in video encoding to improve quality at a given file size or target bitrate. Instead of compressing your video once and guessing how to distribute bits, the encoder runs through the footage twice.
In the first pass, it only analyzes the video, collecting statistics about motion, complexity, and scene changes. In the second pass, it uses that data to allocate bits more intelligently, sending more bitrate to difficult scenes (fast motion, noise, detailed textures) and less to simple shots (static interviews, slides). This makes video compression more efficient and helps keep visual quality consistent from start to finish.
You will encounter two-pass options when exporting from editing software, converting camera footage for delivery, preparing files for streaming services, or encoding masters for playback on TVs, phones, and social platforms.
Why Is Two-Pass Encoding Important in Video Compression?
Two-pass encoding exists to solve a common problem: how to hit a specific file size or bitrate while still getting the best possible video quality. One-pass encoding has to make decisions on the fly without seeing future frames, which can lead to uneven quality and wasted bits.
By separating analysis from encoding, two-pass offers several benefits:
- Better bitrate efficiency: Bits are moved from easy sections of the video to complex ones that actually need them, improving bitrate control.
- More consistent image quality: Dark or fast-motion scenes are less likely to fall apart into blocky artifacts because the encoder knows they are complex ahead of time.
- Predictable file size: For downloads, streaming libraries, and archives, you can target a precise bitrate and trust the encoder to use it smartly.
- Improved motion handling: Action shots, camera pans, and handheld footage can look smoother and cleaner at the same nominal bitrate.
However, there are limitations:
- Slower encoding: The file is scanned twice, so export times are roughly doubled compared with one-pass.
- No benefit at very high bitrates: If you are encoding visually lossless or near-lossless, the gains from two-pass may be minimal.
- Less helpful for live workflows: Real-time recording or live streaming typically cannot afford the extra analysis pass.
Despite these trade-offs, two-pass is a powerful option for offline encoding where you care about every megabyte and need smooth playback across devices and platforms.
How Does Two-Pass Encoding Work in the Encoding Workflow?
In a typical workflow, you capture or edit your footage, then export it using a codec such as H.264, H.265/HEVC, or AV1. Two-pass comes into play at the compression stage, directly impacting how bits are distributed across your frames.
You will see two-pass settings in tools like:
- FFmpeg, x264, x265 (command-line flags for pass=1 and pass=2)
- HandBrake (radio buttons for 2-pass encoding and target bitrate)
- Adobe Premiere Pro and Media Encoder (CBR vs VBR, 2-pass options)
- Some hardware encoders that offer 2-pass modes for file-based exports
First pass: analysis of your video
In the first pass, the encoder does not try to create a final, high-quality stream. Instead, it runs quickly through the entire video and records information such as:
- Where scene changes and cuts occur
- How much motion and detail each segment contains
- How complex textures, noise, or camera shake are
- How many bits each segment would roughly need to hit your video compression targets
In many tools, the first pass writes a temporary log file rather than a usable video. This keeps the process fast and lightweight, focusing only on gathering statistics.
Second pass: optimized encoding
During the second pass, the encoder reads the analysis data and encodes your video for real. This is where the quality gains happen:
- Complex scenes get a higher bitrate budget to control blocking, banding, and smearing.
- Simple or still shots get fewer bits while still looking clean, which keeps the overall file size in check.
- The encoder can maintain a more stable perceived quality from frame to frame rather than wildly fluctuating detail.
In practice, the steps look like this for common tools:
| Tool | How two-pass appears |
|---|---|
| HandBrake | Enable "2-pass encoding" with a set average bitrate (kbps). |
| Adobe Media Encoder / Premiere | Choose VBR, 2-pass under bitrate settings for H.264/H.265 exports. |
| FFmpeg (x264/x265) | Run two separate commands: one with -pass 1, then another with -pass 2, sharing the same log file. |
Once encoding finishes, your final file should hit your target size while keeping quality as high and even as possible across the whole duration.
When Should You Care About Two-Pass Encoding? Common Mistakes and Quick Tips
Two-pass encoding matters most to editors, colorists, YouTubers, filmmakers, and anyone delivering polished videos where both quality and file size are important. It also helps when preparing libraries for OTT platforms, educational portals, or corporate video systems where bandwidth is limited.
Situations where two-pass is worth using:
- Final exports for clients, festivals, or paid courses
- Upload-ready files for YouTube, Vimeo, or social media with tight upload speeds
- Downloadable videos where you must control file size precisely
- Archiving a large catalog while trying to save storage space
Cases where it may not matter much:
- Quick edits or preview renders where speed is more important than efficiency
- Live streaming from OBS or hardware encoders (you cannot do two passes in real time)
- High-bitrate masters or mezzanine files where compression artifacts are already negligible
Common misunderstandings:
- "Two-pass always looks better than one-pass." At very high bitrates or with constant quality (CQ/CRF) modes, the difference can be small.
- "Two-pass will fix bad source footage." It cannot remove noise, blur, or focus issues; it only decides how to spend bits.
- "Two-pass can repair broken files." It cannot fix structural corruption; you need a video repair tool for that.
Practical quick tips:
- Use two-pass encoding whenever you must meet a specific bitrate or file size and have time for a slower export.
- Pick a realistic bitrate for your resolution and frame rate; two-pass cannot work miracles if the bitrate is far too low.
- Keep your source as clean as possible (noise reduction, stable exposure) so the encoder does not waste bits on random noise.
- Test short segments with different bitrates and passes before encoding an entire feature-length project.
The takeaway: two-pass encoding is a smart switch to flip for final deliveries where you care about both quality and size, but it is not required for every draft or rough cut.
How to Use Repairit to Fix a Corrupted Video File
Even with perfect two-pass encoding settings, things can go wrong: interrupted transfers, storage errors, or power cuts can leave you with damaged or unplayable video files. Wondershare Repairit is designed for exactly these situations. It focuses on video repair and other file recovery tasks, helping you rescue clips that no longer open, stutter badly, or refuse to play after export. Learn more and download it from the Repairit official website, then re-encode your rescued footage with your preferred video encoding settings.
Key features of Repairit for video creators
- Video repair for corrupted or unplayable files from cameras, drones, phones, and storage devices.
- Support for multiple popular formats and high-resolution footage, fitting modern video compression workflows.
- An intuitive repair flow with preview and flexible saving options, so you can quickly get back to your encoding workflow.
Step-by-step: Fix corrupted video files with Repairit
- Add corrupted video files
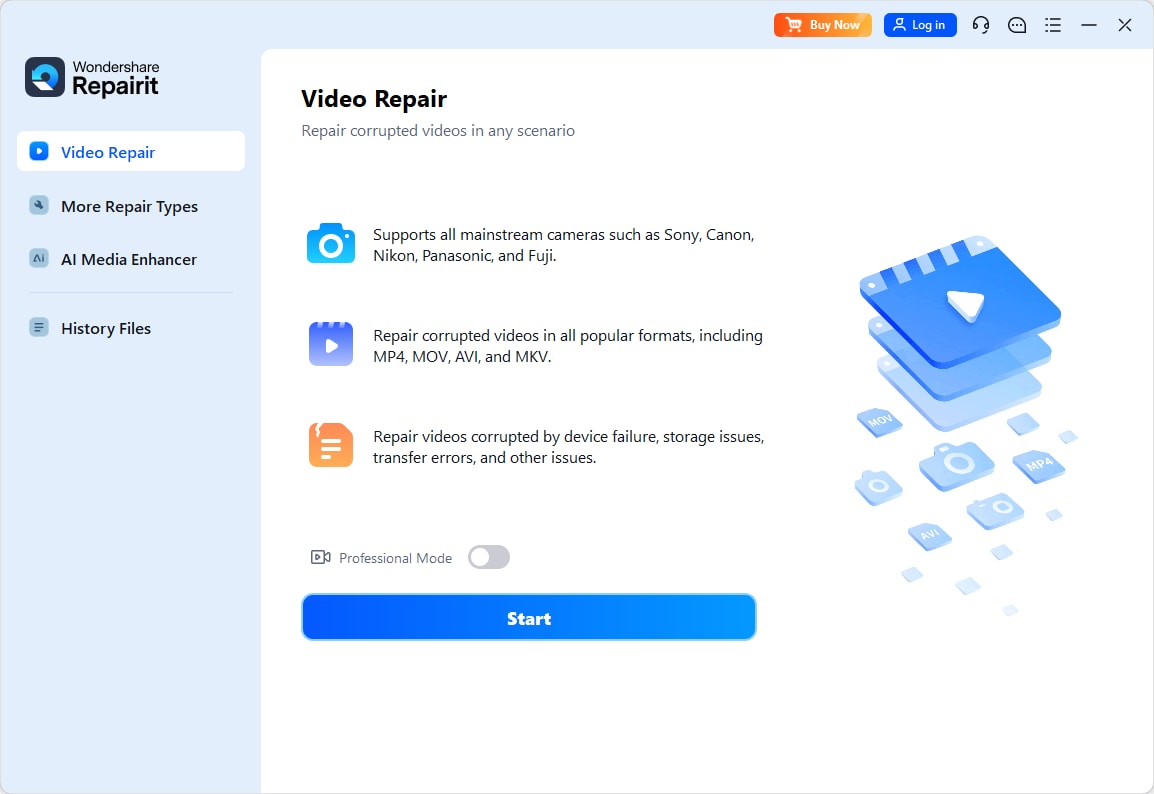
Install and launch Wondershare Repairit on your computer, then go to the Video Repair module. Click the button to add files and browse to the corrupted or unplayable clips from your camera card, external drive, or local folder. You can load a single problem file or add several damaged videos at once.
- Repair video files
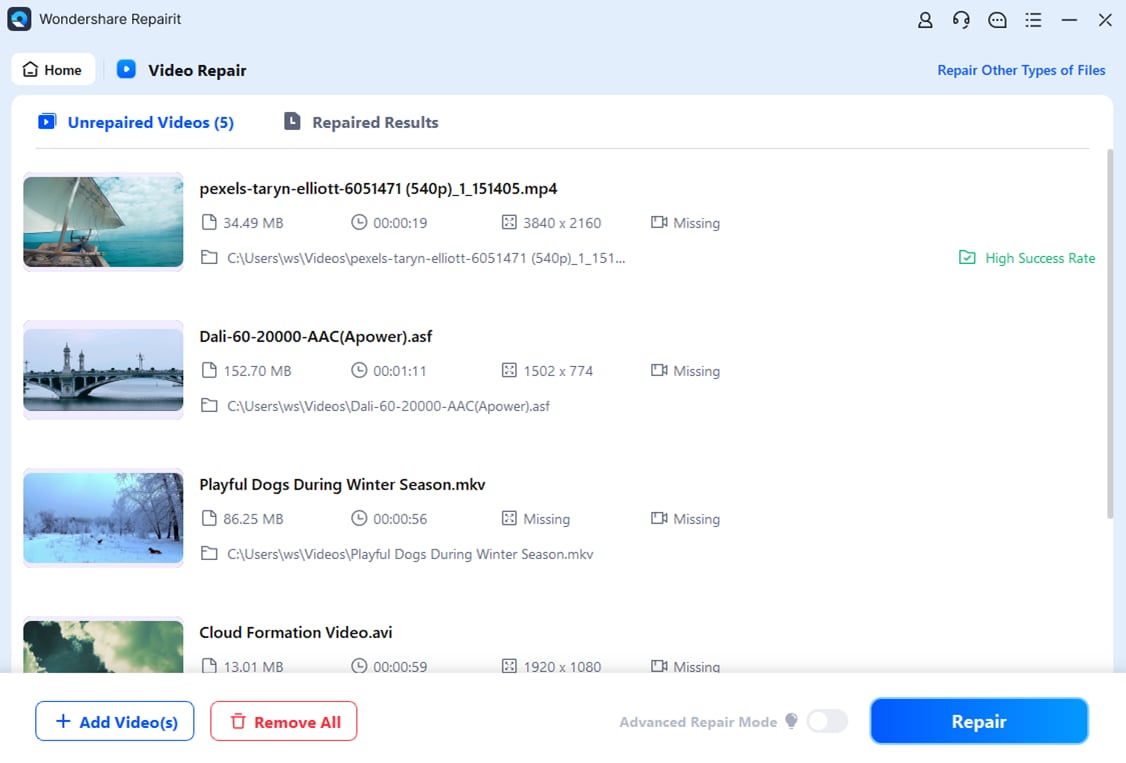
After your videos are listed, start the repair process. Repairit will scan each file, analyze the damage in the container and stream, and attempt to reconstruct a playable version. When the repair finishes, use the built-in preview window to check both picture and sound, making sure playback is smooth and properly synchronized before you proceed.
- Save the repaired video files
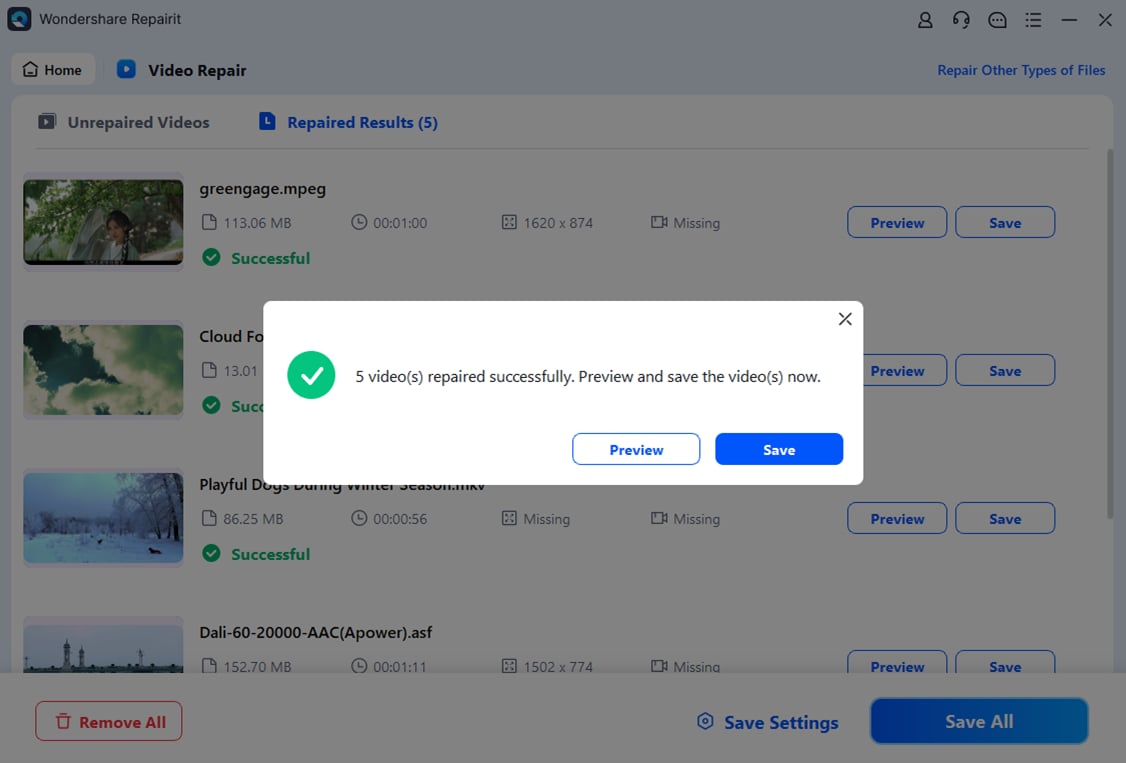
If the preview looks good, choose a safe output folder that is different from the original location and click to save. Repairit will export the repaired copies so you can open them in your editor, convert them again with video encoding tools, or upload them to your streaming platform using optimized two-pass encoding and other bitrate control settings.
Conclusion
Two-pass encoding is a practical way to boost video quality when you must stay within strict file size or bitrate limits. By analyzing your footage first and encoding second, it gives the encoder a global view of motion and complexity, leading to smarter bitrate control, smoother motion, and fewer artifacts in challenging scenes.
For final exports that will be downloaded, streamed, or archived, taking the extra time for two-pass often pays off with more professional-looking results. Just remember that no encoding setting can repair structural file damage. If your videos become corrupted after recording, editing, or transfer, a dedicated Repairit workflow can help you restore them before you run another optimized encode.
Next: Lookahead
FAQ
-
1. What is two-pass encoding in simple terms?
Two-pass encoding means the encoder analyzes your entire video once to understand which parts are easy or hard to compress, then encodes it a second time using that information. The goal is to deliver better video quality at the same file size compared with a single-pass encode.
-
2. When should I choose two-pass instead of one-pass encoding?
Use two-pass when you need reliable bitrate control and consistent quality at a fixed file size, such as for streaming uploads, client deliveries, or downloadable training videos. One-pass is better when you need speed, like quick drafts, internal reviews, or time-sensitive exports.
-
3. Does two-pass encoding always look better than one-pass?
Two-pass usually looks better or more consistent at the same average bitrate, especially in difficult scenes with lots of motion. However, at very high bitrates or when using constant-quality (CRF) modes, the visible difference between one-pass and two-pass encoding can be small.
-
4. Can two-pass encoding fix a corrupted video file?
No. Video encoding settings like two-pass only control how data is compressed; they do not repair damaged file structures. If a file is corrupted and will not play, use a dedicated video repair tool such as Wondershare Repairit to try to restore it first, then re-encode if needed.
-
5. Does two-pass encoding affect playback compatibility?
No, two-pass does not change the final codec standard (H.264, H.265, etc.), so playback compatibility on TVs, phones, and browsers remains the same. It only improves how efficiently your chosen codec and bitrate are used, which can lead to smoother playback at lower bitrates, especially over constrained networks.