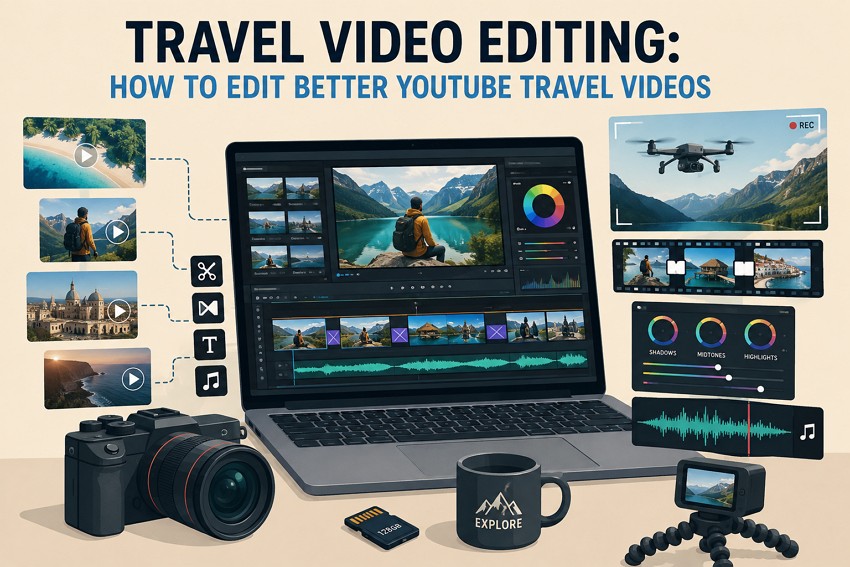
Two creators can film the same journey yet produce completely different viewer experiences afterward consistently. Strong storytelling rarely begins during filming because thoughtful editing shapes every viewing decision naturally. Most abandoned videos lose attention through confusing pacing, weak structure, and unnecessary scenes alone.
Effective travel video editing transforms scattered clips into engaging stories viewers remember longer. This guide explains every step from organizing footage to publishing polished travel videos.
In this article
Part 1. Decide What Kind of Travel Video You Are Editing
Editing YouTube travel videos starts by deciding the final format before making any editing decisions. Choosing the right format early prevents unnecessary changes and saves editing time throughout the entire process.
Popular Types of YouTube Travel Videos
The table below compares common travel video formats with their typical editing priorities and styles:
| Type | Typical Length | Editing Emphasis |
| Daily Vlog | 10 to 20 minutes | Quick cuts, personality |
| Cinematic Short Film | 3 to 6 minutes | Music, cinematic B-roll |
| Destination Guide | 8 to 15 minutes | Clear sections, titles |
| Food or Culture Episode | 12 to 25 minutes | Close-ups, natural reactions |
| Vertical Short | Up to 3 minutes | Fast hook, quick pacing |
What to Learn From the Best Travel Vloggers on YouTube
Studying the best travel vloggers on YouTube teaches better editing habits than copying expensive camera equipment. Watch where they cut, introduce scenes, and switch shots to maintain viewer interest consistently throughout. Most successful creators follow consistent editing patterns instead of changing their style with every upload.
Match the Editing Style to Your Audience
Viewers seeking travel advice expect clear information instead of long cinematic sequences without useful details. Viewers watching for atmosphere prefer fewer explanations and longer scenes showing places through natural sounds. Review your highest-retention videos, then repeat similar editing choices that kept viewers watching longer.
Part 2. Prepare Your Travel Footage for Editing
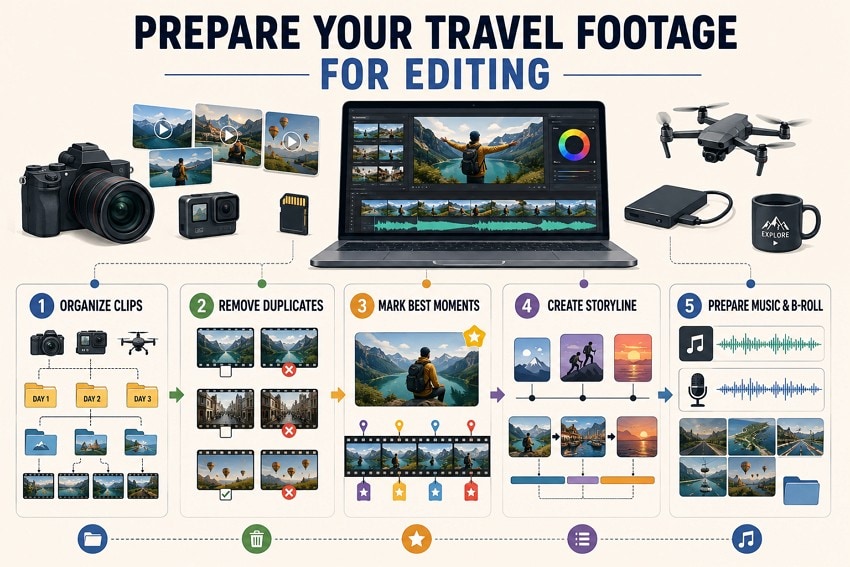
Good preparation makes travel video editing faster while helping you find your strongest footage first. These 5 steps organize everything before editing begins and prevent unnecessary work later during production.
Step 1. Organize Clips by Day, Location, and Camera
Separate footage by camera because different devices save files using different naming systems. Group clips by recording day, then organize them into folders for each location. Clear folder names help you find specific footage quickly during future editing sessions.
Step 2. Remove Duplicate and Unusable Clips
Delete failed recordings, accidental clips, and footage containing unusable audio before editing begins. Keep uncertain clips because short sections sometimes become useful cutaway shots during editing. Compare duplicate takes because later recordings often look sharper than earlier versions during reviews.
Step 3. Mark the Best Moments
Watch each day's footage once and mark moments worth using inside your finished video. Use color labels or markers to identify important clips before starting the editing process. Marked clips become your working footage while remaining clips stay available without timeline clutter.
Step 4. Create a Simple Travel Video Storyline
Write three simple lines describing your travel video before opening the editing software first. Arrange scenes using beginning, obstacle, and ending to create a clear viewing structure naturally. Without clear structure, your video becomes disconnected scenes instead of meaningful travel stories together.
Step 5. Prepare Music, Voiceover, and B-Roll
Choose background music first because tempo influences pacing and overall video structure from the beginning. Adobe recommends editing with proxy files when high-resolution footage causes slow playback or reduced performance. Record voiceover during one session to maintain consistent speaking tone throughout the entire video. Collect strong B-roll separately, avoiding searches while editing important scenes into finished videos.
Part 3. Choose the Right Travel Video Editor
Creating YouTube travel videos starts by choosing an editor that best matches your workflow first.
Compare Online, Desktop, and Mobile Editors
Different editing platforms offer unique advantages for different workflows and devices alike. Look at the table below to compare their features before choosing one:
| Category | Common Options | Strengths | Limitations |
| Online | Clipchamp, WeVideo, Canva | No installation, accessible from most devices | Upload times, limited features, free plan restrictions |
| Desktop | Premiere Pro, DaVinci Resolve, Final Cut Pro | Advanced editing, 4K support, professional color tools | Higher learning curve, stronger hardware required |
| Mobile | CapCut, LumaFusion, VN | Edit anywhere, quick social media publishing | Limited for complex projects and long timelines |
Which Type of Editor Should You Choose?
- Choose desktop software for long videos if your computer handles demanding editing tasks.
- Mobile editors suit creators publishing videos while traveling, especially for vertical video content regularly.
- Online editors work best when editing away from your personal computer during travel periods.
- Generate proxy files when 4K playback stutters, then relink originals before exporting final videos.
Part 4. How to Edit a Travel Video for YouTube
Travel video editing follows clear steps that gradually shape raw footage into finished videos successfully. Now, let's edit your footage using these 9 simple steps from beginning to end.
Check The Best Travel Vloggers on YouTube For Inspiration
The table below highlights the best travel vloggers on YouTube and their editing strengths:
| Creator | Known For | What to Borrow |
| Drew Binsky | Documentary pieces built on culture | Leading each video with one human story |
| Kara and Nate | A long-running couple travel series | A repeatable episode shape viewers expect |
| Mark Wiens | Food-led travel from a home base | Tight close-ups and unfiltered on-camera reaction |
| Peter Santenello | Conversation-driven, journalistic films | Letting long takes run without cutaways |
| Yes Theory | Challenge and comfort-zone trips | Stating a clear goal in the opening minute |
Build a Strong Opening
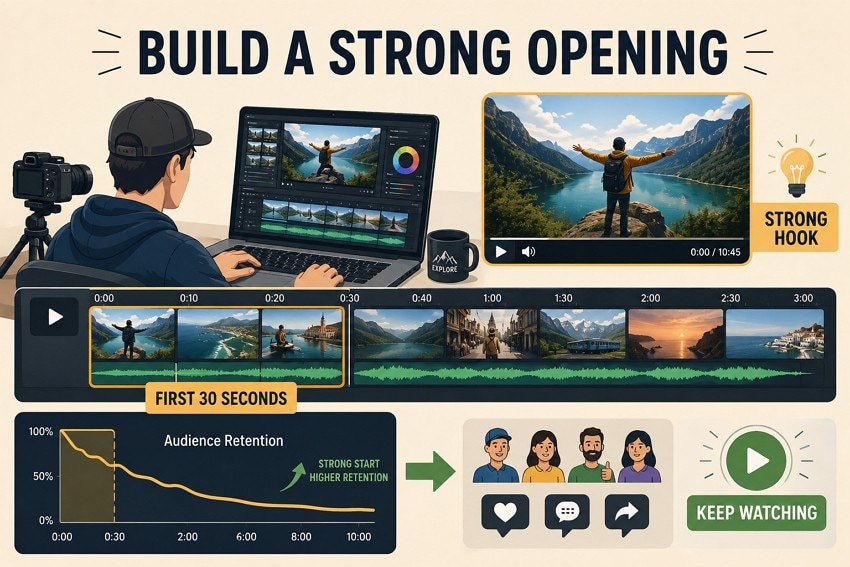
The first 30 seconds strongly influence whether viewers continue watching or leave your travel video early. Start with your strongest scene or show what the video offers before introductions begin. Avoid long intros because exciting openings keep viewers watching much longer from the very beginning.
Create the Rough Cut
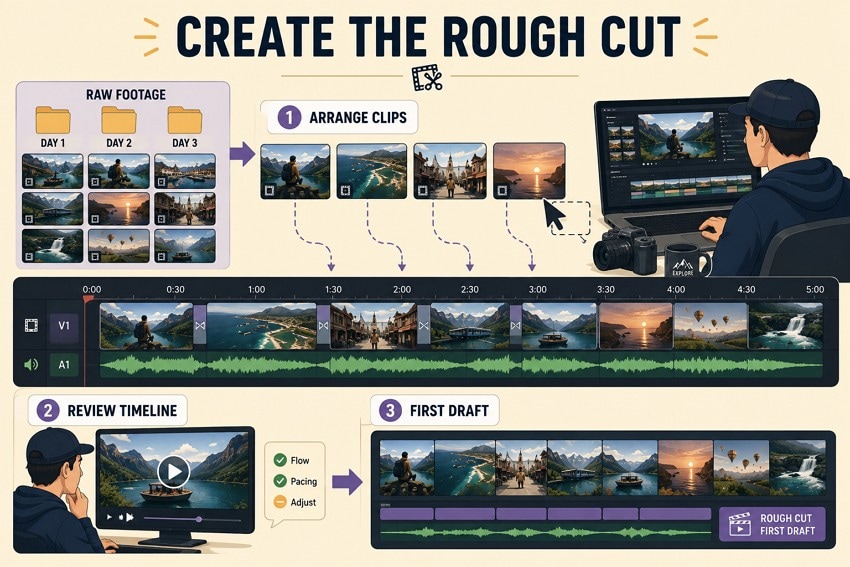
Place your selected clips onto the timeline following your planned story without trimming anything yet. Watch the complete video once and note where your attention naturally starts fading during playback. A rough cut longer than your final video length is completely normal at this stage.
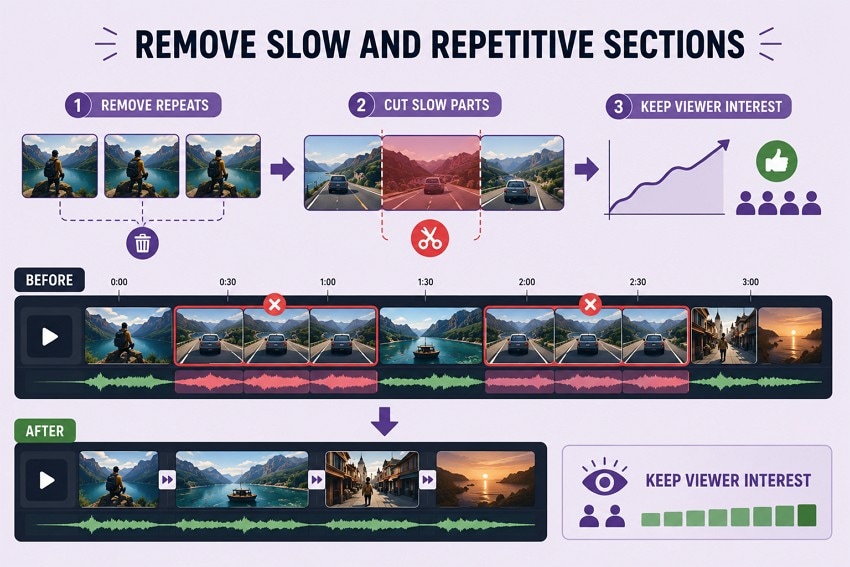
Remove Slow and Repetitive Sections
Remove every section where nothing important happens or information repeats without adding new value. Delete similar clips because viewers rarely need to watch the same moment twice again. Long videos are acceptable, but repeated scenes quickly reduce viewer interest and attention.
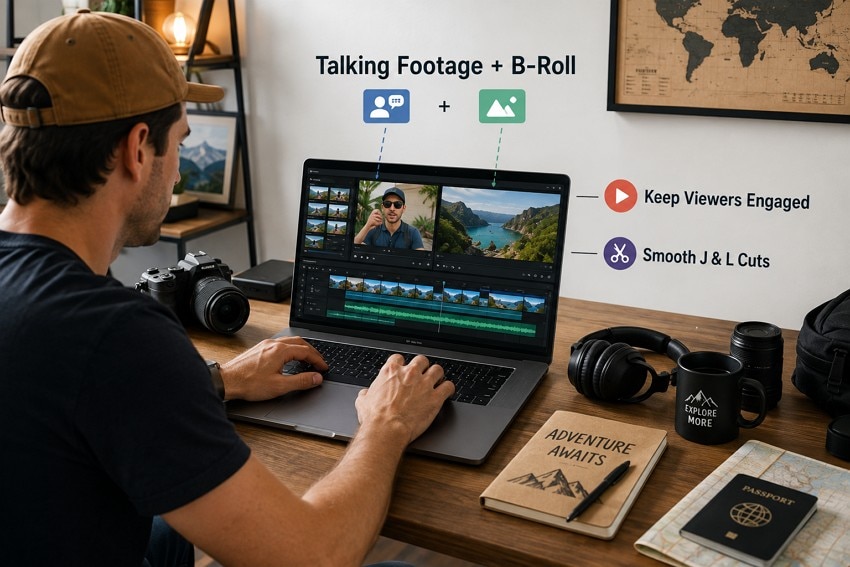
Balance Talking Footage With B-Roll
Talking footage explains information while B-roll shows places across your travel YouTube channel naturally. Cover talking sections longer than 15 seconds with interesting footage showing nearby scenes instead. Use J and L cuts because overlapping audio hides transitions between different video clips.
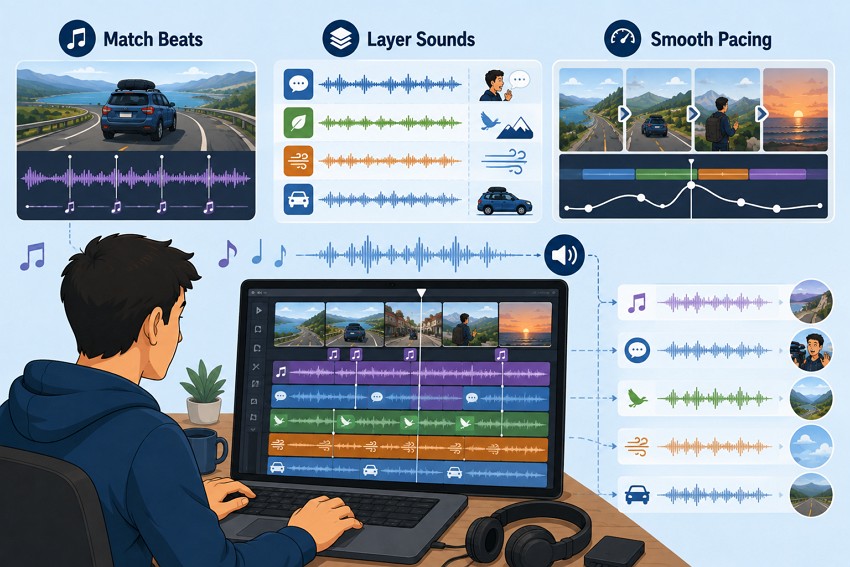
Improve the Pacing With Music and Natural Sound
Cut visual changes onto the points where the music shifts, then drop the track under dialogue rather than removing it. Let location audio come through in the gaps, since silence under music feels artificial. Pacing problems are usually clips held a few seconds too long.
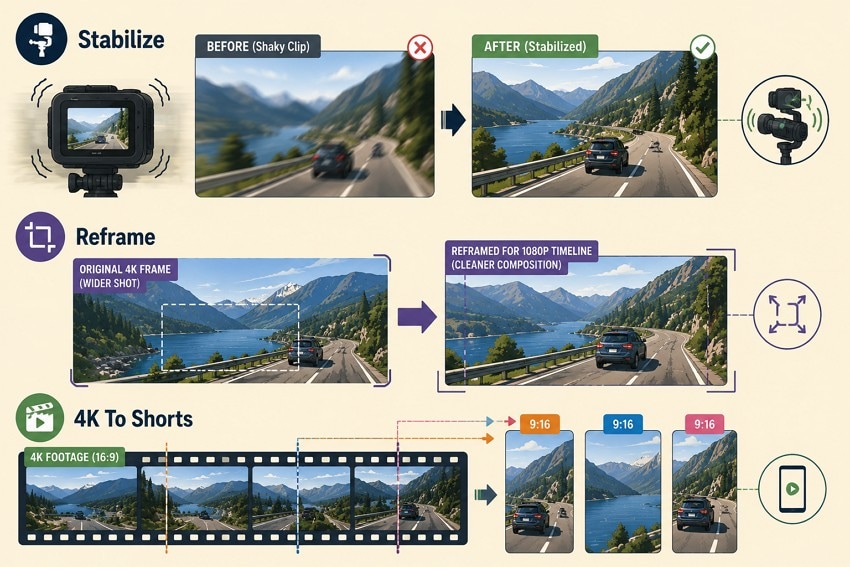
Stabilize and Reframe Problem Clips
Run stabilization only on shots that need it, because many stabilization methods crop footage slightly. Reframing is the other half of this, and a 4K source gives room to punch in on a 1080p timeline. That same headroom lets you pull vertical crops for shorts from the identical footage.
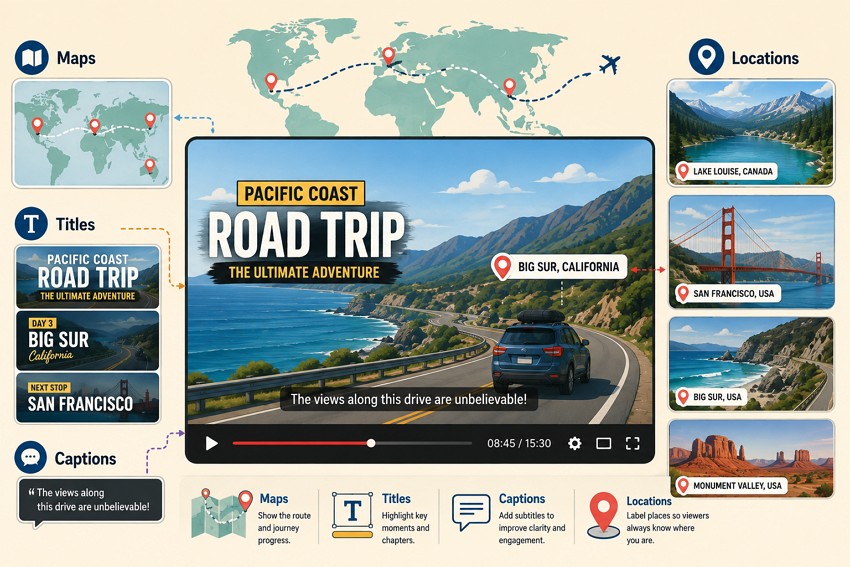
Add Maps, Titles, Captions, and Location Labels
Location labels answer the question viewers ask most often on travel content. A short animated map between countries costs seconds and saves paragraphs of explanation. Captions improve accessibility and comprehension when viewers cannot or prefer not to use sound.
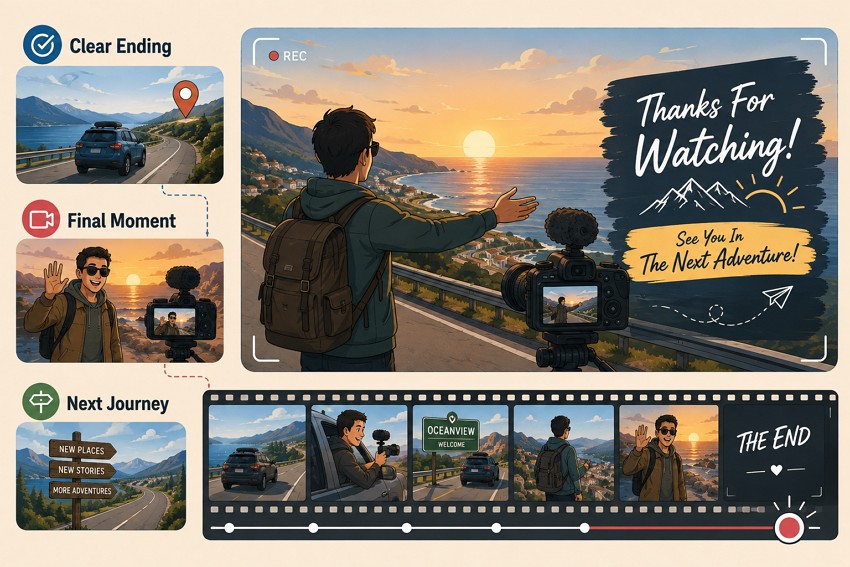
Finish With a Clear Ending
End on a resolution rather than an outro card. A closing thought, an arrival, or a look ahead to the next destination gives viewers a reason to check your channel again. Place end screen elements over a moving shot instead of a frozen frame, since static holds invite people to click away.
Part 5. Fix Common Travel Video Editing Problems
The best travel vloggers on YouTube avoid common editing problems by fixing weak decisions earlier in the workflow. The table below links each issue to the stage where it should be corrected:
| Problem | Root Cause | Solution |
| Video Feels Too Long | No storyline set before editing | Cut back to the three or four beats that matter |
| Viewers Leave Early | Slow or branded opening | Move your best moment into the first thirty seconds |
| Choppy, Restless Feel | Cutting on the beat too rigidly | Vary shot length and let some shots breathe |
| Audio Jumps Between Clips | Mixed sources at different levels | Normalize dialogue, then set music beneath it |
| Mismatched Color | Multiple cameras, no matching pass | Balance clips against each other before any grade |
| Copyright Claim on Music | Track not cleared for use | Use a licensed library and check before uploading |
| Soft or Noisy Footage | High ISO, low light, or heavy compression | Enhance the clips before export, not after |
| Export Looks Worse Than Timeline | Wrong resolution or bitrate on output | Match export settings to the sequence |
Enhance Low-Quality Travel Clips Before Export

Repairit - AI Video Enhancer
Enhance blurry, grainy, or low-resolution travel footage before final export.
-
Travel footage enhancement. Improve soft clips from phones, cameras, night scenes, and compressed sources.
-
AI clarity improvement. Reduce grain, sharpen details, and upscale supported videos before editing or export.
-
Preview before saving. Compare results before exporting enhanced copies.
Some footage is simply weaker than the rest, and no amount of cutting hides it. Handheld night markets, phone clips filmed against bright sky, and anything shot at high ISO arrive soft, grainy, or short on detail. Deleting them costs you moments you cannot re-shoot from another continent.
Repairit Video Enhancer works on that specific problem, using AI models to rebuild detail rather than simply sharpening what is already there. It runs on Windows and macOS with an online version alongside, and accepts MP4, MOV, AVI, MKV, 3GP, FLV, and WEBM. Running weak clips through it before export keeps them usable instead of cut.
Key Features
- Resolution Upscaling: Raises footage up to 4X, taking low-resolution travel clips toward 4K output.
- Noise and Grain Removal: Cleans the speckle that appears in low-light markets, sunsets, and interior shots.
- Blur and Detail Recovery: Rebuilds soft edges in handheld footage so faces and signage read clearly again.
Guide to Enhance Weak Travel Clips Before Export
Not every weak shot needs to be removed from YouTube travel videos. These 3 steps can turn imperfect footage into a cleaner, more watchable clip ready for export:
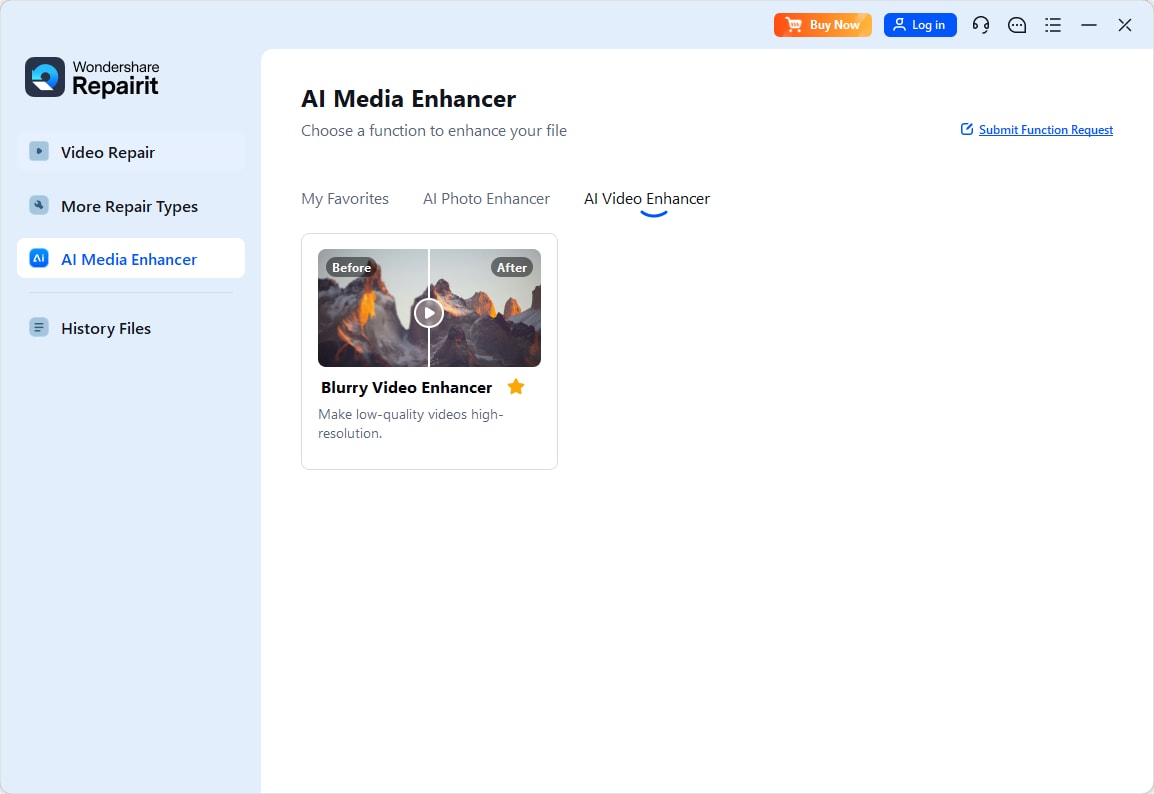
Step 1. Load the Clips You Want Improved
From the AI Media Enhancer page > choose AI Video Enhancer > click Blurry Video Enhancer.
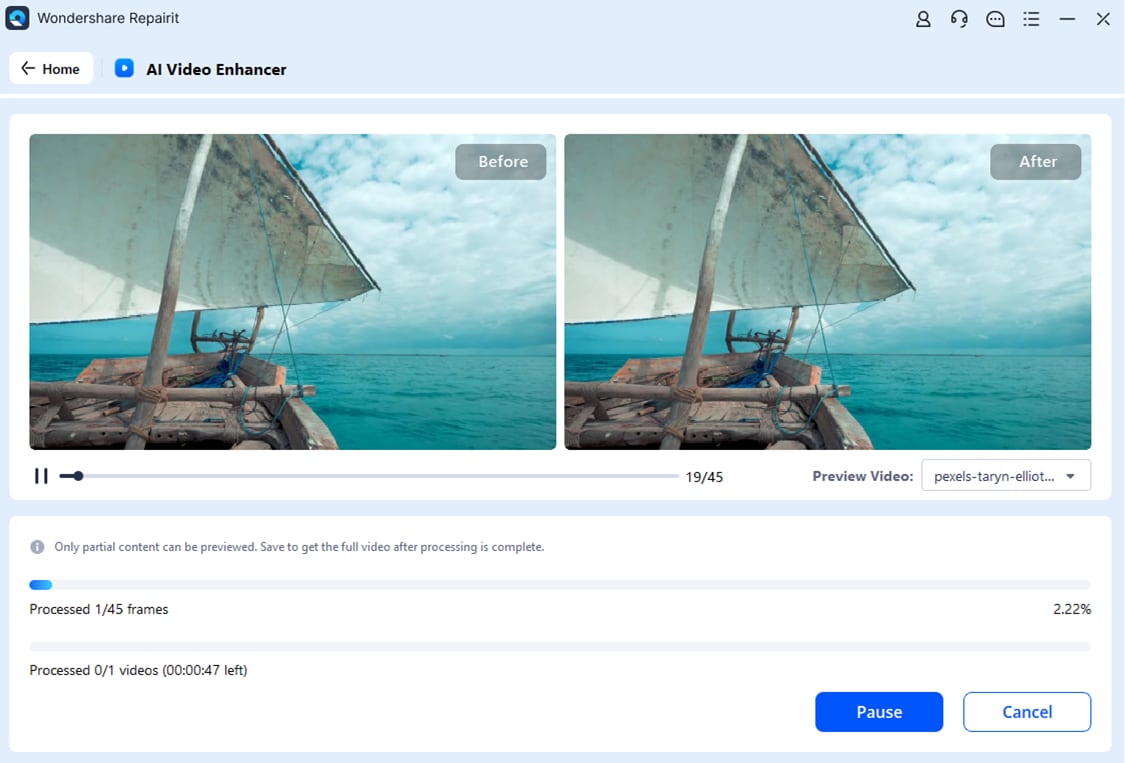
Step 2. Preview the Enhancement Process
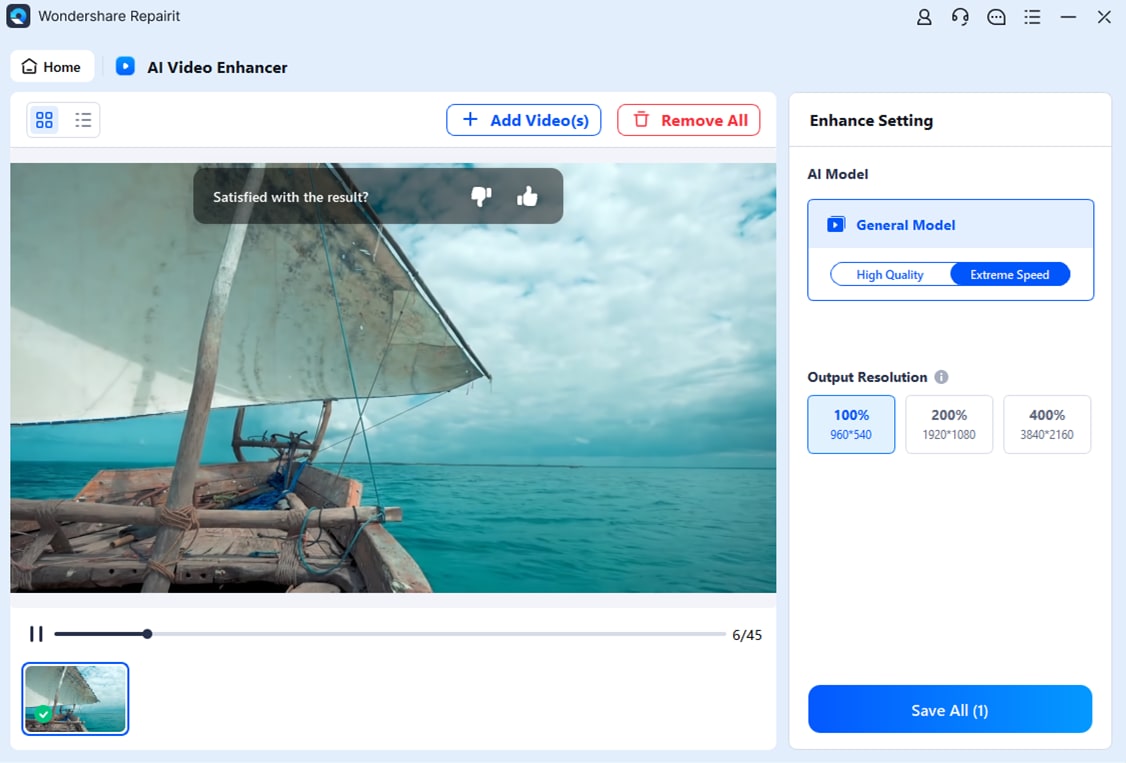
Watch the Before and After comparison while Repairit processes the video frame by frame.
Step 3. Choose Output Settings and Save
Select the preferred AI mode and output resolution, review the result, then click Save All to export the enhanced video.
Part 6. Publish and Grow a Travel YouTube Channel
A finished edit is only half the work on a travel YouTube channel. How the file is exported, titled, and described decides how many people ever reach it. These 5 steps run after the timeline is locked:
1. Use the Right YouTube Export Settings
Export at the resolution and frame rate of your sequence, with no conversion in between. YouTube publishes its own resolution and aspect ratio guidance, and 16:9 remains standard for long-form travel content. Exporting a 4K master is worth it even for a 1080p audience, since the platform derives every lower rendition from your upload.
2. Choose a Clear Travel Channel Focus
A consistent channel focus can help viewers understand what content arrives next. A focus can be a region, a travel style, or a budget level, and it matters more than variety early on. Broad channels take far longer to build a returning audience. Narrowing later is harder than starting narrow and widening once people already subscribe for a reason.
3. Create Search-Friendly Titles and Thumbnails
Write clear titles combining searchable destinations with a specific angle, benefit, experience, or compelling story. Thumbnails need one readable subject and text large enough to survive a phone screen. Test two versions where your analytics allow it.
4. Optimize Descriptions and Video Chapters
Mention the main topic naturally near the description's beginning, where viewers can understand it quickly. For chapters, YouTube requires a first timestamp of 00:00, at least three timestamps in ascending order, and a minimum chapter length of ten seconds.
5. Use Audience Retention to Improve Future Videos
The key moments for audience retention report shows how well individual moments held attention, with data arriving one to two days after publishing. Top moments mark where almost nobody left, while dips mark what viewers skipped. Reading both after every upload teaches you more about pacing than any tutorial.
Conclusion
Nothing in this guide requires a better camera or a bigger budget. Sort the footage properly, remove anything that feels dull on the first watch, and use retention data to improve each upload on your travel YouTube channel. Treat every video as a test, not a finished product. Clips too soft to publish can go through Repairit before export instead of being discarded.
Frequently Asked Questions
-
Do I need paid software for travel video editing?
No, since DaVinci Resolve and CapCut both offer capable free tiers. Paid tools mainly buy you speed, format support, and finishing features rather than better results on their own. -
Can Repairit improve blurry travel videos before editing?
Yes. Repairit AI Video Enhancer sharpens blurry footage, increases resolution, and improves clarity before you import clips into your video editor. -
How do I avoid copyright claims on travel video music?
Use a licensed music library and keep the license record for each track. Popular songs almost always trigger a claim, even when the video is not monetized. -
Can old travel footage be upscaled for a modern channel?
Yes, AI upscaling can lift older clips toward 4K and remove much of the grain. Results depend on the source, so check the preview before committing a whole archive.