
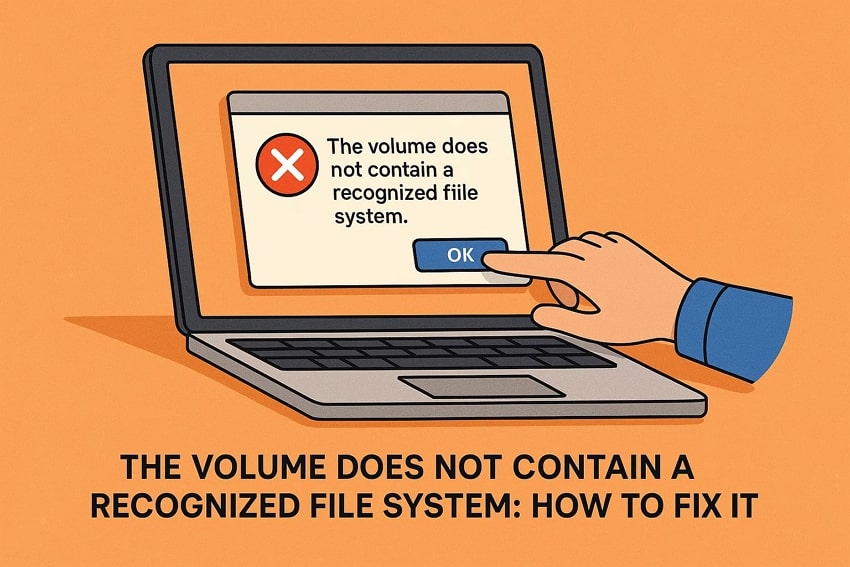
Many people feel worried when their device’s drive stops working and starts hiding their files. This problem can appear suddenly and make simple computer actions feel harder. “The volume does not contain a recognized file system” error appears when Windows cannot read the data stored on the drive.
However, this can be fixed using simple steps that protect your files. By following the right methods, you will be able to open the drive again and use your saved files safely.
Table of Contents
Part 1. The Volume Does Not Contain a Recognized File System: What It Means
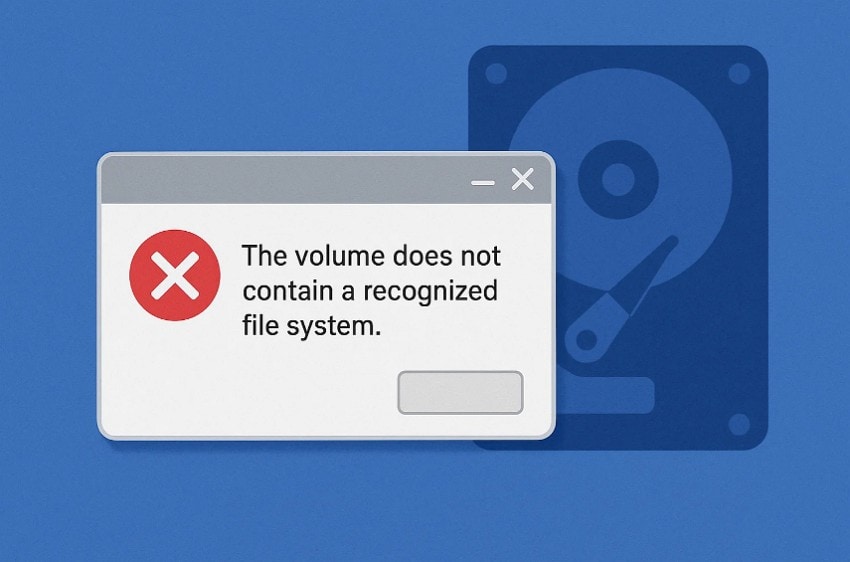
“The volume does not contain a recognized file system” error appears when Windows cannot understand how the drive is arranged inside. A normal drive uses a clear file system setup that Windows can read. However, if it gets damaged, Windows cannot open the drive at all. When this happens, the drive may appear as RAW during simple checks.
The Volume Is Unreadable? Here’s Why Windows Can’t Recognize It
Now, before trying any fixes, let's explore the key causes listed, explaining this file system corruption error:
- File Corruption: Improper removal or sudden crashes can damage the drive’s basic file system. Windows cannot read important areas and marks the entire volume unreadable.
- Partition Damage: A broken partition map can stop Windows from finding your drive. Windows only sees empty space and shows RAW messages during simple access attempts.
- Unsupported Format: Drives using other file systems confuse Windows because their layouts differ from supported versions. Windows detects the device normally, but cannot mount anything for reading data.
- Malware Damage: Malware may change or remove key information that helps Windows read stored data. After this harmful change, the drive appears unreadable and often suggests immediate formatting.
- Hardware Failure: Bad sectors or weak components can block Windows from reading important drive areas. When these spots fail completely, Windows marks the entire disk as unreadable.
Part 2. Volume Not Recognized? 6 Easy Steps to Restore Access
With an idea of the error and its potential causes, let’s review the following fixes to fix “the volume does not contain a recognized file system” error:
Method 1. Run the SFC (System File Checker) Command
Windows sometimes struggles because damaged system files interrupt normal connection with drives. SFC scan checks protected system files carefully and replaces broken ones using stored healthy copies. This method helps when system corruption creates reading issues that confuse the connected external devices. Below are the steps to apply this fix and begin repairing system problems:
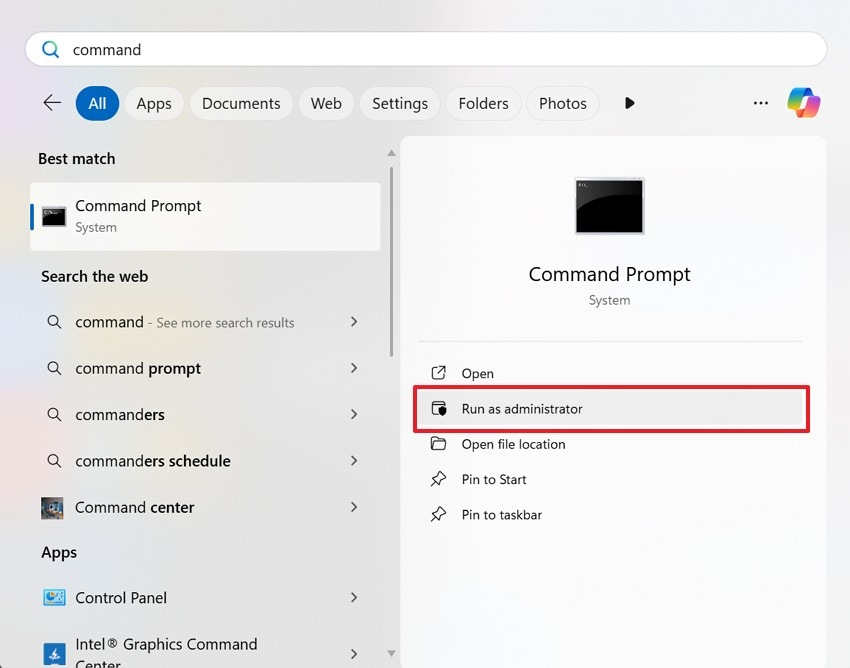
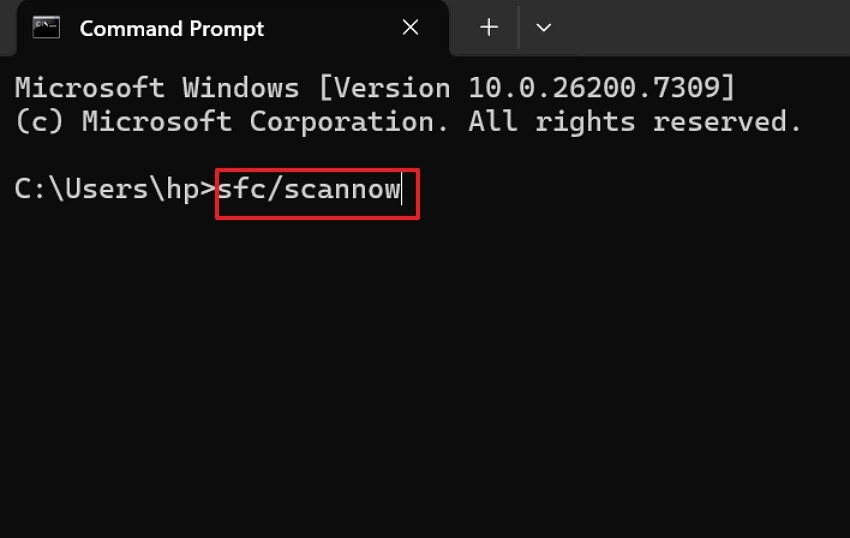
Step 1. Start by searching for Command Prompt and choose “Run as Administrator” to proceed further.
Step 2. Following this, type the command “sfc /scannow," then press the "Enter” key, and wait until the scan finishes.
Method 2. Run CHKDSK Command
Some drives become difficult to access when damaged sectors interrupt normal data reading. CHKDSK scans the disk carefully and rebuilds essential structures needed for smooth use. Windows reads the drive space more easily once repaired entries guide the system correctly. However, serious physical damage may still require more specialized repair approaches. Continue using the instructions below to restore clear drive function with CHKDSK:
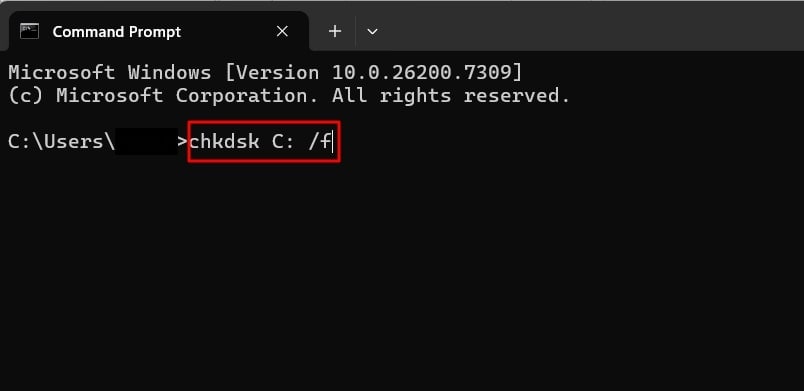
Instructions. After accessing CMD, run the command “chkdsk c /f” and replace the letter “c” with your drive letter. Next, hit the “Enter” key and wait until the command fixes file system errors across the selected drive.
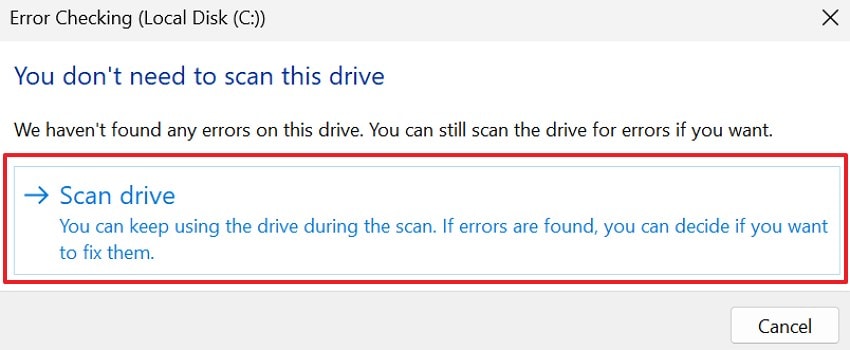
Method 3. Scan Drive for Errors
Many users rely on scanning their drive because it offers simple, direct error checking. Windows examines the drive thoroughly and resolves problems affecting everyday file access. Meanwhile, it proves helpful when “the volume does not contain a recognized file system” error occurs. Adhere to the steps below to start running Windows error scanning:
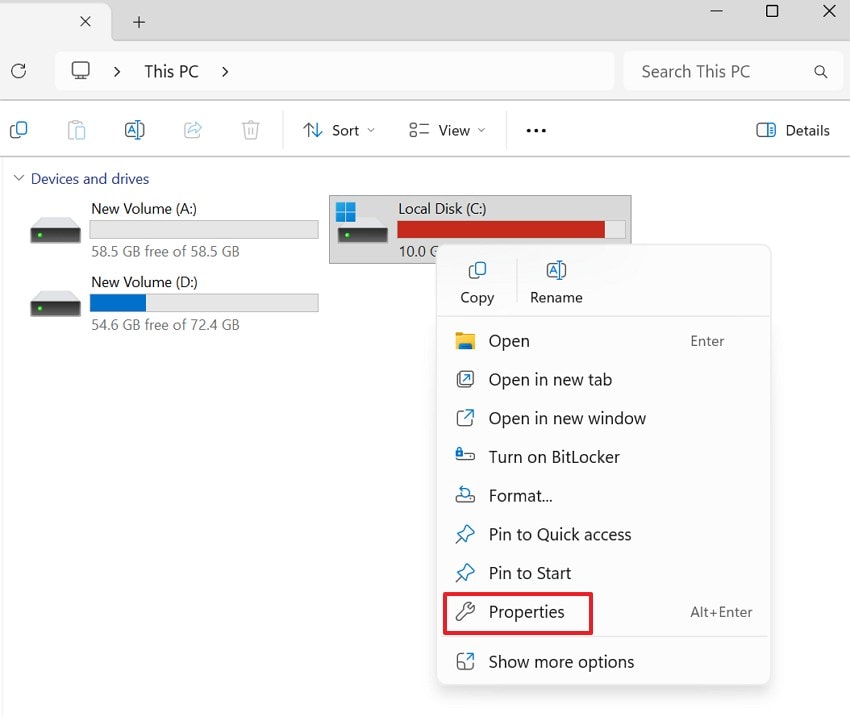
Step 1. First, right-click the target drive in “This PC” and select “Properties” from the dropdown menu.
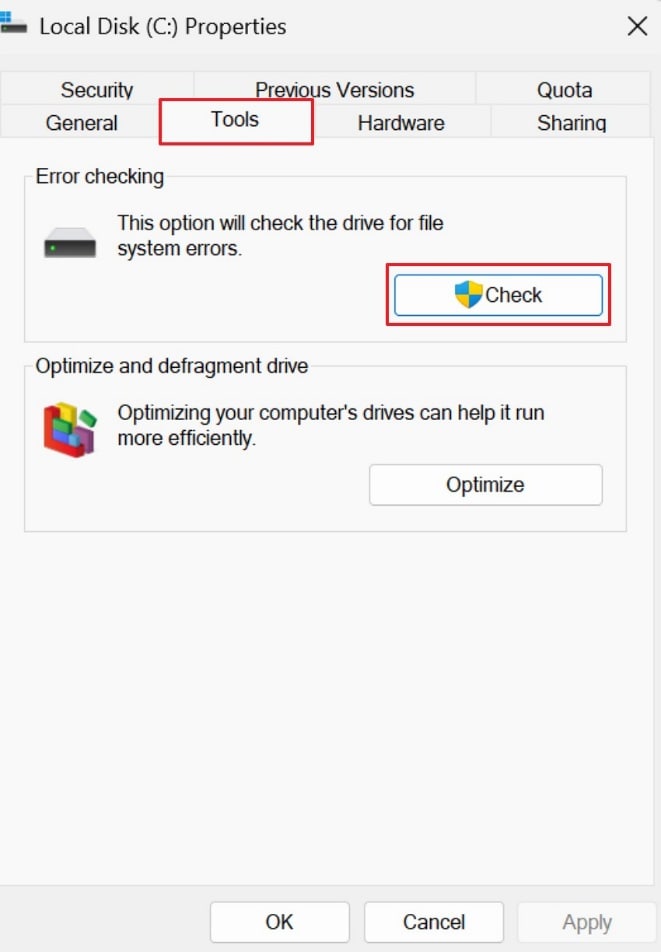
Step 2. Afterwards, navigate to the “Tools” tab and click the “Check” button under “Error checking.”
Step 3. Lastly, select “Scan Drive” when prompted to begin checking the volume for errors. Windows will scan the file system and report issues, giving you the option to fix them automatically.
Method 4. Fix the Drive with an Unrecognized File System
Drives can appear unreadable when Windows fails to read the drive space’s internal setup. This method repairs damaged file details and restores supported structures that Windows can reliably read. Additionally, it helps when the volume does not contain a recognized file system. These repairs often improve opening stability and restore normal access during routine operations. Follow the outlined steps below to begin rebuilding a dependable file system structure:
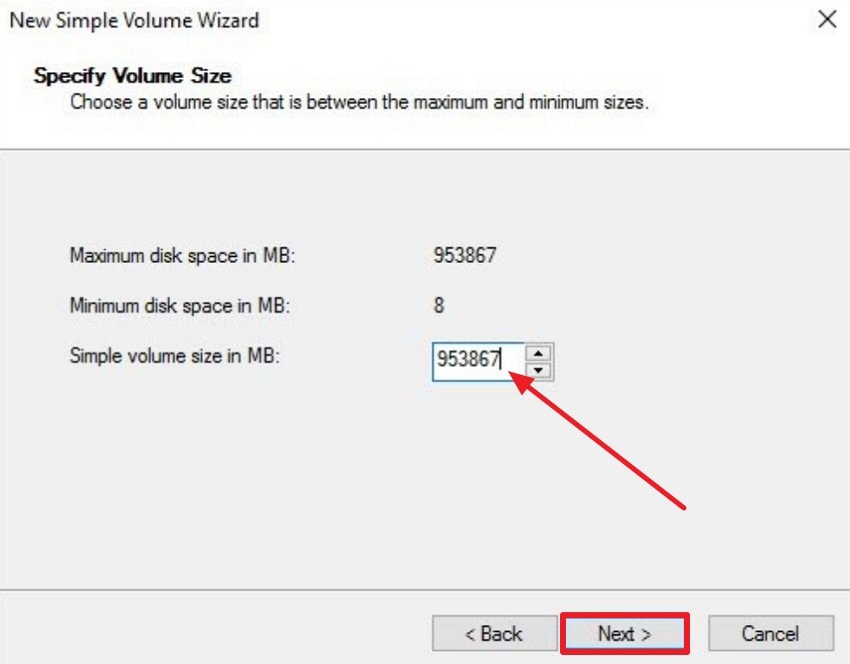
Step 1. Start by opening the “New Simple Volume Wizard” from “Disk Management” after selecting the unallocated space. Next, enter the desired amount in “Simple volume size in MB”, or use the maximum value already shown. After that, click “Next” to continue creating the new volume with your selected capacity.
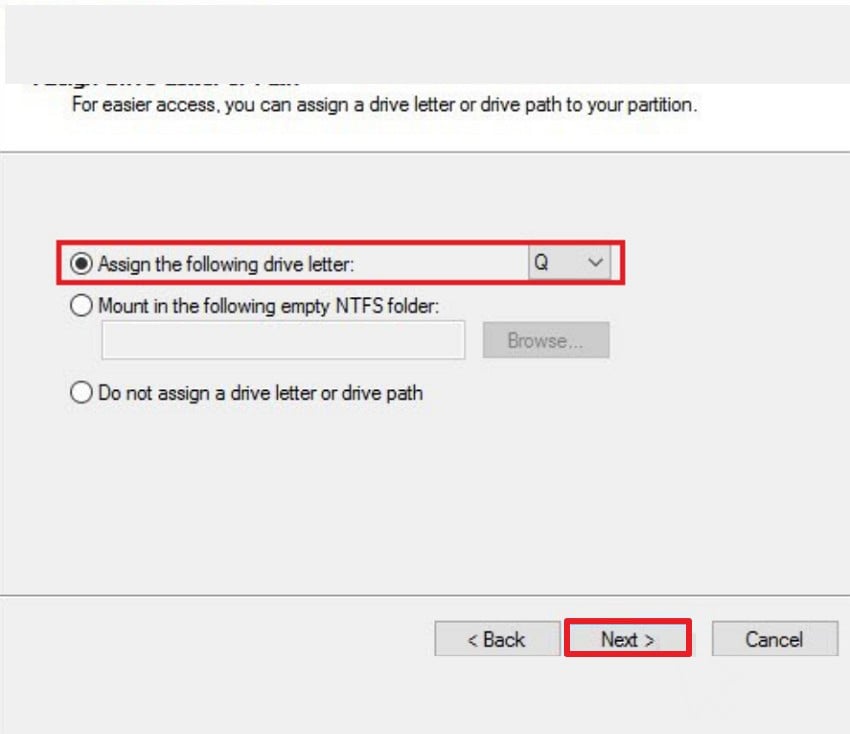
Step 2. Later, choose “Assign the following drive letter” and pick an available letter from the dropdown. Next, click “Next” to confirm the letter Windows will use to mount the new volume.
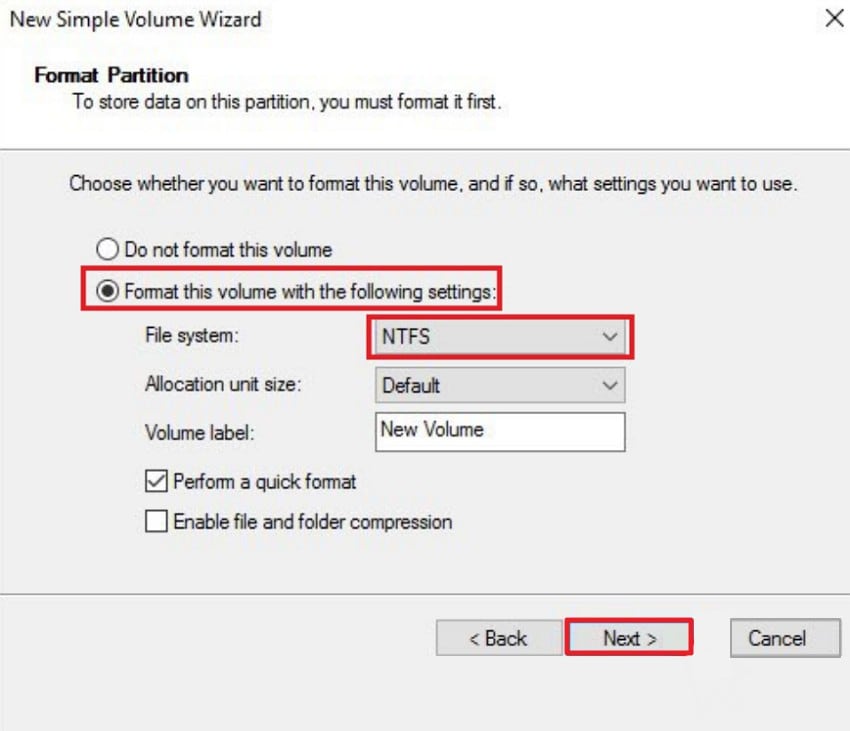
Step 3. Lastly, select “Format this volume with the following settings” and pick “NTFS” as the file system. Keep the allocation unit size set to “Default,” and enter a volume label if needed. Next, leave “Perform a quick format” checked and click “Next” to proceed with creating the formatted partition.
Method 5. Assign a New Drive Letter in Disk Management
Some drives stay invisible because Windows accidentally assigns conflicting or unavailable letters. Changing the letter helps Explorer recognize the volume and open it correctly. This fix is useful when the drive appears healthy but remains hidden unexpectedly. Follow the steps below to fix “the volume does not contain a recognized file system” issue by assigning a new drive letter:
Step 1. In “Disk Management,” right-click the target partition and select “Change Drive Letter and Paths” to proceed.
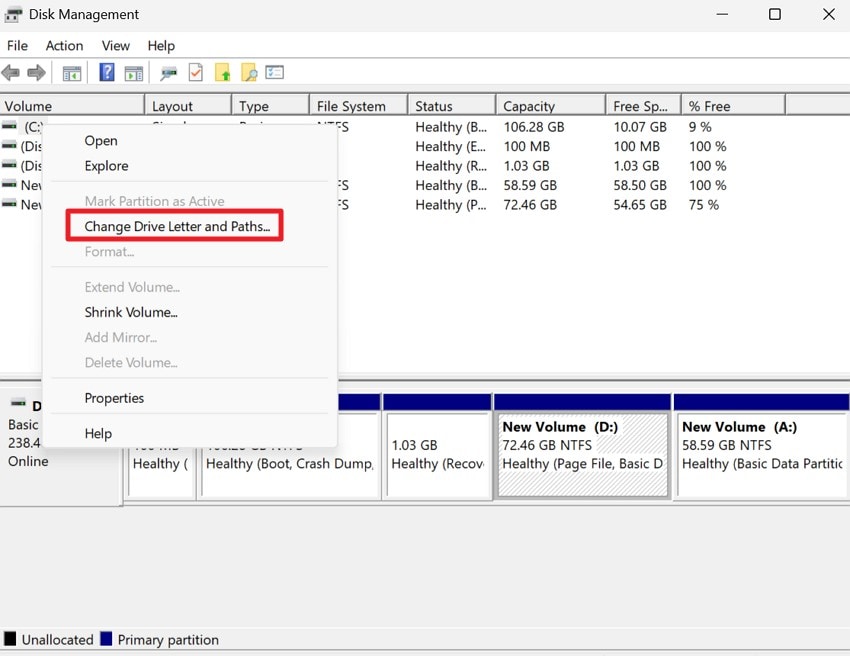
Step 2. Select a new available letter and click “OK” to update the drive’s assignment and make it visible in File Explorer.

Method 6. Format the Drive to a Compatible File System
Severe corruption can prevent Windows from interpreting the drive or accessing stored information. Resetting builds a fresh file setup that Windows can read without issues. Therefore, this method becomes effective when damaged setups or unsupported resets block normal access. To perform a clean reset for dependable drive performance, follow the instructions below:
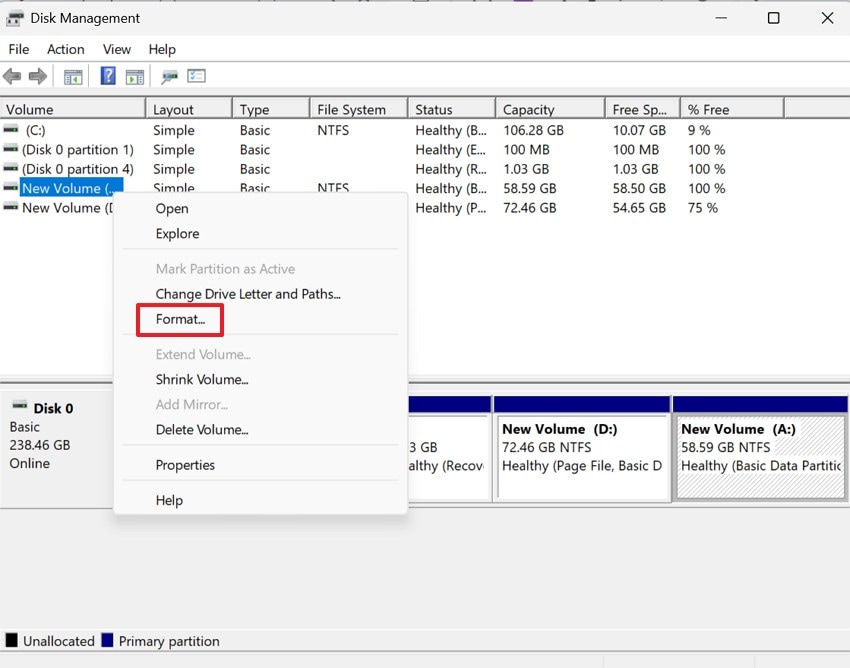
Instructions. In “Disk Management,” right-click the drive you want to reset and choose “Format” from the context menu. Windows then opens the formatting window, where you can select the required settings before confirming.
Pro Tip. Fix “Volume Does Not Contain a Recognized File System” by Repairing Media Files
Broken media files can stop Windows from reading your drive in a normal way. These damaged files make Windows confused and cause loading problems on your device. As a result, you may see errors like “volume does not contain a recognized file system”. Fixing these files helps the drive open again and keeps your stored content safe.
Therefore, Repairit can fix broken photos, videos, and audio files with simple guided steps. The tool checks each file and brings back parts that were lost before. Consequently, your drive works better because damaged files no longer block reading tasks. Repairit keeps your content safe and helps users repair media without the difficult work.
Key Features

-
Batch File Repair: Repairs many damaged files at once, helping users save time during large repair tasks.
-
Document Repair: Fixes corrupted documents, PDFs, and office files by rebuilding damaged structures and restoring usable content safely.
-
DWG File Repair: Repairs corrupted DWG drawings caused by crashes, errors, or damaged storage sections, which might affect drive accessibility.
Comprehensive Guide to Repair Corrupted Files with Repairit
Let’s walk through the step-by-step guide below to repair damaged files with Repairit:
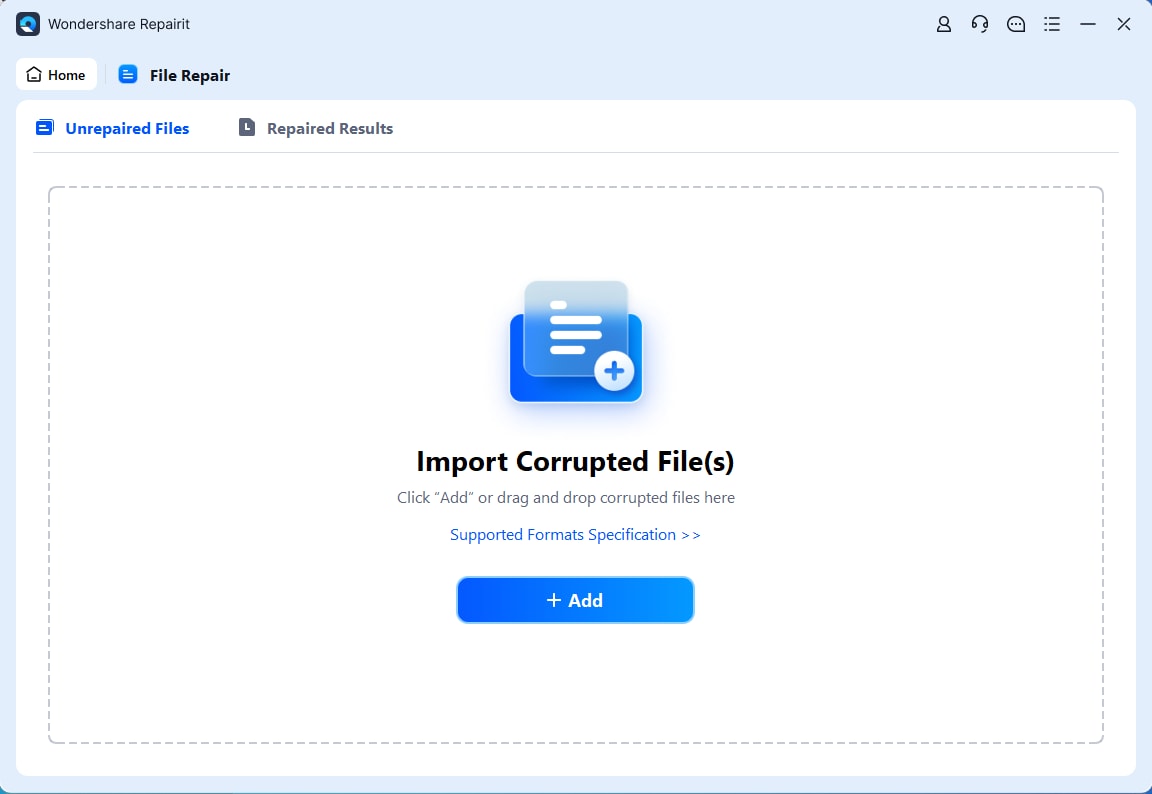
Step 1. Import the Corrupted Files to Proceed
To start, select the “Add” button on the main Repairit screen and select the damaged files. You can also drag and drop the files directly into the “Unrepaired Files” section.
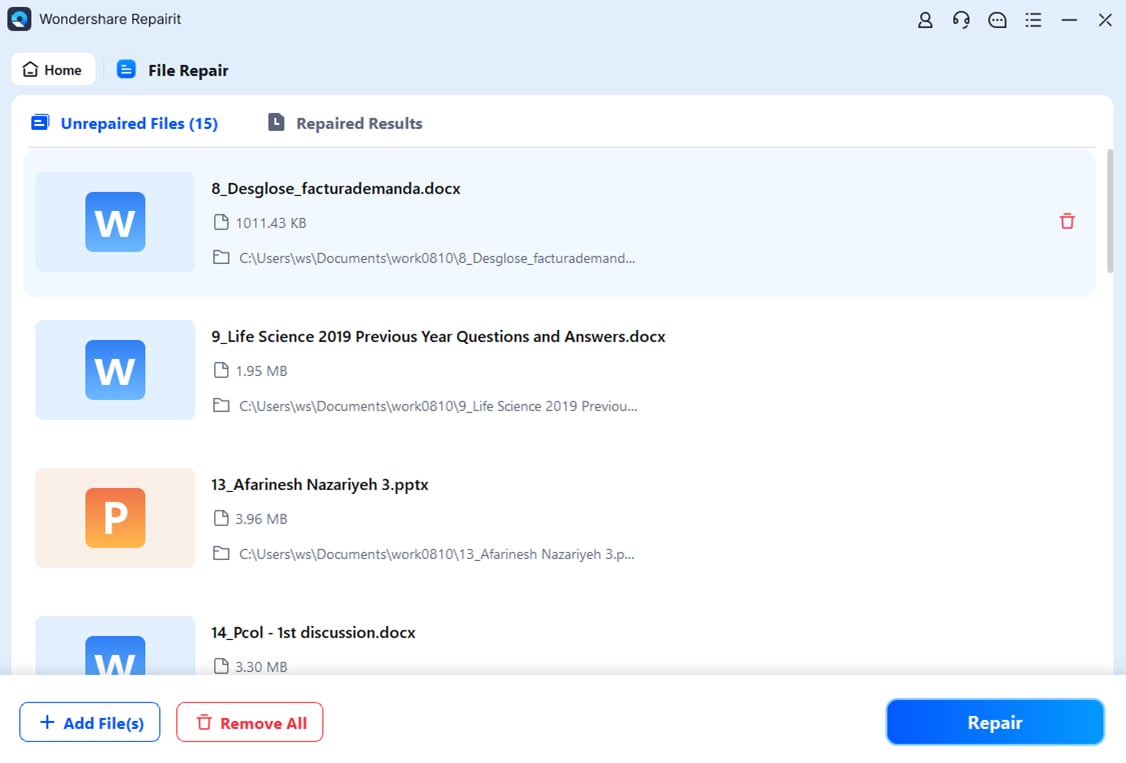
Step 2. Start the Repairing Process
Next, the files appear in the list, and press the “Repair” button at the bottom right. Afterwards, Repairit will start analyzing and repairing each file, with progress shown for each.
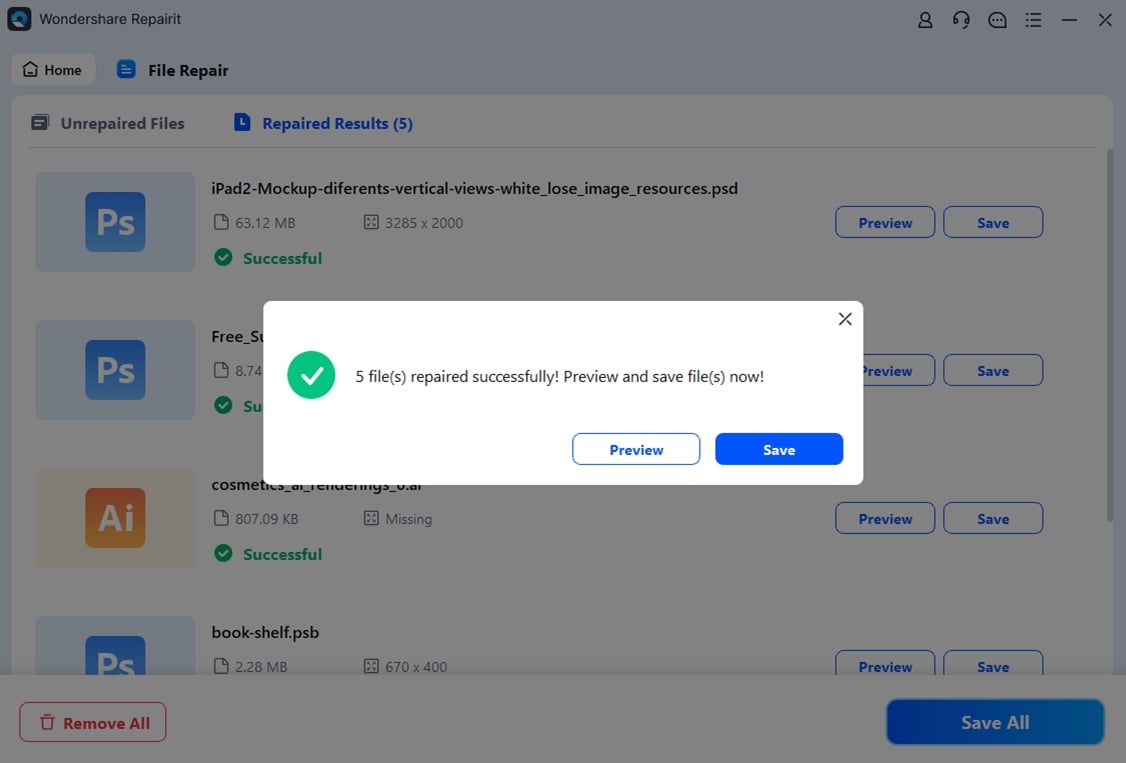
Step 3. Preview the Results and Save Them
Lastly, when the repair completes, select “Preview” to check the repaired files before saving. If the files look correct, click “Save” to export them or choose “Save All” for bulk repair.
Repair Corrupted Files Now
 Security Verified. Over 7,302,189 people have downloaded it.
Conclusion
To conclude, the message “the volume does not contain a recognized file system” error can stop your storage from opening. In this article, we discussed common reasons for the issue and simple ways to bring your drive back to normal use. When broken media files add more trouble, Repairit offers a safe way to fix them with ease.
FAQs
-
1. Why does my drive show this file system error?
This error appears when the drive setup becomes broken and stops working normally. The system then fails to read saved items and blocks access until simple fixes are applied. -
2. Can I fix the drive without losing stored items?
Yes, many simple steps can help the drive open again without removing saved data. You just need to follow safe actions that avoid harm to your important files. -
3. Why does my drive appear unreadable on different devices?
A broken setup can confuse each device and stop the drive from opening correctly. Different systems may read the drive differently, causing mixed results during normal use. -
4. When should I use Repairit for broken media files?
Use Repairit when photos, videos, audio stop working and show wrong results. It can rebuild missing parts safely and bring your damaged media back to use.
