
While graphic cards are very important to process everything we see on our screens, they often face problems. When a graphics card malfunctions, it can disturb your entire computing experience, causing issues like crashes or complete system failure. These problems often arise due to outdated drivers, hardware wear, or overheating. Whether you're gaming or editing videos, a faulty GPU can disrupt productivity and lead to frustration.
When you face such situations, it is better to analyze the root cause first and then look for its solution. That’s why this guide outlines the most common problems and provides detailed steps to fix graphics card errors. By going through this guide, you'll be able to troubleshoot and resolve your GPU issues quickly.
In this article
Part 1. How to Fix the Graphics Card's Most Common Errors?
As mentioned above, your graphics card can face many problems due to issues like overheating or outdated drivers. Fortunately, all these GPU problems can be resolved by following simple steps and tutorials. In the following section, you can find details of the most common graphics card errors and their relevant fixes.
1. Black Screen Issues
As a common graphic card problem, a black screen can be frustrating because it makes your system unusable. These issues occur when your GPU fails to display output due to faulty drivers, improper hardware connections, or overheating.
In many cases, the system doesn't recognize the GPU or malfunctions under load during intensive tasks like gaming. Additionally, incorrect power supply or loose PCIe connections can contribute to the problem.
Solution 1. Update Your Display Adaptor to Solve System Compatibility
Step 1. Start the updating process by going to your PC's Device Manager. Once there, you have to find and left-click the "Display Adaptors" button to access its drivers. Afterward, right-click the graphic card causing the problem and select the "Update Driver" option from the pop-up.

Step 2. The next screen will give you options for either searching for the latest version of the driver or installing it manually from the PC. Here, you need to choose the “Search Automatically for Drivers” option to proceed with the updating process.

Solution 2. Refresh Your Graphics Card
Instructions: To refresh your graphics card, you need to press the “Windows + Control + Shift + B” key simultaneously. When you do so, your screen will restart after making a beep sound, and the black screen issue will be resolved.
2. Visual Artifacts
These glitches and distortions perform irregularities, such as lines or distorted images on your screen. When your computer faces these issues, it is because of overheating, memory corruption, or graphic card failure. High GPU temperatures during intense workloads can also compromise performance and damage components. In some cases, when you overclock or use a defective VRAM model, the problem increases.
Solution 1. Force Restart Your Computer
Instructions: When you see visual artifacts on your screen, simply press and hold the Power button on your keyboard. Keep holding it until your computer turns off, and it will boot up from the beginning.
Solution 2. Disable and Enable the Graphics Card
Step 1. To disable your display adaptor, you need to go to your Device Manager. Here, expand the drop-down of the “Display Adaptors” and right-click the targeted graphic card. Once the pop-up appears, press the "Disable Device” option and confirm your choice from the next warning screen.

Step 2. To enable the same graphics card, return to the "Device Manager” and select the desired graphics card under the “Display Adaptors” section. When you right-click the graphics card this time, select the “Enable Device” option to resolve the problem.

3. Poor Performance
When your graphics card underperforms, tasks like gaming or 3D rendering become laggy and inefficient. Usually, this graphics card crash error is caused by background applications consuming GPU resources or inadequate hardware specifications.
Additionally, a mismatched CPU-GPU combination can also bottleneck performance. You can either upgrade your cards or monitor your system’s resource usage to resolve performance bottlenecks effectively.
Solution 1. End Unnecessary Background Apps from Task Manager
Instruction: To remove unnecessary apps from the background, you have to launch Task Manager on your PC. You can open it by pressing the "Control + Shift + Escape” buttons simultaneously. Once it launches on your PC, right-click on any process or application that is unnecessarily running in the background. Finally, press the “End Task” option from the pop-up screen to disable it.

Solution 2. Enable Hardware Accelerated GPU Scheduling
Step 1. In your settings, you need to go to the “System” tab from the left menu. Once there, access the “Display” settings option at the top of the list.

Step 2. After the display settings appear, scroll down to the bottom of the list. Under the “Related Settings” section, you will find the “Graphics” option that you need to access.

Step 3. When the “Graphics” window appears, you will find many options related to its settings and customization. Here, you need to press the “Change Default Graphics Settings” option to make changes to it.

Step 4. On the new screen, you need to toggle on the “Hardware Accelerated GPU Scheduling” option. Additionally, you can enable “Optimizations for Windowed Games" to boost your performance.

4. Overheating
Overheating is also a common problem that affects GPU performance and causes graphics card failure. This issue happens due to dust accumulation on fans and aging thermal paste. Due to excessive heat, you face issues like throttling or even permanent hardware damage if not addressed promptly.
To solve this problem, you need to ensure regular maintenance, including cleaning your GPU. Monitoring GPU temperatures under different loads ensures they stay within the manufacturer’s recommended range.
Solution 1. Clean Your PC and GPU
For this solution, we highly recommend getting some professional help, as any misstep can cause damage to your motherboard. To start, you need to power off your PC and remove its outer casing. Then, use a soft brush to remove dust from the fans. Alternatively, you can use compressed air to clean the vents and PC fans. Finally, reassemble your PC, and you will feel the difference in the overheating issue.
Solution 2. Update Your Windows to the Latest Version
Instructions: Usually, your system automatically detects updates and downloads them when an internet connection is available. You can also install such updates manually by going to the “Windows Update” tab in your Settings. There, you will find the option to “Check for Updates,” after which you can use the “Download & Install” button to automate the process.

5. Driver Crashes
This type of error occurs when the software controlling your graphics card crashes or becomes incompatible with your system. As a result, your PC can face screen freezes or temporary flickering. It often arises after a recent driver update or due to interference from background software.
To resolve such issues, you need proper driver maintenance, including clean installations or rolling back to previous stable versions.
Solution 1. Downgrade your Display Adaptor to a Previous Version
Step 1. To fix the graphics card crashing error, you need to access the “Device Manager” on your computer. Then, under the “Display Adaptors" option, you must select the faulty graphics driver and right-click it. This time, users will need to tap the "Properties” option from the small pop-up screen.

Step 2. On the “Properties” screen, you need to go to the “Driver” tab to manage its settings. Here, you will find the “Roll Back Driver” option that you need to press. After the driver is downgraded, press the “OK” button to close the window.

Solution 2. Uninstall and Reinstall Your Graphics Card Driver
Instructions: Once again, access your targeted graphics card under the “Display Adaptors” section. Then, right-click on it to access the driver’s various options. Afterward, just click the "Uninstall Device" option when the pop-up appears.

Step 2. In this step, an “Uninstall Device” screen will pop up to confirm your choices. Here, you simply need to press the “Uninstall” button to remove the driver from the PC. Afterward, restart your PC, and it will automatically install the driver’s latest version.

Part 2. How to Fix the Damaged Videos Due to Graphics Card Errors?
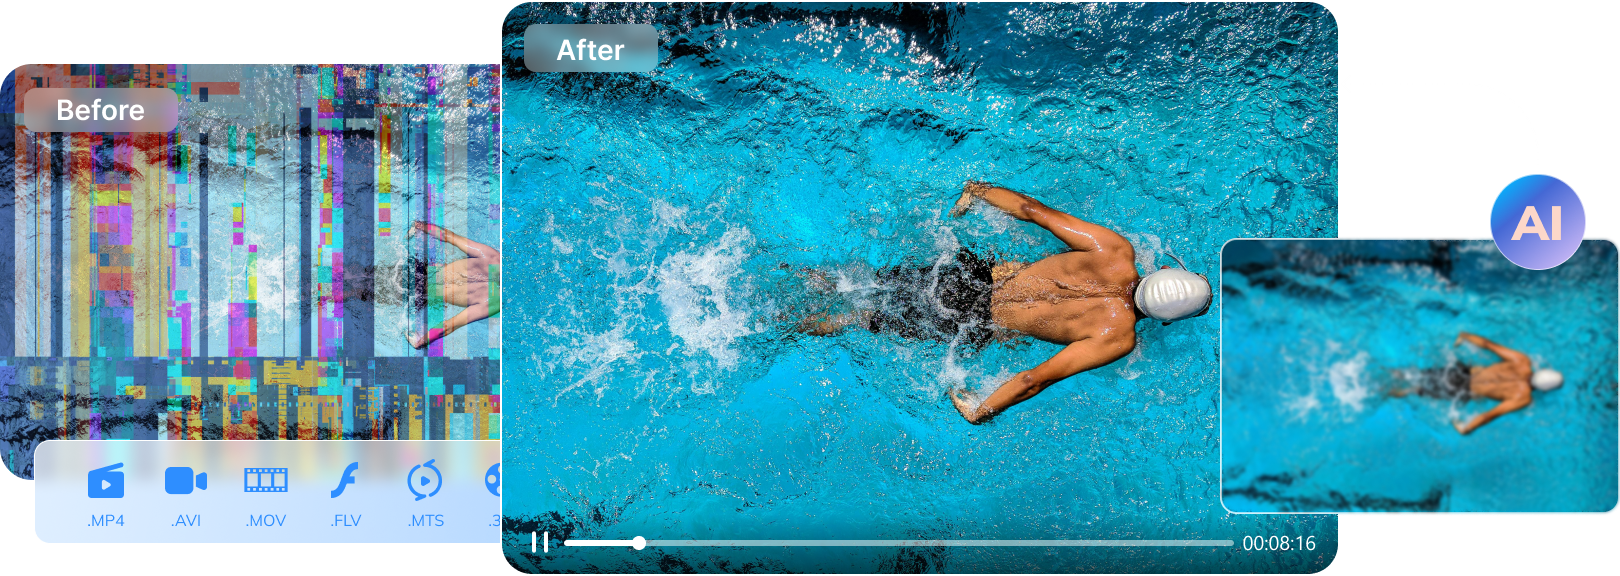
Since graphic cards are very important in processing and editing HD videos, any error with them can also disrupt the editing procedure. When the editing process is disturbed suddenly, your videos often fail to save properly and become corrupted. To make these videos playable after they are corrupted by graphic card failure, you will have to use advanced tools like Repairit.
It is an extremely useful tool that simultaneously removes corruption from multiple videos. In addition to videos, you can use it to repair your documents, emails, or even other media types. Using this tool, users can also enhance the quality of their videos and use them for professional editing purposes. Besides, this tool supports the repairing of 8K videos without size limitations, which makes it valuable for professional usage.
Key Features

-
Repair damaged videos with all levels of corruption, such as video not playing, video no sound, out-of-sync video or audio, playback errors, header corruption, flickering video, missing video codec, etc.
-
Users can use Repairit’s advanced repairing capabilities to remove corruption from more than 20 video formats. As a result, you can virtually remove corruption from all types of videos.
-
For users who can't access the software version of the tool, it is also available online. With some limitations, the online version supports repairing your videos without burdening your system.
-
When you take videos from drones, they often come out blurry and noisy. Repairit supports their repairing and stabilizing those videos to give them an instant professional look.
-
To ensure the repair process has restored your videos, the tool allows you to preview them. In this way, users can decide whether the repair process should be repeated or not.
-
No limit to the number and size of the repairable videos.
-
Repaired videos are more compatible with professional editing software such as DaVinci, Composer, Final Cut Pro, and Premiere Pro.
-
Support Windows 11/10/8/7/Vista, Windows Server 2003/2008/2012/2016/2019/2022, and macOS 10.12~macOS 15.
Steps to Fix the Damaged Videos Due to Graphics Card Errors Using Repairit
As the tool's advanced features suggest, it is the ideal solution for all file corruption issues. After learning about its features, follow the given steps to use it to repair damaged videos due to graphics card errors:
Step 1. Once the main interface appears, go to the "Video Repair” tab from the left panel and import the damaged videos by pressing the “+ Add” button.

Step 2. Once all the corrupt videos are successfully imported, initiate the repair process by pressing the "Repair” button.

Step 3. Click the "Save” button to safely store the repaired media files in your device.

Repair Corrupted Video Files Due to Graphics Card Errors
 Security Verified. Over 7,302,189 people have downloaded it.
Conclusion
In short, graphics card errors can disrupt your computer's functionality and prevent you from editing videos and playing games. When your graphics card faces issues, your computer will also face black screens or driver issues. This issue arises when you don't update your drivers or there is physical damage to the GPU. You can resolve this problem by updating your drivers and cleaning your PC regularly.
Additionally, when your graphic card crashes during the video editing process, you can lose your important videos. To solve this problem, you will have to use tools like Repairit and remove corruption from the videos. Due to the tool's advanced features, we highly recommend using it to repair all types of files.
FAQ
-
Q1. How do I know if my graphics card is failing?
When your GPU is failing, you will see signs like crashes, black screens, and poor performance in games or applications. Additionally, your computer may face overheating and loud fan noises when there is trouble with your GPU. -
Q2. Are there risks to underclocking or overclocking a GPU?
Underclocking reduces performance but typically has no risks, making it safe to resolve overheating issues. On the other hand, overclocking increases heat and power consumption, which can damage the GPU if done excessively. -
Q3. What should I do if my GPU fans aren’t spinning?
When the fans don’t work, it may be a mechanical issue or related to software problems. To solve the problem, clean the fans to remove dust and ensure they’re not obstructed. Additionally, you can verify fan settings in GPU software and test the card in another system.
