
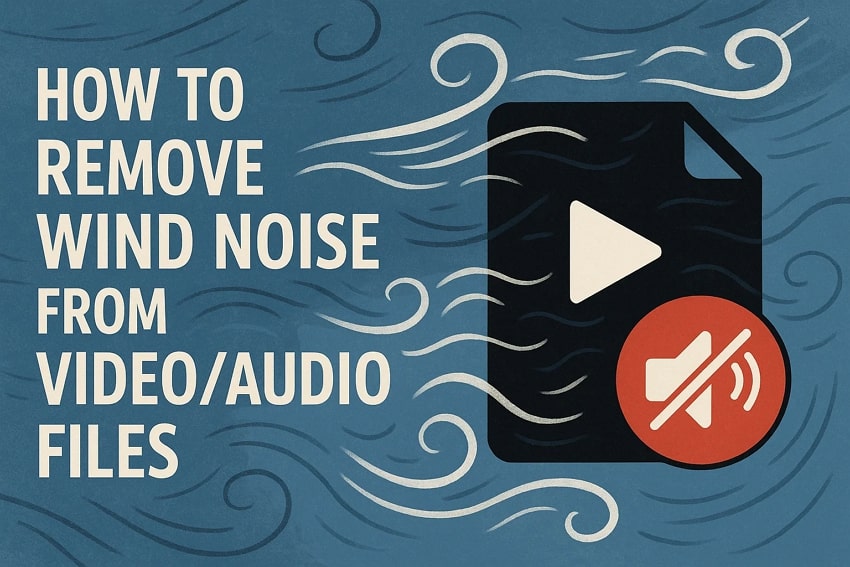
If you’ve ever recorded outdoors, either a video or audio, you know how frustrating wind noise can be. That constant whooshing sound doesn’t just distract viewers/listeners, but it completely overpowers voices or natural sounds you capture. No matter how appealing your visuals are, remember your audience will lose interest if the sound feels rough or distracted.
To avoid such distractions, many people seek programs that remove wind noise from videos or audio and restore clarity. If you’re among those, explore the guide below and discover top programs that eliminate wind noise from your content.
Table of Contents
Part 1. Can I Reduce/Remove Wind Noise from Video During Pre-Production on iPhone?
For sure, you can remove wind noise from video recordings during pre-production on iPhone 16 or later models through its Wind Noise Reduction function. Doing this beforehand is always better than trying to fix the audio later, as it minimizes distortion at the source. To know how to proceed, follow the instructions and enable this feature on your iPhone:
Instructions: Open your iPhone's Settings and select the “Camera” option from the menu. Next, access the “Record Sound” feature and toggle the “Wind Noise Reduction” to reduce wind noise in recorded videos automatically.

Part 2. How to Remove Wind Noise from Audio [Top 3 Tools]
For instance, you weren’t able to stop wind noise during recording; here are top 3 programs listed to remove wind from audio in post-production:
1. Repairit
Every audio file that is corrupted or affected by wind whistling can be easily handled through Repairit. The program supports all major standard audio formats, including both common and professional lossless formats. The recording with humming audio, which produces a nasal-lick sound, can be addressed through the program. Besides this, you can even insert audio files with hissing or buzzing distractions for a complete repair.
Through its AI assistance, users can achieve high-precision restoration with studio-grade quality results in a matter of minutes. It guarantees the repair of damaged audio without overwriting the original files, thereby maintaining integrity. Apart from wind audio, you’re allowed to fix the recordings with heavy breathing, causing a rumbling effect. With this data repair software, editors can also add multiple audio tracks at the same time for repairing.
Key Features

-
Repair damaged videos with all levels of corruption, such as video not playing, video no sound, out-of-sync video or audio, playback errors, header corruption, flickering video, missing video codec, etc.
-
Repair full HD, 4K, and 8K videos and support 20+ popular formats, including MOV, MP4, M2TS, MDT, RSV, WMV, MPEG, DAT, etc.
-
Repair damaged or corrupted videos caused by video compression, system crashes, video format changes, etc.
-
Repair critically damaged or corrupted RAW/LOG/HDR videos from professional cameras such as Blackmagic Design, RED Digital, ARRI, etc.
-
Repairit has a quick and advanced scanning mode. You can use either depending on the level of corruption the video file has undergone.
Step-by-Step Guide to Remove Wind Noise from Recordings
Walk through the provided tutorial and remove wind noise from audio to give your recordings the clarity they deserve:
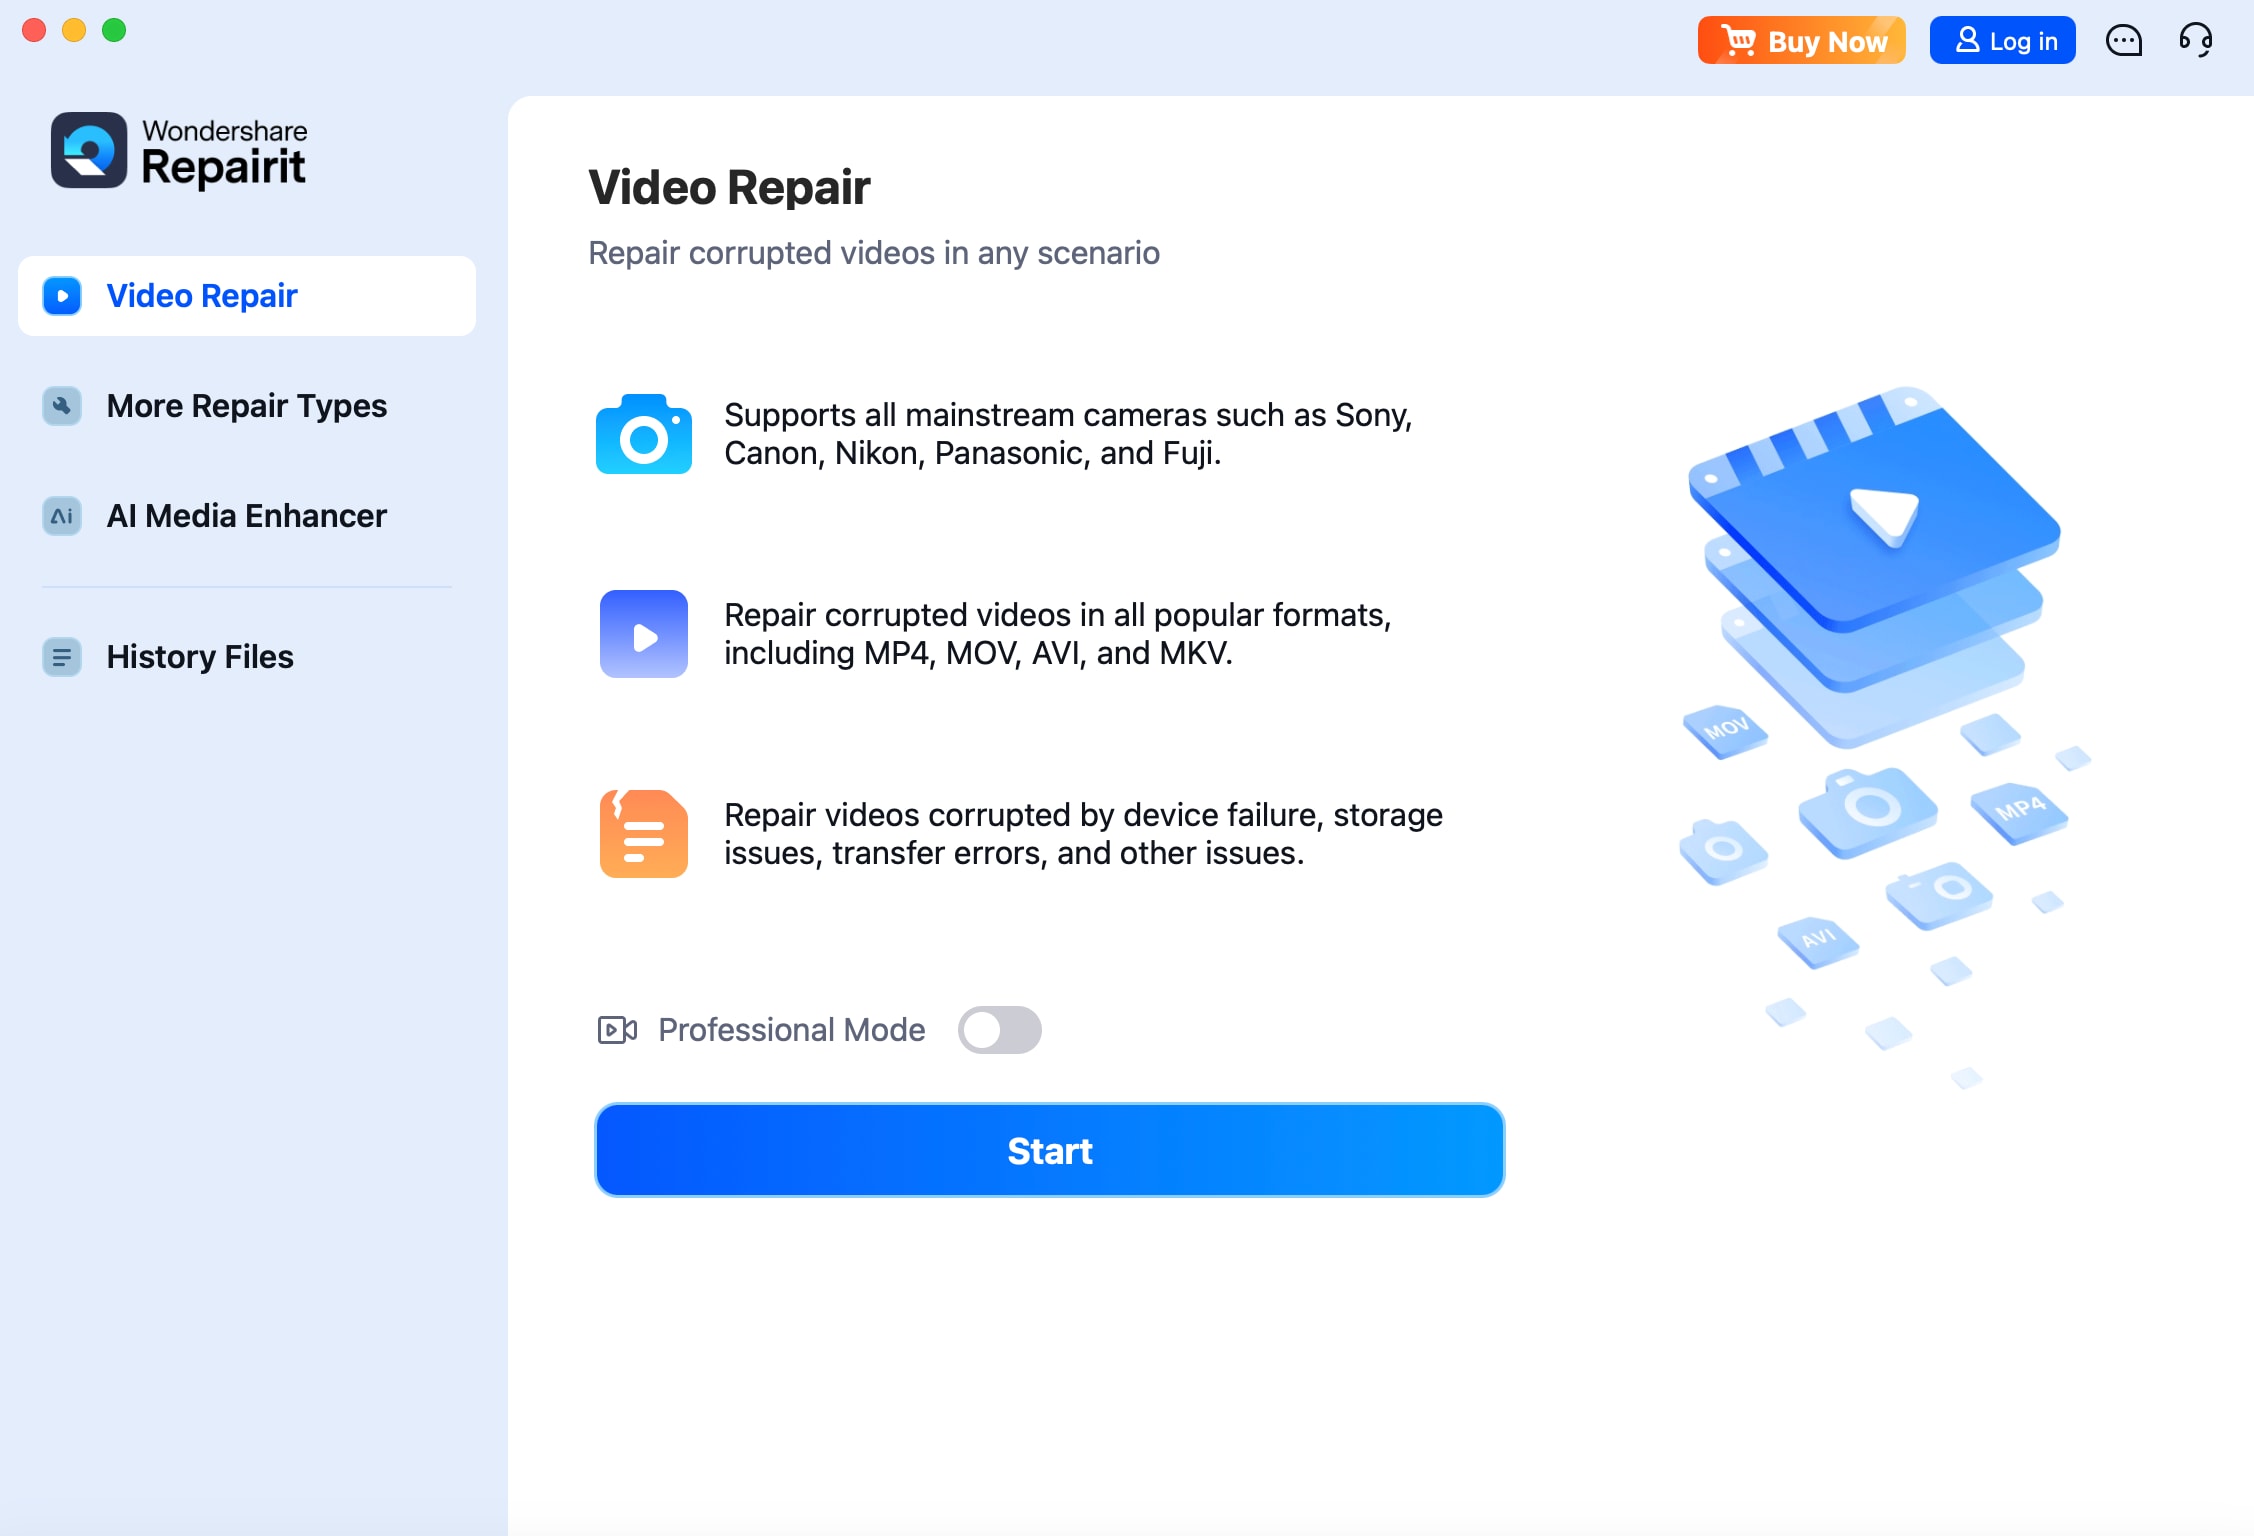
Step 1. Access the Video/Audio Repair Module
Install the software, press the “More Types Repair” tab, and click the “Start” button for the Video/Audio Repair tool.
Step 2. Insert All the Video/Audio Containing Wind Noise
Here, hit the “Add” button to add all the recordings containing wind noises for distraction removal.

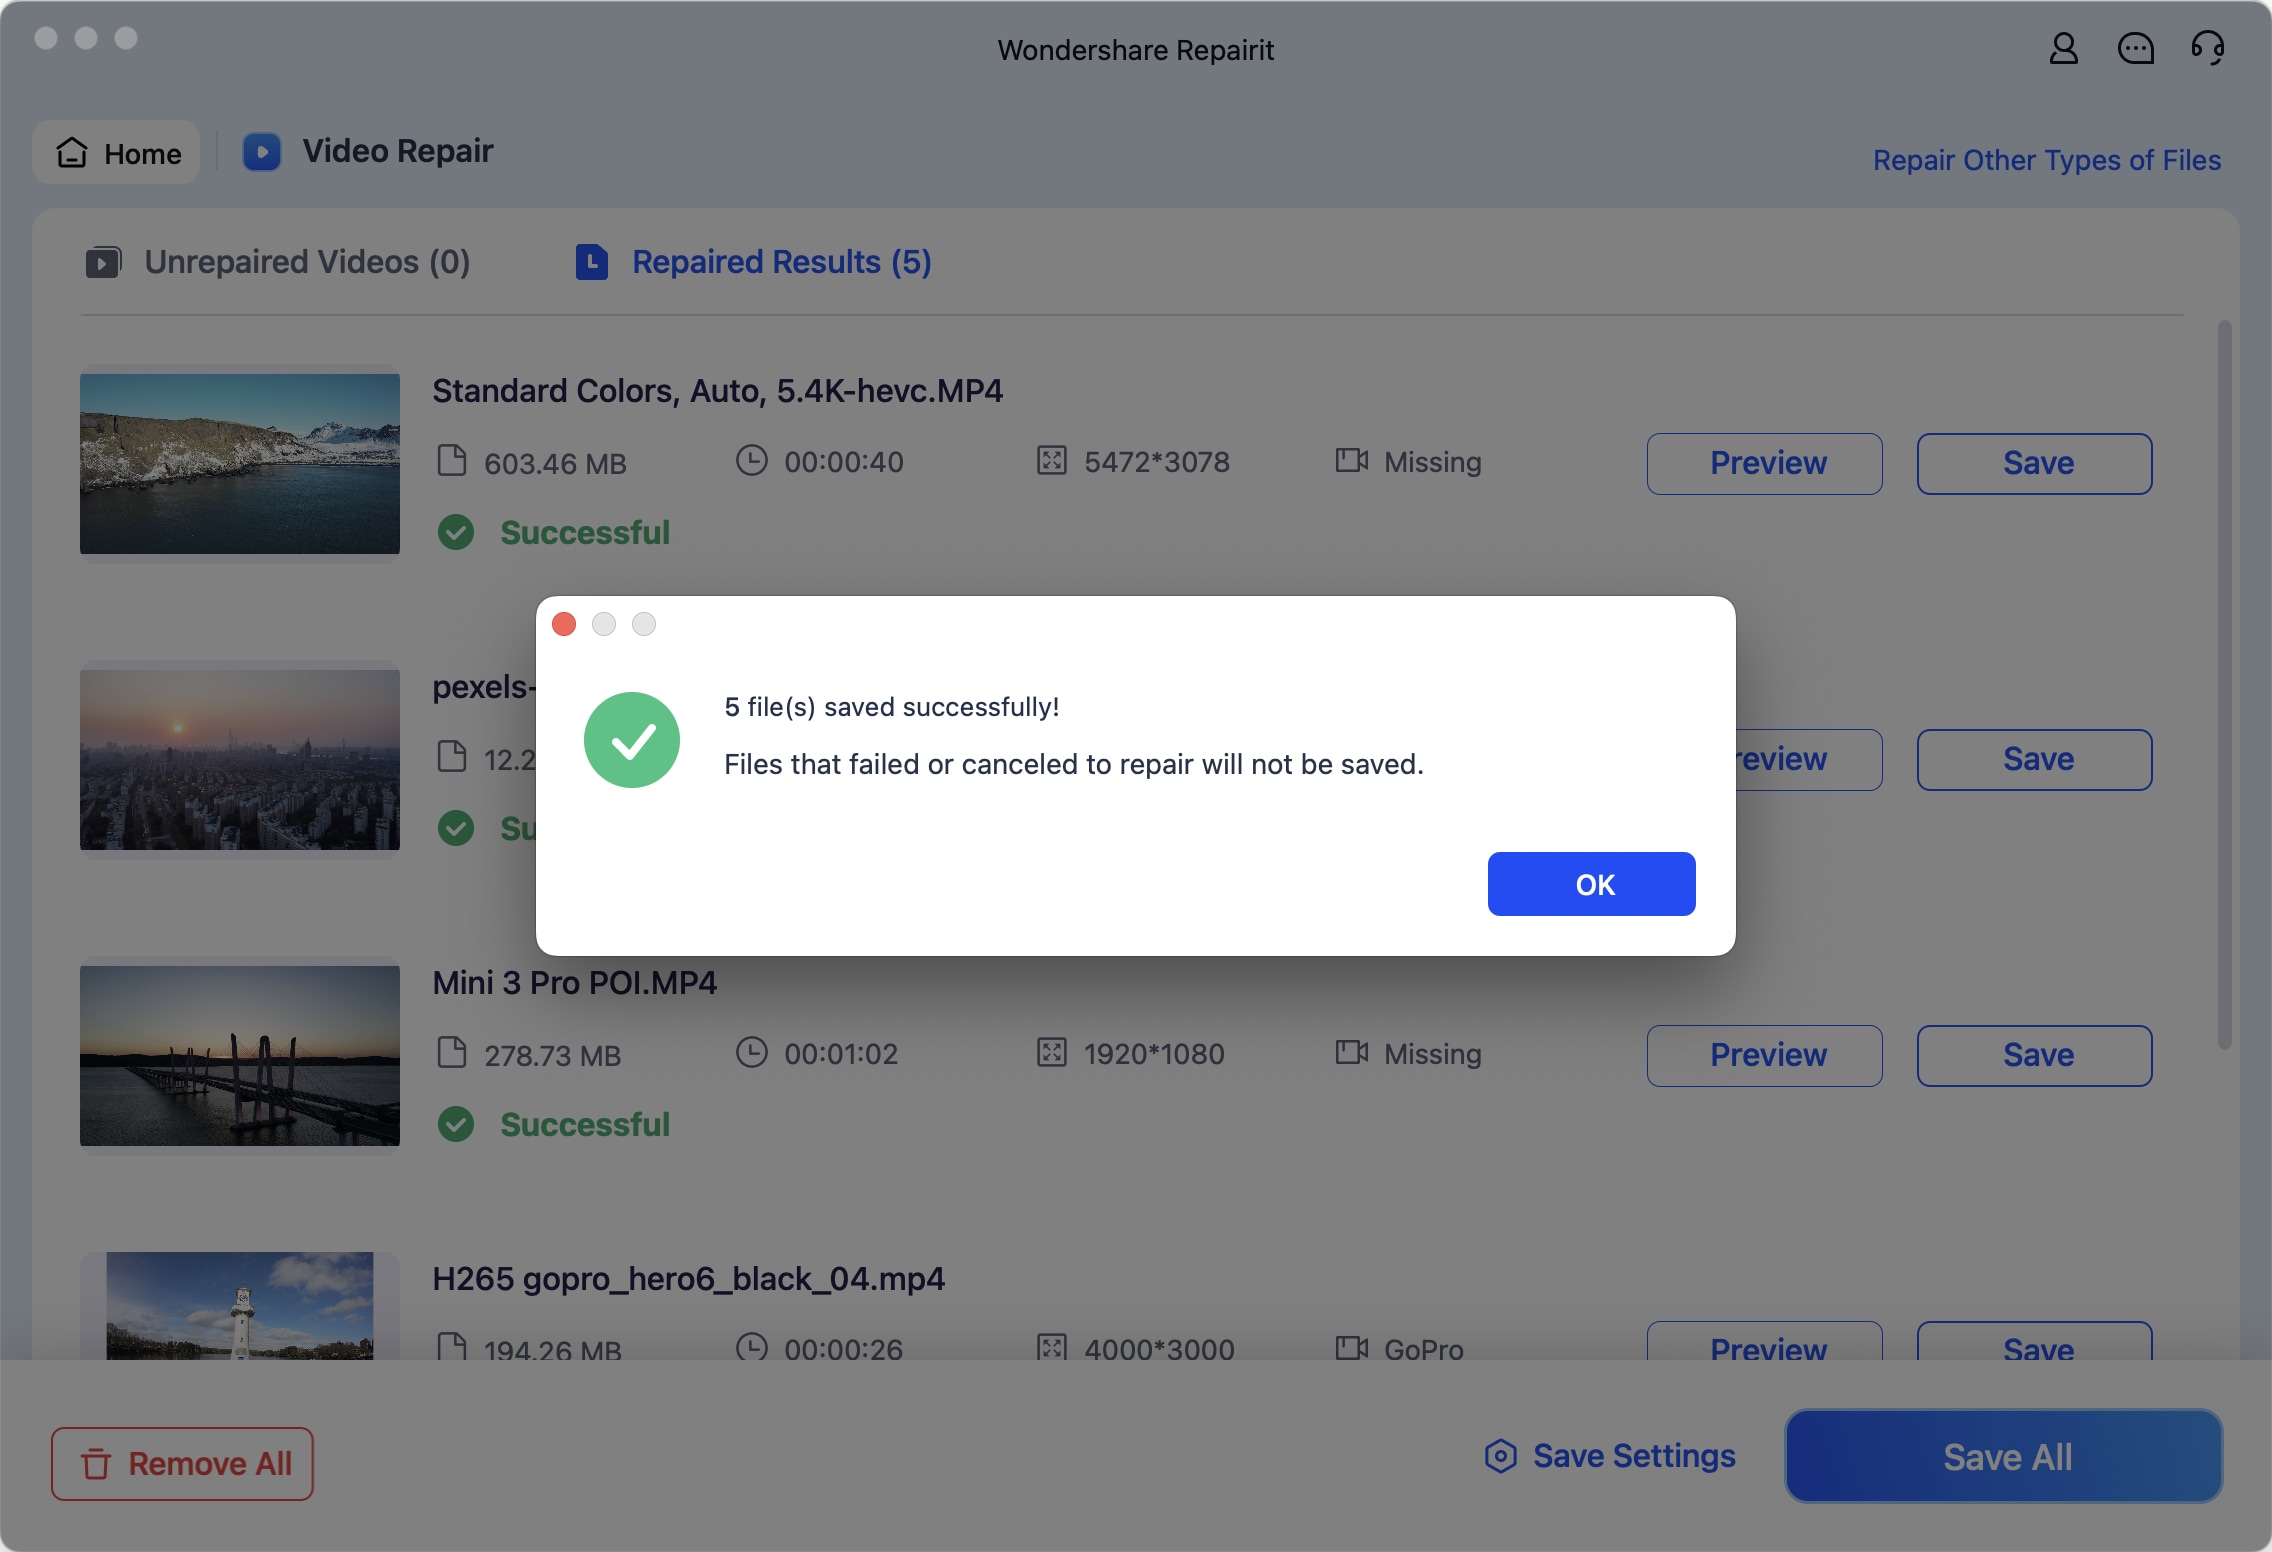
Step 3. Start the Video/Audio Repair Process and Preview Files
Once you’re done inserting recordings, press the “Repair” button and start repairing your audio for more clarity. After this, preview your repaired recordings and save the final version with no wind noise.
Remove Wind Noise from Video/Audio Now!
 Security Verified. Over 7,302,189 people have downloaded it.
2. Audacity
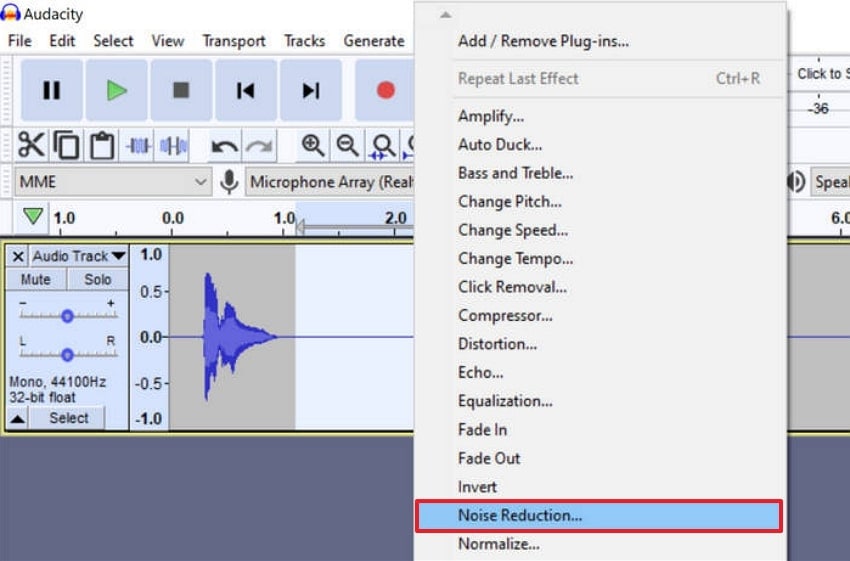
Noise reduction is one of the main functions of this tool, which utilizes frequency analysis and smoothing to target background noise. It allows users to sample a segment of unwanted noise, create noise profile, and apply reduction across the entire track. The program features a High-Pass Filter that eliminates low-frequency rumble and a Noise Gate that silences unwanted noise in audio. Follow the provided steps and remove wind noise through Audacity:
Step 1. Import the audio track into the program and select the portion that contains only wind noise. Next, go to the “Effects” tab and select the “Noise Reduction” option. In the Noise Reduction box, click the “Get Noise Profile” to apply it to the created noise profile. Later, adjust the Noise Reduction and Sensitivity sliders to fine-tune the noise reduction process.
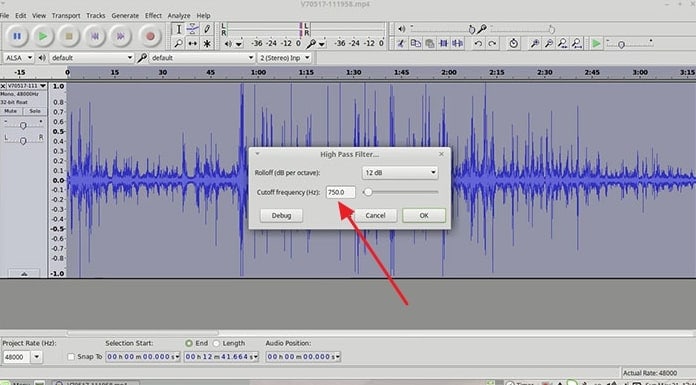
Step 2. Now, navigate back to the “Effects” tab, choose the “High-Pass Filter” option, and adjust the slider for Cuttoff Frequency. Following this, you’ll be able to remove low-frequency noise without affecting the desired audio frequency.
3. Adobe Audition
Audition provides a visual representation of your audio’s frequency, making it easier to identify and isolate unwanted wind noise. Its High-Pass Filter or Parametric Equalizer allows you to filter out low frequencies, where most wind rumble resides. Plus, setting out thresholds allows silencing parts of the track where only wind noise is present. For better learning on how to remove wind from audio, explore the tutorial for Adobe Audition:
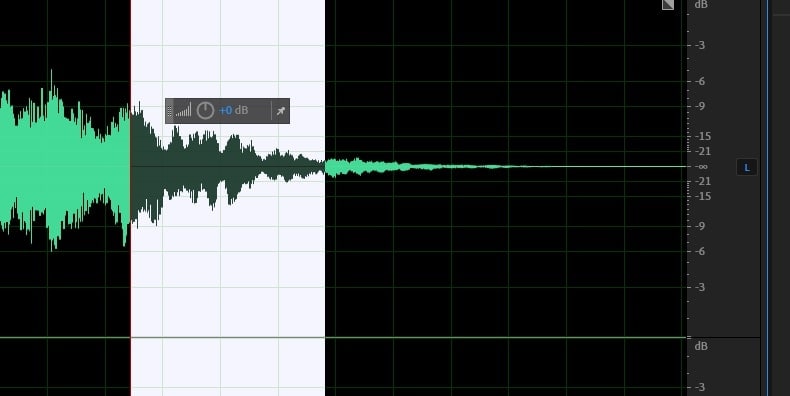
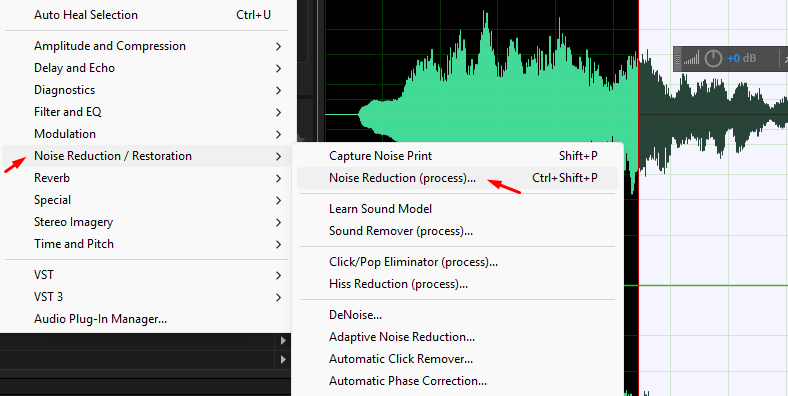
Step 1. Add your audio, open the waveform of the audio from the Files panel, and drag the divider up to display the frequency. Now, listen to select the portion you want to eliminate and then access the “Effects” tab. From the menu, choose the “Noise Reduction/Restoration” option and press the “Capture Noise Print” option from sub-menu.
Step 2. To apply noise reduction, click the “Effects” tab again, choose “Noise Reduction/Restoration,” and select the “Noise Reduction (process)” option. Now, choose the part of the audio you want to erase and adjust the slider for smoother playback.
Part 3. 3 Best Tools to Remove Wind Noise from Video
Building upon wind removal discussion, now explore the best 3 programs to remove wind noise from video, trusted by creators and editors alike:
1. Wondershare Filmora
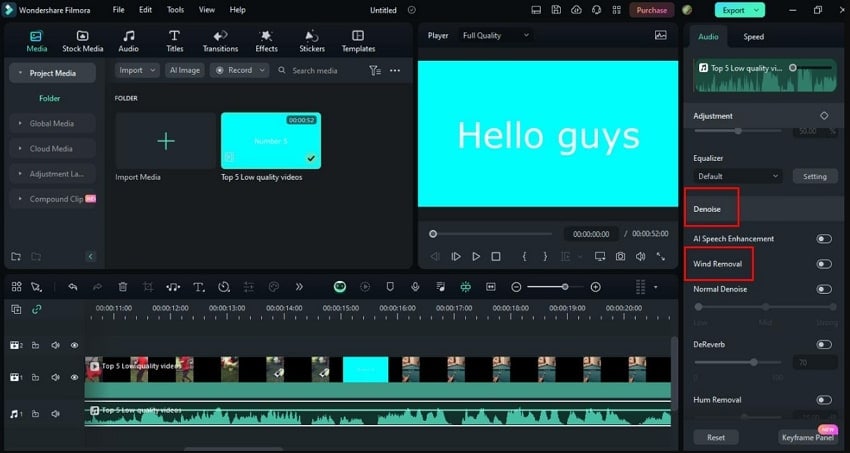
In the latest Filmora 14, an explicit Wind Removal feature is available, targeting low-frequency rumbling noises. Editors can adjust the strength of denoise and wind removal using the slider or preset levels to find the right balance for each clip. Through its Silence Detection feature, you can detect moments of silence and automatically remove them, ensuring an uninterrupted video flow. Adhere to these steps and learn how to use Wind Removal on Filmora:
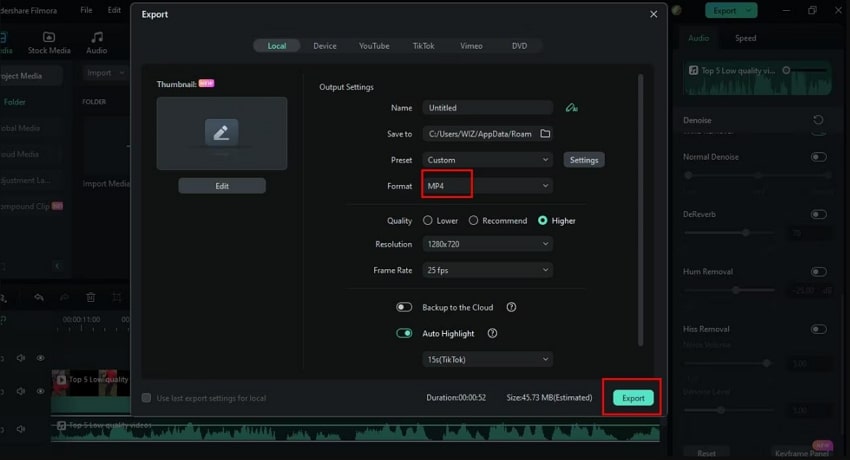
Step 1. Access Filmora, press the “Create a New Project” option, and import your video file into the timeline. Now, double-click the video clip to reveal the editing panel and find the “Denoise” feature to toggle “Wind Removal” option. Next, adjust the intensity using the sliding bar according to the required demand of removal.
Step 2. Here, click the “Export” button and expand the “Format” menu to select the desired output format. Following this, set the Resolution and Frame Rate accordingly and press the “Export” button to save the wind-removed video.
2. Adobe Premiere Pro
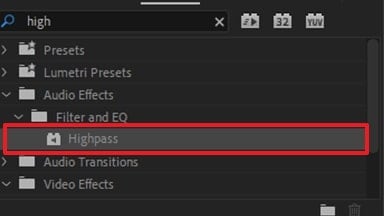
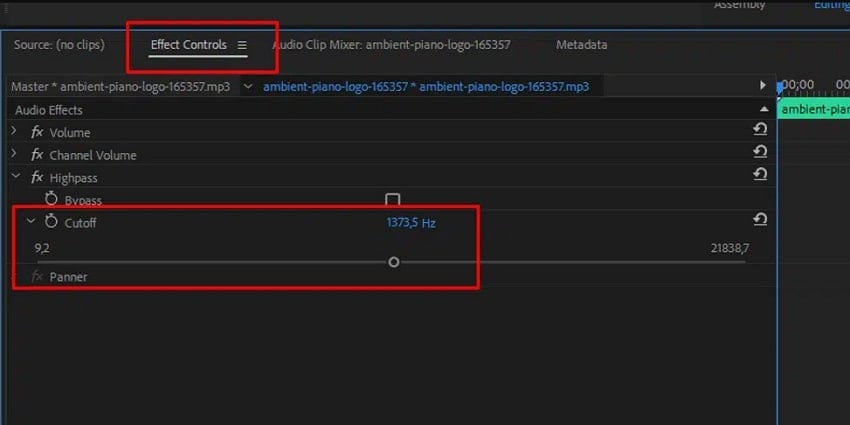
The Premiere’s High Pass Filter enables editors to eliminate low-frequency (wind noises) by allowing higher frequencies (dialogues) to pass through. To remove wind noise, it offers a Denoise feature that gives users control over the automated removal of persistent background noises. Its Parametric Equalizer allows for precise frequency adjustments, enabling editors to reduce low-frequency content while retaining vocal clarity. Explore this guide and proceed with wind removal using Premiere Pro:
Step 1. First, import your project, then locate the “Effects” option and select the “Filter and EQ” option. Following this, choose the “High Pass” option and drag and drop it onto the clip in the timeline.
Step 2. Here, set the “Cutoff Frequency” slider in the “Effect Controls” section to target wind noise without damaging vocals. Finally, preview your footage to confirm that the noise reduction hasn’t compromised the sound quality.
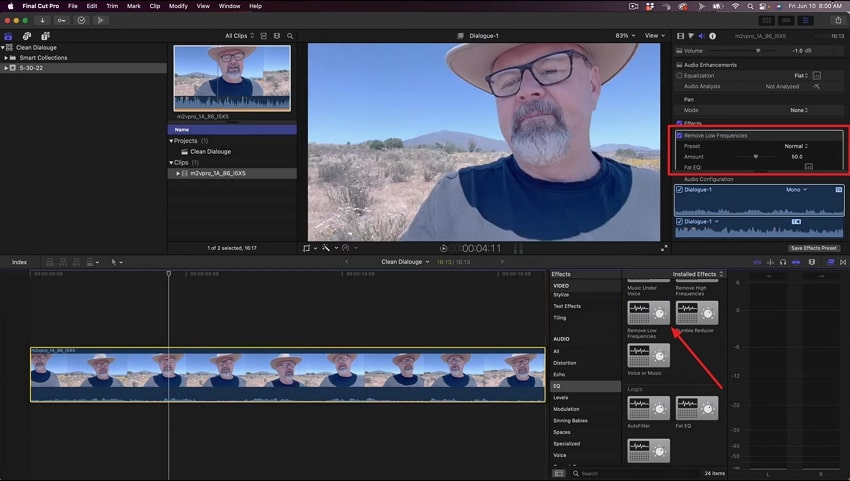
3. Final Cut Pro
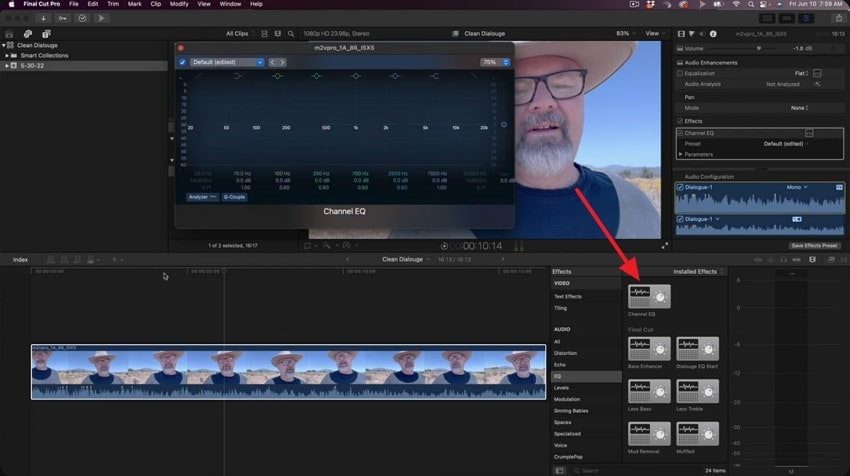
To remove wind noise from videos, Denoiser Audio effect in Final Cut Pro is made to reduce constant background noises. It's accessible directly from the Audio Effect browser and is convenient for both steady and mild wind noises. Through Channel EQ, editors can manually mute the exact frequency bands afflicted by, especially when high-pitched wind issues are present. Dive into these instructions and understand the process of removing wind noise broadly:
Step 1. Insert your video, identify the audio section affected by wind noise in the timeline, and access the "Effects” section. Here, drag and drop the “Channel EQ” on your clip to determine and reduce bands most affected by wind.
Step 2. Once done, drag and drop “Remove Low Frequencies” filter from Effects to your clip. Now, move the slider for “Amount” to roll off low-frequency noise until wind rumble is minimized.
Conclusion
In summary, whether it's a travel vlog or an outdoor interview, wind noise in the background can take away the visual impact immediately. Viewers/listeners might stop paying attention to your story and instead get distracted by the constant rumble at the back. However, this wind doesn't have to be an obstacle now because reliable tools like Repairit know how to remove wind noise from video/audio.
FAQ
-
Q1. Which is harder: removing wind noise from video or audio?
Both are similar technically in the sense that video editing software also includes an integrated audio editing feature. Special audio-only applications such as Audacity tend to have more filters, spectral views, and frequency adjustments, and are more useful in fine-tuning wind noise. Conversely, video editors like Filmora are more convenient, allowing you to work on the sound and the visuals in the same location. -
Q2. Will removing wind noise affect background ambiance like birds or nature sounds?
Noise reduction can also cut off softer background noises like birds chirping, and does not only cut the rumble of the wind. This is due to the fact that such natural sounds are usually in the same frequency range as the wind, making it harder to distinguish. -
Q3. What frequency range should I target when removing wind noise?
Wind noise usually occupies the low-frequency spectrum in the range of 20 Hz to 250 Hz; hence, it is a deep rumble. Instead, voices tend to be concentrated in mid-range frequencies (approximately 300 Hz to 3 kHz). Therefore, it is much easier to remove wind that can be filtered out without dialogue being blurred.
