
- HDR screenshots look washed out because HDR content is compressed into SDR during capture.
- Common causes include HDR tone mapping, brightness slider issues, and mixed HDR/SDR content.
- Quick Fixes: Turn off HDR, adjust brightness and calibration, update Snipping Tool, and tweak browser settings.
- Advanced fixes: Update GPU drivers, adjust color profiles, and manage Auto HDR settings.
- If screenshots or files appear corrupted, tools like Repairit can help enhance quality and restore visuals.
When visuals fail to reflect reality, users' trust declines almost instantly. One growing concern among professionals is that browser screenshots are washed out, stripping away the details that make an interface appealing. This issue becomes more stressful when screenshots are required for product demos, client presentations, or marketing materials. If what users see in a screenshot doesn't match the live experience, it undermines credibility.
Beyond aesthetics, the problem directly affects communication and decision-making among teams. All of this is catered in the article with proper fixes, both simple and advanced, ensuring professionalism across every visual interaction.
Table of Contents
Part 1. Understanding Windows 11 HDR Screenshot Color Problems
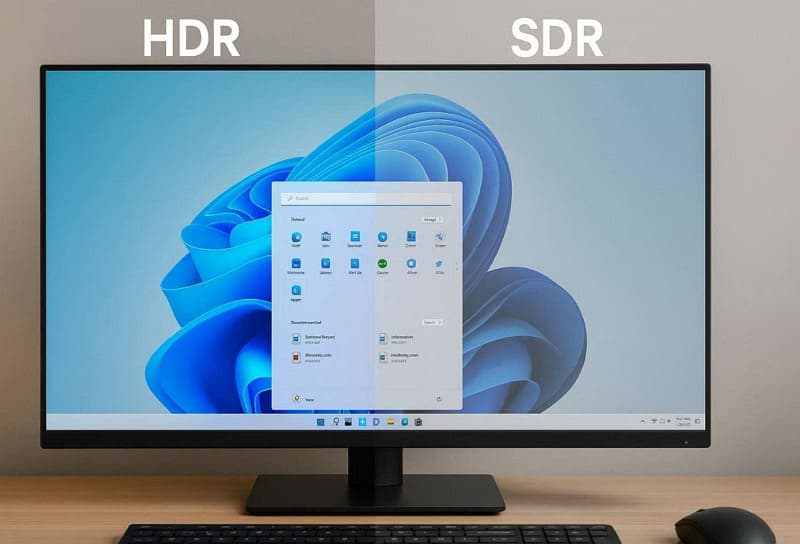
HDR makes bright areas much brighter and dark areas darker. This is why, on supported Windows 11, you see higher peak brightness, deeper blacks, and more vivid colors than SDR. When this wide range is tone-mapped down for non-HDR apps, the system compresses highlights and mid-tones, making captures look dim. However, manufacturers still treat SDR (Standard Dynamic Range) as relatively low-brightness viewing.
As per BenQ's guidance, a monitor capable of 500-600 nits can already be useful for HDR work. While many colorists still try to keep most HDR content under 350 nits for average colors.
Why HDR Screenshots Lose Contrast
Building upon the discussion, review the given reasons and understand why the Windows 11 HDR screenshot washed out:
- HDR Range is "Squeezed" into SDR: Windows shows you a very wide HDR range, but screenshots are saved as SDR images (with a smaller brightness range). To adjust everything, Windows compresses highlights and mid-tones, making the image look flatter and less contrasty.
- SDR‑in‑HDR Brightness Slider: In Windows 11 HDR mode, SDR apps are remapped using an SDR content brightness slider. If this slider is set too high, the SDR parts of the image are boosted, making the screenshot appear overexposed.
- Mixed HDR + SDR Content on One Screen: Many Windows setups show a mix of HDR video or games alongside SDR UI and websites on the same HDR desktop. Reddit users suggest setting the SDR content brightness slider because a too-high slider value makes SDR elements "blow out" when mixed with HDR.
- Tone Mapping Difference: The Windows desktop, GPU driver, and your monitor each apply their own tone‑mapping and gamma curves for HDR. Microsoft's HDR documentation states that tone-mapping for HDR content is always done on the GPU using content metadata.
- Limited Color‑Management in Apps: Multiple apps and capture tools assume a simple sRGB/SDR display and do not understand HDR color spaces. When they pull pixels from an HDR desktop, they interpret those HDR values as SDR, resulting in washed‑out colors.
Difference Between SDR and HDR Display Rendering
To better navigate the browser screenshots are washed out error, go through the given comparison between SDR and HDR:
| Aspects | SDR (Standard Dynamic Range) | HDR (High Dynamic Range) |
| Brightness Range | Typically, around 100-300 nits peak brightness. | Can reach 600-1,000+ nits on many HDR displays |
| Dynamic Range | Limited range between darkest and brightest areas. | Much wider range, with higher contrasts. |
| Color Depth | Usually 8‑bit per channel, about 16.7 million colors | Roughly 10‑ or 12‑bit, enabling billions of colors |
| Highlight detail | Bright areas clip more easily, losing detail | Preserve more detail in bright highlights |
| Usage | Legacy TV, Web video, older games | Modern TVs/monitors, HDR-enabled games |
Part 2. Stop Washed-Out Screenshots in Windows 11 HDR Browsers (Easy Fixes)
Remember that most of the HDR screenshot issues come from simple mismatches in settings and tools. Due to these minor gaps, users often experience the Windows 11 HDR screenshot washed-out problem in everyday browsing scenarios:
Quick Fixes for HDR Screenshot Color Issues
Before advanced fixes, consider applying a few simple fixes to significantly improve screenshot clarity and restore contrasts:
Fix 1. Turn HDR Off and Test Screenshot Results
HDR content is often converted to SDR during capture, leading to faded colors and poor contrast. However, when you turn off HDR, it removes the complexity of HDR-to-SDR conversions, reducing unexpected brightness shifts. To get accurate, consistent screenshots with better color balance across different devices, follow the guidelines to turn HDR off:
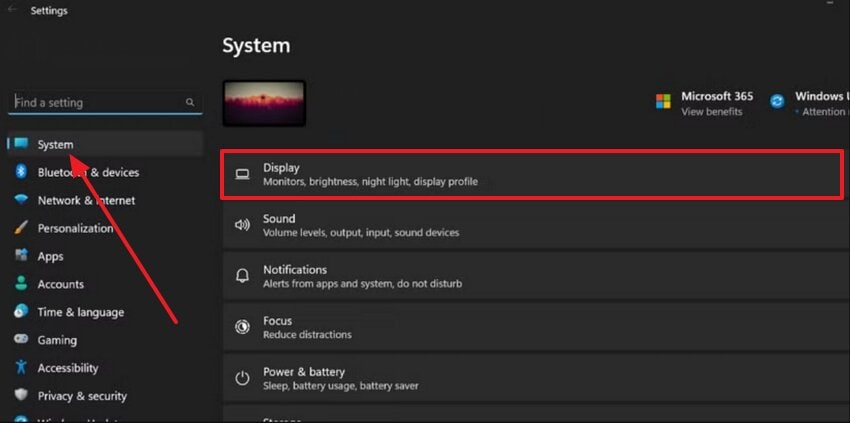
Step 1. Open Windows Settings, access the "System" section, and press the "Display" option.
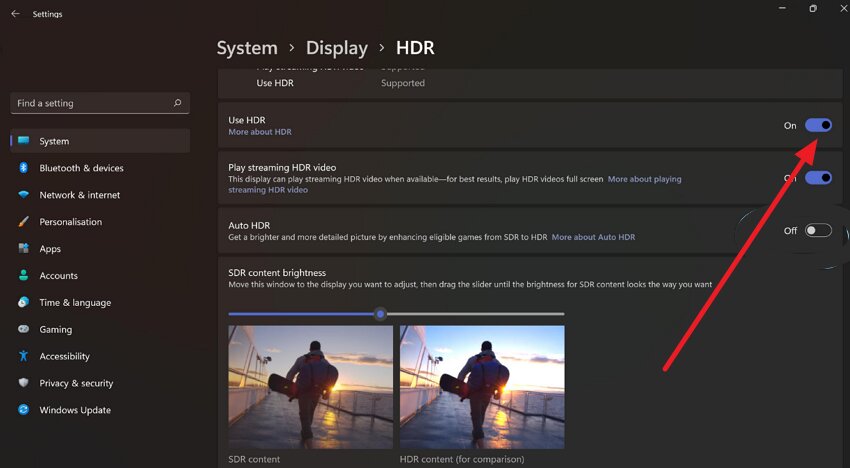
Step 2. After this, click the "Use HDR" option and toggle "Use HDR" to off. Later, capture a screenshot on your device and compare if the colors/contrasts now look normal.
Fix 2. Adjust Brightness and Color Calibration Settings
Incorrect HDR calibration can exaggerate brightness or wash out darker tones, directly affecting how screenshots are processed. To improve both on-screen visuals and captured images, you can adjust brightness and color calibration settings for balanced tones. For browser screenshots that are washed out, follow the tutorial and ensure that the system maps brightness levels more accurately:
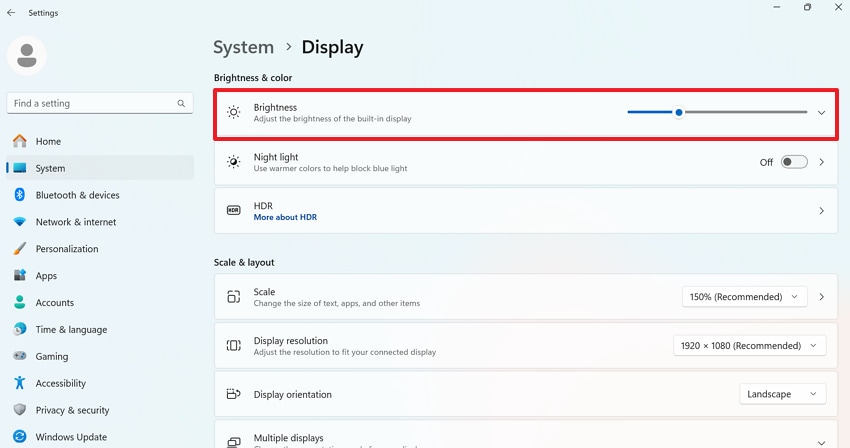
Step 1. Access Windows Settings, open the System tab, and adjust the slider for "Brightness" accordingly.
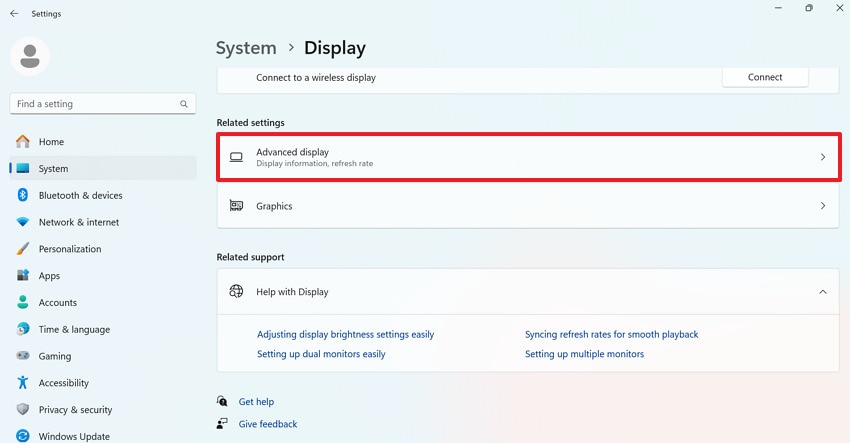
Step 2. Now, move to the "Advanced Display" option and click "Display Adapter Properties for Display 1" to proceed.
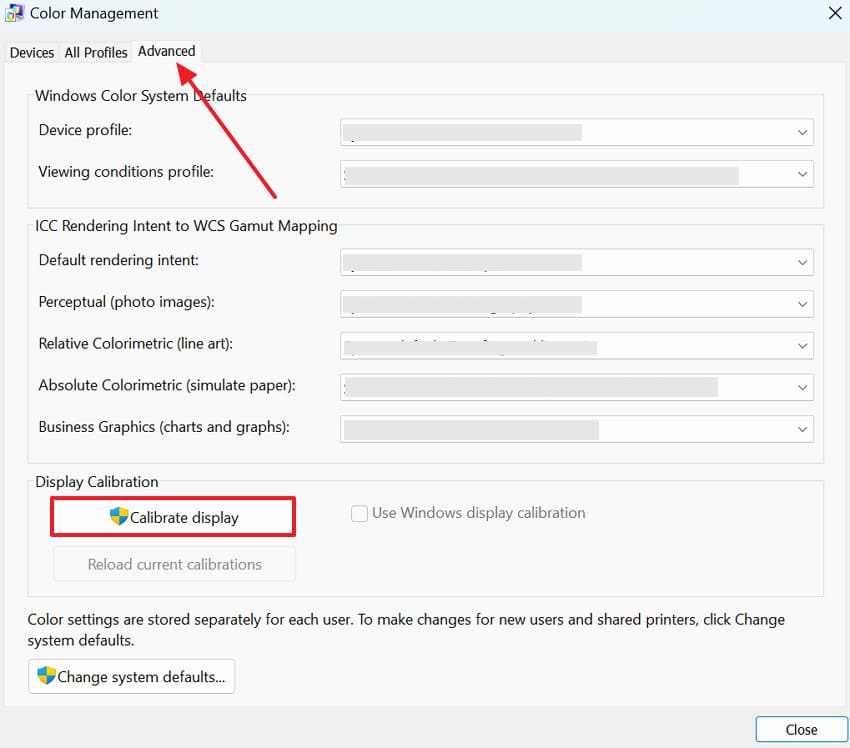
Step 3. From the Generic Monitor Graphics Properties window, access the "Color Management" section for adjustment. Later, press the "Advanced" tab and click the "Calibrate Display" button, then follow the on-screen instructions.
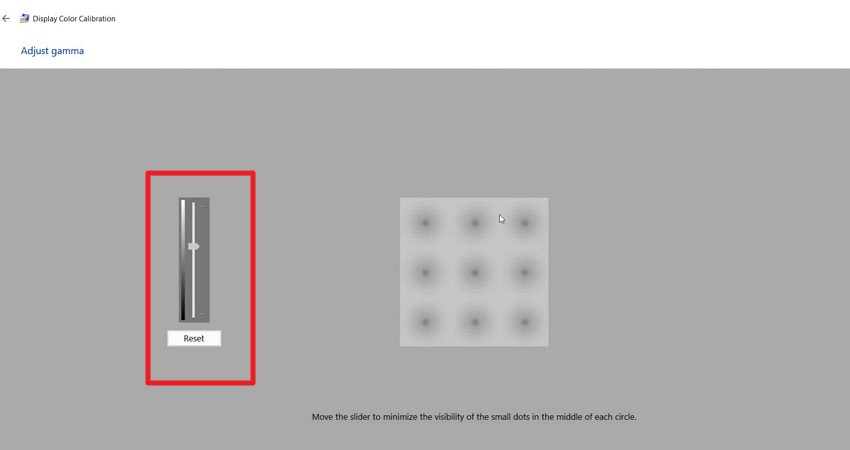
Step 4. Proceed and set the Gamma settings with the slider to improve your display colors. Move forward, make each adjustment accordingly, take a new screenshot, and check the colors.
Fix 3. Use Updated Screenshot Tools or Built-In Snipping Tool
Once you opt for updated screenshot tools or the Windows built-in Snipping tool, the output of screenshots looks better. They further reduce compatibility issues with HDR content, ensuring that brightness and color transitions are captured accurately. Follow the manual and make use of the updated pre-installed Snipping tool for Windows 11 HDR screenshot washed out:
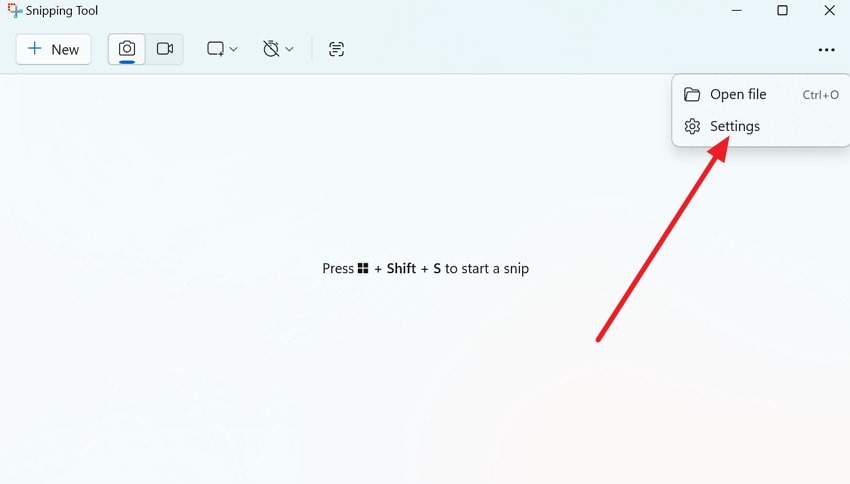
Step 1. On your Windows 11 device, search for and open the built-in Snipping Tool. Make sure it's updated, then press the "Three Dots" icon and choose the "Settings" option from the menu.
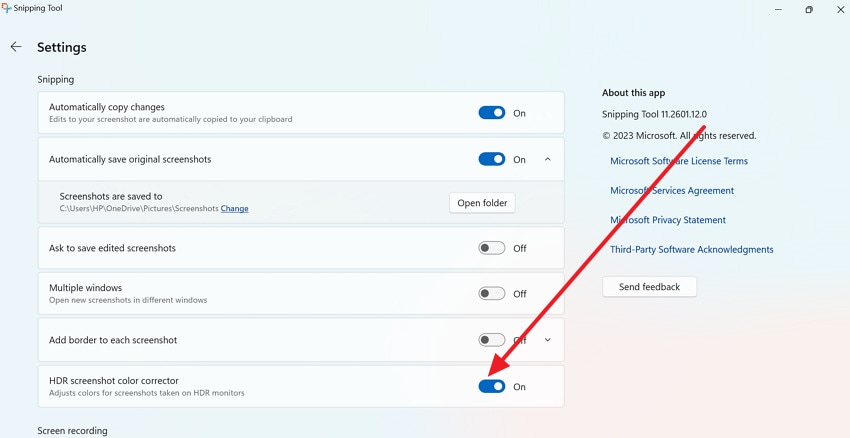
Step 2. Next, scroll down and turn on or off the "HDR Screenshot Color Corrector" option as needed.
Fix 4. Set Browser Hardware Acceleration Settings
Prefer switching rendering or graphics settings on and off to reduce mismatches between the display and the captured output. It can also stabilize color rendering, minimize brightness shift, and improve how HDR elements are translated during capture. For the persistent browser screenshots are washed out problem, try switching your rendering settings through the stepwise guide below:
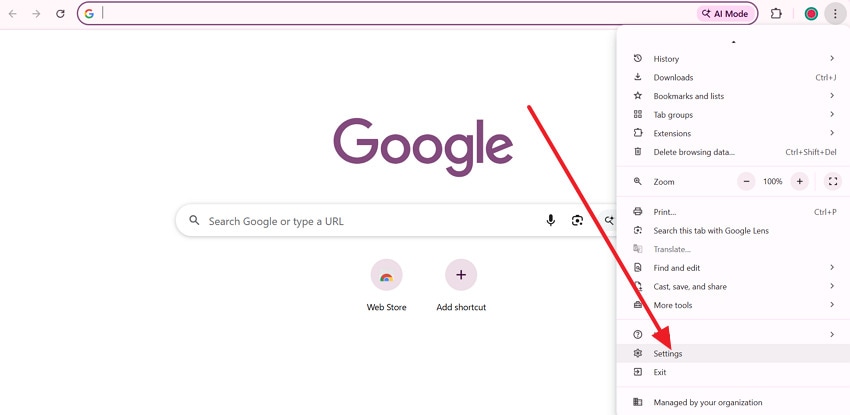
Step 1. Enter your browser, press the "Three Dots" icon, and click the "Settings" option from the menu.
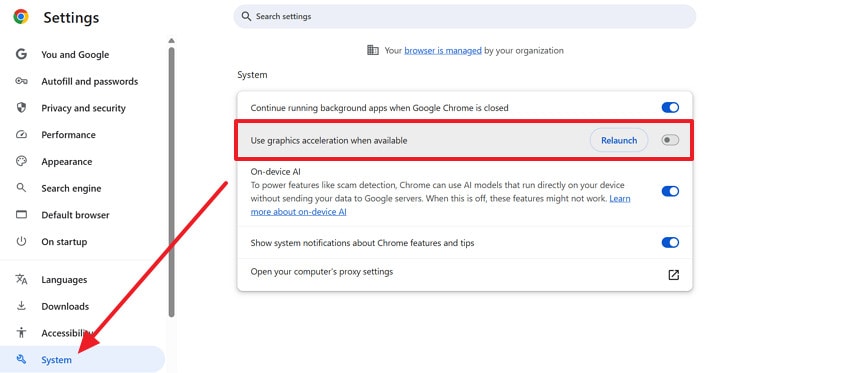
Step 2. Proceed and access the "System" section, then toggle "Use Hardware Acceleration When Available" off. After this, restart your PC, take a screenshot; if it's worse, turn it back on.
Fix Windows 11 HDR Screenshot Washed Out Problem Permanently
For a long-term solution, go beyond quick fixes and resolve the Windows 11 HDR screenshot washed-out issue with advanced fixes:
Fix 1. Update GPU Drivers (NVIDIA/AMD /Intel)
Any outdated GPU driver can lack proper HDR optimization and can mishandle color mapping during screenshots. So, update drivers to ensure better HDR processing, improved tone mapping, and more accurate color reproduction. Adhere to the manual and update your GPU drivers to enhance system stability and overcome the issue where browser screenshots are washed out:
Step 1. Initially, open Device Manager on Windows, and expand the "Display Adapters" option. After this, right-click your GPU driver and choose the "Update Driver" option from the drop-down menu.
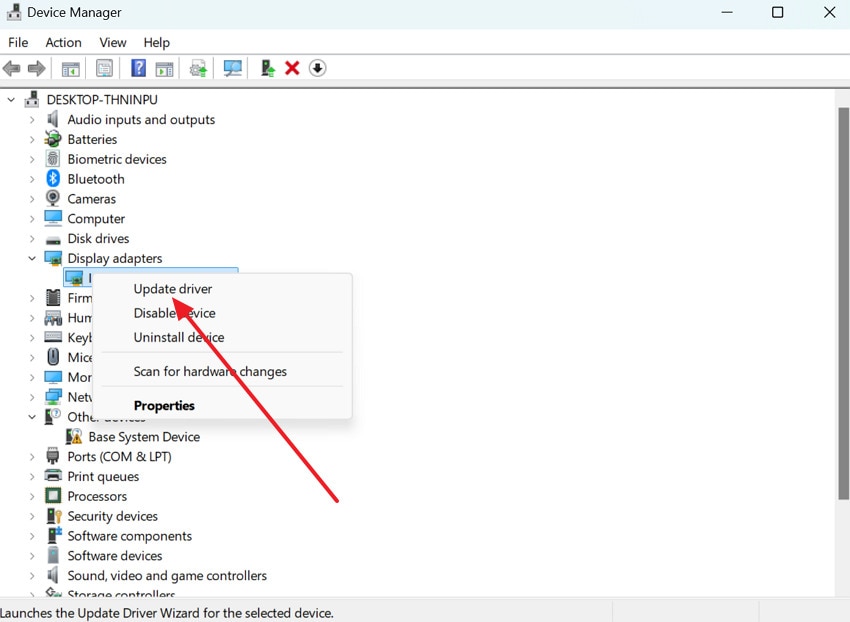
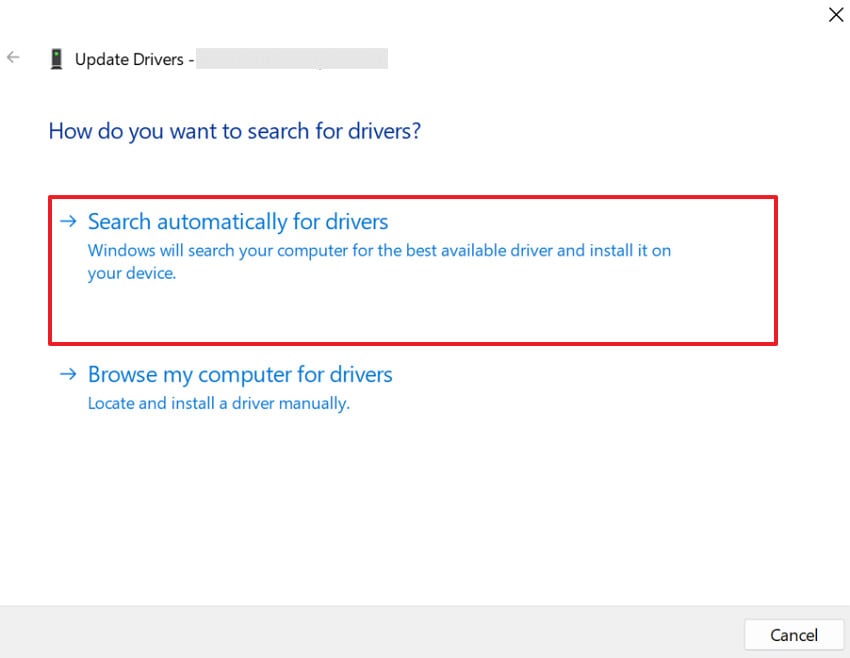
Step 2. Next, press the "Search Automatically for Drivers" option to allow Windows to search and install the latest version. Conversely, download the latest driver from the NVIDIA official website, then capture a screenshot to test.
Fix 2. Deep Browser/Color-Profile Adjustments
Browser and OS-level color management settings might not align with HDR output, resulting in washed-out screenshots. For this, fine-tuning the color profile via the browser improves how colors are rendered and captured. Review the guidelines below and learn how to set browser color profiles to avoid Windows 11 HDR screenshots from being washed out:
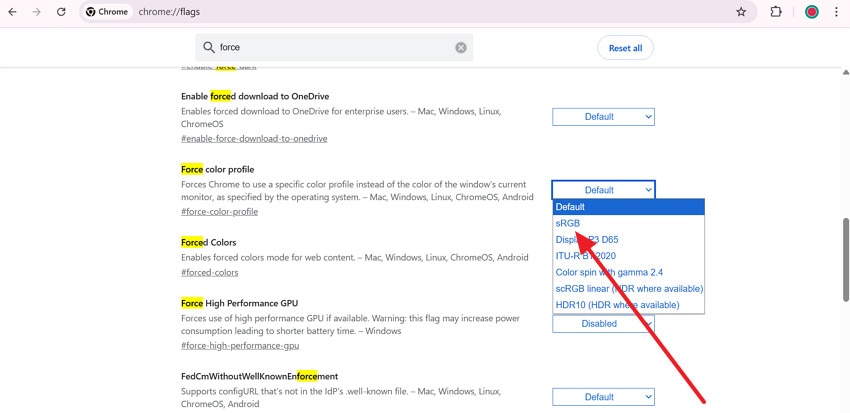
Instructions. In Chrome, visit "chrome://flags" and search for "Force Color Profile" in the search bar. Expand the menu and try the "sRGB" or "HDR 10 (HDR Where Available)" option to avoid weird color on HDR desktops.
Fix 3. Match Monitor Color Profile with System Settings
A mismatch between your monitor's color profile and system settings can distort brightness and color output in screenshots. Therefore, ensure consistency between what your monitor displays and what the system captures to reduce washed-out effects. To address the Windows 11 HDR screenshot washed out, follow the tutorial to set the color profile as the default:
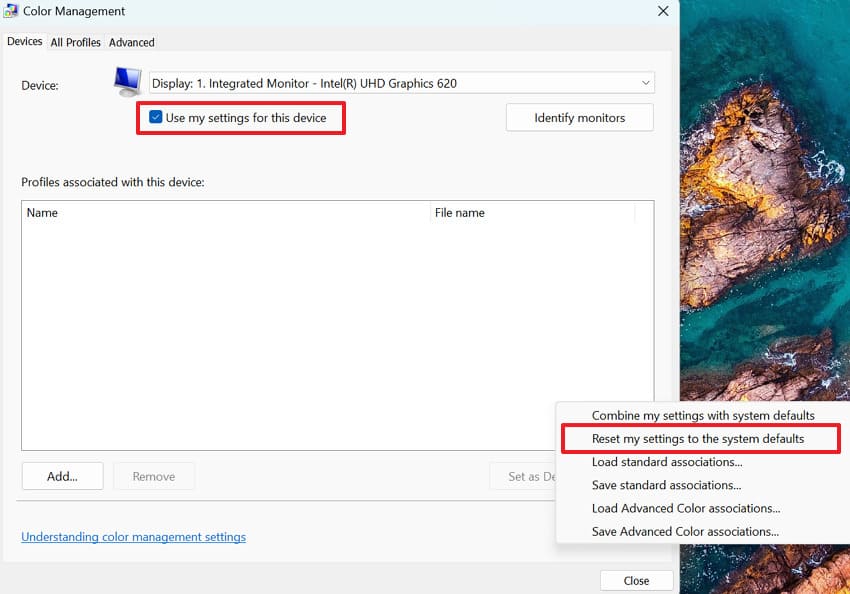
Instructions. On your Windows, open Color Management and check the "Use my Settings for This Device." Later, press the "Profile" option and choose the "Reset My Settings to the System Default" option. Move forward, restart your system, and recheck screenshots after adjusting color profiles.
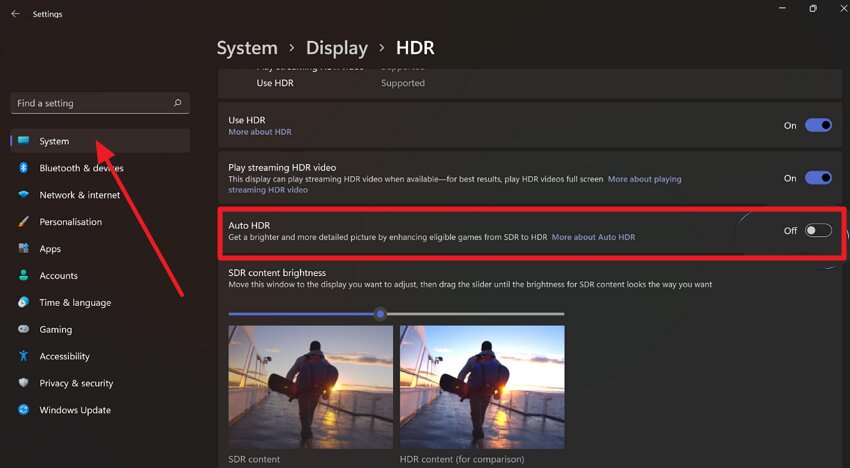
Fix 4: Enable Or Disable Auto HDR Based on Needs
Auto HDR can sometimes over-process SDR content, leading to inconsistent screenshot results. In this context, adjusting Auto HDR helps you reduce unexpected brightness spikes and color shifts across different apps. For a predictable visual experience when switching between HDR and SDR content, learn how to enable or disable Auto HDR through the tutorial:
Instructions. Enter Windows Settings, access the "System" section, and open the "Display" option. Now, press the "Use HDR" option and scroll to the "Auto HDR" option to either turn on or off accordingly.
Pro Tip. Quick Fix for Improving Screenshot Quality and Visuals Using Repairit
Sometimes, the issue isn't limited to HDR settings; it may involve corrupt or poorly processed screenshot files that affect how visuals appear. This is often overlooked in the "Windows 11 SDR screenshot washed out" problem, especially when basic fixes fail. In such cases, Repairit helps restore damaged images and improves overall screenshot clarity, particularly when visuals appear faded, distorted, or low in contrast.
Beyond repair, Repairit also includes a Photo Enhancer feature that uses AI to improve screenshot quality. It can enhance brightness, restore color balance, sharpen details, and reduce noise without altering the original resolution or structure. This makes it useful for refining washed-out screenshots and making them closer to the actual on-screen appearance.
Key Features

-
Repair Color Distortion: It focuses on repairing data within the file, including frames, colors, and metadata, unlike Windows color calibration.
-
Supports High‑Resolution & HDR‑Style Formats: The platform supports these highest-resolution and HDR-style formats, helping preserve a wide range of rich color information after repair.
-
Complete Compatibility with OS/Devices: Users can repair their system files on both Windows and macOS, with no feature loss, either online or offline.
Tutorial for Improving Windows 11 Screenshots Quality and Visuals via Repairit
When basic fixes fail, follow the provided tutorial to fix and enhance screenshot quality using Repairit.
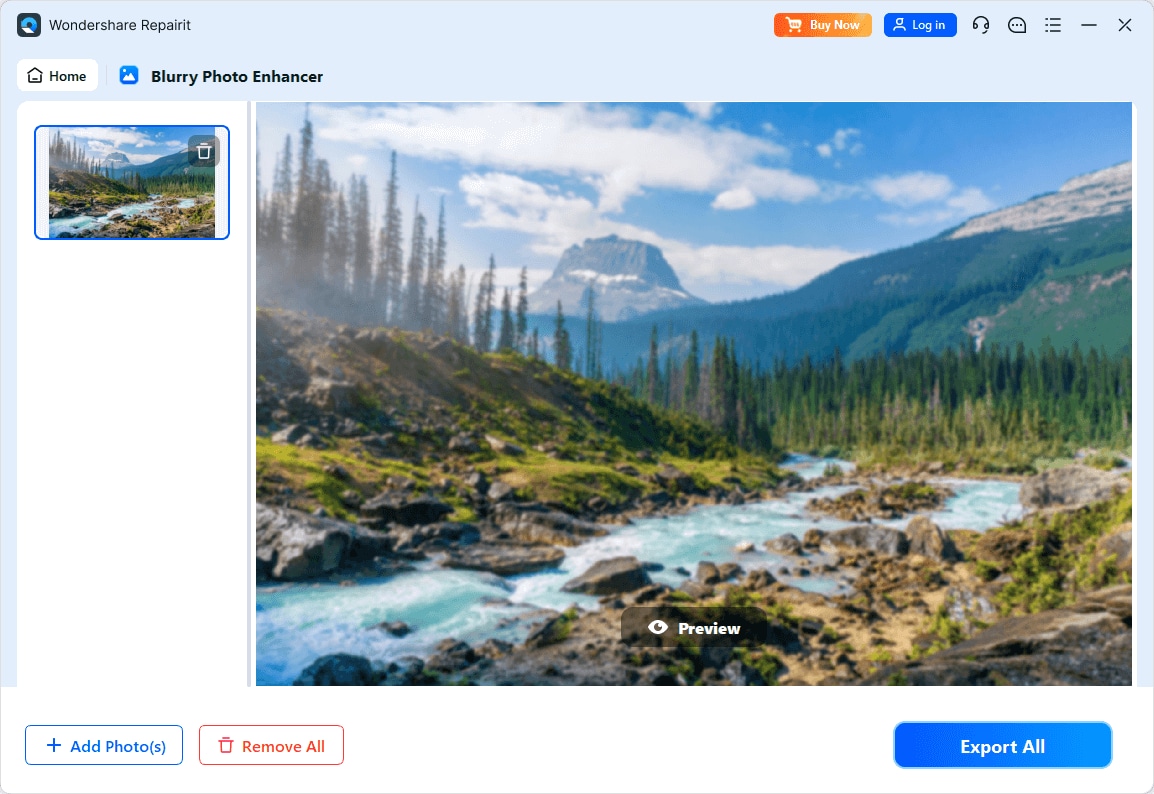
Step 1. Load Your Screenshot Files
Access the "AI Media Enhancer" tab and select the "Blurry Photo Enhancer" feature. Proceed and press the "+Add" button to insert all screenshot files.

Step 2. Initiate the Screenshot Enhancement Process
Next, click the "Export All" button to start enhancing and fixing all the quality and visual issues in your screenshots.
Enhance Blurry Photos
 Security Verified. Over 7,302,189 people have downloaded it.
Conclusion
In conclusion, the challenge of browser screenshots being washed out goes beyond a simple visual glitch and reflects how HDR displays are processed and converted. This mismatch leads to dull colors, reduced contrast, and screenshots that fail to represent the true on-screen experience. However, if the problem persists even after applying the discussed solutions, consider using Repairit to enhance screenshot quality and fix corrupted visuals.
Frequently Asked Questions
-
1. What does the "Failed to Initialize" error mean in Windrose?
This error usually indicates that the game's engine or critical system components failed to start correctly. It can be caused by missing DLL files, outdated drivers, or insufficient system permissions. -
2. Can a weak internet connection cause initialization errors?
Yes, if Windrose requires an initial server handshake or updates during the startup phase, a network failure can prevent the game from initializing properly. Flushing your DNS or using a wired connection might help. -
3. Will I lose my game progress if I reinstall Windrose?
Generally, no, as most modern games store progress in the cloud or a separate "Saved Games" folder. However, it is always recommended to back up your local save files before a full reinstallation. -
4. How can Repairit help with initialization errors?
Repairit can fix corrupted game data, screenshots, or related media files that might have been damaged during a system crash or failed update. This ensures your supporting files are healthy while you troubleshoot the main game engine.
