
Image color temperature is a core setting you will see on cameras, smartphones, and photo editors whenever you adjust white balance, filters, or color correction. It decides whether your images look warm and golden or cool and bluish, which directly shapes mood and realism. Understanding it helps you avoid strange color casts, keep skin tones natural, and create consistent photos for printing, social media, or professional work.
Repair Corrupted Files To Save Your Data
 Security Verified. Over 7,302,189 people have downloaded it.
In this article
What Is Image Color Temperature?
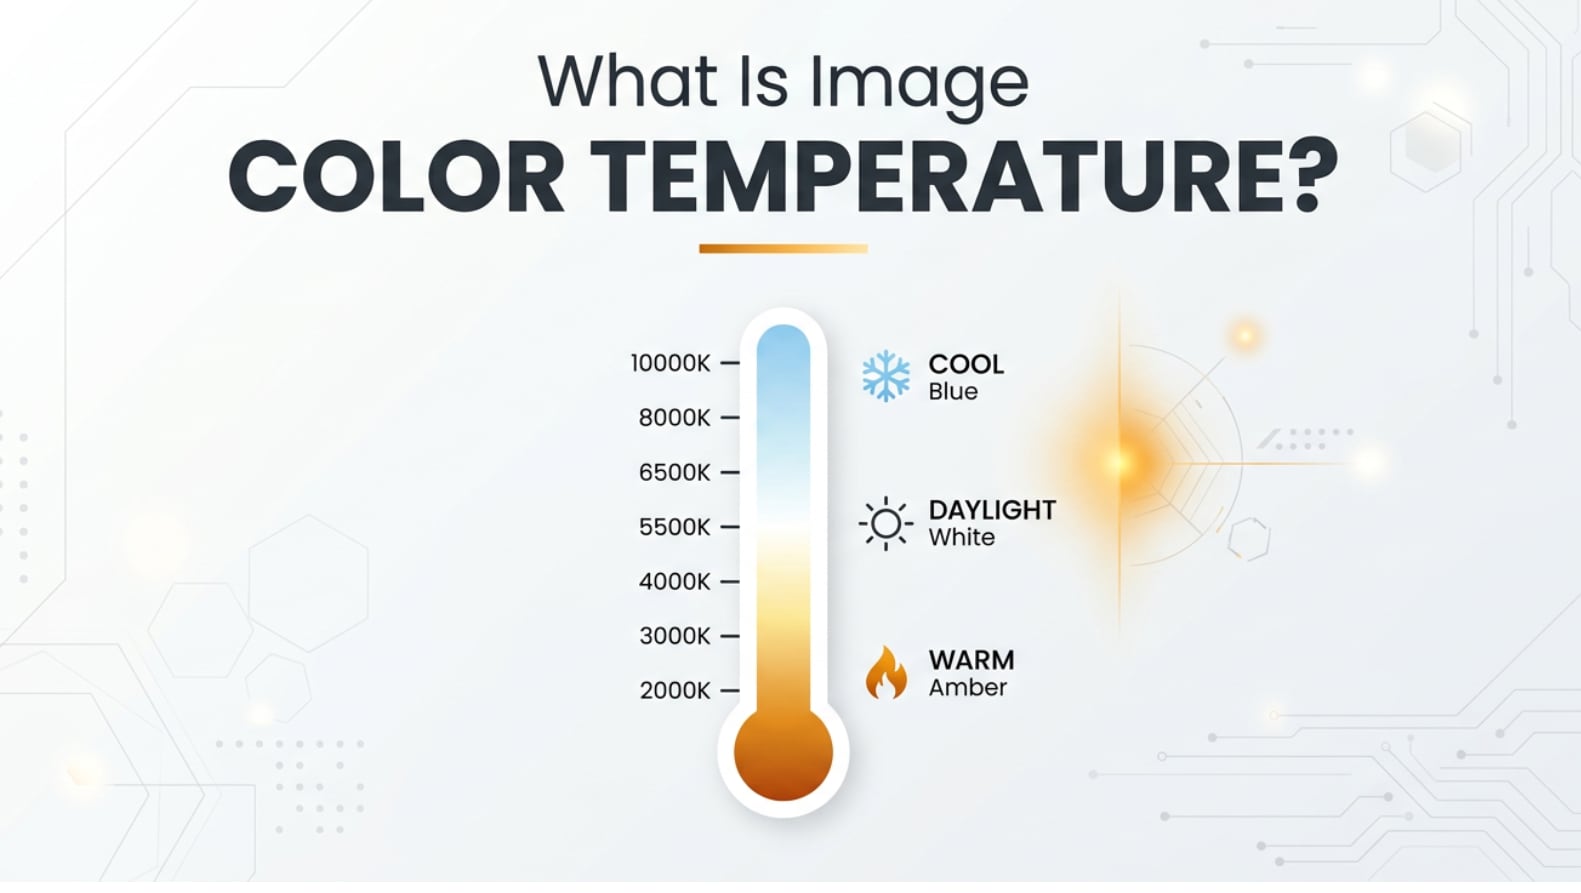
Image color temperature describes whether the light in a photo appears warm (more orange/yellow) or cool (more blue). It is measured in Kelvin (K) and is treated as an image parameter closely tied to white balance in photography and photo editing.
In technical terms, color temperature is based on the color of light emitted by a theoretical black-body radiator at different temperatures. In practical photography, you simply see it as a numeric scale:
- Low values (around 2500–3500 K) look warm and orange, like tungsten bulbs or candlelight.
- Mid values (around 5000–6500 K) look neutral, like daylight at noon or many LED panels.
- High values (7000 K and above) look cool and bluish, like shade or overcast sky.
On cameras and in editing apps, image color temperature is usually controlled through the White Balance setting or a Temperature slider. Adjusting it tells the camera or software how to interpret the color of the light so that white objects appear neutral instead of orange or blue.
What Does Image Color Temperature Affect?
Visual quality and realism
Color temperature has a direct impact on how realistic your photos look and how accurately they reproduce real-world colors.
- Skin tones and portraits: Too warm makes skin look overly orange or sunburnt; too cool makes people appear pale, sick, or lifeless. A balanced color temperature in photography keeps skin natural.
- Product and brand photos: Incorrect temperature can make products look like the wrong shade, which is a big problem for e-commerce, branding, and advertising.
- White and neutral objects: If a white wall, dress, or sheet of paper looks yellow or blue, viewers instantly feel something is off, even if they cannot explain why.
- Cross-device viewing: When temperature is well balanced, images stay visually consistent across phones, monitors, and TVs, even though each display has its own profile.
Mood, style, and consistency
Beyond realism, color temperature is a powerful creative tool that shapes mood and visual style.
- Warm vs cool images: Warm photos feel cozy, nostalgic, or romantic; cool photos feel calm, modern, or even dramatic. Choosing a deliberate warm vs cool look is one of the simplest ways to control atmosphere.
- Scene storytelling: Sunset and indoor scenes often look better slightly warm; night cityscapes or snowy mountains can benefit from a cooler look.
- Series or feed consistency: Matching warm vs cool images across a gallery, Instagram grid, or portfolio gives your work a unified style. Inconsistent color temperature can make a feed look messy.
- Editing workflow: Getting color temperature close to correct early in the workflow makes later color grading, sharpening, and exporting faster and more predictable.
How Does Image Color Temperature Work in Real Use?
Color temperature in photography shows up almost everywhere in real workflows, from shooting to editing to exporting and sharing.
On cameras and smartphones
Most cameras and phones handle color temperature through White Balance (WB) options:
- Auto White Balance (AWB): The device guesses the scene's color temperature and tries to make it neutral. It works well most of the time but can be fooled by mixed lighting or strong colors.
- Presets: Daylight, Cloudy, Shade, Tungsten, Fluorescent, and Custom presets set different Kelvin values and tints so you do not need to think in numbers.
- Kelvin (K) mode on advanced cameras: Lets you manually enter a specific color temperature, such as 3200 K for tungsten or 5600 K for daylight studio lights.
When you shoot JPEG, your WB and image color temperature choice is mostly baked into the file. When you shoot RAW, you retain more flexibility to change it later in post-production without degrading quality.
In photo editing software
In editors like Lightroom, Photoshop Camera Raw, Capture One, and many mobile apps, color temperature is exposed through:
- A Temperature slider labeled Temp or Color Temperature (blue on one side, yellow on the other).
- A Tint slider that compensates green/magenta color shifts.
- A White Balance eyedropper you click on something neutral gray or white in the photo to auto-correct the balance.
During editing, you may use color temperature to:
- Fix a photo color cast caused by indoor lighting, shade, or mixed sources.
- Match multiple images shot in the same place so they look consistent.
- Create stylized warm or cool looks as part of your color grading.
- Prepare images for printing or web export so they do not appear too blue or yellow on common displays.
Across exporting, viewing, and platforms
Although color temperature is primarily set during capture or edit, it affects how your images look across platforms:
- Monitors and phones: Displays themselves can be warmer or cooler (for example, "Night Shift" modes on phones add warmth). If your image is already very warm or cool, display shifts can push it too far.
- Social media and websites: Correct temperature helps your images stand out clearly in busy feeds and look professional on portfolios or e-commerce sites.
- Printing: Prints often look slightly different than screens; starting with a balanced image color temperature reduces surprises and wasted test prints.
Common Mistakes and Quick Tips
Common misunderstandings
- Confusing white balance with color filters: White balance corrects for the color of the light; filters or LUTs are creative looks layered on top. If WB is wrong, filters may not fix the problem.
- Thinking "warmer" is always better: Over-warming makes whites dirty and skin orange. It should support the scene, not overpower it.
- Ignoring mixed lighting: A room with daylight windows plus tungsten lamps can never be perfect everywhere at once. One area will always lean warm or cool unless you control the lights.
- Relying only on your memory: Human memory of color is poor. Use neutral references (white walls, gray cards) whenever possible instead.
Practical quick tips
- Use Auto WB as a starting point: Let the camera guess, then fine-tune in editing, especially if you shoot RAW.
- Carry a gray card for critical work: One quick shot of a gray card under your lighting lets you set accurate white balance later with one click.
- Check skin tones first: For portraits, adjust temperature until skin looks believable, then fine-tune tint.
- Use side-by-side comparison: In editors, compare Before/After while adjusting the Temperature slider to avoid going too far.
- Create presets for regular locations: Save WB presets for your studio, office, or frequently used room so you can get close instantly.
Key takeaways: understand the blue-to-orange Kelvin scale, fix obvious color casts early, and use temperature to support your creative mood, not fight it.
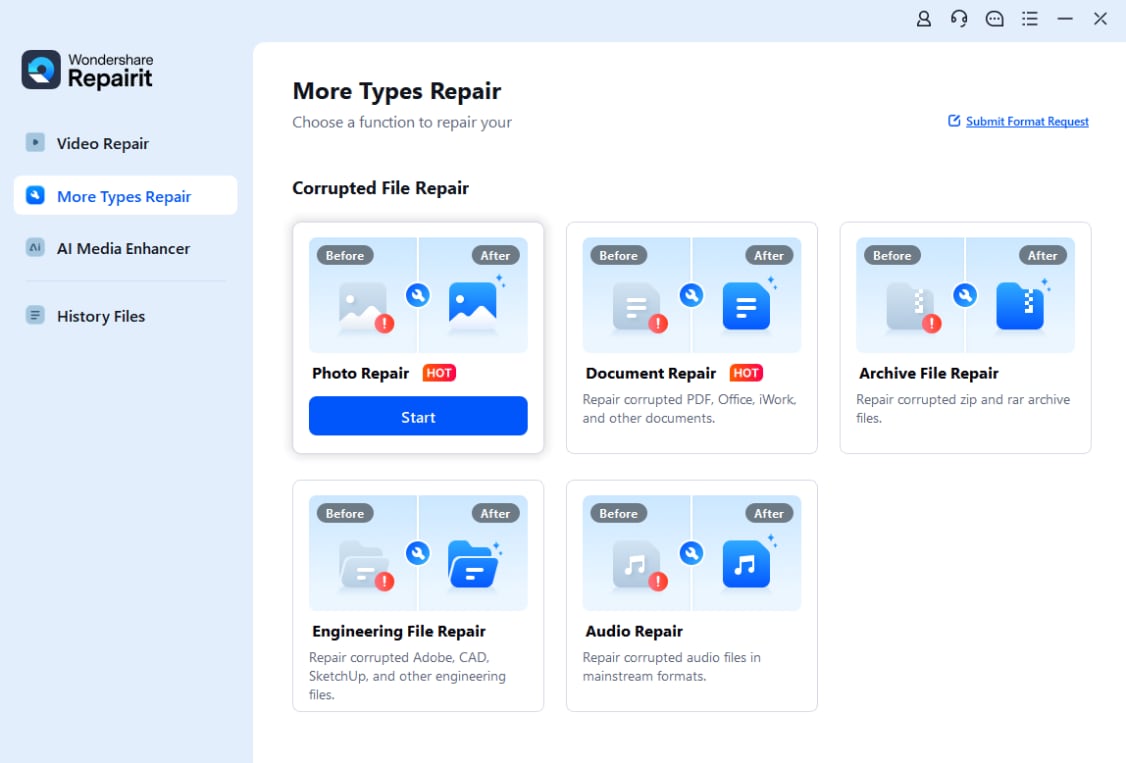
How to Use Repairit to Fix a Corrupted Photo File
If a photo is corrupted and will not open, you cannot adjust image color temperature, white balance, or any other settings in your favorite editor. Wondershare Repairit offers a dedicated repair workflow for damaged media files, so you can recover broken photos first and then safely perform your color corrections. Learn more and download it from the Repairit official website.
Key features of Repairit
- Image repair, video repair, and file repair for photos and videos from cameras, phones, memory cards, and computers.
- Support for multiple formats and corruption cases, such as photos that will not open, preview, or display correctly.
- A guided, step-by-step interface suitable for beginners who just want to repair files quickly without complex settings.
Step-by-step: repair a corrupted photo file
- Add corrupted photo files
Install and open Repairit on your computer, then go to the Photo Repair section. Click the add icon or drag and drop the corrupted photos into the window. Repairit will list each file so you can confirm exactly which images you want to fix.
- Repair photo files

After the images are loaded, start the repair by clicking the Repair button. Repairit scans each photo for structural damage, broken headers, or display errors and automatically fixes them. When the process is complete, preview the recovered photos inside the program to make sure they open and look normal.
- Save the repaired photo files

Once you are satisfied with the preview, click Save or Export, then choose a safe destination folder that is different from where the damaged files were stored. Repairit will save clean copies of your photos so you can open them in any editor and adjust photo color cast, white balance, or other settings without errors.
Conclusion
Image color temperature is the backbone of natural, believable photos. By understanding the warm-to-cool Kelvin scale and how it interacts with white balance, you can avoid unwanted color casts, keep skin tones realistic, and shape the mood of every shot.
Combine good control of color temperature in photography with a reliable repair solution such as Wondershare Repairit, and you can protect both the technical integrity and emotional impact of your images, from capture to editing, exporting, and long-term storage.
Next: What is Image Gamma Correction?
FAQ
-
1. What is image color temperature in simple terms?
Image color temperature describes whether the light in a photo looks warm and orange or cool and blue. It is measured in Kelvin and is mostly controlled by the white balance setting in your camera or editing software. -
2. How is color temperature different from white balance?
Color temperature is the physical property of light, measured in Kelvin, while white balance is the camera or software adjustment that compensates for that light so neutral areas (like white or gray) look truly neutral in your photo. -
3. Why do my indoor photos look too yellow or orange?
Indoor lighting such as tungsten or many warm LEDs has a low color temperature and appears very warm. If your camera is set to daylight or Auto WB fails, the images can pick up a strong yellow or orange cast. -
4. Can I fix the wrong color temperature after shooting?
Yes. In most editors you can adjust the Temperature and Tint sliders to remove color casts. If you shot in RAW, you have much more flexibility to change image color temperature without noticeably degrading quality. -
5. What if my photo is corrupted and will not open for editing?
If the photo file itself is damaged, standard editors may not open it. In that case, use a repair tool such as Wondershare Repairit to restore the file first, then fine-tune photo color cast and other settings in your usual software.
