
- Problem Overview: High RAM Usage in Windows 11 fix starts with identifying signs of CPU and memory overload.
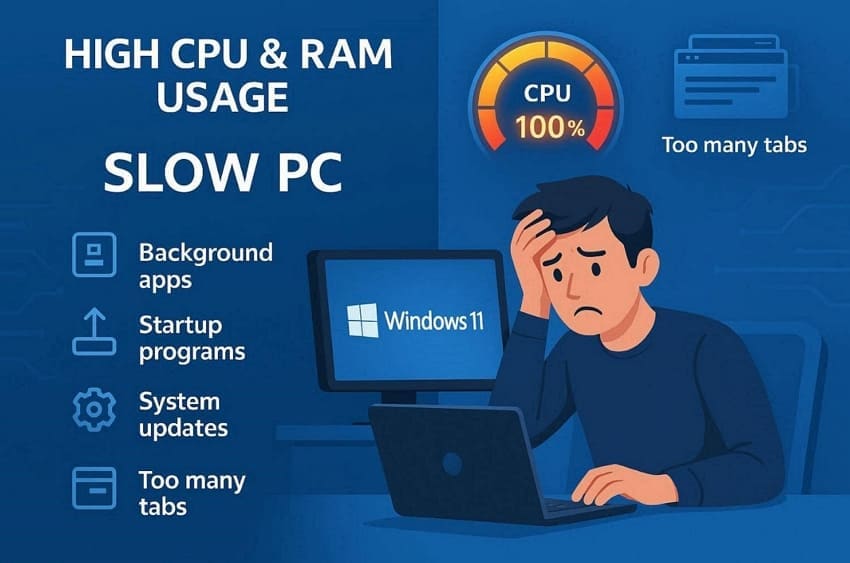
- Core Causes: Background apps, startup items, updates, corrupt files, and browser tabs all raise CPU load.
- Workable Fixes: Close background apps, disable startup programs, and adjust memory settings in Windows 11.
- Corruption Repair: Use a repair tool like Repairit when corrupted files cause a stubborn high RAM usage issue.
- Top Tip: Restart regularly and limit the number of browser tabs to prevent high memory usage.
- Quick Answer: To implement a high RAM usage Windows 11 fix, close background apps, turn off startup programs, and run a malware scan to free up system resources.
You may experience significantly reduced performance on your Windows 11 PC. Along with that, users may notice their fan spinning loudly while the screen starts to freeze. This common issue happens when your system struggles with a very heavy load.
Therefore, finding a high RAM usage Windows 11 fix is vital for your computer. Microsoft reports that background processes like “CMD.exe” consume up to 30% of Windows 11 memory. When your CPU or memory hits the limit, your productivity quickly disappears. Therefore, this guide provides easy steps to help you regain control of your PC.
In this article
Part 1. 5 Causes of High CPU and RAM Usage To Know
Understanding why your computer feels slow is the first step toward success. So, learning the given common issues leads to a Windows 11 high memory usage fix:
- Background Apps: Many programs continue to run even when you are not using them. These hidden processes consume a large amount of your available system power.
- Startup Items: Some software starts automatically as soon as you turn on your PC. This creates a massive load on your processor during the initial boot.
- System Updates: New software installations often require extra power to finish their background tasks. Your computer might struggle until the update process is fully complete.
- Corrupt Files: Damaged data can force your system into a continuous and heavy loop. This error prevents your hardware from resting and causes very high heat.
- Browser Tabs: Opening too many pages at once uses a lot of active memory. Every single tab needs its own space to keep the content running.
Part 2. How to Solve High System Memory Usage in Windows 11
Now you can apply practical methods to reduce system memory usage. Fixing Windows 11 high RAM usage when idle starts with these helpful methods:
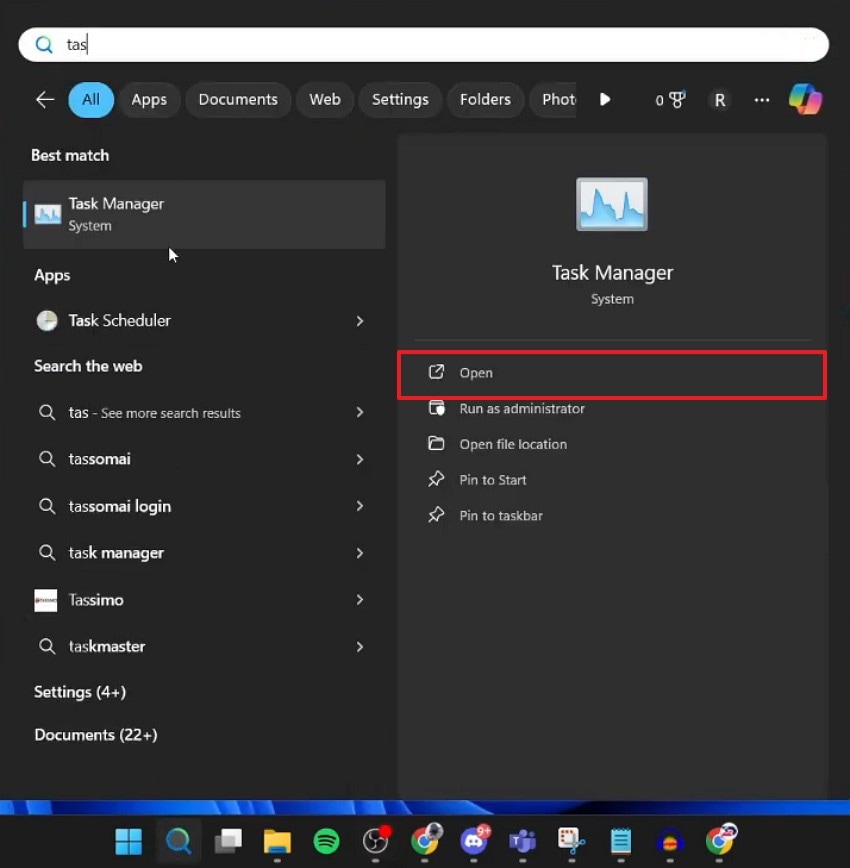
Way 1. Close Background Apps
Closing background apps is an effective way to free up your computer resources. Many programs stay active and use power without you even knowing it. This specific method often helps with Windows 11 high RAM after the update 2026. These unnecessary tasks can be turned off to give your processor a break. Adhere to these simple steps to close all those unwanted background apps:
Step 1. Type “Task Manager" in the search bar and run it using the "Open” option.
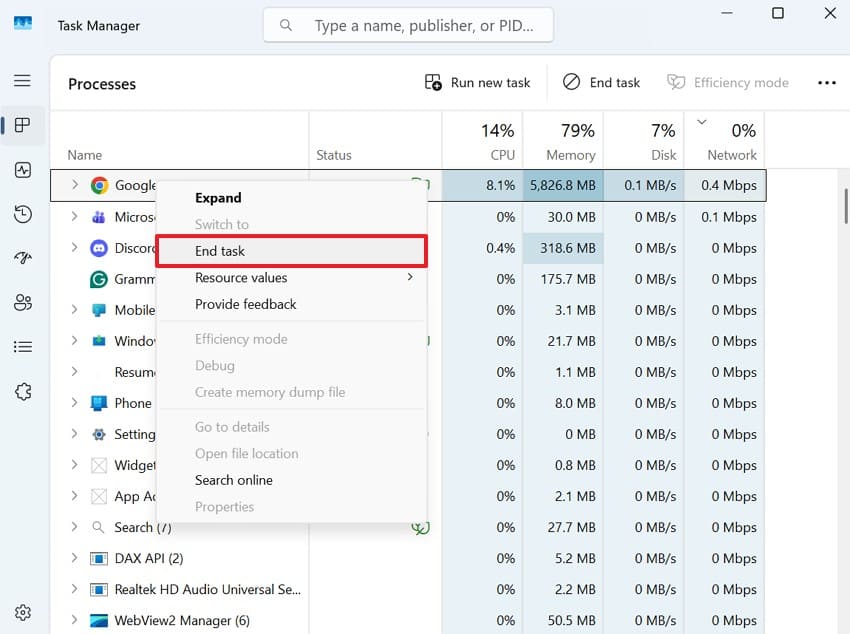
Step 2. Right-click the app or program you don't want to run in the background. From the upcoming menu, click the "End Task” option.
Way 2. Disable Startup Programs
Many applications try to open automatically every time you start your computer. These unnecessary tools often run in the background, slowing down your system. Therefore, turning them off will help your PC boot much faster. It ensures that only the most important software uses your valuable memory space. Explore the steps to use this solution as a Windows 11 using too much RAM fix:
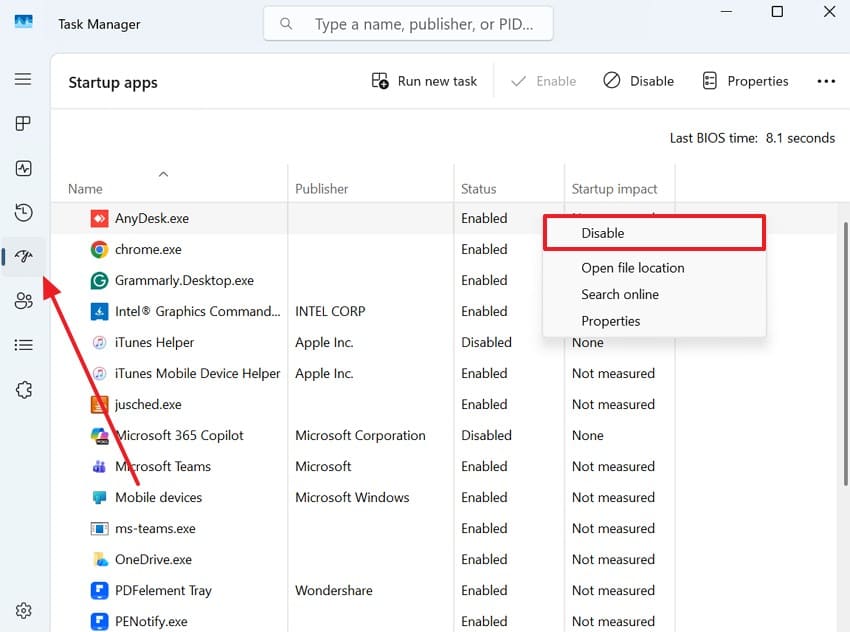
Instructions. Upon heading to “Task Manager,” access the “Startup Apps” tab. Next, right-click the app to choose “Disable" and repeat the same process for all unnecessary ones.
Way 3. Check Task Manager for Memory-Heavy Processes
The Task Manager is a tool that shows which specific programs use the most system memory. It helps identify hidden processes that cause high RAM usage in Windows 11. You can see a live list of every active process on your screen. It allows you to stop any heavy program that is causing your lag. So, go through the given steps to find problematic applications:
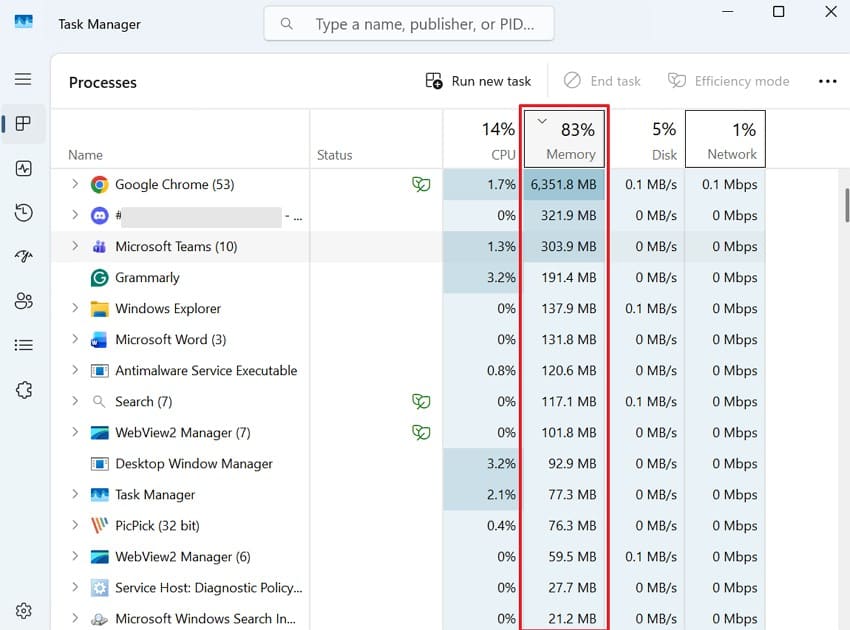
Instruction. From the “Processes” tab of “Task Manager,” click the “Memory" column header. This moves the most memory-consuming programs to the top of the list. Look through the list and identify any unnecessary or unfamiliar programs that use high memory.
Way 4. Run Windows Memory Diagnostic Tool
This tool searches for hidden errors in your physical RAM that cause system crashes. It scans your memory sticks for any signs of permanent damage. Running this simple test acts as a reliable Windows 11 high memory usage fix. It also provides a detailed report about your computer hardware health after the restart. Follow these easy steps to start the diagnostic process on your device:
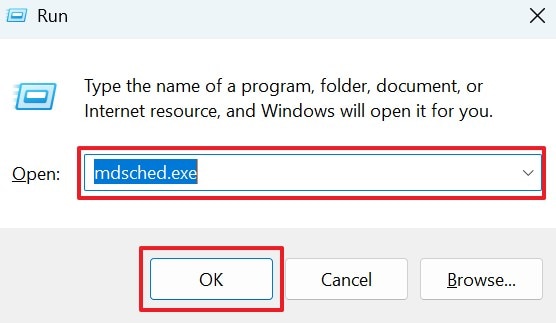
Step 1. Type “mdsched.exe” upon pressing “Windows + R” and click the “OK” button.
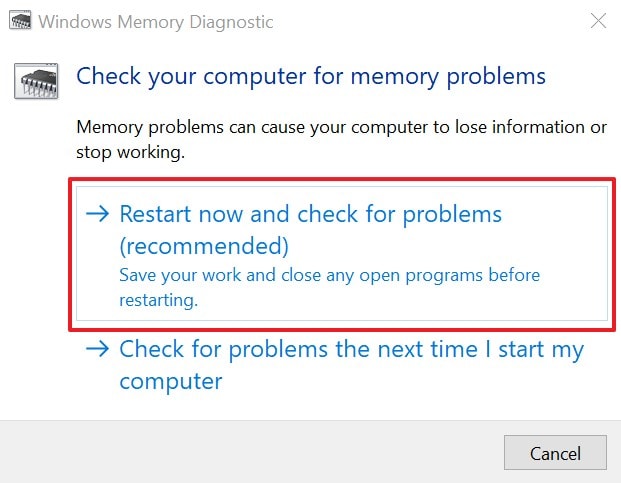
Step 2. After the diagnostic window appears, choose the “Restart Now and Check for Problems” option. Your system will reboot, run the memory test, and later display the results through a notification.
Way 5. Scan for Malware
Sometimes, malicious software runs hidden tasks that consume all your system power. These dangerous viruses can cause Windows 11 high RAM usage when idle. Thus, scanning your computer helps to find and remove these harmful digital threats. A deep scan protects your private data while cleaning up your active memory. The following simple steps help you perform a full malware scan:
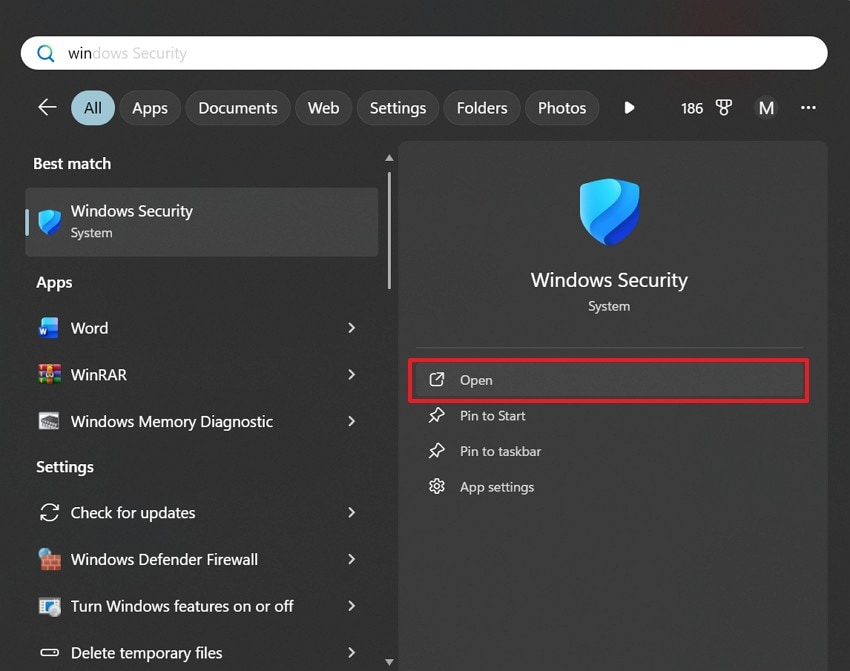
Step 1. Look for “Windows Security” through the search bar and opt for the “Open” option.
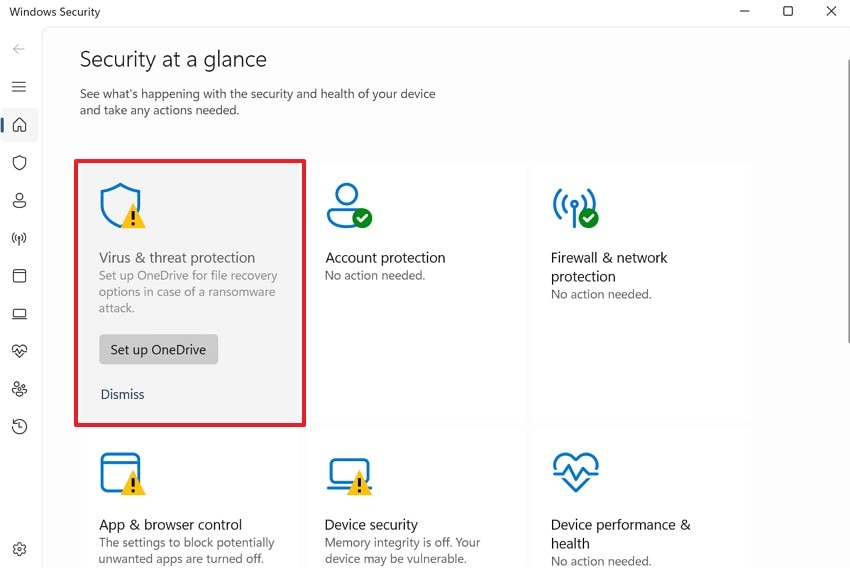
Step 2. Upon opening the program, head to the “Virus & Threat Protection” section.
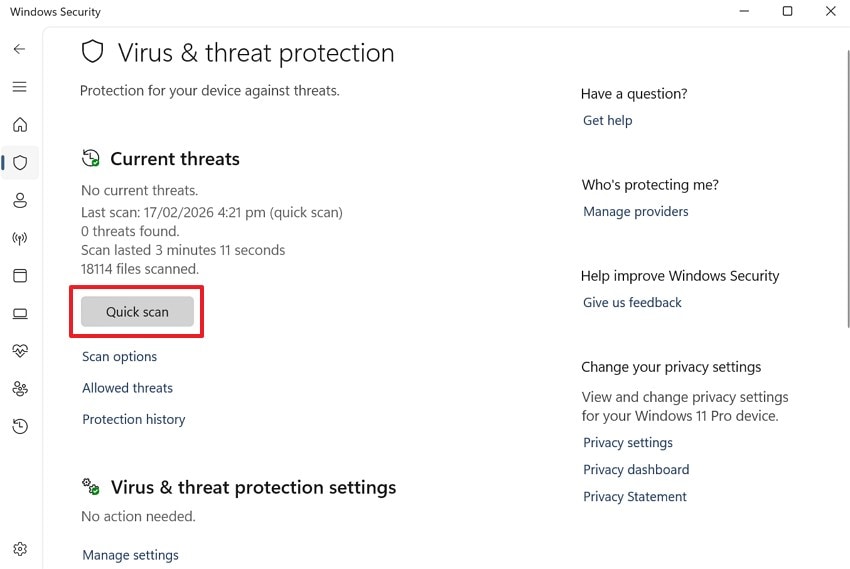
Step 3. After accessing that section, click the “Quick Scan" button to start the scan.
Way 6. Adjust Virtual Memory (Pagefile) Settings
Virtual memory acts like a backup for your physical RAM when space runs low. It uses your hard drive to store extra data for your active computer programs. At this point, you should adjust this to help with Windows 11 high RAM after update 2026 errors. This setting ensures your system does not crash when you open many large files. Review these steps to change the virtual memory settings on your device:
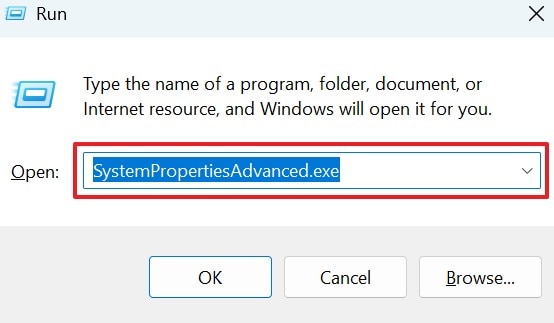
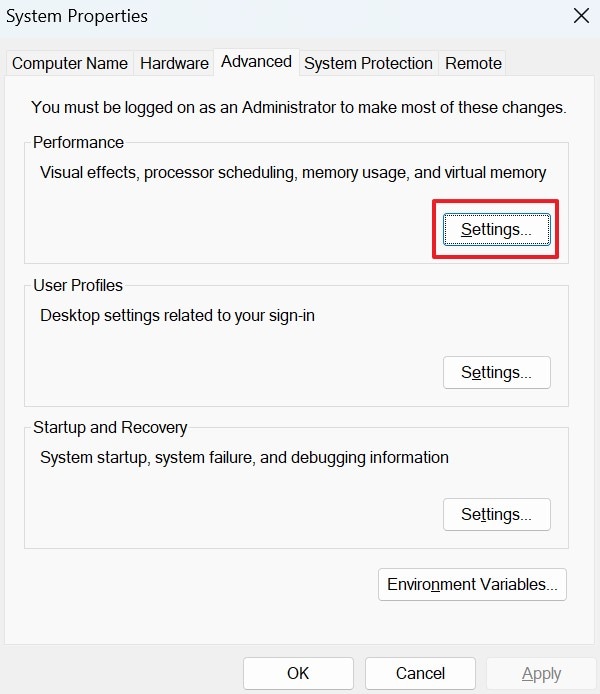
Step 1. From the “Run” dialog box, input “SystemPropertiesAdvanced.exe” and press “Enter.”
Step 2. In the upcoming properties panel, press “Settings…” under the “Performance” tab.
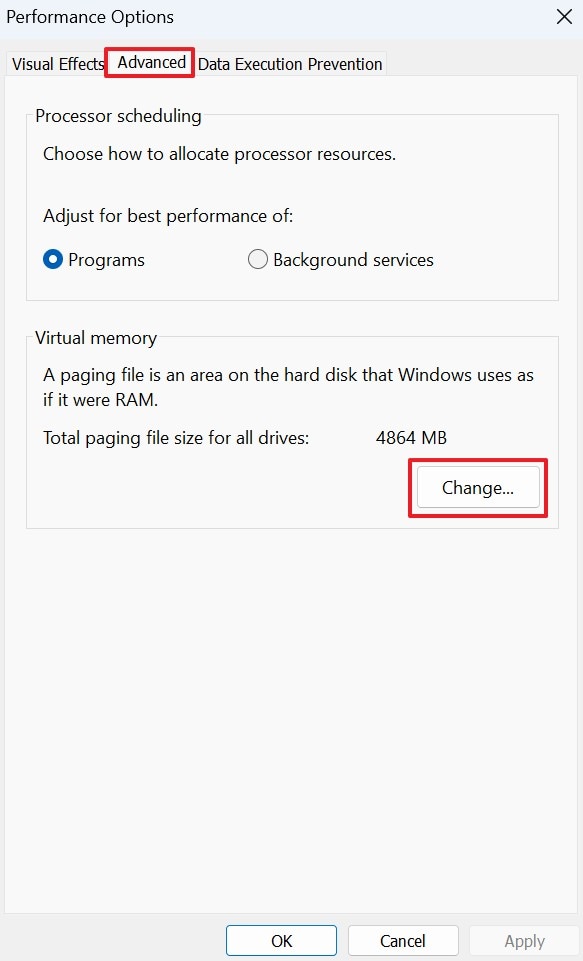
Step 3. Click “Change” under “Virtual Memory” from the “Advanced” tab.
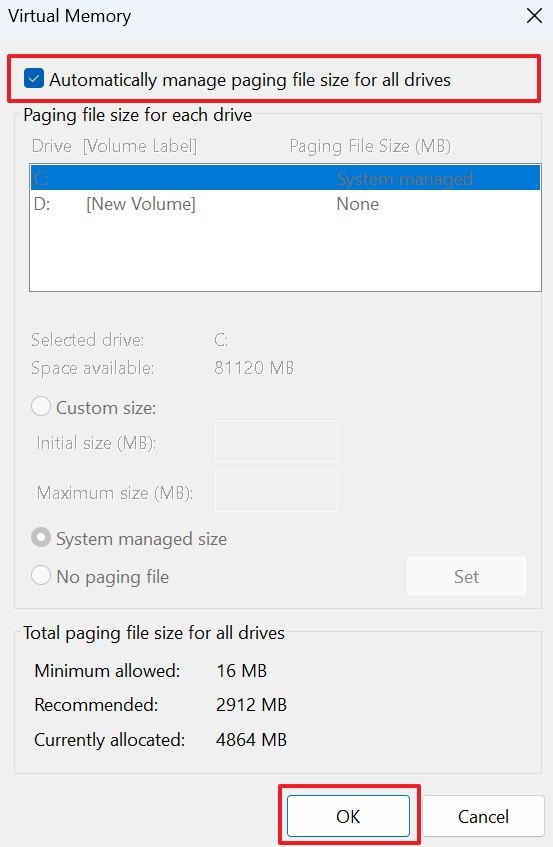
Step 4. Going ahead, tick “Automatically Manage Paging File Size for All Drives” and press “OK.”
Way 7. Disable SysMain (Superfetch) Service
This is a service that preloads your favorite apps into your system memory. While it aims to speed things up, it can consume too many resources. Turning off this background feature is a smart Windows 11 using too much RAM fix. It stops the computer from reading data from your hard drive unnecessarily. Take guidance from the steps below to turn off the SysMain service on your computer:
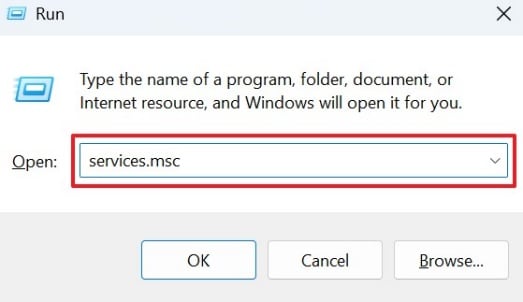
Step 1. You need to enter “services.msc” in the “Run” prompt and click “OK.”
Step 2. Scroll down and right-click the “SysMain” service to choose “Properties.”
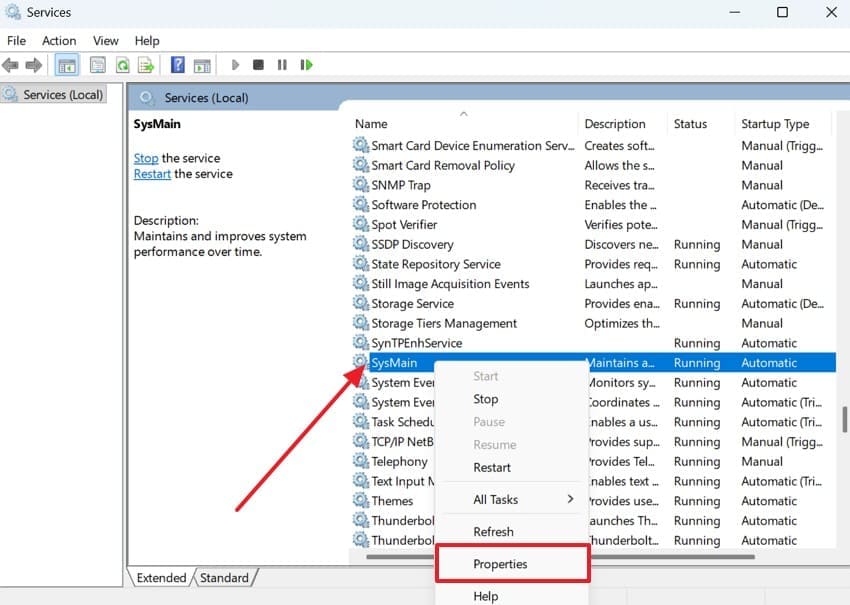
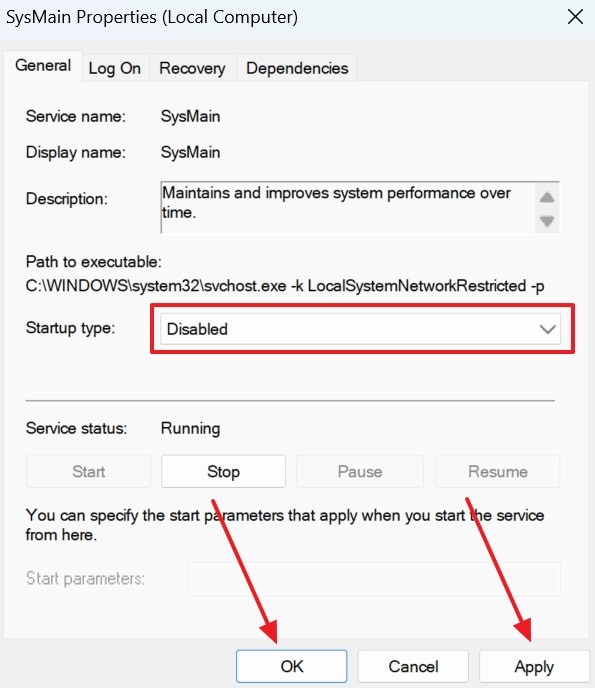
Step 3. Following that, select the “Disabled” option from the “Startup Type” drop-down. Once done, you need to press both the “Apply” and “OK” buttons.
Pro Tip. Use Repairit If System Corruption Causes High CPU/RAM Usage
Sometimes, corrupted system files are the real reason behind high CPU usage. According to Intel, abnormally high CPU usage causes computers to stutter or eventually crash. These damaged files force your processor to work harder than it normally should. No standard setting change can fully repair deeply corrupted Windows system files. Yet, programs such as Repairit are a viable high RAM usage Windows 11 fix for corruption.
During repair, it deeply scans your entire system to detect all corrupted files. The tool then restores broken system settings that cause high memory consumption problems. Moreover, Repairit fixes corrupted registry entries that overload your CPU with background tasks. The software even supports all major Windows 11 versions for broad and complete compatibility.
Key Features

-
Processor Load Reduction: Repairit lowers processor pressure by repairing broken files, causing endless system background processing operations frequently afterward.
-
Memory Usage Optimization: It reduces excessive memory consumption triggered by corrupted operating system components running repeatedly during activities.
-
Deep Scan Technology: The advanced scan detects hidden file-level corruption that standard Windows tools may not identify during repair.
Guide to Use Repairit If System Corruption Causes High CPU/RAM Usage
Using this specialized software, like Repairit, is a very quick way to fix your system. Follow these simple and clear instructions to repair your corrupted files:
Step 1. Access the Tool’s File Repair Feature
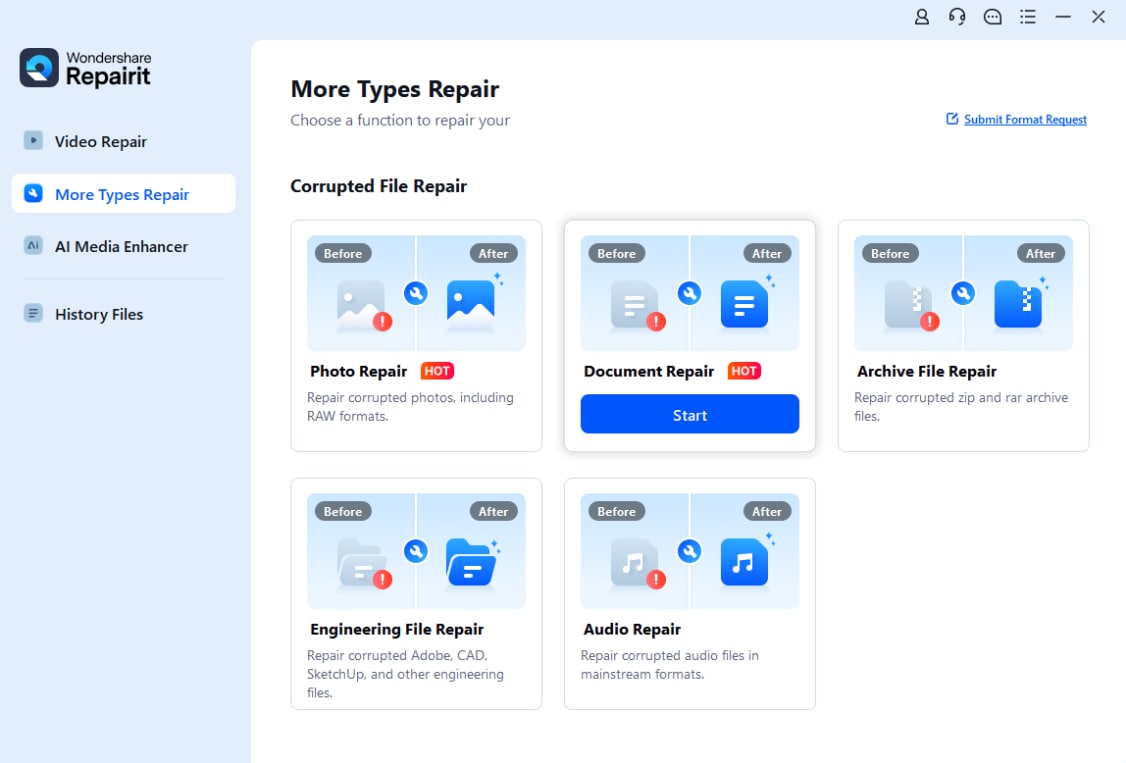
From the “More Types Repair” section, select the “Document Repair” feature. Then, click the “Start” button and utilize the “+Add” option to upload the corrupted system files.
Step 2. Fix the Corrupted System Files
As you import the files, press the “Repair” button to begin the restoration procedure. The software will scan the uploaded files and recover damaged or corrupted system data.
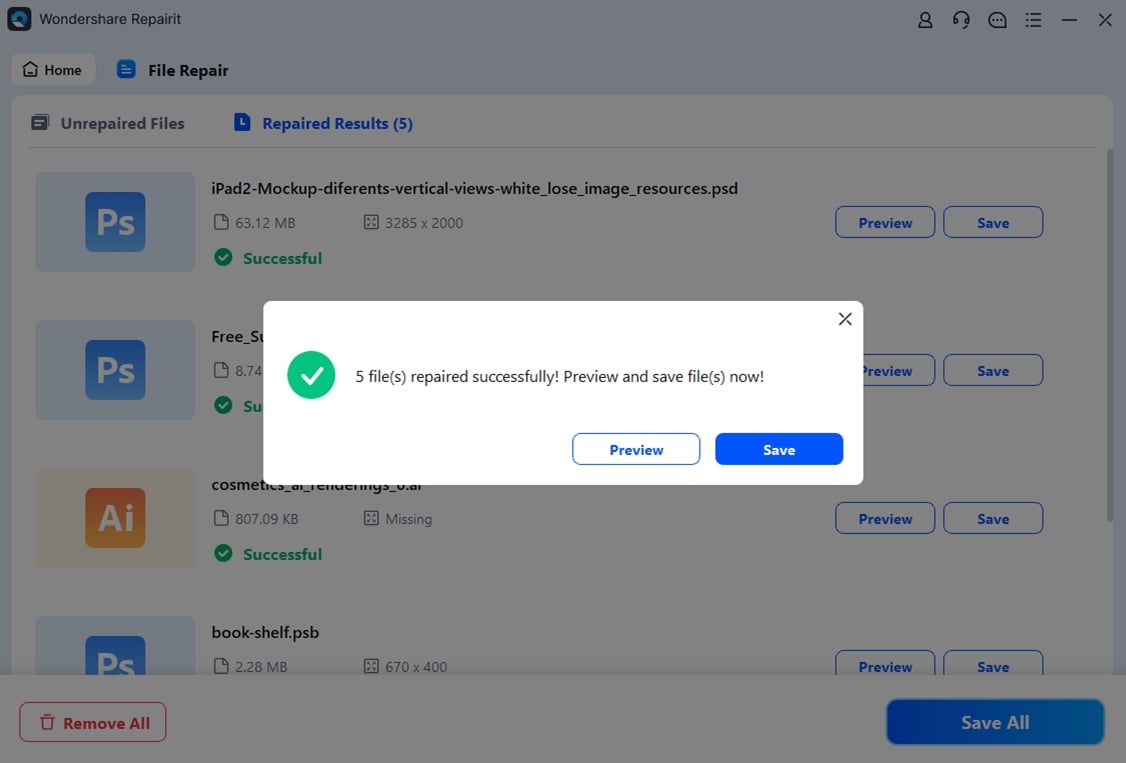
Step 3. Export the System Files from Repairit
Once the repair process is completed, click the “Save” button to download the repaired files. After that, store the restored system files in your preferred location on the computer.
Repair Corrupted Files
 Security Verified. Over 7,302,189 people have downloaded it.
Part 3. Expert Tips: How to Prevent High Memory and CPU Usage
Applying a Windows 11 high memory usage fix is great, but prevention saves more time. These expert tips will help you keep your CPU and RAM always optimized:
- Restart Regularly: Restarting your PC clears all temporary memory that slowly builds up. It gives your processor a completely fresh start every single day.
- Limit Tabs: Try to avoid keeping too many browser Windows open at one time. This simple habit keeps your active memory free for more important work.
- Manage Storage: Delete large files that you do not need to keep anymore today. Having extra space allows your system to process all data much better.
- Check Drivers: Make sure that your hardware drivers are always updated to the latest versions. Correct drivers ensure that your components communicate without any delays.
- Avoid Bloatware: Remove unnecessary programs that came pre-installed on your device. Fewer apps mean fewer background processes fighting for your limited system power.
Conclusion
In conclusion, managing your system resources is the best way to keep your computer healthy. Following these simple methods provides a complete high RAM usage Windows 11 fix. You can now enjoy a much faster experience while working on important tasks. Always remember to keep your software updated for the very best performance results. If your system files are badly damaged, you should try using tools such as Repairit.
FAQs
-
Does a high screen refresh rate impact my overall CPU performance?
Higher refresh rates require your processor to work much harder for smooth visuals. Lowering this setting can reduce the heavy load on your central processing unit. This simple change often helps computers struggle with constant system lag. -
Can outdated BIOS settings lead to high system resource consumption issues?
An old BIOS might not manage your hardware components effectively on Windows 11. Updating your motherboard firmware can resolve many hidden power and memory conflicts. Check your manufacturer's website to find the latest version for your specific model. -
Which repair solution helps damaged system files, causing CPU and RAM usage problems?
Corrupted system files frequently overload processors with repeated background activities. Tools like Repairit deeply scan operating system files and restore damaged components. It also improves computer stability while reducing abnormal memory and processor consumption.
