
Image dynamic range is a key idea behind photos that look rich and natural instead of flat or washed out. You will see this term in camera specs, phone camera reviews, HDR modes, editing software, and even TV and monitor settings. Understanding dynamic range helps you avoid blown-out skies, crushed shadows, and disappointing prints, so your photos hold onto detail from bright highlights to deep, dark areas.
Repair Corrupted Files To Save Your Data
 Security Verified. Over 7,302,189 people have downloaded it.
In this article
What Is Image Dynamic Range?
Dynamic range in photography is the span between the darkest tones and the brightest tones a camera, sensor, or display can capture or show while still preserving visible detail. In simple terms, it measures how much contrast a system can handle before shadows turn into solid black or highlights turn into solid white.
Technically, image dynamic range is an image parameter that describes the brightness range a camera sensor records, a file encodes, and a screen can reproduce. It is often expressed in stops (EV) or as a ratio, and it influences how realistic and detailed your photos look in scenes with strong contrast, like sunsets, backlit portraits, or interiors with bright windows.
What Does Image Dynamic Range Affect?
Detail in highlights and shadows
The most obvious effect of photo exposure range is how much detail survives in bright and dark parts of the image.
- With low dynamic range, bright areas clip into pure white, and dark areas become featureless black. Skies lose texture, and shadows look like silhouettes.
- With higher dynamic range, the camera retains texture in clouds, subtle tonal steps in shadows, and smoother midtones, all in one exposure.
| Dynamic range level | Visible result in a high-contrast scene |
|---|---|
| Low dynamic range | Blown highlights, crushed shadows, harsh contrast |
| Medium dynamic range | Balanced exposure but some loss of sky or shadow detail |
| High dynamic range | Rich detail in sky and shadows, smoother tonal transitions |
Editing flexibility and image realism
Dynamic range also shapes how far you can push your files in editing.
- Files with higher image dynamic range (especially RAW) let you brighten shadows and tame highlights without banding, noise, or strange colors.
- Files with limited range quickly show noise in dark areas or ugly halos around contrast edges when you push them too hard.
- Displays and HDR-capable screens with higher range show more lifelike highlights, glossy reflections, and subtle gradations.
This directly affects your workflow, from capturing a flexible photo on your camera, through editing in Lightroom or Photoshop, to exporting, sharing, or printing images that still look natural.
How Does Image Dynamic Range Work in Real Use?
In real-world shooting, dynamic range in photography is limited by your camera sensor and the brightness contrast of the scene.
- Cameras and phones: Modern DSLRs, mirrorless cameras, and even smartphones quote dynamic range in EV or stops. A sensor with 13–15 stops of range can handle tougher lighting than an older sensor with 8–9 stops.
- Recording and encoding: When you shoot JPEG, the camera compresses tonal data into a smaller range, which slightly reduces flexibility. Shooting RAW preserves more of the original sensor range, which is why RAW files are better for editing.
- HDR images: High dynamic range (HDR) modes combine multiple exposures or use computational photography to extend effective range beyond a single frame. Phones often auto-enable HDR for backlit scenes or sunsets.
- Editing software: Tools like Lightroom, Photoshop, or mobile photo apps let you adjust highlights, whites, shadows, and blacks. The more true dynamic range your file holds, the more gracefully these sliders work.
- Exporting and sharing: When you export to JPEG or share to social media, you are mapping a wide captured range into formats and screens that may have less range. Good tone-mapping preserves detail without making the image look flat.
- Displays and playback: HDR-capable monitors, TVs, and phones support formats like HDR10 or Dolby Vision. They can show brighter highlights and deeper blacks, making HDR photos and videos appear more three-dimensional.

Understanding these stages helps you decide when to use HDR modes, when to bracket exposures, and how aggressively to edit without breaking the image.
Common Mistakes and Quick Tips
- Assuming HDR always looks better: Over-processed HDR can look artificial, with halos and strange colors. Use it when the scene contrast really exceeds your camera range.
- Relying only on the screen: The back-of-camera display may make a clipped image look fine. Check the histogram or highlight warning to protect critical areas.
- Overexposing bright skies: Once highlight detail is gone, no editing can bring it back. Expose slightly for the highlights in contrasty scenes.
- Ignoring ISO: High ISO reduces usable dynamic range. Use the lowest ISO that still lets you avoid motion blur or camera shake.
- Using only JPEG for tricky light: JPEG has less latitude than RAW. For sunsets, concerts, or interiors with windows, shoot RAW or RAW+JPEG.
Quick takeaways: protect highlights, use RAW for tough lighting, keep ISO low, and enable HDR or exposure bracketing when your scene looks too contrasty for a single shot.
How to Use Repairit to Fix a Corrupted Photo File
Repairit introduction
If your images with carefully captured highlight detail and shadow detail refuse to open, show gray thumbnails, or display strange blocks and colors, the problem is file corruption, not dynamic range. In those cases, a dedicated repair tool such as Wondershare Repairit is extremely helpful. Repairit is a media repair toolkit that fixes broken photos, videos, and audio files with a guided workflow. You can learn more and download it from the Repairit official website.
Key features
- Photo repair for corrupted images from cameras, phones, memory cards, and other storage devices, including common formats like JPG and JPEG.
- Batch repair support so you can restore multiple damaged photos in one go, saving time after a card or drive problem.
- Clear interface with real-time preview, allowing you to check repaired images before saving them to a safer location.
Step-by-step guide
- Add corrupted photo files
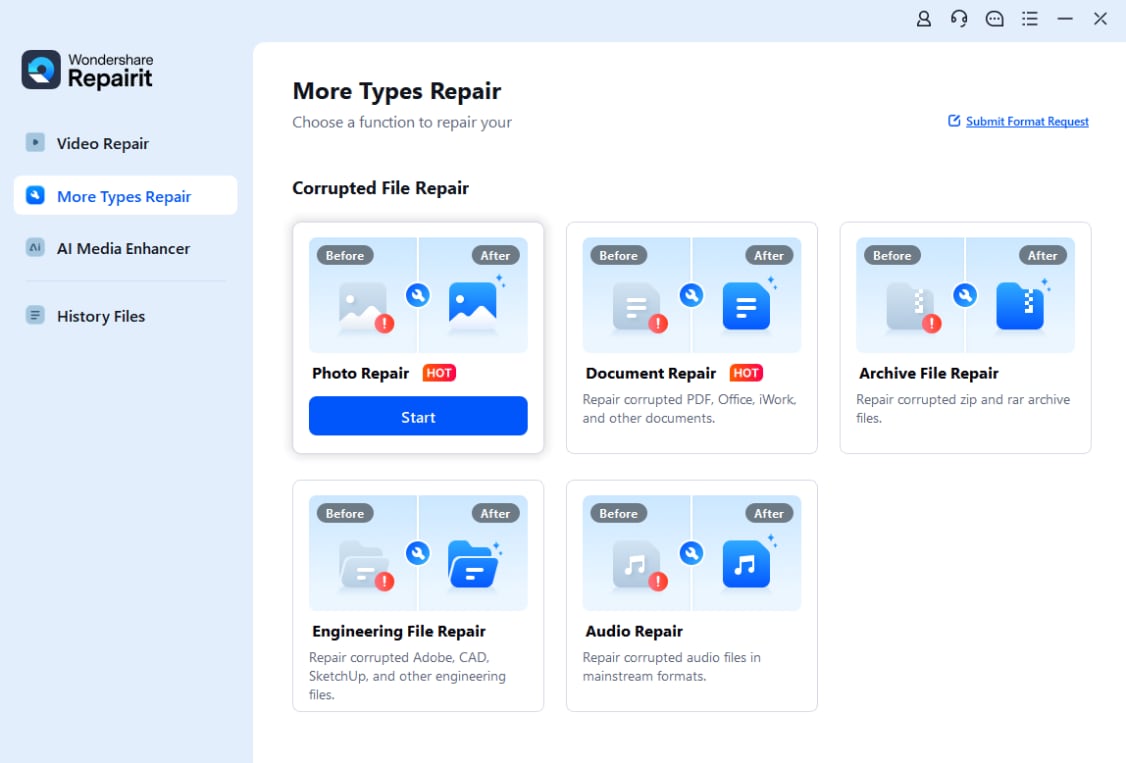
Install and launch Repairit on your computer, then switch to the Photo Repair module. Click the Add button, or drag and drop your problematic image files into the window. You can load a single photo or an entire batch from your camera card, phone backup, or external drive.
- Repair photo files

After importing, confirm the list of photos you want to fix and click the Repair button. Repairit will scan each file structure, locate errors, and attempt to rebuild the damaged data. If some images are badly corrupted, you can enable advanced repair by providing a sample photo from the same device or format to guide the process.
- Save the repaired photo files

When the repair completes, preview your photos inside Repairit to ensure they open correctly and display as expected. Finally, choose a secure destination folder on a healthy drive and click Save to export all repaired images, keeping them separate from the original damaged copies.
Conclusion
Image dynamic range describes how much brightness contrast your camera, file, and screen can handle while keeping detail in bright highlights and dark shadows. By understanding sensor limits, exposing to protect highlights, using RAW and HDR when needed, and respecting what your displays can show, you capture photos that look more natural and hold up better in editing.
When problems go beyond exposure and your images become unreadable or visually broken, corruption repair is the next step. Wondershare Repairit helps you recover damaged photo and video files so the detail you worked hard to capture does not vanish due to technical issues.
FAQ
-
1. What is image dynamic range in simple terms?
Image dynamic range is the difference between the darkest and brightest tones a camera or display can show while still keeping visible detail in both. It describes how much contrast the system can handle without turning shadows into solid black or highlights into pure white. -
2. Is higher dynamic range always better for photos?
Higher dynamic range is generally better because it preserves more detail in bright skies and deep shadows at the same time. However, if you process the file too aggressively or use extreme HDR effects, images can start to look unnatural even if the technical range is high. -
3. How can I maximize dynamic range when shooting?
Use the lowest ISO you can, expose carefully for the highlights, shoot in RAW, and enable features like exposure bracketing or HDR mode for scenes with strong backlight or bright windows. These practices help your camera capture the widest usable range it can. -
4. Can I fix low dynamic range in editing?
You can improve the look of a low-range image by lifting shadows, lowering highlights, and adjusting contrast, especially from RAW files. But you cannot fully reconstruct highlight or shadow detail that was never recorded, so correct exposure at capture is still crucial. -
5. What is the difference between HDR and image dynamic range?
Image dynamic range is the underlying brightness span a sensor or display can handle. HDR (High Dynamic Range) is a technique or format that uses multiple exposures or special processing to extend that span in practice, then maps it for playback on compatible screens.
