
Windows keeps throwing “video driver crashed and was reset” right in the middle of your games or videos. It’s even more frustrating when it happens over and over, whether you’re just browsing, streaming, or pushing your GPU in a demanding title. If you are also exploring quick approaches, this guide covers the most efficient methods for fixing the "video driver crashed and was reset” error.
Table of Contents
Part 1. Common Causes Behind Video Driver Crashes and Automatic GPU Resets
If your system keeps getting “video driver crashed and was reset” error, the following factors are often responsible:
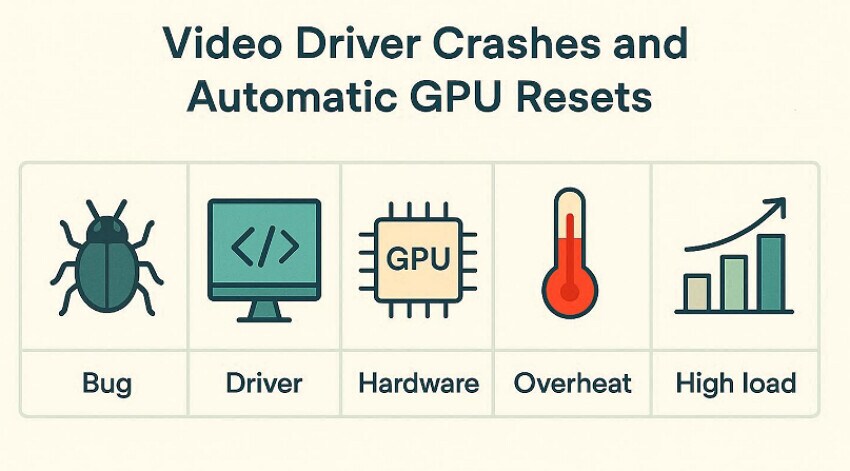
- Outdated and Buggy Graphics: When your Nvidia, AMD, or Intel drivers are outdated, they can cause crashes in modern games. This mismatch can cause sudden crashes, black screens, or automatic GPU resets during normal use.
- Corrupted Driver Files: Driver files can become corrupted after interrupted updates, improper shutdowns, or failed installations. Once corrupted, the driver may load partially or behave unpredictably, leading to frequent errors.
- Conflicting Software: Background programs such as recording tools, overlays, and monitoring utilities. When they interfere with how the driver handles graphics, the result can be instability and repeated driver restarts.
- Windows or DirectX Bugs: Underlying issues in Windows itself, including DirectX problems, can disrupt driver communication. When the operating system cannot reliably talk to the GPU driver, it often results in display driver timeouts.
Part 2. 3 Quick Fixes: Video Driver Crashes Without Losing Games or Applications
Now that we've identified the causes, let's move on to quick fixes that resolve the “video driver crashed and was reset” issue:
Fix 1. Roll Back to a Stable Previous Driver If the New One Fails
Rolling back to a stable previous driver is useful when a new graphics driver update immediately starts causing crashes. New drivers can introduce bugs, performance regressions, or compatibility issues with specific games. This method also lets you keep most of the benefits of recent Windows and other software updates. Upon hearing its key features, let's explore its detailed guide discussed below:
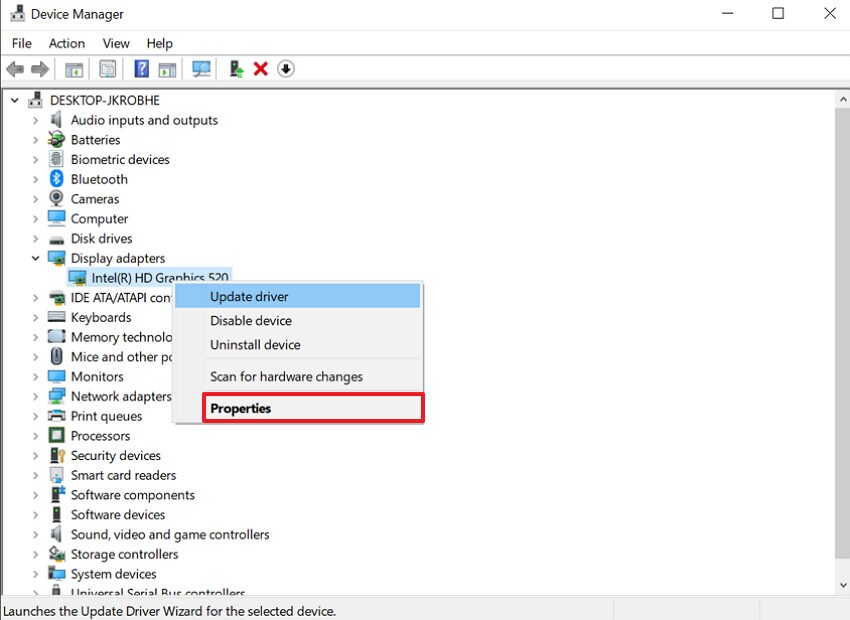
Step 1. Start by opening the “Device Manager” app, expanding the “Display Adapters” option, and selecting the “Intel(R) HD Graphics 520.” Now, choose the “Properties” option in the opened pop-up to jump to the next interface.
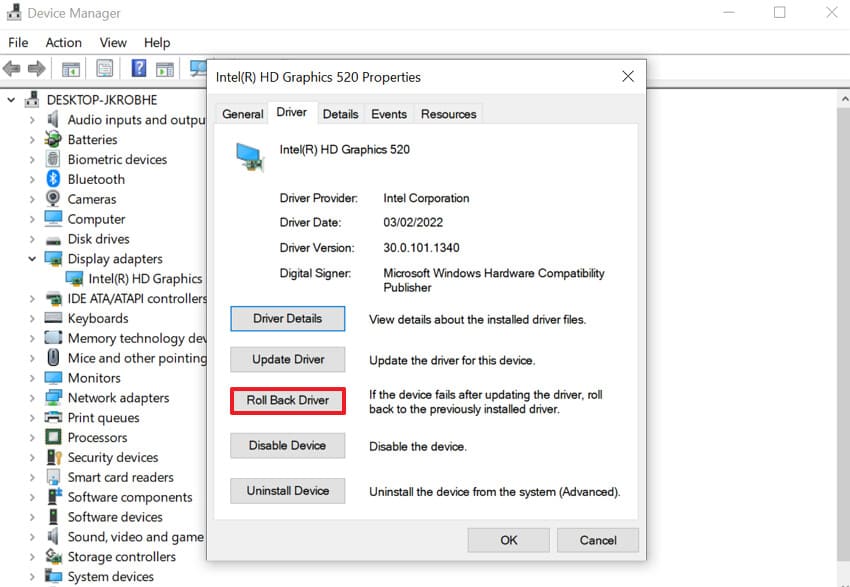
Step 3. Here, select the “Driver” tab and choose the "Roll Back Driver" and follow the commands that appear. Lastly, restart the PC to fix the video crashing error effectively.
Fix 2. Lower Game or Display Settings to Reduce GPU Load
Lowering game or display settings is useful because it directly reduces the workload on your GPU. This method can prevent driver crashes and resets, especially on older or mid‑range hardware. Furthermore, it reduces GPU and VRAM load, lowering the chance of timeouts and overheating. So, if you are also facing the "video driver crashed and was reset” error, then follow the given guide:
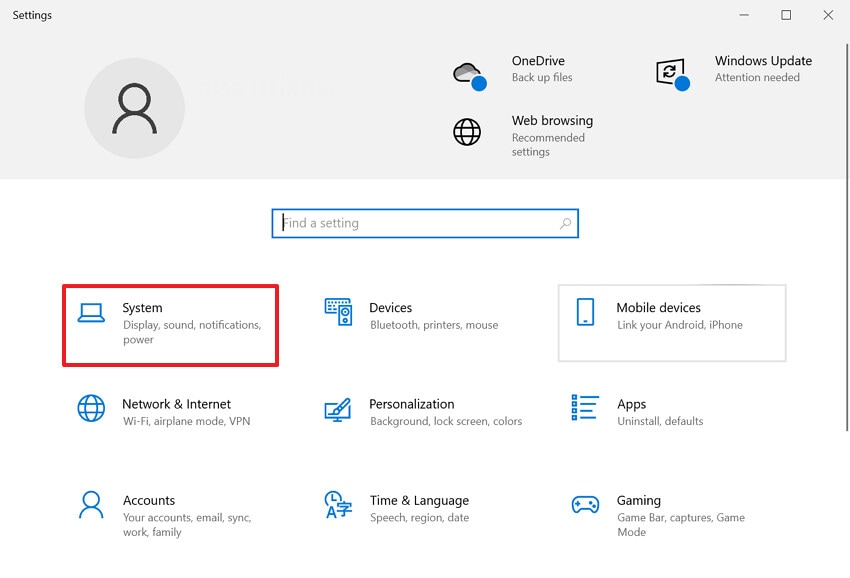
Step 1. First, open the "Settings" interface and choose the "System" option from the main page.
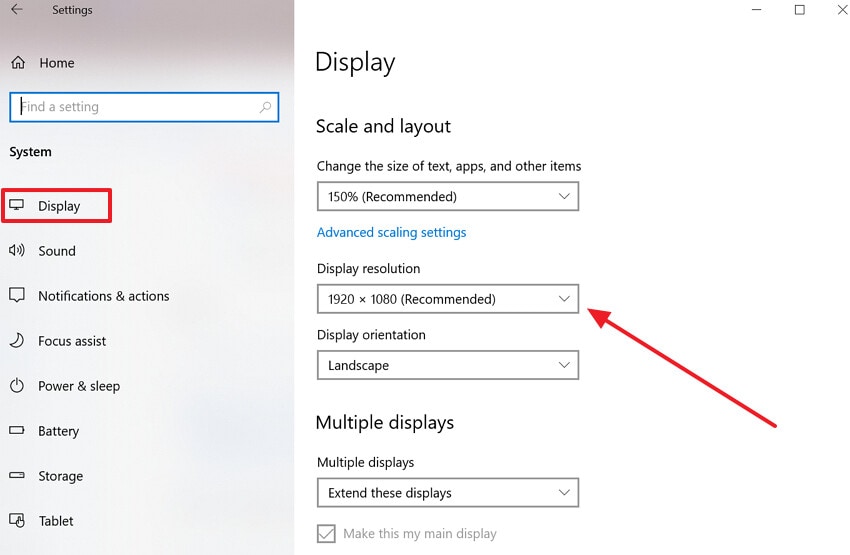
Step 2. Following this, select the "Display" option from the sidebar, then lower the "Display Resolution" and other settings.
Fix 3. Reinstall GPU Drivers Cleanly with Manufacturer Tools
Users can opt for this method to fix the “video driver crashed and was reset” error because it removes corrupted and leftover files. This often fixes stubborn issues like repeated video driver crashes, black screens, or missing control panels. Furthermore, it can clean up old driver files, registry entries, and settings that can cause instability or conflicts. Now, let's explore its extensive guide to use this efficient method:
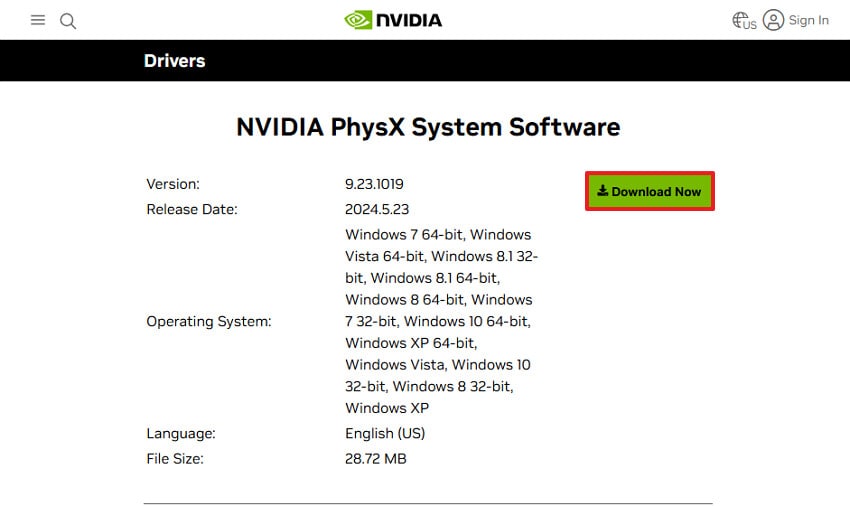
Step 1. Go to the NVIDIA website and click on the "Download Now" button adjacent to the desired graphics driver.
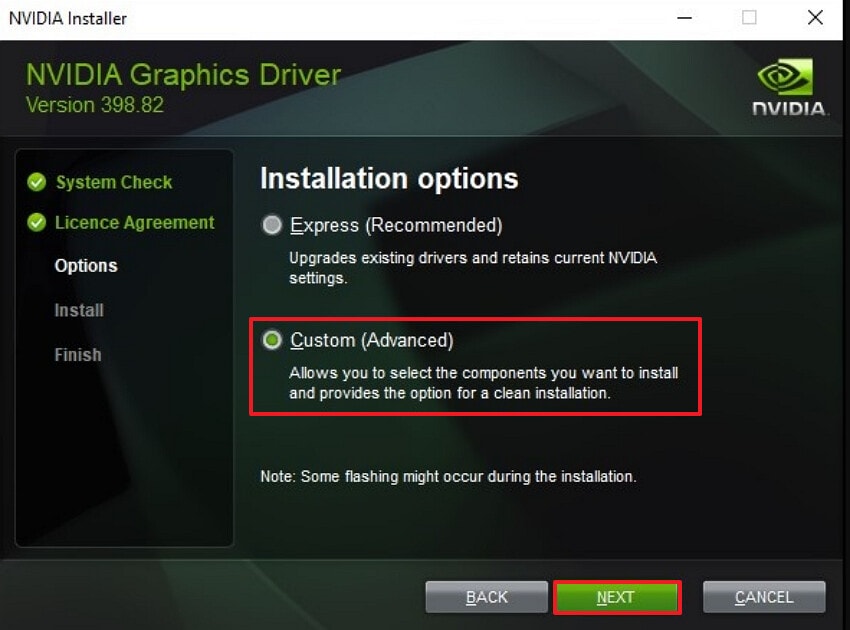
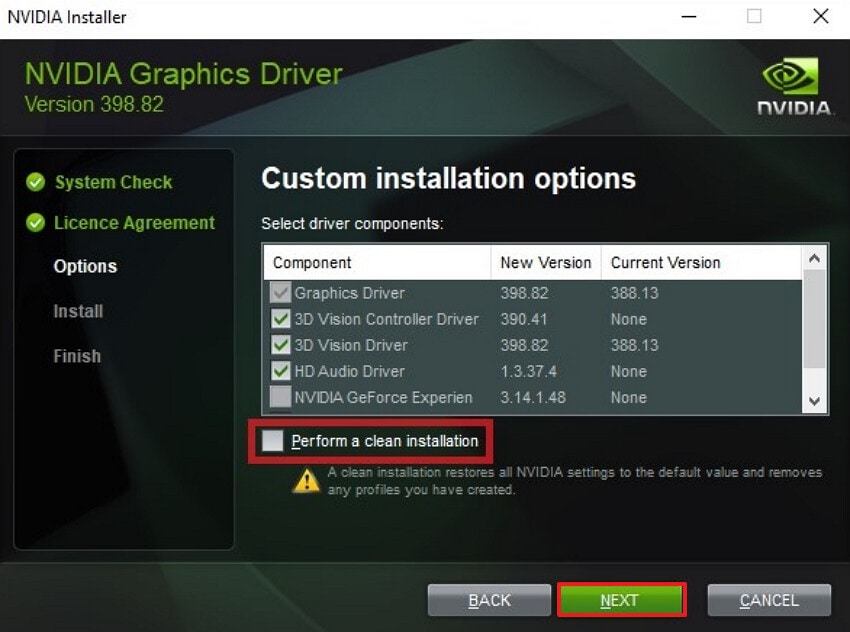
Step 2. Run the downloaded installer and choose “Custom (Advanced)” option and select the "Next" button.
Step 3. Here, check the “Perform a Clean Installation” box and choose the “Next” button to initiate a fresh installation.
Part 3. 4 Advanced Fixes for Persistent Video Driver Crashes
If the basic fixes didn’t work, it’s time to move on to advanced solutions for the persistent “video driver crashed and was reset” error:
Fix 1. Run the Windows Graphics Troubleshooter
Running the Windows graphics/video troubleshooters is useful because they automatically scan for common problems. It is a built-in tool, so there is no need to download external software. Furthermore, it's also able to diagnose issues like outdated drivers, missing codecs, or misconfigured playback/video settings. Users can opt for this method as it directly repairs for you, reducing trial‑and‑error changes. So have a look at its detailed guide:
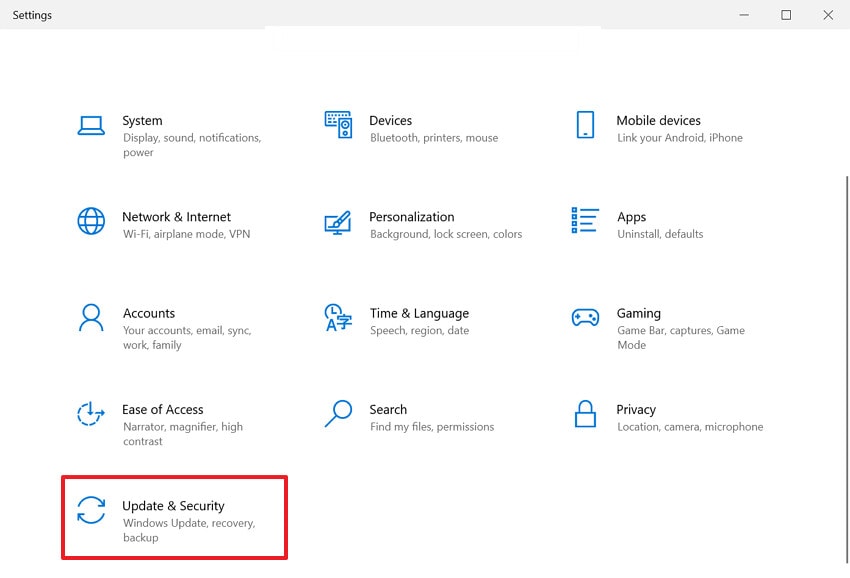
Step 1. Initiate by entering the “Settings” interface and choosing the "Update & Security" option from the main interface.
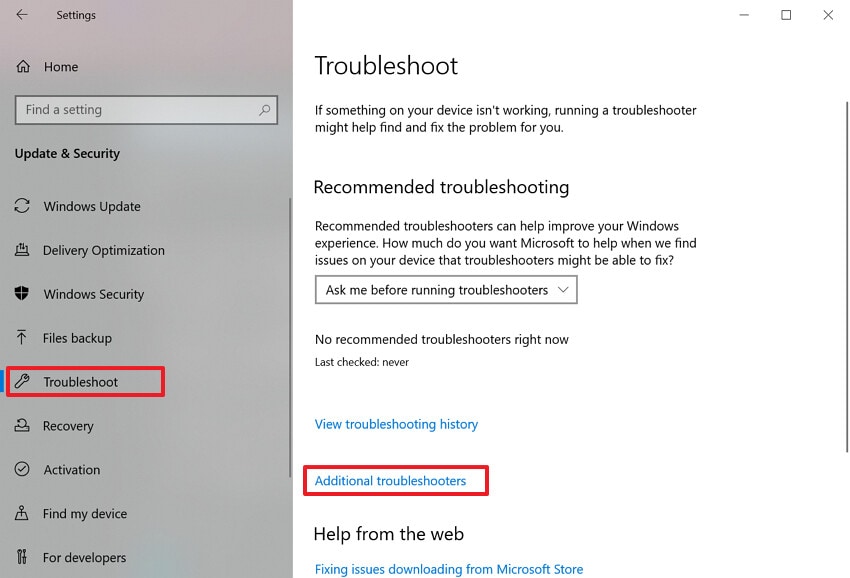
Step 2. Here select the “Troubleshoot” option from the left sidebar and choose the “Additional Troubleshooters” from this interface.
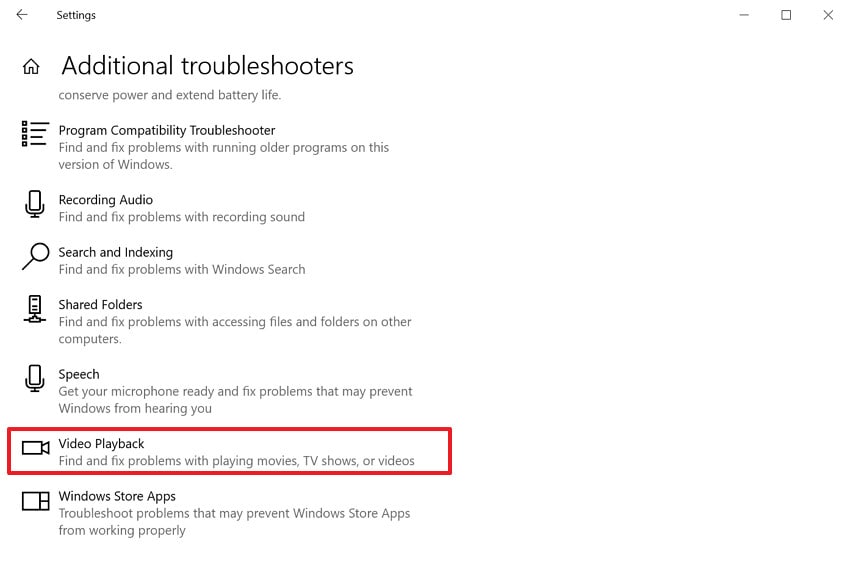
Step 3. Lastly, navigate to the end of this page and select the "Video Playback" option to start the procedure. Here, wait for a while and restart the PC to check if the video or game is working properly now.
Fix 2. Repair System Files with sfc /scannow and DISM
To fix the “video driver crashed and was reset" error, users can instantly opt for an SFC scan in the command prompt. These tools scan protected system files and the Windows component store, automatically replacing damaged files. The main point is that SFC and DISM are included with Windows, so you do not need third‑party tools. It is capable of repairing core files that can break drivers, so have a look at its guide:
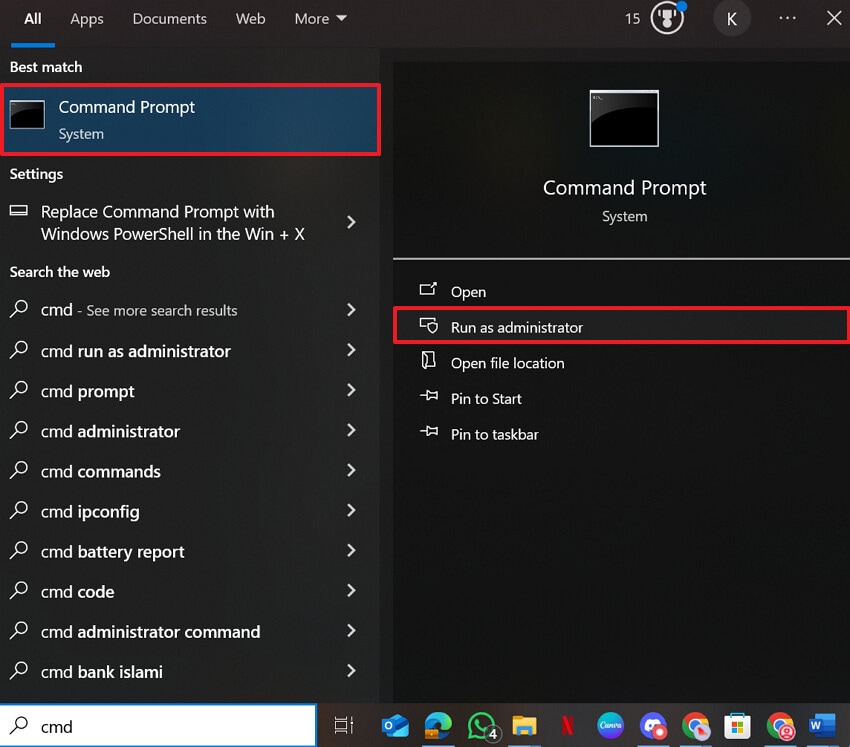
Step 1. Begin by searching for “Command Prompt” and choose the “Run as Administrator” option to enter its interface.
Step 2. Upon entering the interface, insert "sfc /scannow" prompt and hit the enter button. Here, you need to wait for a while to complete the repair procedure.
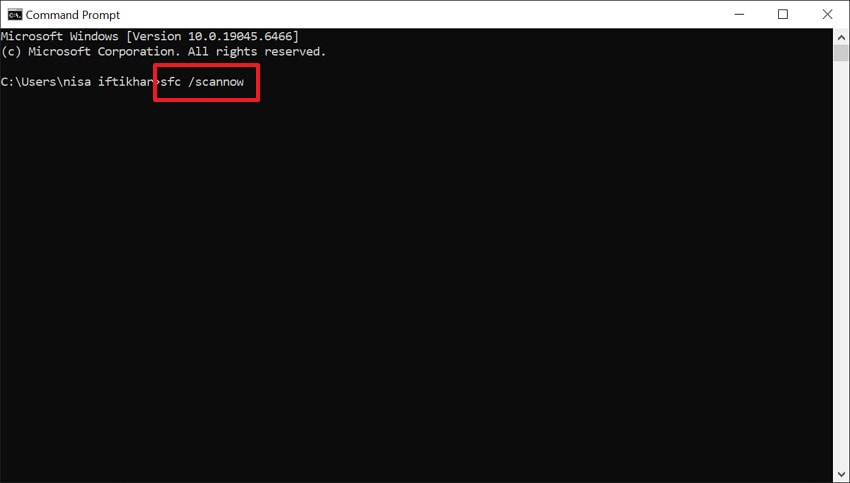
Note: If SFC could not fix everything or you still see crashes, run the DISM method within the command prompt using the following command:
Dism /Online /Cleanup-Image /RestoreHealth
Fix 3. Adjust TDR Settings to Reduce GPU Resets
Adjusting TDR settings is mainly useful when your GPU is actually working hard, but Windows keeps hanging. By increasing the timeout, you give the GPU a few extra seconds to finish heavy frames. With this method, you can also reset the driver; here, the driver is fine but slow because of high load, complex scenes, or rendering workloads. So, let's dive into its stepwise guide below to use this efficient method:
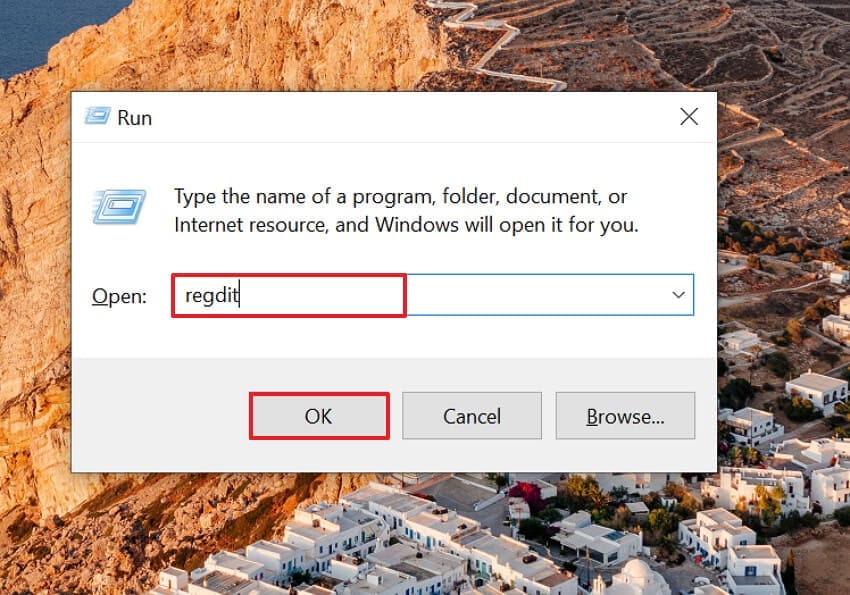
Step 1. Initiate by pressing the “Win+R” keys on the keyboard, insert “regedit,” and press the “Enter” button.
Step 2. In the Registry Editor, select the “HKEY_LOCAL_MACHINE,” then navigate to the “SYSTEM” option and expand the “CurrentControlSet.”
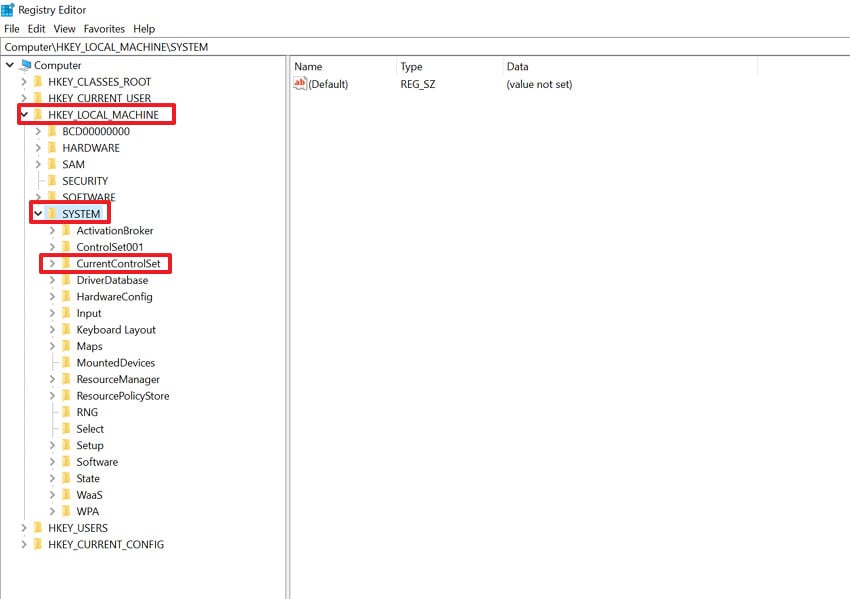
Step 3. Here, choose the “GraphicDrivers” menu and select the "TdrDelay" option. Following this, enable the “Decimal” option, enter the "8" value, and choose the "OK" button.

Step 4. Now close the Registry Editor and restart your PC so the new TDR settings take effect and restart your PC.
Fix 4. Clean‑Install Drivers Using DDU
Using DDU for a clean installation is helpful when normal driver installs/uninstalls do not fix the video driver crashed and was reset error. This method is very useful when changing GPU brands or models, or rolling back from a bad driver. Furthermore, it often resolves stubborn issues such as installation failures, BSODs, stutters, and random crashes So, let’s move on to its detailed guide below:
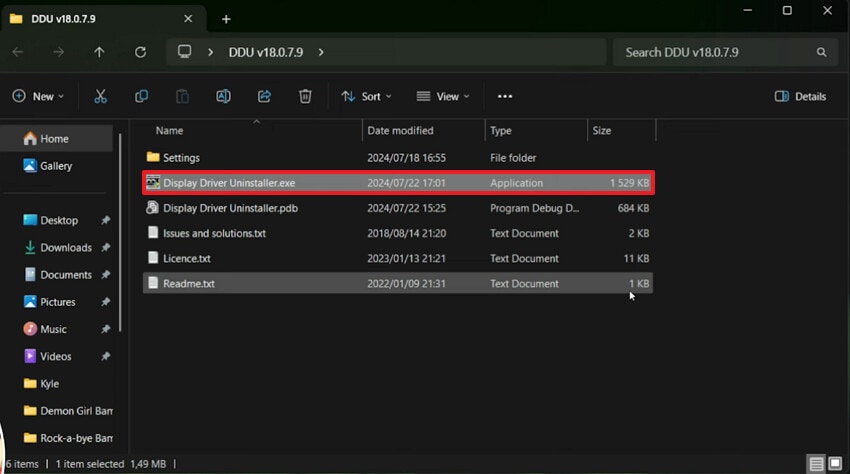
Step 1. First, download the latest driver for your GPU from the official site. Then download Display Driver Uninstaller (DDU) and extract the ZIP file to your desktop.
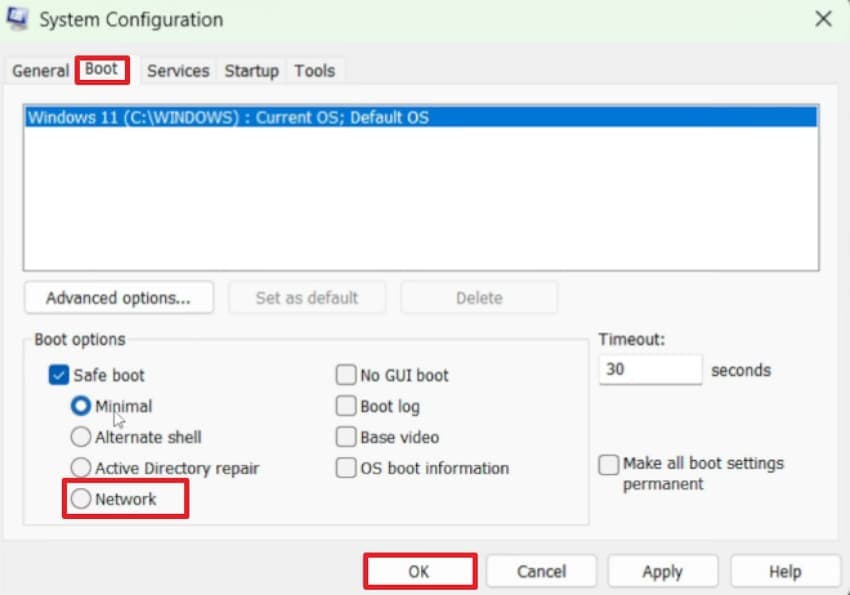
Step 2. Now, open the “System Configuration” app, choose the "Boot" tab, enable the "Network" option under the Boot options, and hit the "OK" button.
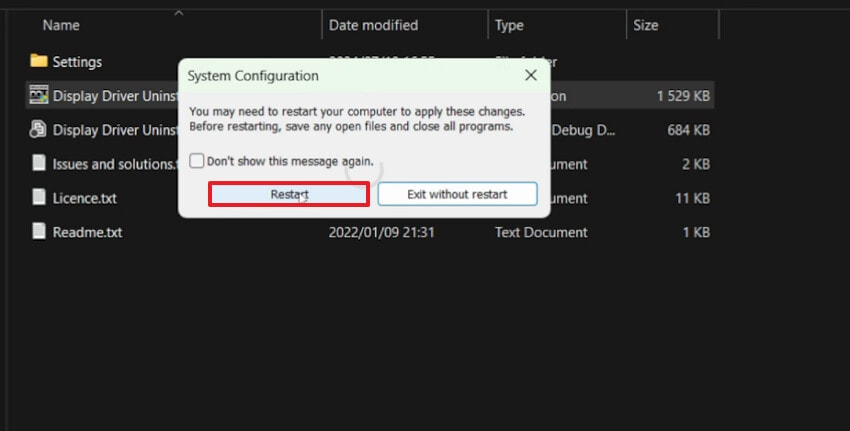
Step 3. Here, hit the “Restart” button to let the PC run in safe mode.
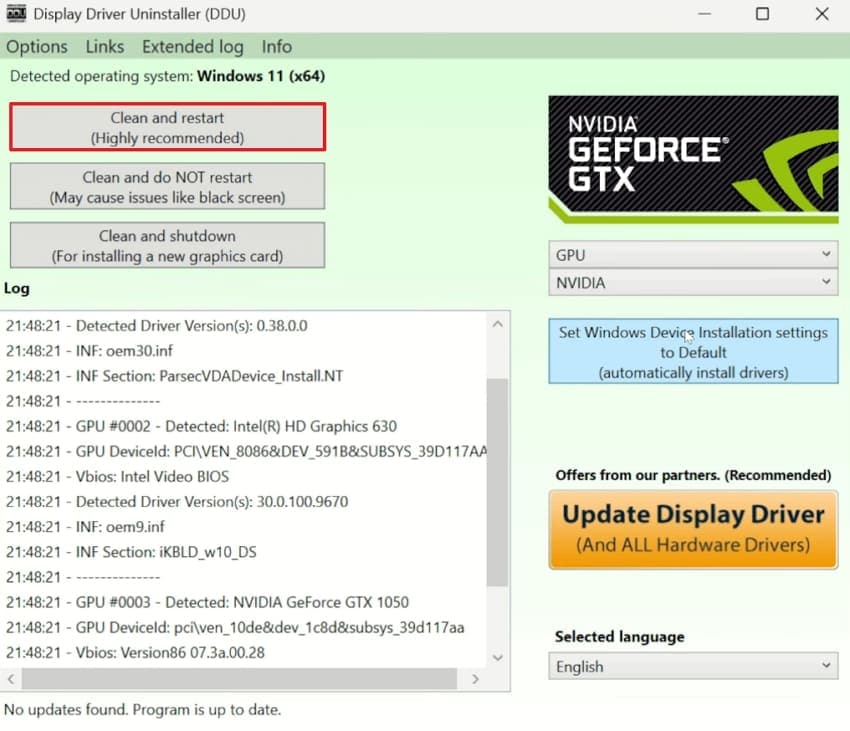
Step 4. Once in Safe Mode, open “Display Driver Uninstaller.exe,” select your GPU type and click “Clean and Restart” to remove all existing driver files completely.
Pro Tip: Repair Corrupted or Unplayable Videos with Repairit
Imagine you have just come back from shooting your sister's wedding ceremony. After coming back, you can see that your computer playing the video is showing the "video driver crashed and was reset" error. You tried various DIY fixes, but nothing worked and you still cannot run it. To address this situation, we recommend using Repairit, which lets you fix videos with complete accuracy.
This efficient tool lets you fix numerous file types, including MOV, images, AVI, MKV, MTS, and LOG footage. Furthermore, this tool is optimized for 4K/8K, HDR, LOG, and RAW from cameras and drones, with a high repair success rate. You can also access the batch processing system to process multiple files simultaneously.
Key Features

-
Repair Modes: This efficient tool provides both Quick and Advanced repair modes to handle both simple and complex video corruption scenarios.
-
Preserve Original Codec: It preserves the original codec, resolution, and color depth of the video, making it an efficient tool.
-
AI Enhancement Tools: Repairit utilizes optional AI features to unblur and enhance videos, and even colorize black‑and‑white footage
Extensive Guide To Fix Corrupted or Unplayable Videos with Repairit
After getting aware of its outstanding features, let’s have a look at its detailed guide below to fix the “video driver crashed and was reset” error:
Step 1. Access the Video Repair Feature in Repairit
Upon accessing the tool, click on the “Video Repair” option from the left-hand side to add corrupted video files.

Step 2. Initiate the Repair Procedure
Now, click on the “Repair” button to start the repair procedure instantly.

Step 3. Preview and Save the Repaired Video
At the end, click the "Preview" button to examine the outcome. After ensuring its accuracy, hit the "Save" button to export the fixed video.

Repair Corrupted or Unplayable Videos
 Security Verified. Over 7,302,189 people have downloaded it.
Part 5. Tips to Avoid Video Driver Crashes and Maintain GPU Health
To prevent the “video driver crashed and was reset” error, it's important to follow these tips:
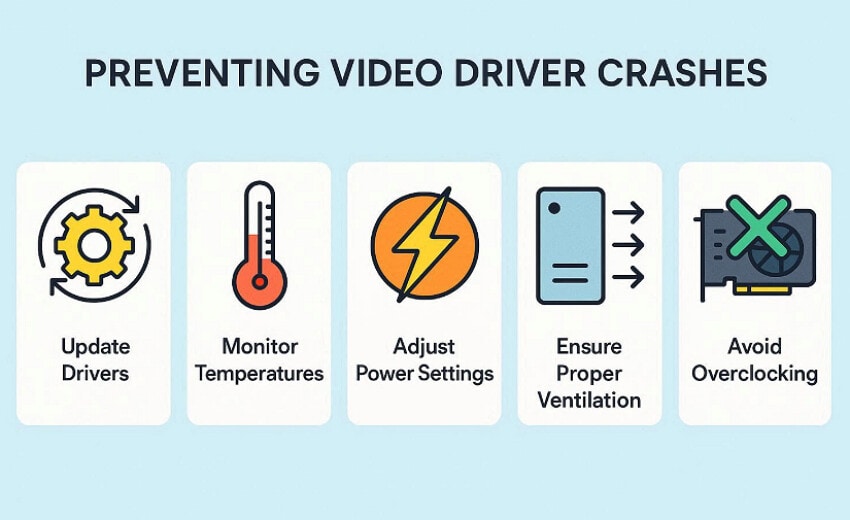
- GPU Drivers Sensibly Updated: Keep your GPU drivers reasonably up to date so they include the latest fixes. Furthermore, avoid rushing into day‑one releases for critical work.
- Use Clean Installs When Needed: If crashes keep returning after several updates, a clean driver install clears out leftover files and settings. This reduces conflicts that simple “update over the top” installs can’t fix.
- Monitor and Control GPU Temperature: Watching your GPU temperature during games helps you catch overheating before it causes crashes. Staying in a safe range extends hardware life and keeps drivers from timing out.
- Be Careful with Overclocking: Pushing clocks or voltages can make your system unstable even if benchmarks seem fine. If you notice driver resets or crashes, returning to stock settings is the fastest way to check for stability.
Conclusion
Summing up, you can easily fix the “video driver crashed and was reset” error using efficient approaches. This article covers 7 efficient methods to fix the specific error, each with its own guide. However, if your video becomes corrupted, we recommend using Repairit, which lets you repair corrupted files with its efficient technology.
Frequently Asked Questions
-
1. Why does my video driver only crash when I’m gaming?
Games push your GPU close to its power, temperature, and VRAM limits. So, any weak driver, overclock, or cooling issue shows up there first. -
2. I updated my GPU driver, and now everything is worse. Should I always stay on the old drivers?
It is not necessarily as most new drivers bring important fixes, but some versions are buggy on specific games. The smart approach is to roll back to the last version again and update the newer version later. -
3. Can a bad Windows update cause video driver crashes?
Absolutely, it can crash, especially when it changes graphics, security, or kernel components. If crashes started right after a Windows update, then checking for a newer update or rolling back is necessary. -
4. Is it safe to increase TDR (GPU timeout) values to stop driver resets?
Yes, raising the TDR values is a smart and safe step if your GPU is simply slow under heavy load. However, it does not fix real hardware or driver faults, which makes this method limited.
