

While shifting homes or organizing your photo albums, have you found a faded memory that you want to revive? If so, know that over time, images can lose their appeal due to air, light, or sun exposure. Hence, using the right techniques to restore them is necessary to ensure you won't affect their originality.
Fortunately, with the rise of technology, various tools can bring back image originality as if nothing had happened to them. Therefore, in this article, we’ll let you know about restoring faded photo tools with detailed stepwise guidance. So, review the guide till the end and see which method suits you best.
In this article
Part 1. What Are the Major Causes Behind Faded Photos?
Before you learn about the foremost tools to restore faded photos, knowing the root cause behind the affected resolution is necessary. Hence, here we have mentioned 5 common reasons to tackle the issues effectively during restoration.
| Reasons | Description |
| Sunlight Exposure | First, exposure to sunlight can badly damage the chemicals in photos and cause the colors to fade. Among all, UV rays are especially harmful and can lead to significant discoloration; therefore, it is better to store photos away from sunlight. |
Humidity and Moisture |
Not just humidity, contact with water can also lead to discoloration, warping, or mold growth on photos. Moreover, moisture damages the surface and weakens the paper over time. |
| Heat | Excessive heat accelerates the breakdown of dyes and materials in photographs. This can result in faded colors and brittle paper. Thus, keep photos in cool, temperature-controlled environments to extend their lifespan. |
| Poor Storage | Using acidic paper, plastic, or albums can lead to photo yellowing and fading. These materials release harmful chemicals that deteriorate the photo. That’s why opt for archival-quality storage materials to ensure long-term preservation. |
| Chemical Reactions | Finally, residual chemicals from the development process or exposure to pollutants like smoke and chemicals can degrade photos. This leads to fading and staining, so keep photos in clean and pollutant-free spaces to maintain their quality. |
Part 2.Ways for Professionals to Restore Faded Photos
After learning about the reasons behind the fading of the photos, let’s see how you can improve their quality. By following the given methods, you can restore faded pictures easily.
Way 1. Adobe Photoshop
As a comprehensive editing suite, Photoshop is the ideal choice for all types of editing and restoration purposes. While the advanced features may feel complicated to beginners, the recent updates and the inclusion of AI have made it easy to handle.
As for photo restoration, the editing tool has introduced various neural filters that simplify the whole process. For detailed steps to restoring faded photos, find a comprehensive guide below:
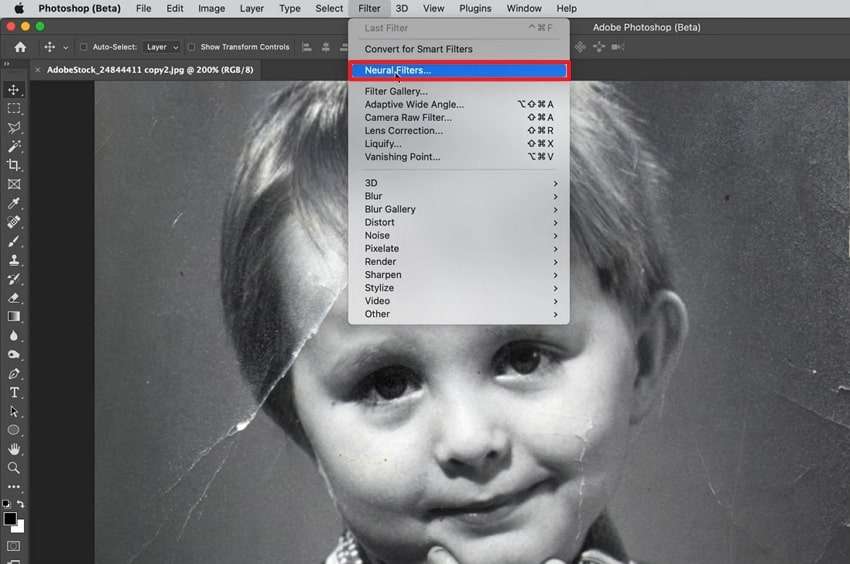
Step 1. Start by importing the picture that needs restoration into the tool. Afterward, go to the "Filter" section from the top menu bar and click the "Neural Filters" option from the drop-down.
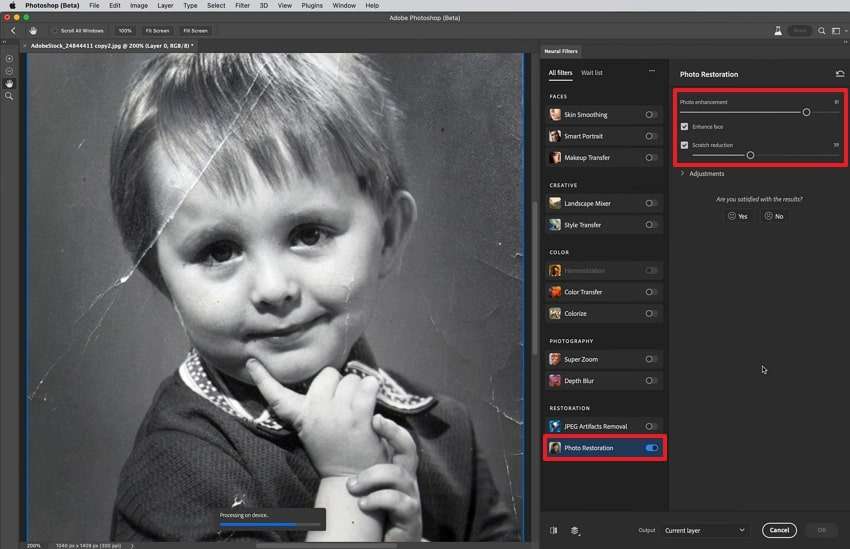
Step 2. Once the filters load in the side section, toggle on “Photo Restoration.” Next, you need to enable the “Scratch Reduction” option and adjust its slider according to your needs.
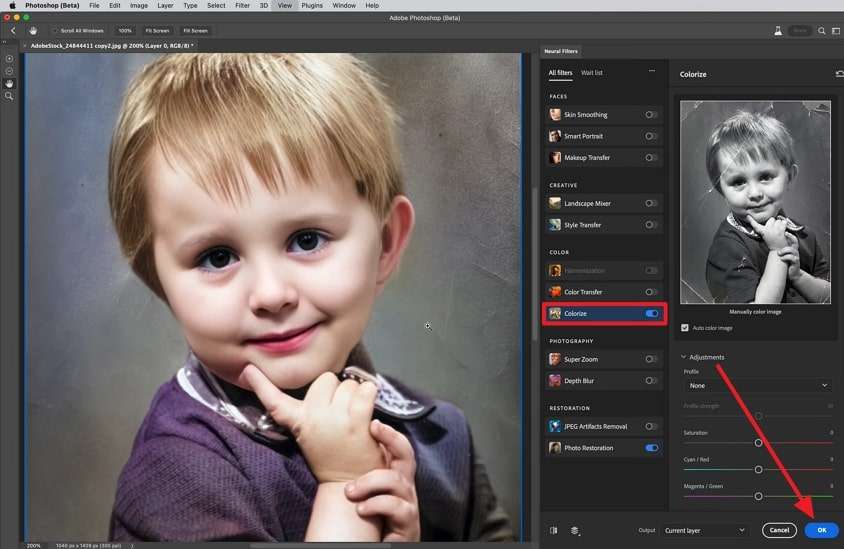
Step 3. Once the software is done with the restoration, toggle the “Colorize” filter to improve the colors of the old photo. Finally, click the “Ok” button to finalize your changes and export the restored photo to your PC.
Way 2. GIMP
Although not as much useful as Photoshop, GIMP still is a reliable editing tool to restore faded photos. With this tool, most of the editing work is manual, which makes it a dependable choice for professional editors.
Additionally, since its interface is like Photoshop, you can easily shift to it for professional-grade editing. To know how you can use it for the photo restoration process, follow the detailed steps next:
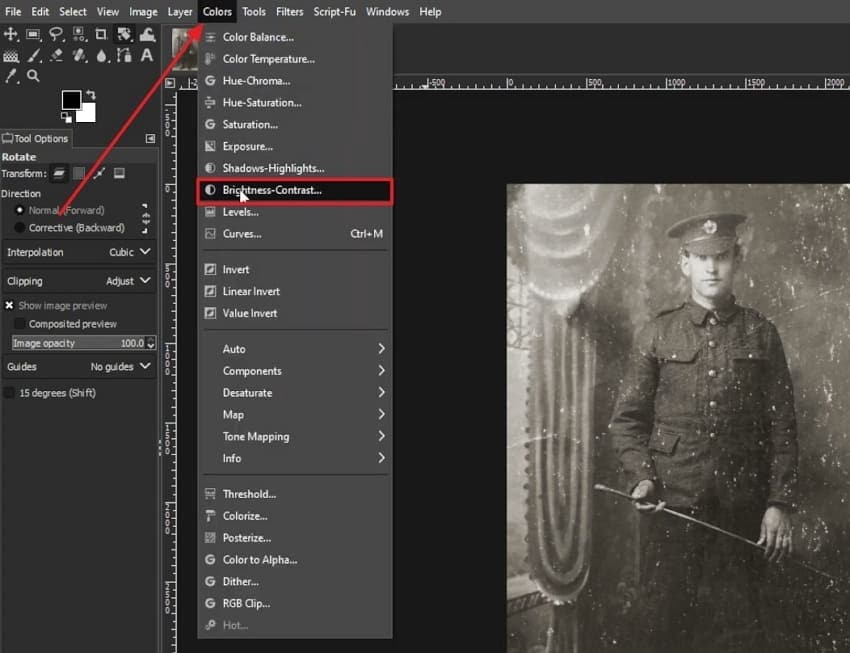
Step 1. After importing your picture into the tool and creating a new layer on it, go to the “Colors” section from the top menu bar. Once the drop-down menu appears, select the “Brightness - Contrast” option and adjust these settings to make it brighter.
Step 2. Now, go to the editing tools on the left side and select the “Healing” button. After acquiring this tool, use it all over the photo to remove stains and make the photo smoother.

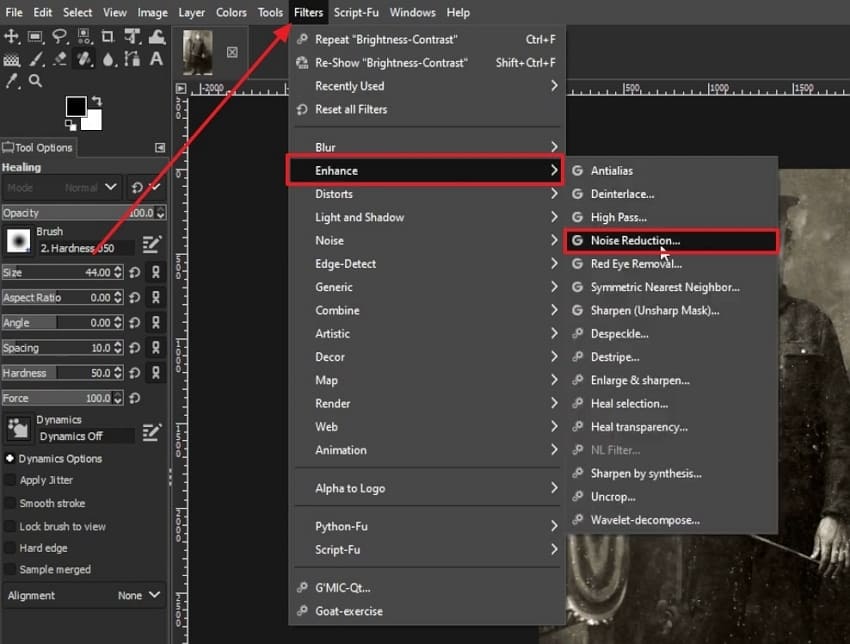
Step 3. Next, go to the "Filters" tab from the top menu and hover over the "Enhance" option from the drop-down menu. From the next extended menu, click the "Noise Reduction" feature and tweak its settings from its settings window.
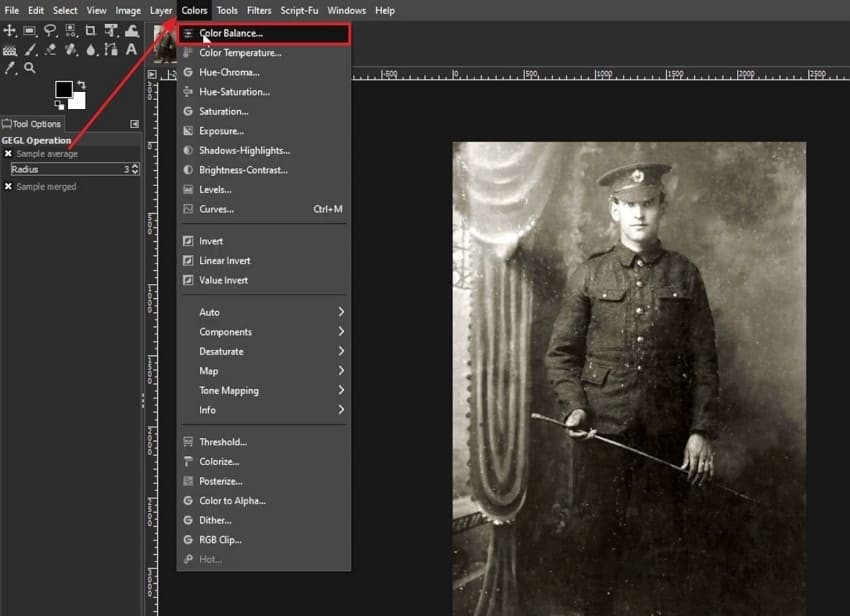
Step 4. Once again, go to the “Colors” section from the top menu bar and select the “Color Balance” option. From its settings window that appears, make changes to the given colors to add them to the photo.
Step 5. For the final time, access the “Colors” section from the top menu bar and access the “Curves” option from the drop-down menu. When the curve settings appear on the screen, change them according to your needs and simply export the restored photo.

Part 3. The Most Simplified and AI-Powered Tool to Restore Old Photos Efficiently
Besides the above-mentioned restore faded pictures tools, consider using Repairit to regain the image quality by using AI upscaling techniques. This can remove scratches and enhance the quality for better visibility. The best aspect of this platform is that it leverages batch processing facilities to repair old images in batches.
While doing so, you can monitor the results before and after to determine the restored effect. Besides that, the tool leverages an intuitive interface and requires zero technical knowledge to repair the old portraits. Being a versatile and budget-friendly option, users can repair up to 3 images without paying a single penny. Furthermore, it offers two different reaping modes, Quick and Advanced Repair.
Key Features Of Repairit AI Photo Enhancer
- Safe and Guaranteed: While repairing old images, this tool ensures that all the data is end-to-end encrypted to prevent unauthorized access.
- AI-Powered Photo Digitization and Colorization: Besides restoration, it can also add color to old images, making them more appealing and attractive.
- Compatibility: Repairit supports images from all types of cameras, such as Sony, Canon, or Fuji.
Detailed Guide on How to Restore Old Photos with Repairit
When it comes to restoring faded photos, here is a detailed stepwise guide for your assistance to regain access to your precious memories.
Step 1. Access the AI Photo Enhancer tool of Repairit
Launch the Repairit on your device and locate the “More Types Repair” tab from the left side to access the “AI Photo Enhancer” tool. There, hit the “Start” option to access a new screen where you have to fetch the old image.

Step 2. Import the Decolored File on the Tool
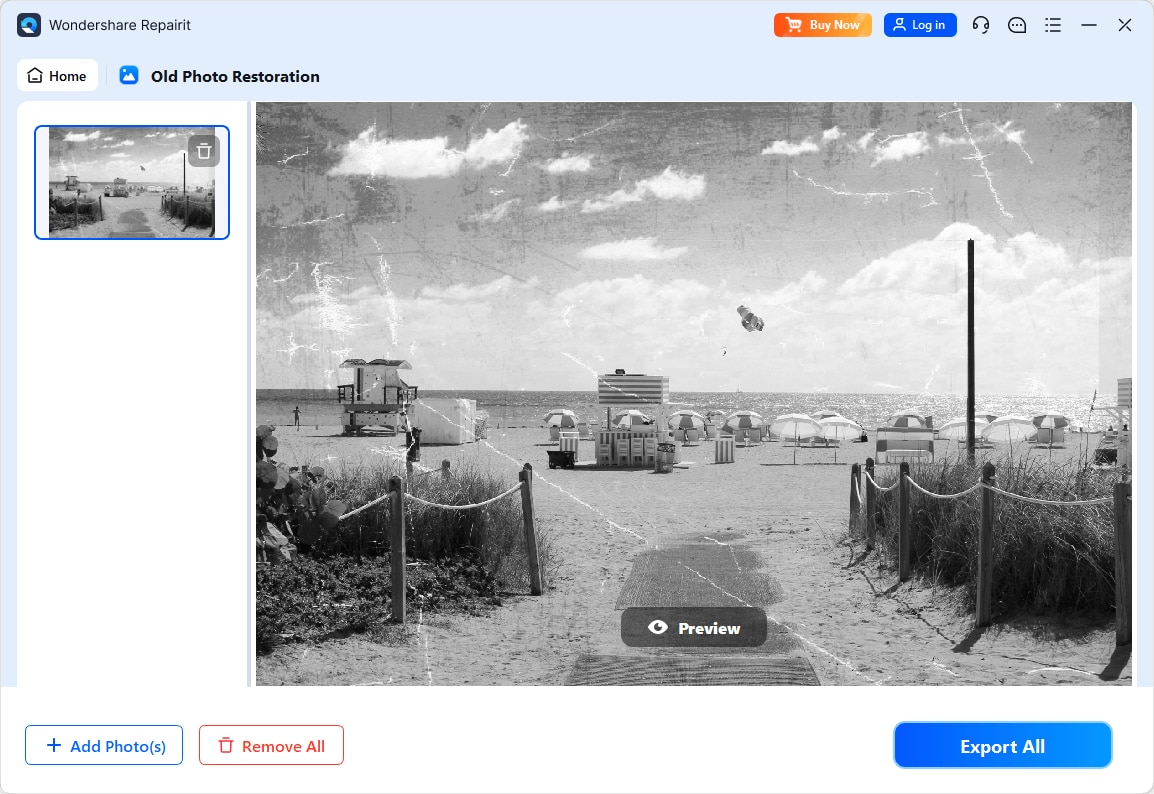
Now, on the new screen, tap the “+Add” option to start importing the faded photo to the tool. As the image is displayed, pick the “Old Photo Restoration” mode from the right side of the screen. Once done, hit the “Start Enhancing” button to let the tool restore image colors for you.
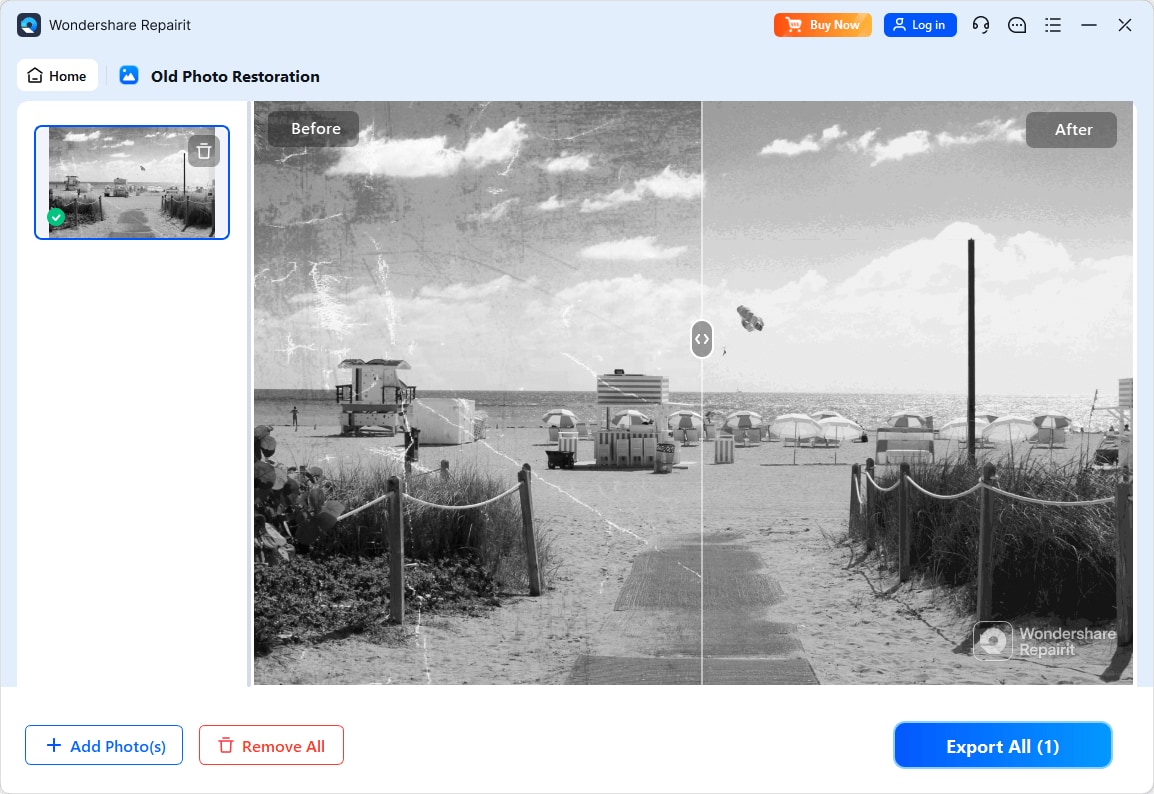
Step 3. Preview the Outcomes and Export to Your Device
After some time, when the tool offers polished results, click the “Save All” button to export the image to your device.
Restore Your Faded Photos Nowadays
 Security Verified. Over 7,302,189 people have downloaded it.
Conclusion
In a nutshell, restoring old faded photos is simpler than ever with innovative tools like Wondershare Repairit. This article even shed light on Adobe Photoshop and GIMP software, which restore old photos with precision but require manual efforts. Therefore, it is evident that you should use Repairit to effortlessly bring colors back to old and damaged photos as if nothing happened to them.
FAQ
-
Q1. How can I restore a faded photo at home?
To restore faded pictures at home, consider using an innovative yet user-friendly tool like Wondershare Repairit. This tool has an AI enhancer feature that supports old image restoration mode to bring colors back into old images. -
Q2. Is it possible to restore old photos without professional help?
Yes, by using a tool like Wondershare Repairit, you can easily repair the image color of damaged and old portraits without any professional help. All you have to do is import the desired image and enable its old image restoration mode. -
Q3. What’s the best way to protect restored photos?
First, consider saving the restored photos digitally in multiple locations. Besides that, you can also try printing them on archival-quality paper for durability.
