While JPG is a universally acceptable extension for images, it isn't the most secure one for sure. For instance, while working on JPG files, you might encounter all kinds of issues related to its header, marker, or any other meta component. Even though it might seem like a complicated situation to be in, you can try to fix an SOS marker error with images. Here, I will let you know why the SOS marker error is caused and what measures you can take to fix it.

Part 1: Things to Know about the SOS Marker Error
Before I discuss different ways to fix an SOS marker error with JPG images, let's cover some basics. Ideally, just like any other data file, JPG pictures also have a dedicated header that contains all kinds of crucial details about them.
A standard JPG header looks like this that has a dedicated SOS (Start of Scan) segment. Ideally, SOS and SOF (Start of Frame) are the two most vital parts of the header as they contain complex information about the image and would let any application know how it should be processed.
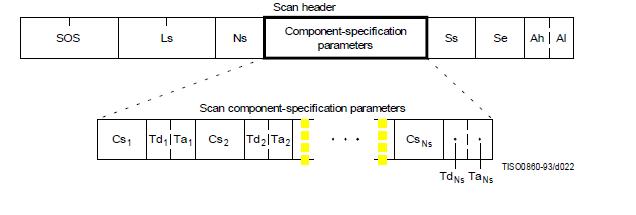
Now, if the SOS marker has been corrupted, damaged, or is missing, then it can lead to all kinds of issues with the file. In most cases, we encounter SOS marker issues with JPG files due to the following reasons:
-
Corruption of file while editing or transferring.
-
The header of the JPG file could be manipulated.
-
A forceful change in the file extension of the JPG photo.
-
If you are trying to process the file with any incompatible application.
-
At times, image editors like Photoshop can also alter its header, leading to SOS marker errors.
-
Any other issue related to the file's mishandling or corruption.
Part 2: How to Fix an SOS Marker Error for your Images?
It has been observed that Adobe Photoshop users mostly encounter an SOS marker error with JPG files while exporting a project. Though, the SOS marker problem can take place due to any other reason and can be resolved in the following way:
Solution 1: Make Sure the File's Extension is Correct
One of the major reasons for getting an SOS marker issue is related to the file's incorrect extension. For instance, let's say that your image was of TIFF format, and you have forcefully converted it to a JPG format. In this case, the SOS part of the header would be compromised, leading to these unwanted issues.
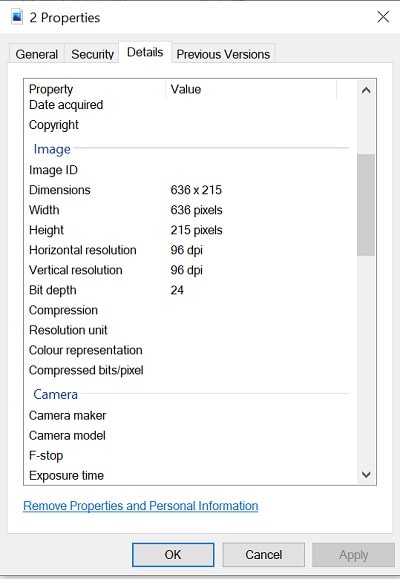
Therefore, you can simply avoid performing a forceful conversion of your images to fix an SOS marker issue. You can also right-click the image and go to its properties tab to check all the crucial details of the file. From here, you can also check that the file extension for the image is correct or not.
Solution 2: Avoid Having More than One Extension for your Images
Apart from a forceful conversion of images to incompatible formats, having multiple extensions is another reason for SOS marker issues. Let's say there was an image of PNG format and you simply renamed it with a JPG extension. This would now lead to two extensions for the image that might corrupt its header.
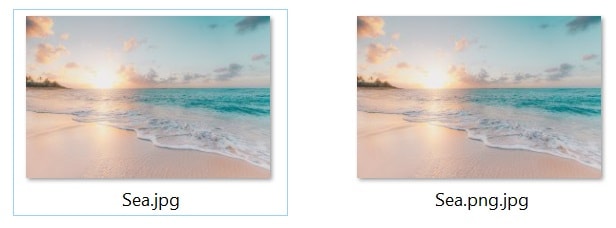
You can simply check the overall extension of the file for which you are facing these issues. If you suspect that the image has multiple extensions, then you can manually rename it and remove its wrong extension type.
Solution 3: Load the Image with MS Paint
Yes - as surprising as it might sound, you can fix an SOS marker issue by simply opening the image with MS Paint. This is because MS Paint is a lightweight application that supports almost every image format.
Therefore, if you are not able to load an image on Adobe Photoshop, Photo Manager, or any other app, then you can try MS Paint. To do this, just launch MS Paint and go to its File > Open feature to browse and load the image that you can't seem to load.
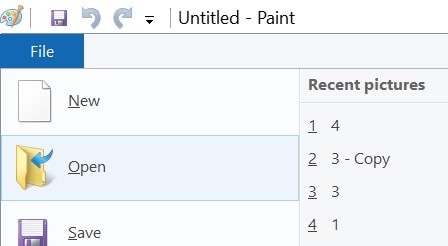
Alternatively, you can also select any image in the Explorer, right-click, and go to the “Edit” feature to directly open it on MS Paint.
Solution 4: Save the Corrupt Image to PNG or JPG Format
Furthermore, you can also consider exporting your images to any other compatible format to fix an SOS marker issue. In most cases, this issue can be resolved by saving your pictures to compatible formats like PNG or JPG.
For this, you can first load the image you want to convert on MS Paint. Afterward, just go to its File > Save as option, and choose to export the image as a JPEG or PNG file. You can later save the converted image to any location of your choice on your system.
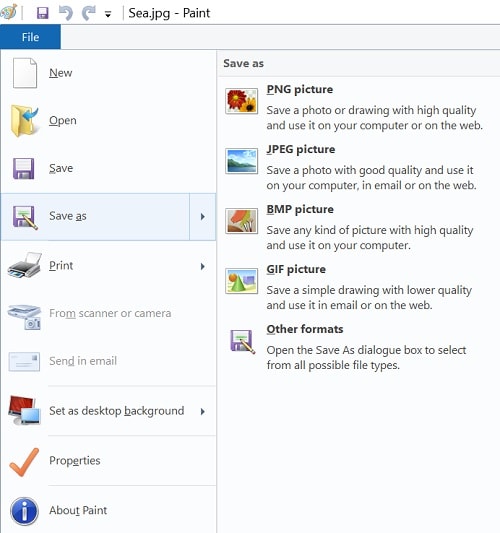
What's more, here is a detail description among PNG, JPG and JPEG.
Solution 5: Perform Hardware Troubleshooting on your PC
This might sound surprising, but the SOS marker error is often occurred due to a hardware-related issue on systems. For instance, if any hardware component is damaged or is not working properly, then it can lead to these SOS marker problems.
Therefore, to fix an SOS marker error with your files, you can consider running a thorough diagnosis of its hardware. Just go to the Start menu and click on the gear icon to visit Windows Settings. Now, browse to its Update & Security > Troubleshoot Settings and run a troubleshooter for its Hardware and Devices section.
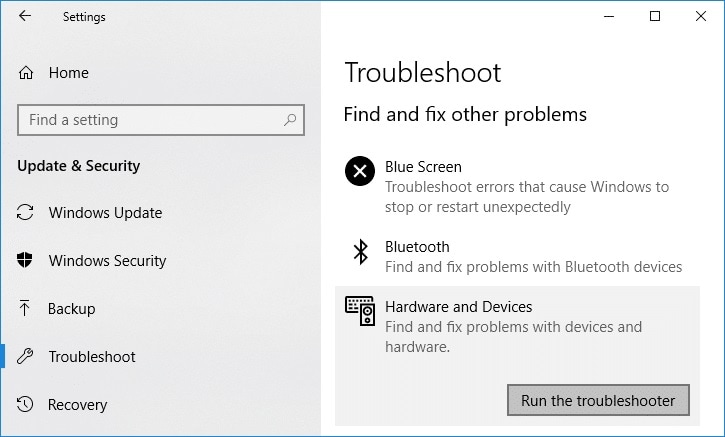
This will open a new pop-up window that you can simply follow to troubleshoot any hardware-related issue with your system.
Solution 6: Use A Dedicated Photo Repair Tool: Wondershare Repairit
Lastly, if nothing else seems to work and you are still getting the SOS marker error, then consider using a dedicated repairing tool like Wondershare Repairit. The desktop application can fix all kinds of issues with your images such as files not opening, pixelated photos, grey areas, and so much more. Developed by Wondershare, Repairit is a poweful application that can fix multiple photos at once and would even let you preview your images.

Wondershare Repairit - Photo Repair

-
Repair damaged photos with all levels of corruption, such as grainy photos, dark photos, pixelated photos, faded photos, etc.
-
Repair images of diverse formats, such as JPG, JPEG, PNG, CR3, CR2, NEF, NRW, etc.
-
Repair critically damaged or corrupted photos available on SD cards, phones, cameras, USB flash drives, and more.
-
Repairit has a quick and advanced repairing mode. You can use either depending on the level of corruption the photos has undergone.
-
The "AI Image Upscaler" feature can enlarge the repaired photos to 2X, 4X, and 8X.
-
Intelligently restore old/scratched photo and colorize black and white photos with various AI effects.
-
No limit to the number and size of the repairable photos compared with the online version of Repairit.
-
Support Windows 11/10/8/7/Vista, Windows Server 2003/2008/2012/2016/2019/2022, and macOS 10.13~macOS 15.
The application offers two different repairing modes and would let you fix an SOS marker error in the following way:
Step 1: Load the Photos to Fix on Repairit
Firstly, you can install Wondershare Repairit on your system and launch it whenever you want to fix an SOS marker error. Now, go to the Photo Repair feature, and click on the Add button so that you can manually add the images you want to fix.
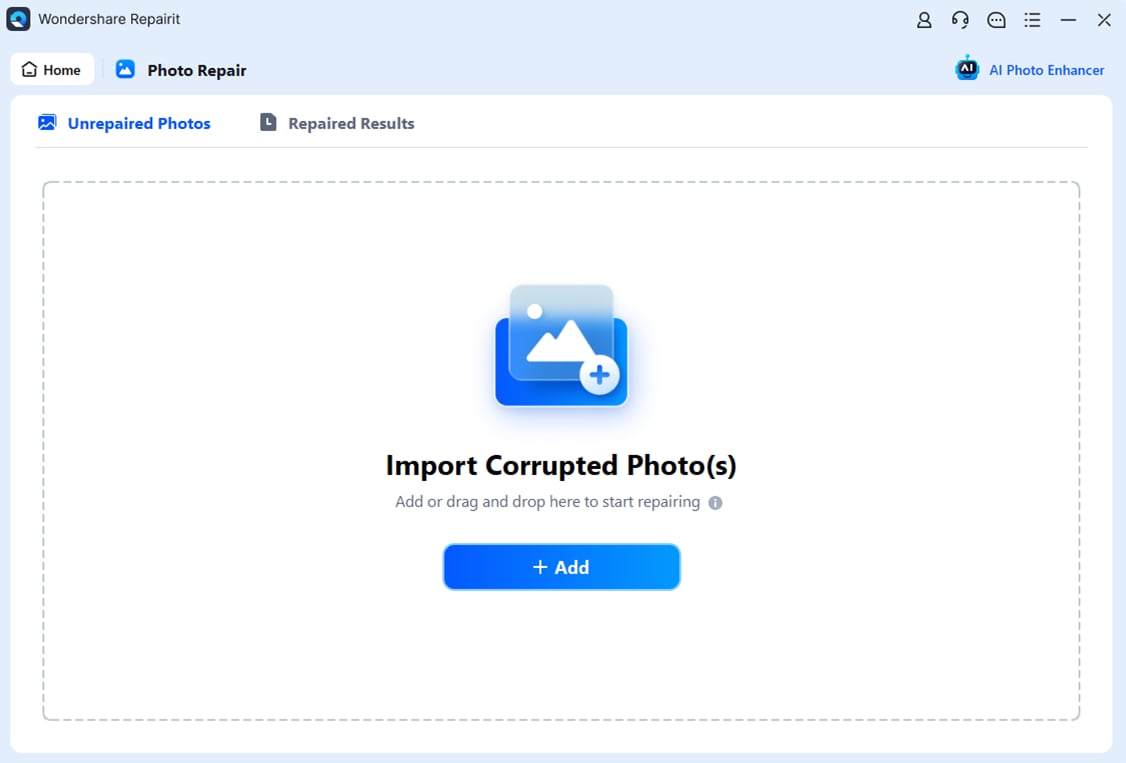
Step 2: Fix your Images and Preview them on Repairit
After loading your images, you can view their thumbnail and other details on Repairit. You can now click on the “Repair” button to perform its standard Quick Repair scan.Once the Quick Repair scan is over, the application will let you know that the process has been completed.
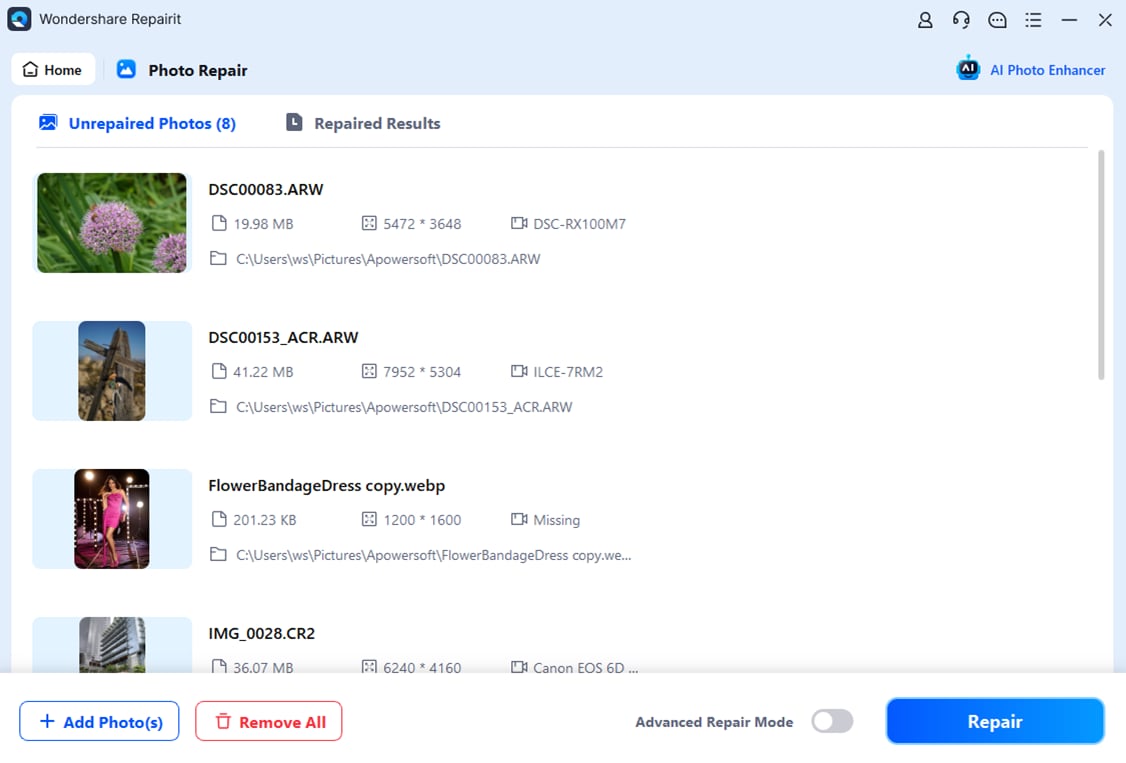
You can now click on the eye icon or the Preview button adjacent to the image's thumbnail to view the results of the repairing process.
In case the Quick Repair scan is not able to fix your image or there is a more serious issue with it, then the application would let you know.
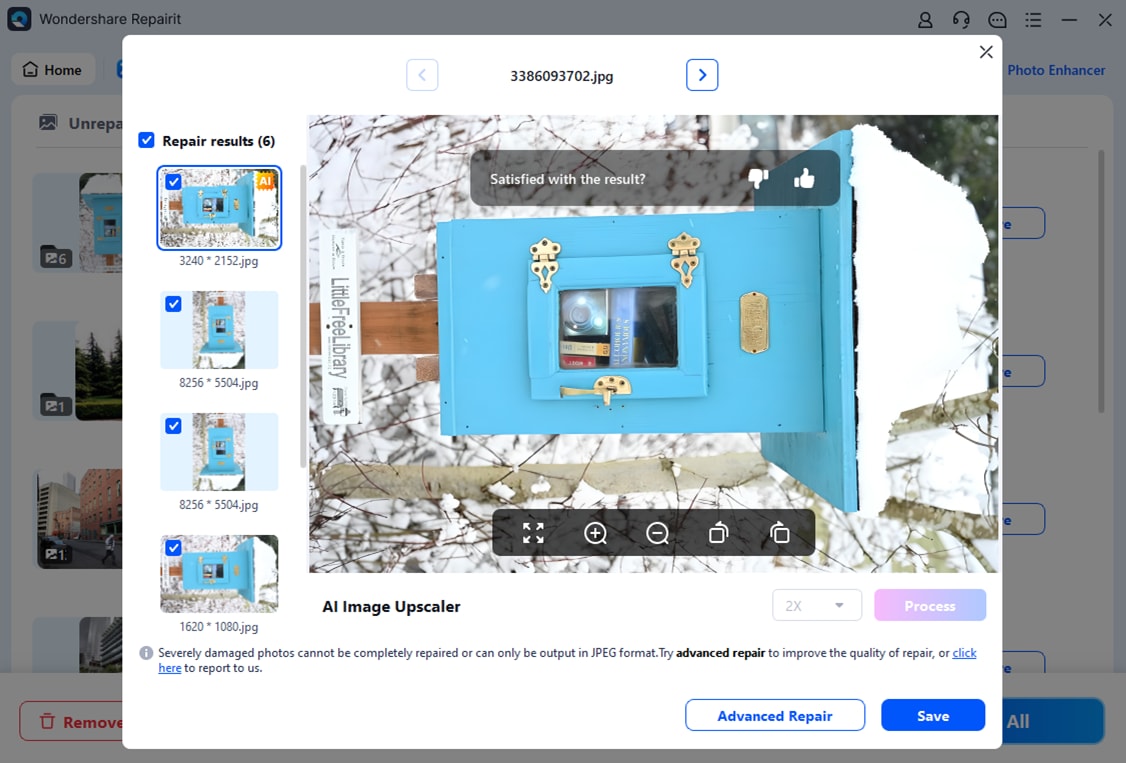
Therefore, you can click on the “Advanced Repair” button to fix all these severe issues with your photos. Though, to run an Advanced Repair, you are needed to load a sample image of the same format as the corrupt one (it should also be shot on the same device).
You should know that while the Advanced Repair will take more time to process, its results would also be better than Repairit's Quick Scan.
Step 3: Export the Repaired Photos from Repairit
That's it! Once you are satisfied with the results, just click on the Save (or the Save All) button. This will let you select any preferred location on your computer where your repaired photos would be saved.
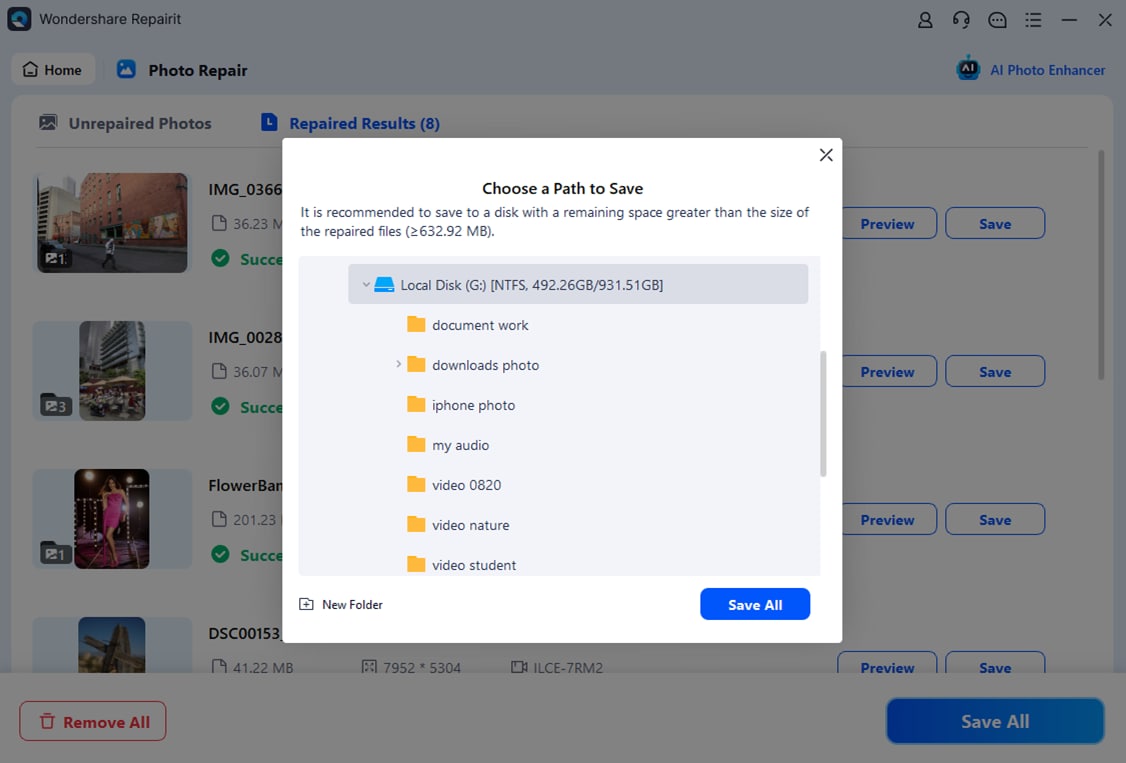
The overall process to fix an SOS marker error with Repairit is the same for both Windows and Mac. Besides that, this process can also be followed to fix numerous other issues with your images by taking the assistance of Repairit.
Further Reading:
Here are the useful articles to help you.
1. Choose Image Compression.
2. Fix Corrupt Image Online.
3. Resolve Images Not Showing Problem.
Closing Words
As you can see, there can be so many reasons for causing the SOS marker error with JPG files. Though, to fix an SOS marker error, you can try to open your images with a compatible application or avoid any forceful conversion of the file. Apart from that, if your image has been corrupted, then you can simply use a resourceful tool like Wondershare Repairit to fix all kinds of issues with a damaged JPG file.
FAQs
-
How do I fix the "SOF DQT or DHT JPEG marker is missing before a JPG SOS marker" error on Mac?
This Start of Frame (SOF) error usually happens when you try to open an image with an incompatible application. You can consider opening the picture with a compatible tool or change its format. -
How to fix the parsing issue of JPEG data?
The best way to fix parsing issues with JPEG is to open the file in MS Paint and saving its second copy to any other location. You can also consider opening it with any other lightweight compatible tool. -
Why can't I save a project from Photoshop due to not enough RAM?
This error usually happens when there is not enough memory to handle the process. To fix this, you can consider closing all the other applications that are running in the background or relaunch Photoshop on your PC.


 ChatGPT
 Perplexity
 Google AI Mode
 Grok
Grok
