Artists used to come up with inventive ways to add color to a black-and-white photo before color photography. Photo studios would tint and dye pictures to give them color if there wasn't a quick technique to take color photos. People added paints and oils to photographs using brushes and even their fingers.
Even when modified with modern design software, this approach isn't all that dissimilar from the one we do to achieve this look today. Therefore, if you are wondering why should add color to a black and white picture and how to restore color to black-and-white photos, I have explained the different methods to help you do that here. So, let's begin.
Table of Contents
Part1- Why Should You Add Color To Black And White Photos
Old photographs can be given new life by adding color to the black-and-white versions. You can edit and share old, memorable photographs you have scanned with your family. Any composition's colors can be changed to create a fun impact. So, these are the reasons why restoring color to old photos is necessary:
- Breathe New Life into Memories: Adding color to black and white pictures can transform them into something fresh and vibrant, making them more relatable and exciting to share with family and friends.
- Enhance Emotional Impact: Color can be used as a creative tool to convey a specific mood or theme, potentially enhancing emotional resonance and making the viewer feel more connected to the b&w photos.
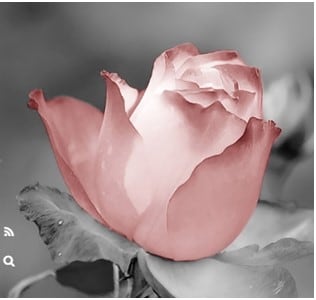
- Highlight Key Elements: For artists and creators, selectively adding color to certain parts of an image allows them to make specific elements stand out. This technique draws the viewer's eye directly to the focal point, guiding their attention and enhancing the overall composition.
Part 2- How To Add Color To Black And White Photos?
As you know why you should restore old black and white photos, now it's time to learn the different methods by which you can colorize old photo .
So, here's how you can do that:
Method 1: Colorize Black-and-White Photos Online
Repairit Online Photo Colorizer provides users with a number of benefits. Before colorization, you can first try to repair any damaged old images. Additionally, the tool allows you to choose from various coloring results. What else? Support for several file formats, including JPG/JPEG/PNG/BMP/WEBP, is one of its key features. You can choose to colorize 300 photos per month because the functionality is only premium.
Steps to Restore Color to Black and White Photos
With this tool, converting black and white photo to color is very easy. You just need to follow the three steps:
Step 1: Add the black-and-white photos online.
Open the Wondershare Repairit Online for AI Photo Colorization. Your screen will display the software's interface, as seen below.
Select the Upload Image button in the blue color. Once you click this, you can upload black and white pictures.
Remember: One picture can only be uploaded at a time.
Step 2: Start AI photo colorization by opening the photo's colorize mode.
You will have two choices on your screen after completing the upload process. Old Photo Restore and Photo Colorize are the two options. It would help if you chose the Photo Colorize mode to colorize the photographs.
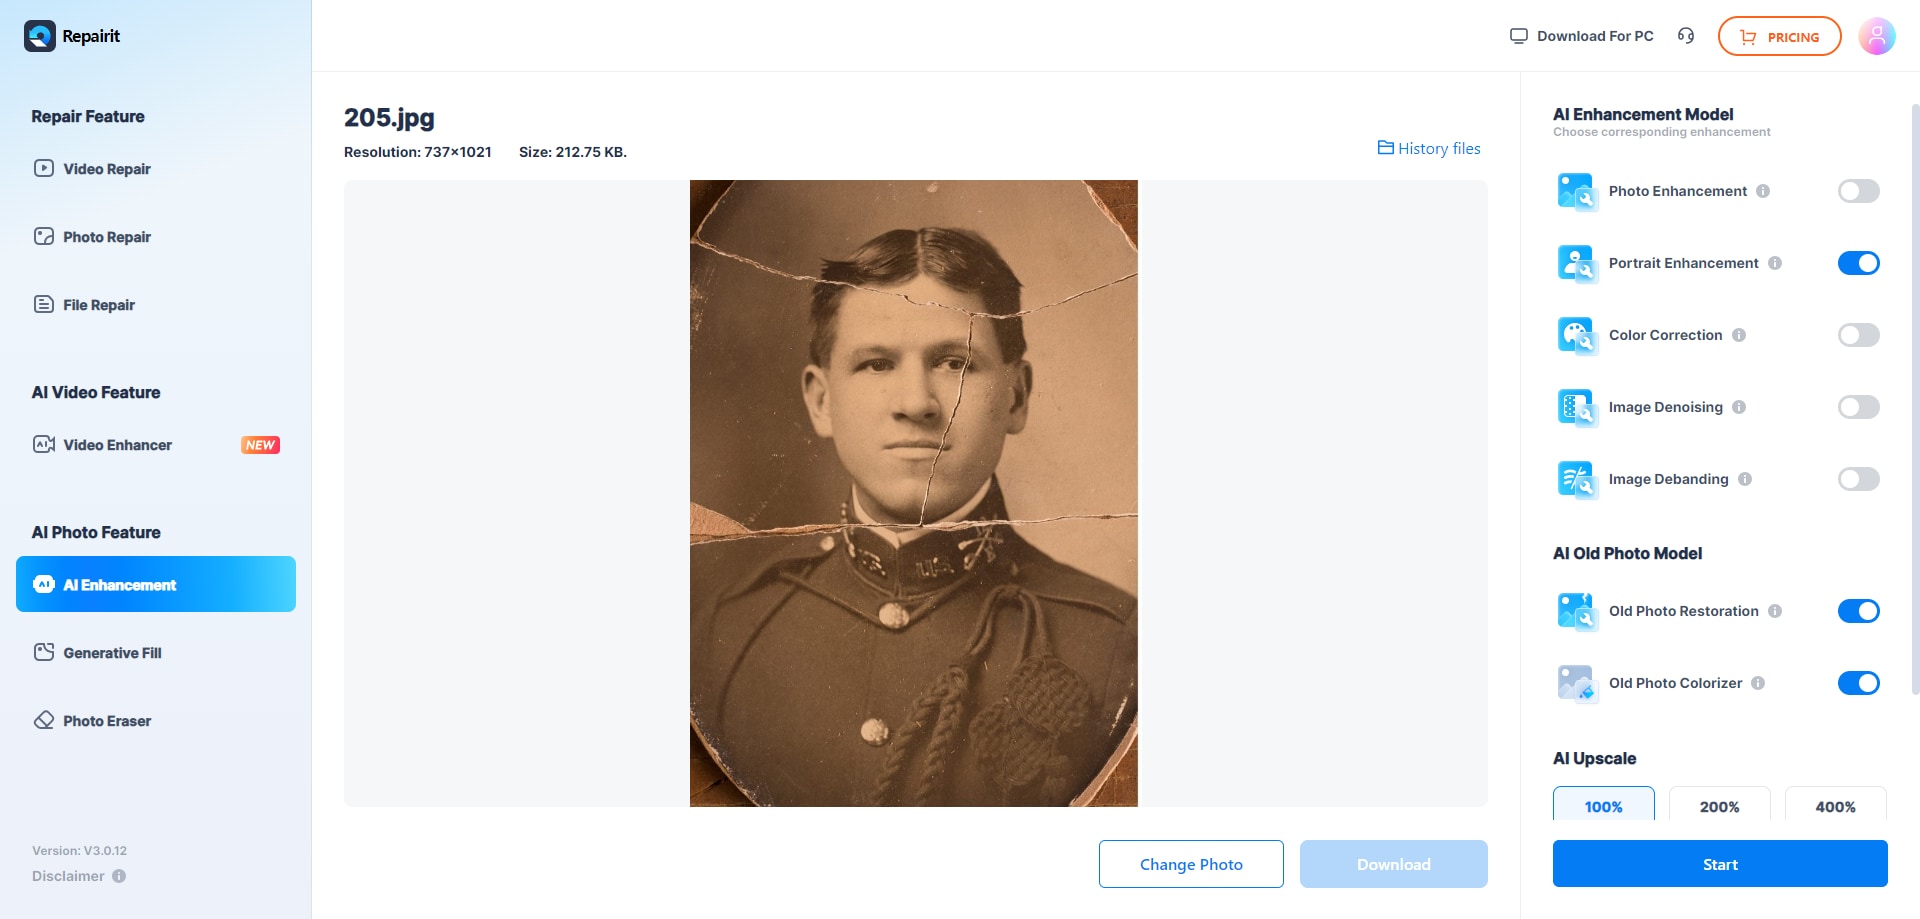
Note: You can choose a desired resolution from the "AI Upscale" feature to make your photo clearer.
Go back to the bottom right corner of the screen and click the Start button. The colorization procedure will begin. Next, wait for a few minutes.
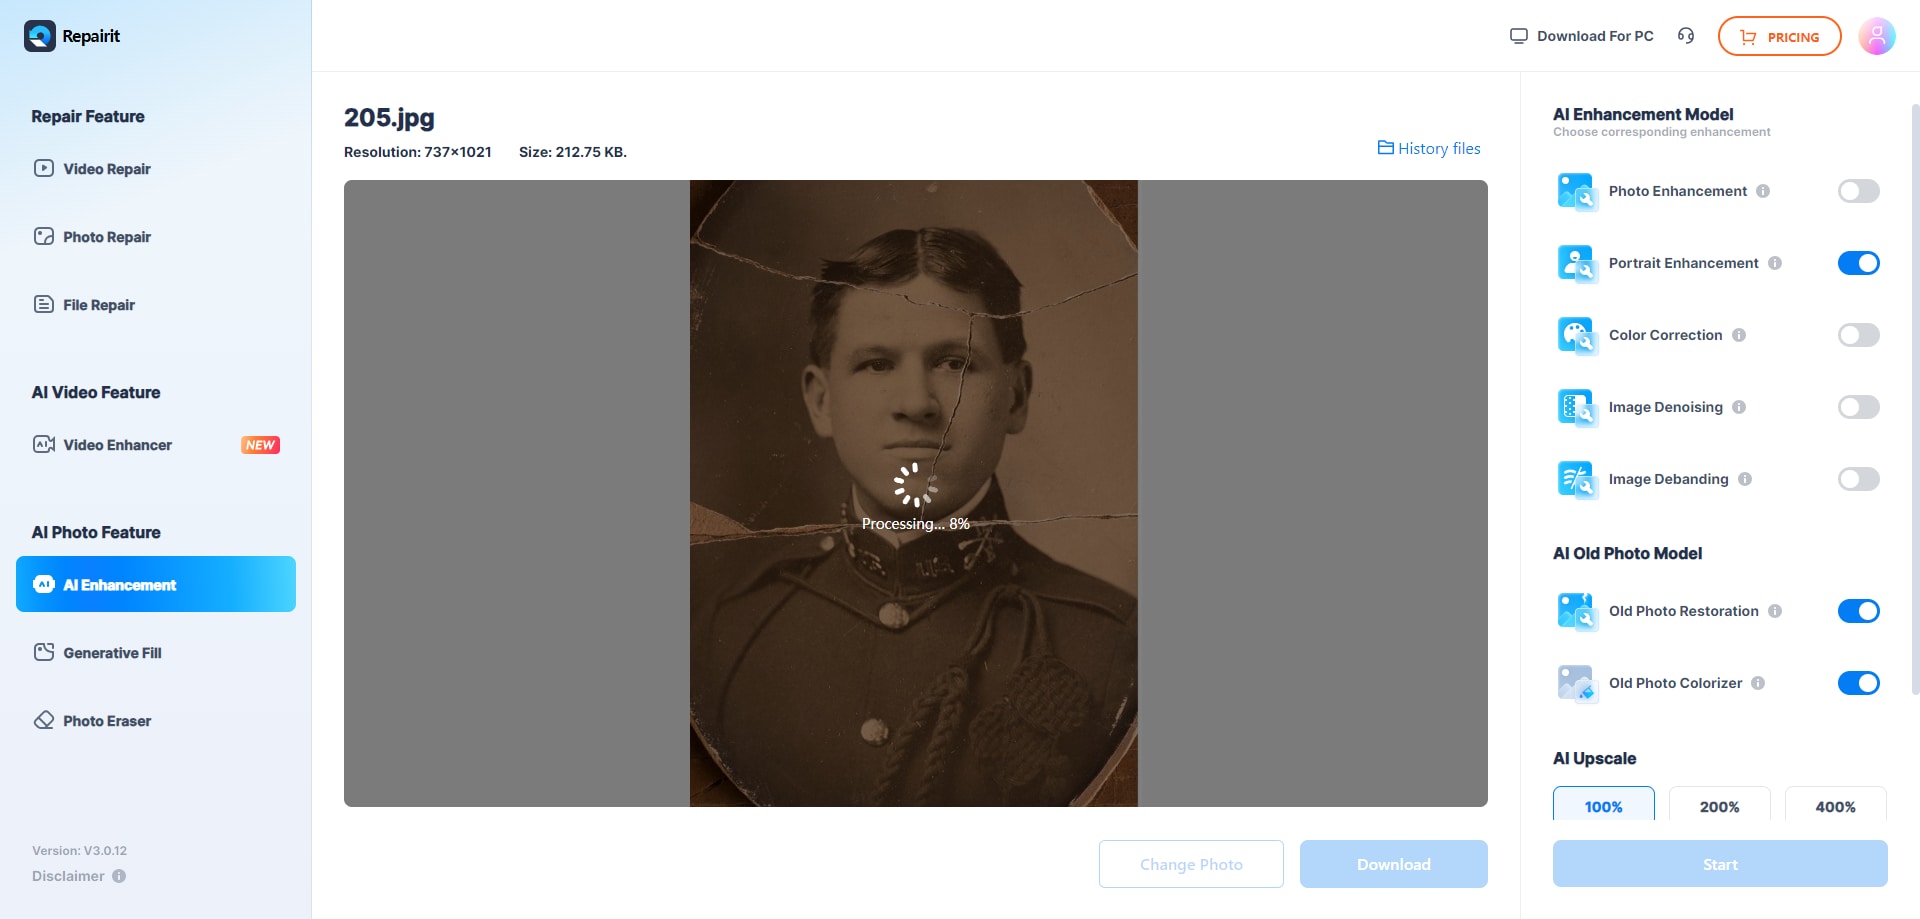
Step 3: View the results and download.
The process of colorization is finished in the last phase. You may now see three examples of colored versions of the image, select the one you like, and click Download to save it.

Attention:
The Repairit - AI Old Photo Restoration supports to repair 300 files each month, and each file is no more than 300MB. If you have more photo repair needs, you can also try the deskop version of Wondershare Repairit , the desktop version has no limit to the size and number of the repairable files.

Wondershare Repairit - Photo Repair
Security Verified. Over 7,302,189 people have downloaded it.
-
Repair damaged photos with all levels of corruption, such as grainy photos, dark photos, pixelated photos, faded photos, etc.
-
Repair images of diverse formats, such as JPG, JPEG, PNG, CR3, CR2, NEF, NRW, etc.
-
Repair critically damaged or corrupted photos available on SD cards, phones, cameras, USB flash drives, and more.
-
Repairit has a quick and advanced repairing mode. You can use either depending on the level of corruption the photos has undergone.
-
The "AI Image Upscaler" feature can enlarge the repaired photos to 2X, 4X, and 8X.
-
Intelligently restore old/scratched photo and colorize black and white photos with various AI effects.
-
No limit to the number and size of the repairable photos compared with the online version of Repairit.
-
Support Windows 11/10/8/7/Vista, Windows Server 2003/2008/2012/2016/2019/2022, and macOS 10.12~macOS 14.
Method 2: Colorize Black and White Photos with Photoshop via AI
Photoshop is a professional tool for colorizing old photos using the Neural Filter algorithm. This algorithm is also known as Adobe Sensi. It recognizes black-and-white photos and automatically determines which colors to use. In comparison to previous versions, restoring the old images should be relatively simple.
Steps on how to restore colour to black and white photos with Photoshop (with AI):
Step 1: Make sure you've signed up for the Photoshop Cloud service.
Also, ensure that you have downloaded Photoshop Colorize option for the Neural Filters menu.
Step 2: To add a photo to the software, select the File menu and Open option.

Step 3: To make a duplicate, click the background layer and select Duplicate Layer.

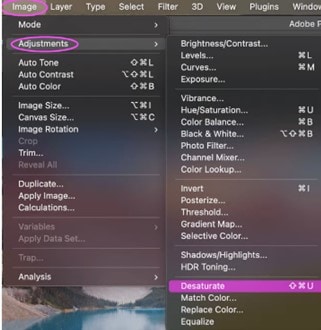
Step 4: Then click the Image menu, and then choose the Desaturate option from Adjustment.
Step 5: You must ensure that the black-and-white image is in GRB/8 bit mode to color it.
To save the image, select the Image menu and then the RGB Color and 8 Bits/Channel options. You can then make a second copy of the layer.

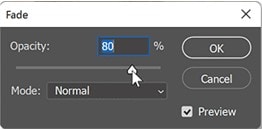
Step 6: Choose the Fade Auto Contrast option from the Edit menu.

You also set the value of the slider for the Opacity menu to either 80% or 100% here. By using the fading effect, you can produce photos that are better colored.
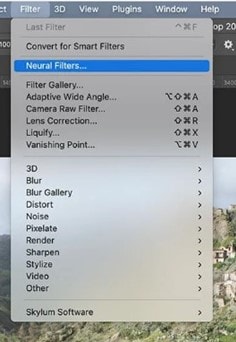
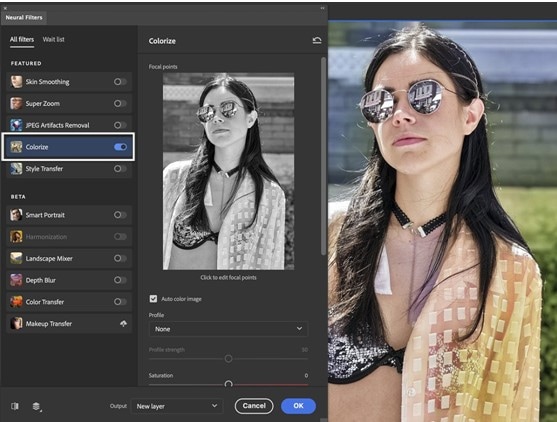
Step 7: Select Neural Filters from the Filter menu by clicking the menu button.
After that, you can enable the Colorize option to have the B/W image colored by itself over time. The saturation, cyan, magenta, and other characteristics can then be changed before saving.
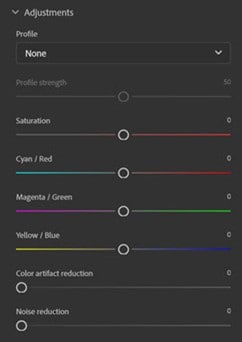
This is how you can turn b&w photos into color using Photoshop via AI.
Method 3: Add Color to Black and White Photos Using Photoshop without AI
Till now, you have understood how to color-correct old photos. So, let's find out the steps here to restore color to old photos using Photoshop without AI.
Step 1: Open Photoshop and add the image you wish to colorize.
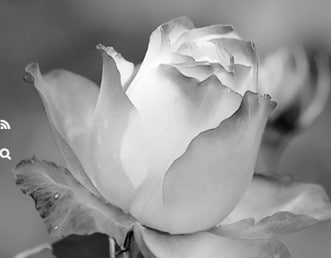
Once the photo has been imported, you should be able to see if it is a black-and-white image with a good range of values from deepest black to pure white.
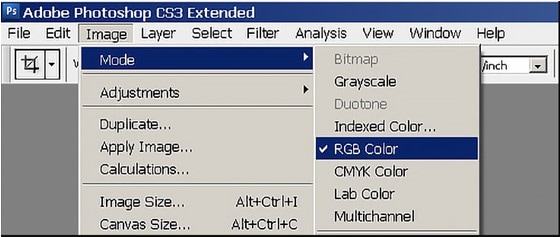
Step 2: Select the Mode option from the Image menu.
Choose RGB Color from the menu. Then, decide whatever region of the B&W image you want to color.
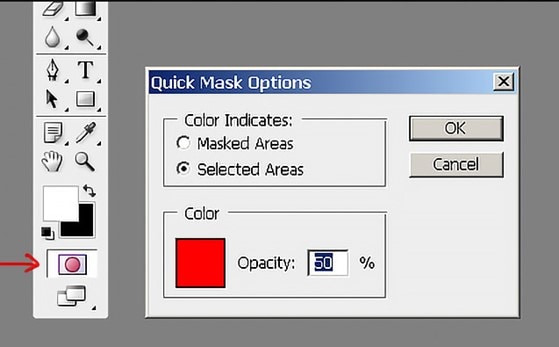
Step 3: To apply the color mask to the B&W images, double-click the Quick Mask button.
You can use the Selected Areas option under Color Indicates. Then, press the OK button after that.
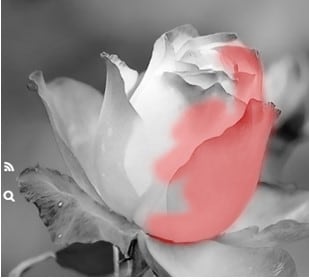
Step 4: From the toolbar, select the Paintbrush button.
The portion of the black-and-white image where color should be added can be painted over. Just be patient to add color to the black-and-white images.
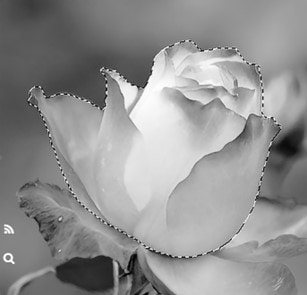
Step 5: If you haven't finished coloring the images yet, click Quick Mask once more to go to Normal mode.
You can search for the region you just filled in with the chosen color.
Step 6: To give your selection some color, use the Color Balance option from the New Adjustment Layer menu by clicking the Layer menu.
Following the initial dialogue box's click, the subsequent color slider will show up.

Step 7: To colorize more sections, simply repeat the preceding steps on a new portion.
You can change the hue of the black-and-white image.
Conclusion
I have shared how you can restore color to black-and-white photos, and I hope everything is clear to you. There are many methods to restore color to old photos, but we recommend you start using AI Photo Colorizer today and enjoy the vibrant result!
People Also Ask
-
How to make old black-and-white photos look new?
You can restore black-and-white photos using AI tools like Repairit AI Photo Colorizer or Picsart, enhance them in Photoshop with colorization features, or use digital restoration to repair damage and improve clarity. -
What is the difference between sepia and black and white photography?
Sepia is a type of toning applied to black and white photos to give them a warmer, brownish tint, while still maintaining a monochromatic look, whereas black and white photography lacks any additional tones and remains purely grayscale. -
How to fix a black-and-white photo?
Photoshop offers a powerful solution for colorizing black-and-white photos using the Neural Filter algorithm (also known as Adobe Sensei), which automatically detects the image's content and applies appropriate colors, making the restoration process easier than before.


 ChatGPT
 Perplexity
 Google AI Mode
 Grok
Grok
