

Drop frames can be quite frustrating if you're a content creator or live streamer using OBS Studio. Due to that, your stream lags and loses its quality or stutters, which ruins the viewer experience. However, drop frames happen when the internet connection is unstable or your device struggles to keep up with the streaming workload.
Regardless of the reason, there are various solutions to fix drop frame OBS to ensure smooth and high-quality streaming. Hence, in this guide, we have uncovered 5 simple and effective methods to help you optimize your streaming setup step by step. Thus, review the details and see which method suits you best while exploring some reasons behind it.
In this article
Part 1: Realizing The Causes Behind Dropped Frame OBS
Before you know how to fix drop frame OBS, knowing the reasons behind it is necessary for better understanding and clarity. Therefore, in this section, we have mentioned 5 common reasons that can lead to this vexing issue:
- Poor Internet Connection: First off, an unstable or slow internet connection is the top reason for dropped frames. Due to insufficient upload speed, the system prevents OBS from maintaining a consistent stream.
- Overloaded CPU or GPU: If your computer's processor or graphics card is overwhelmed, it can also struggle to handle the encoding process. Hence, this leads to skipped or dropped frames, which disrupt your stream and overall user experience.
- Incorrect OBS Settings: High-quality settings exceeding your hardware or internet capabilities can strain your system. This is why adjusting to balanced settings helps OBS run smoothly and prevent dropped frames.
- High Network Traffic: Other devices or applications on your network using bandwidth can interfere with your stream. So, because of this, competition for bandwidth often leads to interruptions and dropped frames.
- Outdated Software or Drivers: Running an older version of OBS or obsolete drivers for your hardware may lead to compatibility and performance issues. Hence, regular updates ensure optimal functionality and help prevent dropped frames.
Part 2: Potential Solutions for Drop Frame OBS Issue
After learning the potential cause of drop frame OBS, you might seek seamless ways to fix this issue. If so, dive into the sequential guide and discover 5 straightforward ways to ensure high-quality streaming without lag and buffering issues:
Solution 1. Reducing Video Bitrate in OBS
It is the foremost effective solution since it can help ensure your stream stays smooth, especially when your internet connection is limited. By lowering the bitrate, you can reduce pressure on your network, leading to fewer interruptions and a more stable stream. Hence, here is a detailed guide for you to learn how to fix the drop frame OBS issue with video bitrate settings:
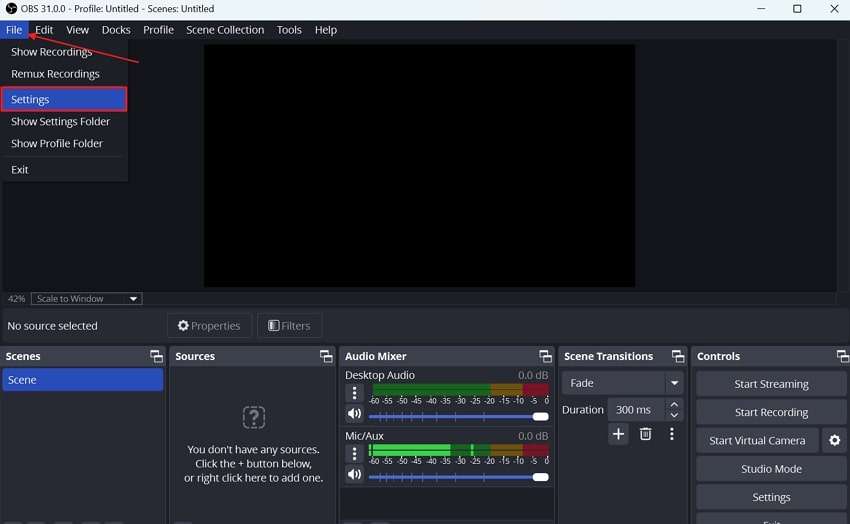
Step 1. Launch the OBS Studio on your device and tap the “File” tab to access the “Settings” option from the top left corner of the screen.
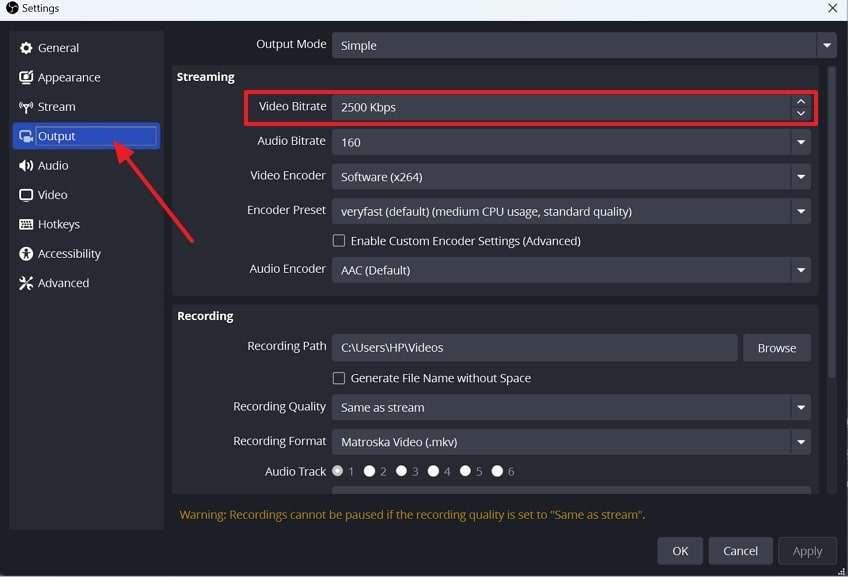
Step 2. This will direct you to a pop-up window where you have to press the “Output” tab and pick the “Video Bitrate” option from the list. Once there, reduce the bitrate to ensure a smooth and hindrance-free streaming experience.
Solution 2. Define Bind to IP Settings
The Bind to IP setting can solve the drop frame OBS issue as it allows you to specify which network OBS should use for streaming. This solution can be helpful if you have multiple network connections like Ethernet and Wi-Fi and want to ensure OBS uses a specific one. So, by doing so through the instructions given, you can improve stream stability and prevent issues caused by automatic network switching:
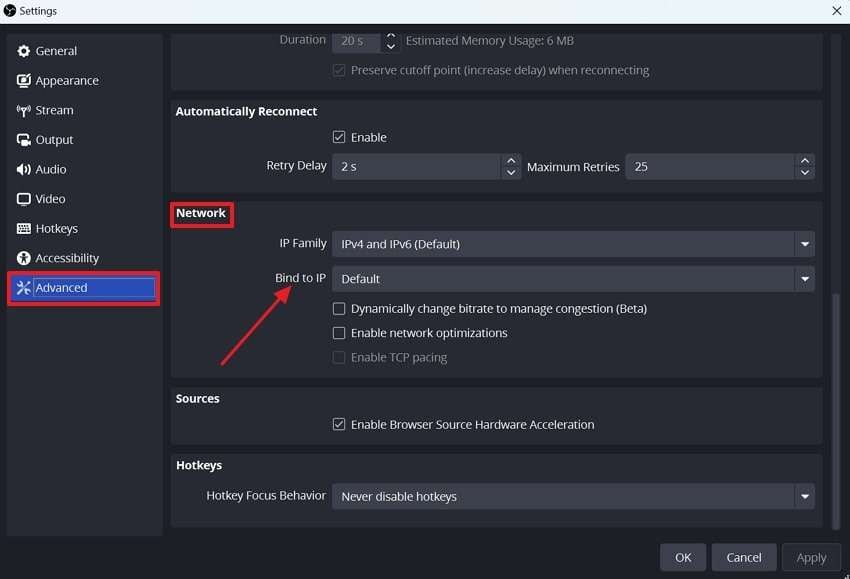
Instructions. From the OBS settings, head to the “Advanced” tab and scroll down to the “Network” settings to pick the “Bind to IP” settings. There, make sure it is set to default to let OBS automatically bind to the correct network.
Solution 3. Manage The Hardware Encoding
Hardware encoding in OBS uses your computer's GPU instead of the CPU to handle the video encoding. This can significantly reduce the load on your CPU, allowing for smoother streams with better performance. Hence, enabling hardware encoding by following steps can free up system resources, improve stream quality, and prevent dropped frames.
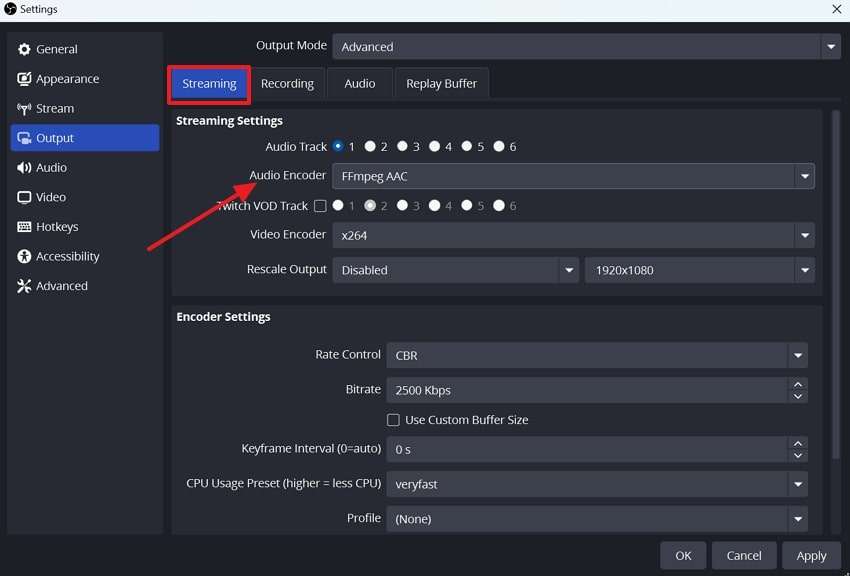
Step 1. Access the “Output” tab from the OBS settings and change the output mode to “Advanced” by dragging the dropdown menu.
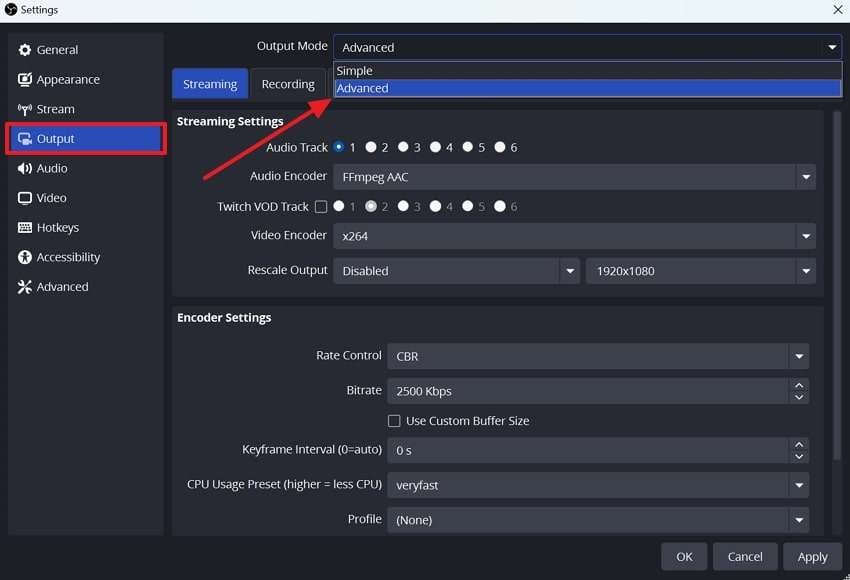
Step 2. After that, you will be directed to a new screen where you have to unfold the “Audio Encoder” dropdown menu from the “Streaming” section. Pick NVENC H.264 to enable hardware encoding to your graphic card.
Solution 4. Network Optimization in Advanced Settings
If you still face drop frame OBS issues, network optimization from its advanced settings can aid you in improving the streaming performance. For that, you can adjust how the software interacts with your internet connection by enabling options like "Network Optimizations." Hence, to know how it's done, adhere to the sequential guide, and reduce lag, dropped frames, and stream interruptions.
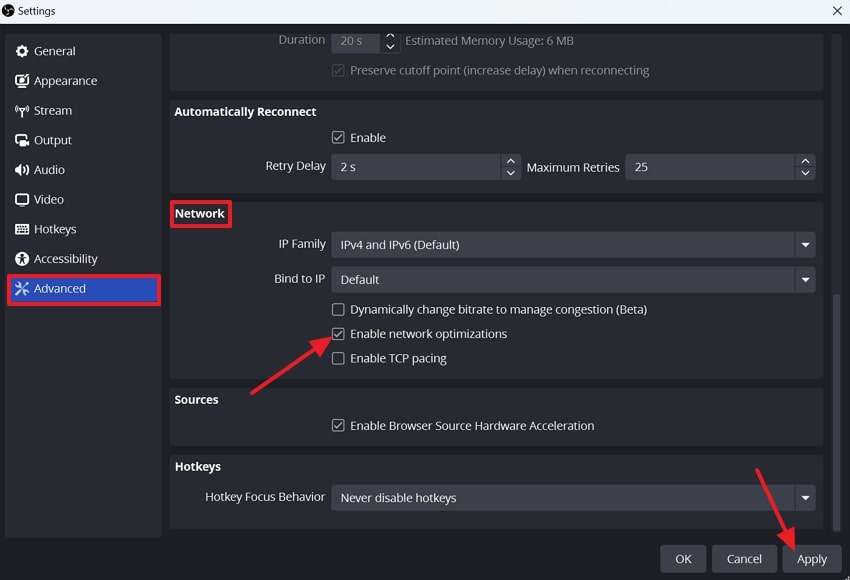
Instructions. On the OBS “Advanced” Settings” locate the “Network” settings section and check the “Enable Network Optimization” option. After that, hit the “Apply” button to improve your OBS's performance.
Solution 5. Update Network Drivers on Your Device
As mentioned, outdated drivers can cause connection issues, leading to dropped frames and interruptions. Hence, regularly updating your network drivers ensures compatibility with OBS and other applications, providing a stable and efficient streaming experience. Thus, follow the steps below to see how you can update the network drivers on your PC:
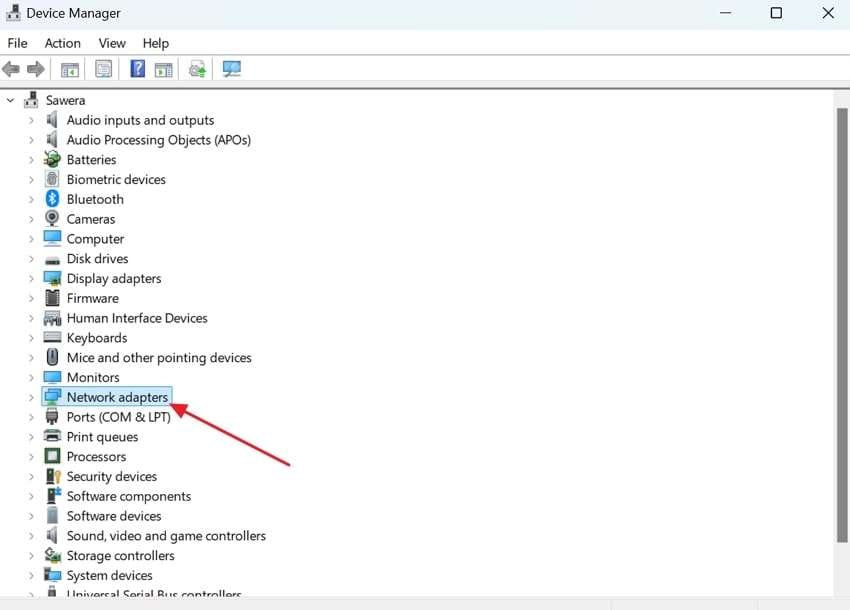
Step 1. Search for the Device Manager on your device and tap the “Network adapters” option from the list.
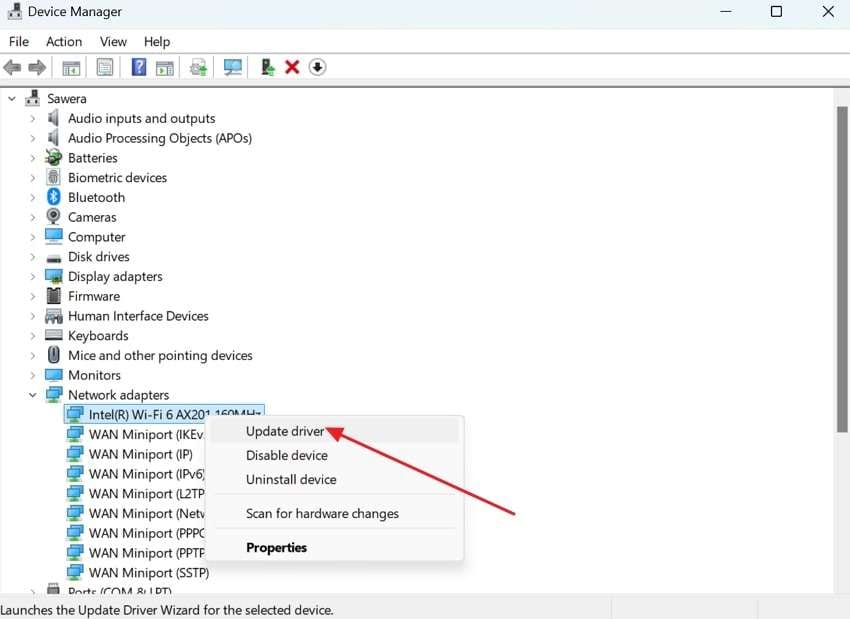
Step 2. Upon choosing this option, you will get a list of networks, right click on the LAN or Wi-Fi network and choose the “Update driver” option.
Bonus Part. Enhance Your OBS's Recorded Low-Resolution Video With Ease
After exploring all the solutions to fix drop frame OBS, if you face low-quality streaming video, enhance it with a robust solution, Repairit. Using this tool, you can improve your video with a powerful AI algorithm that will sharpen any online or offline video. Moreover, it lets you denoise your blurry videos and make them crystal clear and high quality.
Furthermore, this tool provides a free trial to experience its features before upgrading to its premium version. Users can increase their video quality to 4K resolution by giving them cinematic effects. Plus, you can use its batch feature to enhance your videos in bulk, which saves you time and effort.
Key Features
- Customizable Output Resolution: It provides options to choose the output resolution quality from 100% to 400%.
- No Length Limitation: With this software, there is no limitation on the length of the videos, and users can upload videos of any duration.
- Broad Format Compatibility: Works with all types of video formats, which ensures flexibility and ease.
Detailed Guidelines to Enhance Videos Using Repairit
Now that you know about the features of the Repairit AI Video Enhancer, let's explore the detailed step-by-step guide on achieving crystal-clear videos.
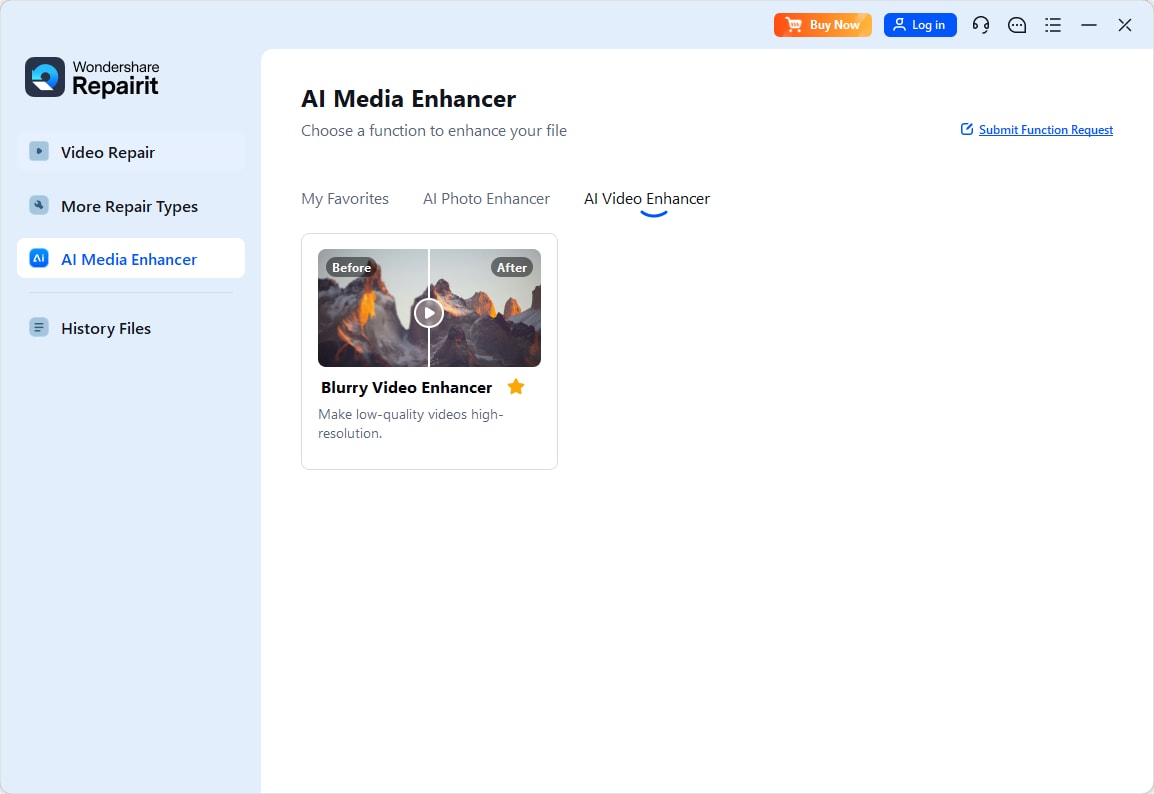
Step 1. Search the AI Video Enhancer and Choose the Repair Type
Start by searching the Wondershare Repairit, then from the “More Types Repair” section on the left side of your window, select the “AI Video Enhancer” tool.
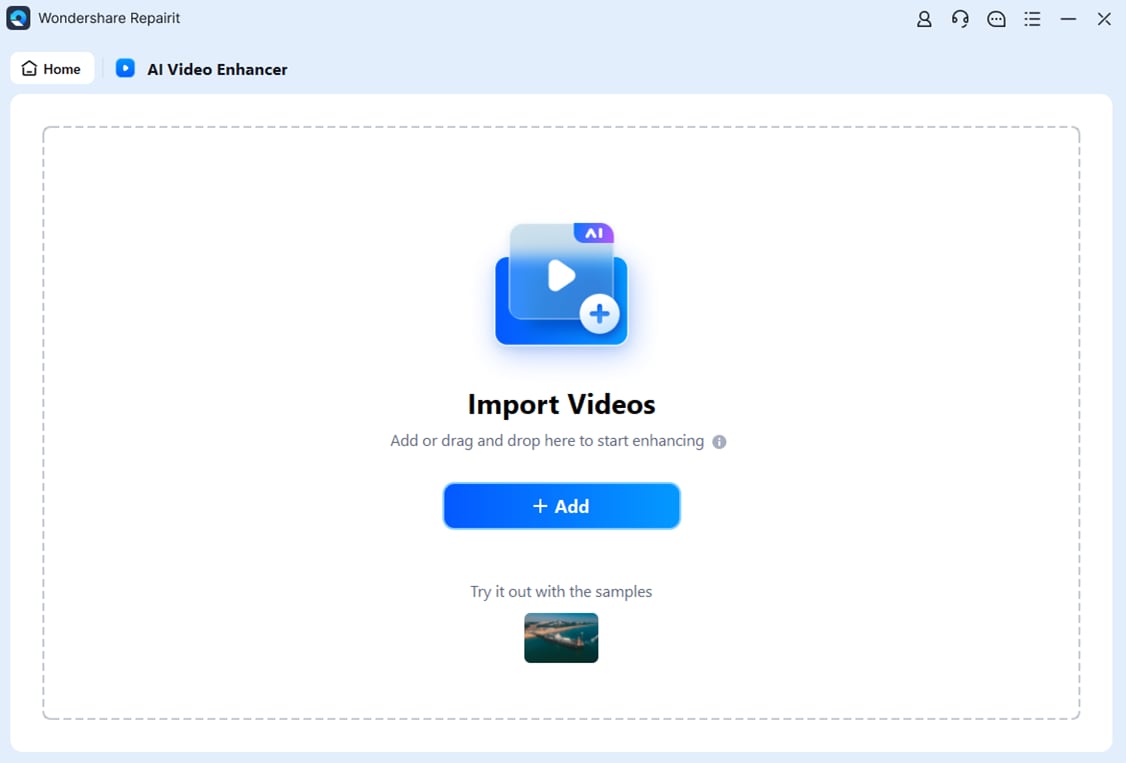
Step 2. Upload the Blurry Video You Want to Enhance
On the next screen, click the “Add” button and upload the blurry video you want to enhance from your computer.
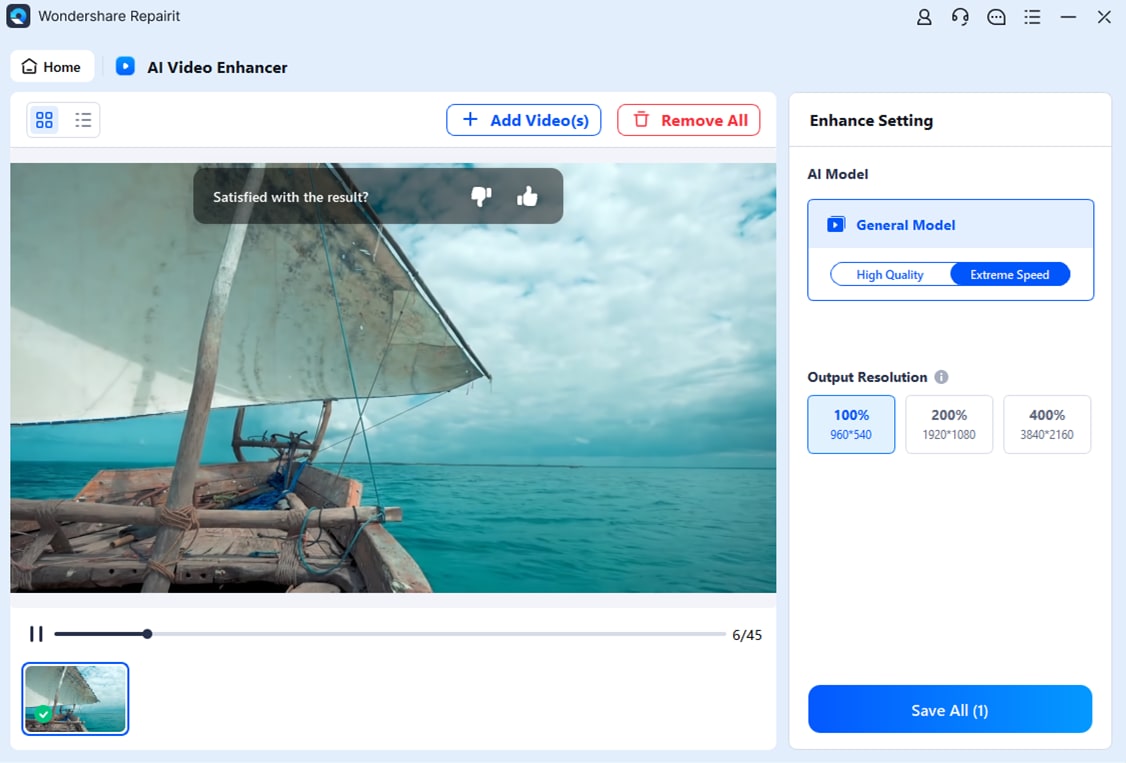
Step 3. Select the Output Resolution and Start Enhancing
Then, choose the output resolution from the right side of the screen, which is 100%, 200%, and 400%, and press the “Start Enhancing” button on the bottom.

Step 4. Save the Final Results and Download It
Once the video is enhanced and you are satisfied with the results, hit the “Save All” button and download the final enhanced video on your device.
Enhance Your OBS's Recorded Low-Resolution Video Now
 Security Verified. Over 7,302,189 people have downloaded it.
Conclusion
Summing up, drop frame OBS is a concerning issue that can affect your streaming quality and audience experience. Therefore, in this guide, we have mentioned 5 simple ways to overcome this frustrating issue. Hence, while resolving the drop frame, if your video quality is affected, head towards Repairit. It can enhance the video quality from 100% to 400% using advanced algorithms.
FAQ
-
How can drop frame issues in OBS affect your streaming experience?
Drop frame issues can lead to stuttering and buffering of the video, which causes interruption during your streaming. This can make it difficult for users to follow the content smoothly. -
Can I preview my video after enhancing it with Repairit?
After using the AI Enhancer tool, you can preview it with the help of the built-in preview feature in this tool. You can further improve it, but if you are satisfied with the result, you can download the final video. -
Is Repairit safe to use for video enhancement?
Absolutely, this software is safe to use as it keeps your data secure throughout the enhancement process. Moreover, it does not save or store your files while respecting your privacy and keeping the file safe.
