
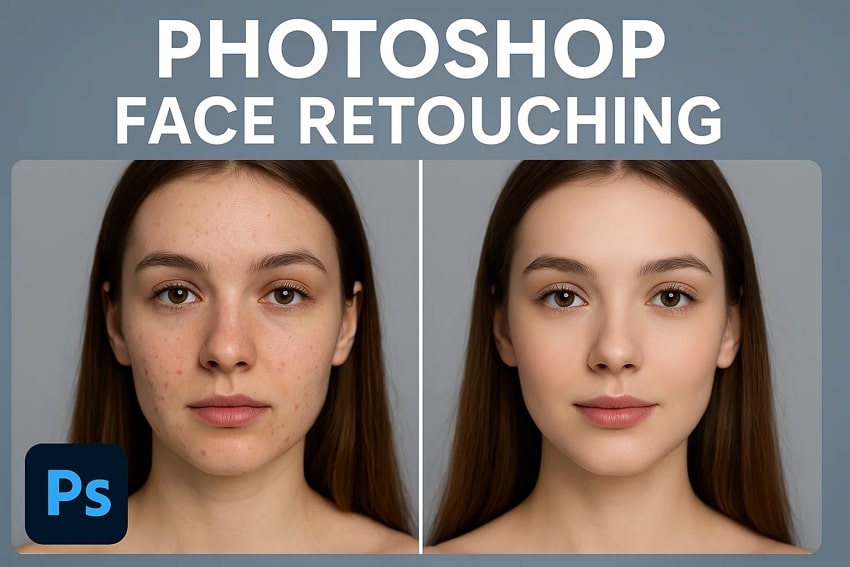
Many people use portraits for their social media profiles and professional portfolios. They can be further enhanced slightly, making the image look more outstanding and attractive. For this, various tools like Photoshop help make the skin smooth, brighten the eyes, and retouch the face in your portraits.
However, since it’s an advanced editing tool, not everyone has the technical expertise to use it, especially beginners in the editing field. Hence, in this guide, we will discuss how they can utilize Photoshop for face retouching via different approaches. So, keep reading this article if you want to know a better alternative by the end.
In this article
Part 1. Is Photoshop a Recommended Choice for Face Retouching?
For professionals, this tool is an ideal choice to retouch the face as it offers many innovative editing tools like Spot Healing Brush, Clone Stamp, Dodge & Burn, etc. These tools let you remove blemishes and freckles from your face while requiring a steep learning curve.
Additionally, Photoshop for face retouching supports layers and masks, enabling detailed facial expressions while maintaining a natural look. However, for beginners, this tool is quite daunting to operate as not just the interface is intricate, but requires detailed editing experience. Still, Photoshop remains a leading option due to its unmatched precision and control.
Part 2. 5 Different Approaches for Photoshop Face Retouching
Based on your level of expertise, here are a few methods that can help you with Photoshop portrait editing:
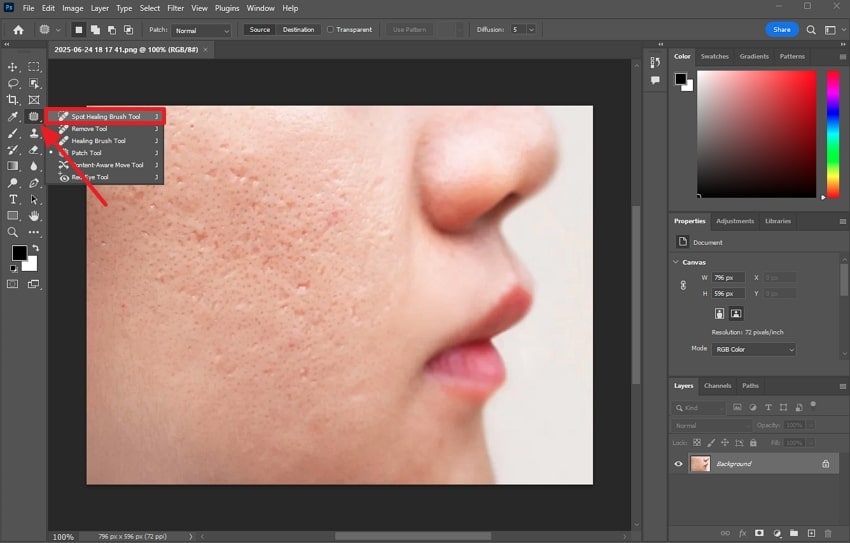
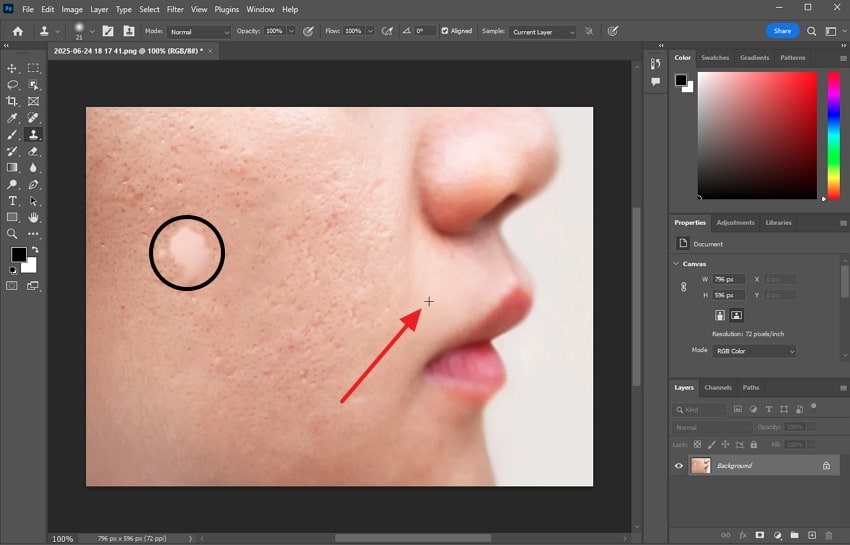
Method 1. Spot Healing & Clone Stamp
While working on editing the face, the Spot Healing and Clone Stamp tools require manual painting. Spot Healing is used for quick fixes of marks, as the brush mixes the pixels from one part with the damaged ones. While working with the Clone Stamp feature, you must manually copy pixels from one part of the image to another. To learn more about Photoshop face retouching, follow the steps below:
Spot Healing Tool
Instructions. Access the “Spot Healing Brush Tool” or simply press “J” on your keyboard after importing the image. Adjust the brush size or the hardness from the top menu bar. Now, simply paint over the area you want to fix.
Clone Stamp Tool
Step 1. Moving forward, select the “Clone Stamp Tool” from the left panel.
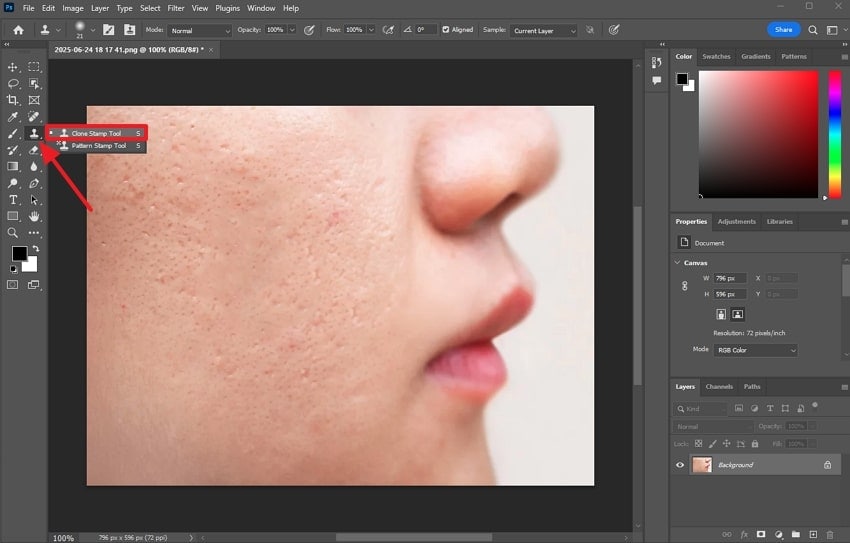
Step 2. Now, you have to press the "Alt” key on your keyboard and select the area you want to copy. Then, release the key and drag it over the damaged area.
Method 2. Frequency Separation
This tool is used to divide the image into high-frequency and low-frequency layers. Through this, you can edit skin texture and skin tone in different layers to get natural retouching. Professionals mostly use this tool to enhance the details of the face to make it look more attractive. For understanding about Photoshop portrait retouch, go through the steps below:
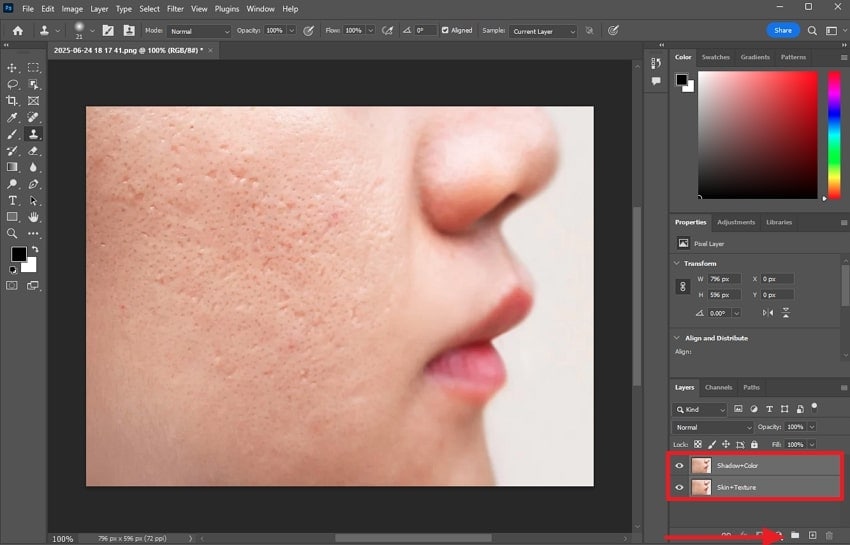
Step 1. On opening the image, right-click on it and create a duplicate layer. Then, rename the layers where the first layer will be renamed as “Shadow + Color." Now rename the second layer as "Skin + Texture” and select both to create a group by pressing the “Group” icon.
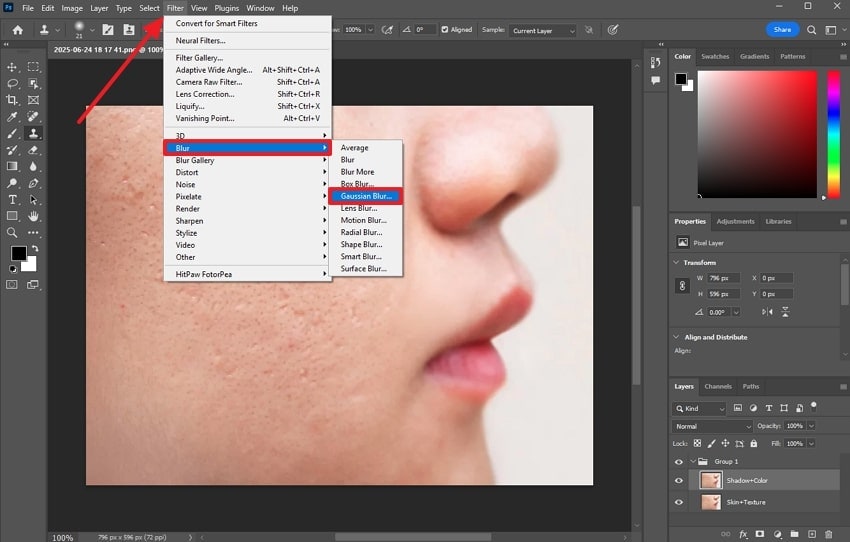
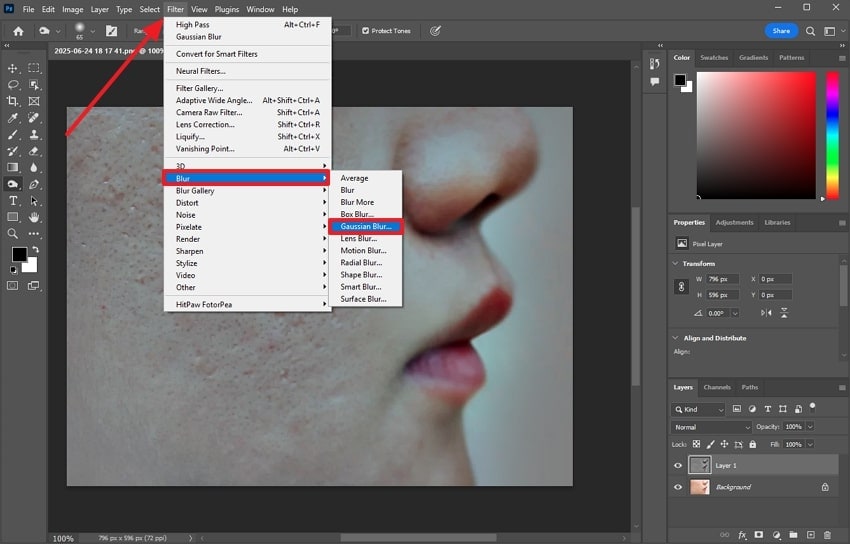
Step 2. Choose the first layer and press the "filter" tan in the top toolbar. Going on, click the “Blur” option and proceed with “Gaussian Blur.”
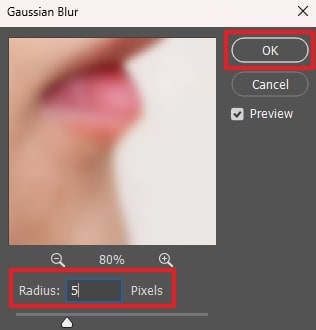
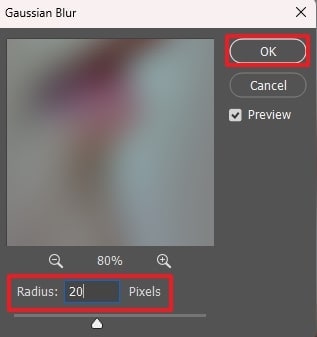
Step 3. Now, adjust the “Radius” value to 5px and press the “OK” button.
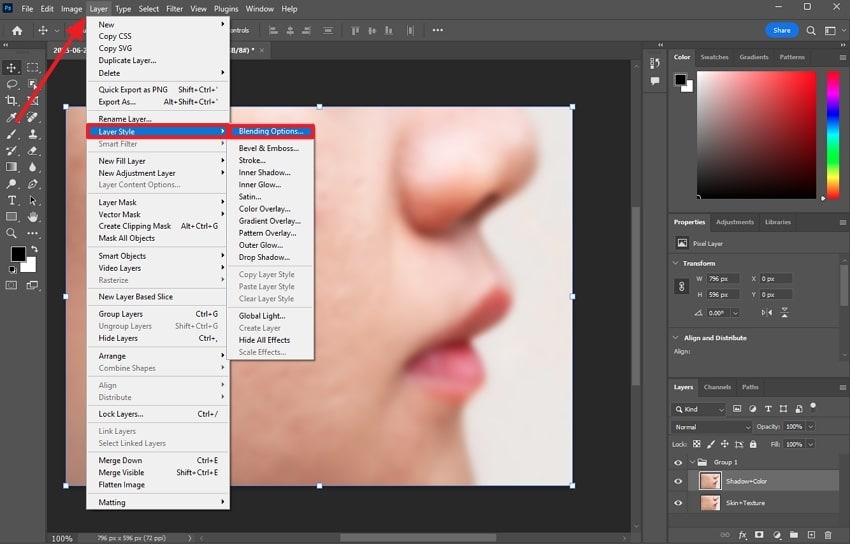
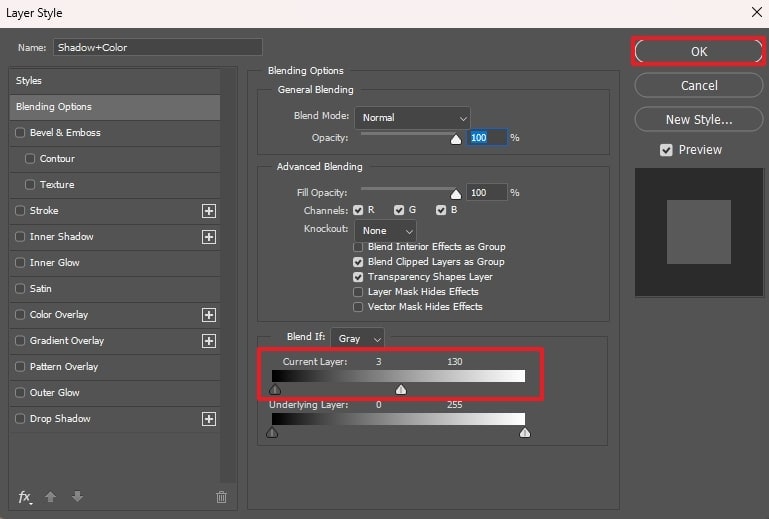
Step 4. Here, select the second layer and navigate to the “Layer” tab. Afterward, press the “Layer Style” and select “Blending Options.”
Step 5. Adjust the “Current Layer" by setting the scale to "3” and the Offset to “130” and press the "OK” button.
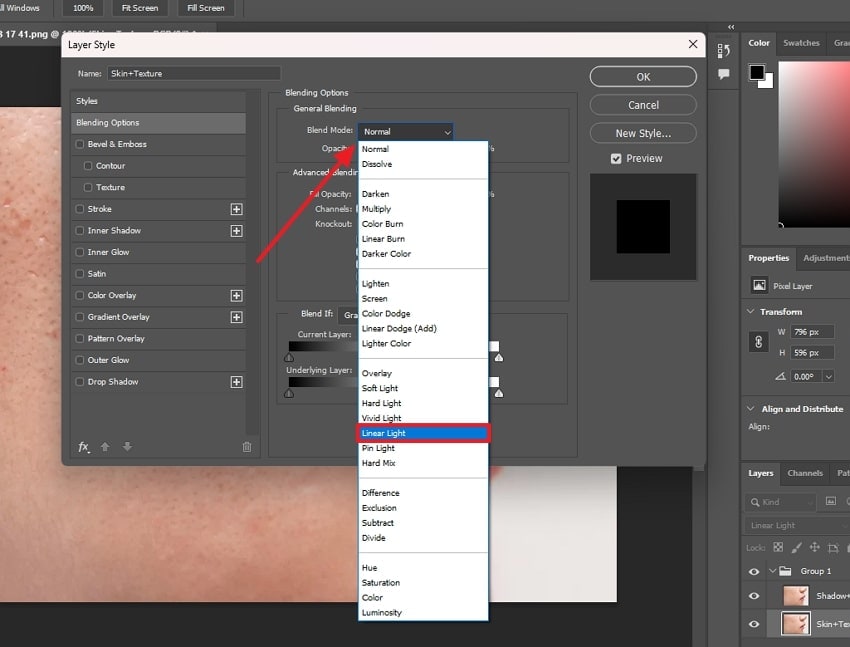
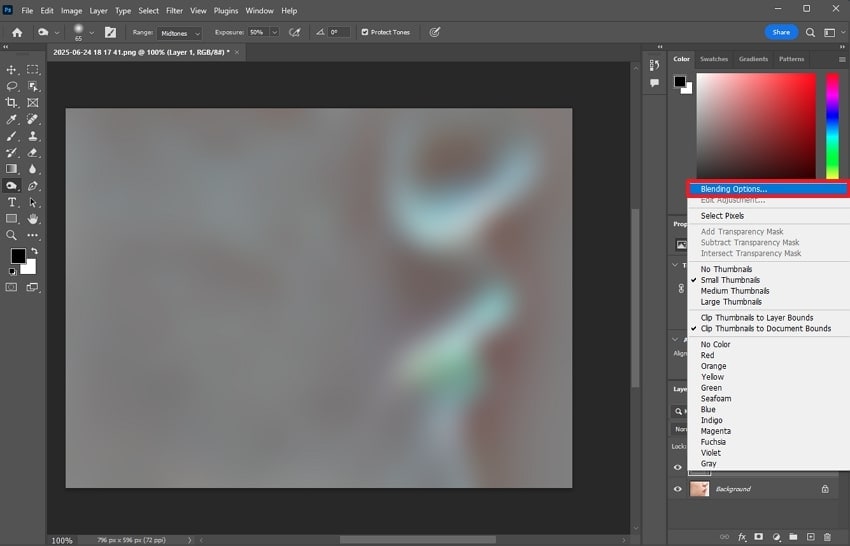
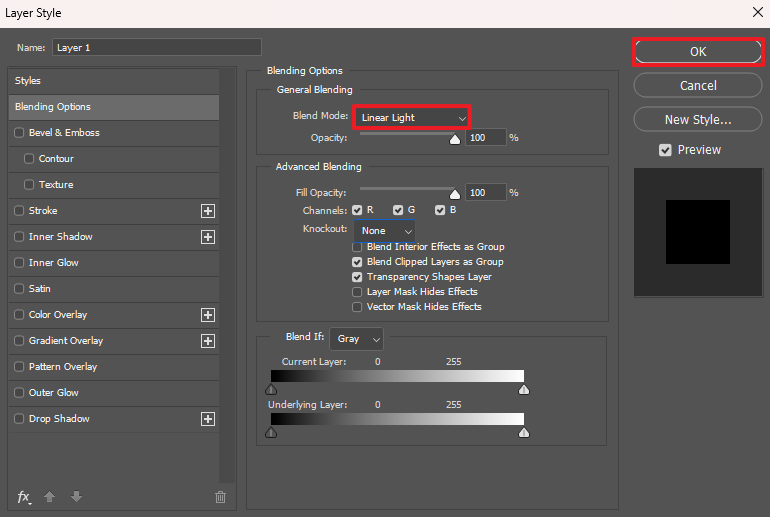
Step 6. Select the second layer, which is renamed as "Skin + Texture," and right-click on it. Then click the “Blending Options," and a new window will appear from where you have to change the “Blend Mode” from “Normal” to “Linear Light."
Method 3. Dodge & Burn
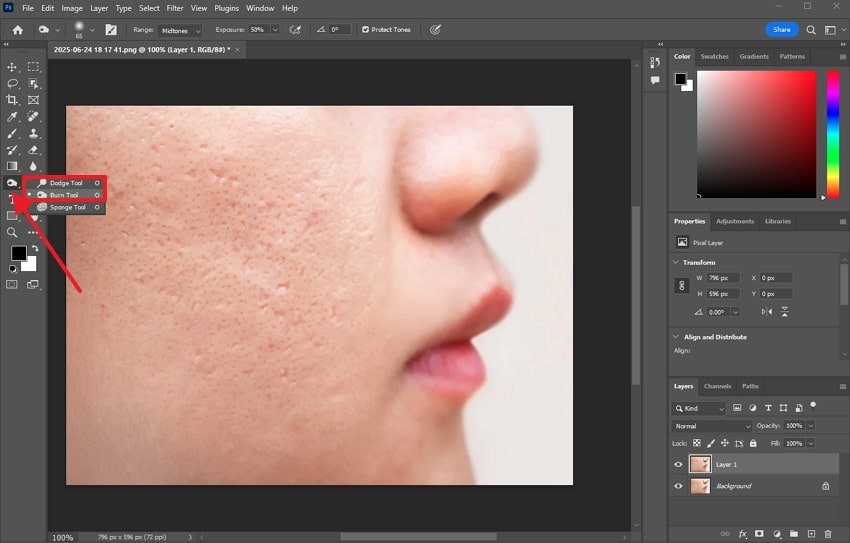
It is mainly used to lighten or darken a specific area on the face. This helps the user enhance the details by adjusting the lighting of the face. Dodge is used when users want to bring out the details from the face's dark part, whereas Burn is used to add contrast or deepen the shadow. The steps below will help you learn how Photoshop portrait editing works:
Instructions. After importing the image, choose the “Dodge Tool” or the “Burn Tool" according to your requirements. Then, you have to adjust the brush size, set the exposure, and brush over the image where they want to increase or decrease the light.
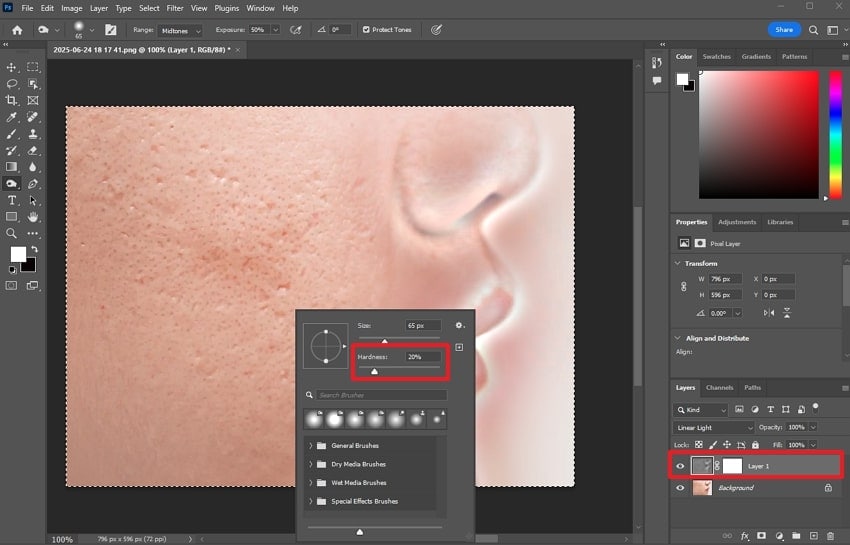
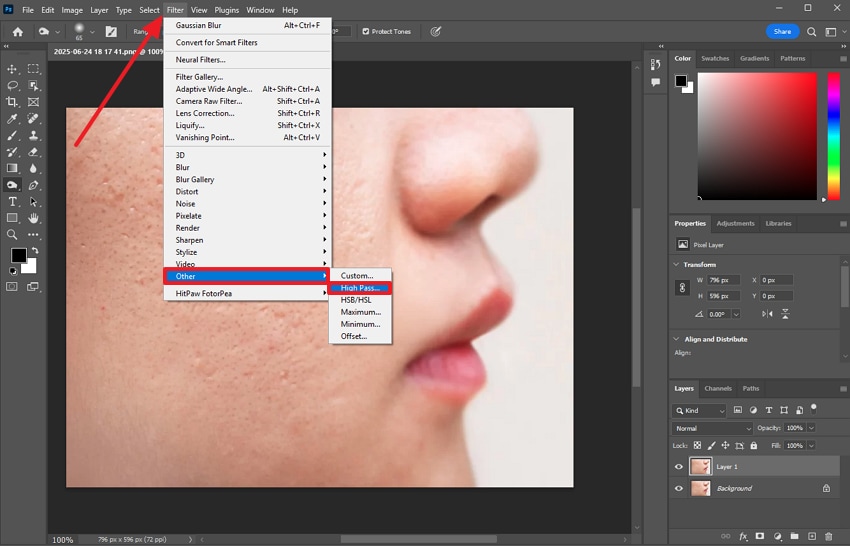
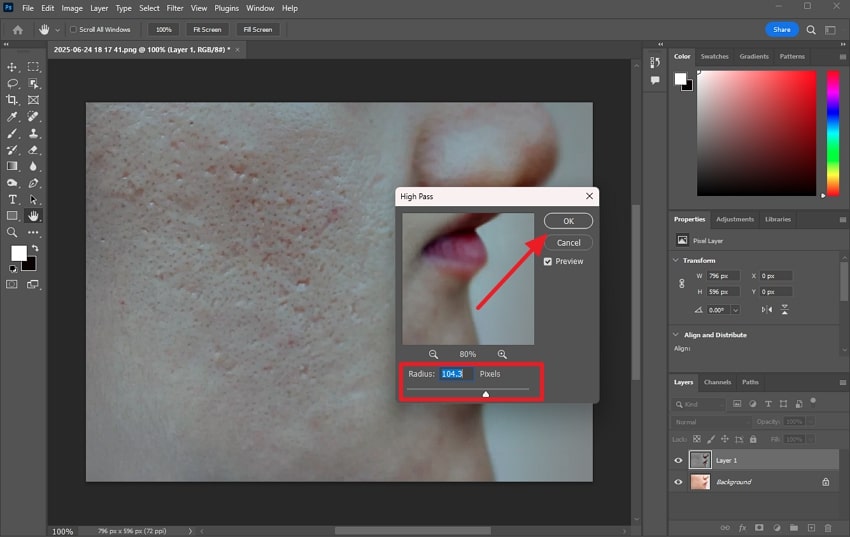
Method 4. High Pass/Inverted High Pass
High Pass, especially when inverted, is used for smoothing the skin without disturbing the face texture. This feature allows the user to adjust the edges and details, ensuring a natural look without an artificial appearance. The face colors are inverted and mixed back to the original image to enhance the edges and details. The steps below can help you understand how Photoshop portrait retouching works using High Pass:
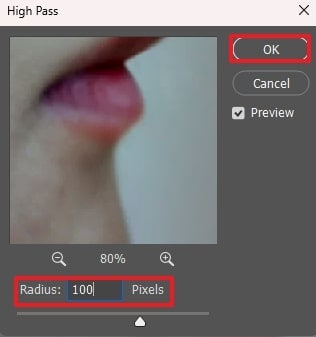
Step 1. Create a duplicate layer of the imported picture and select the top layer. Now, navigate to the “Filter” tab in the top toolbar, choose “Other" and click "High Pass."

Step 2. Upon pressing the “High Pass” button, you have to adjust the “Radius” and press the “OK” button.
Step 3. Choose the “Filter" section once again, move to its "Blur” option, and press the “Gaussian Blur” option.
Step 4. After that, adjust the “Radius” again, setting it to ⅓ of the High Pass radius, and press the “OK” button.
Step 5. Now, invert the image by pressing "Ctrl + I," and by right-clicking the layer, select the "Blending Option."
Step 6. Following this, you need to switch the “Blend Mode” to “Linear Light” and hit the “OK” button.
Step 7. Next, add a “Mask” to the layer and set the mask to black. Use the white brush after adjusting the hardness to create the desired effect.
Method 5. Sharpen Tool (Using High Pass Filter)
This tool is used to bring clarity to your image by making its edges more prominent. Furthermore, it enhances the facial details and sharpens the areas that require more focus. Users can use this tool when their face appears grainy and unnatural due to incorrectly adjusting the contrast. Follow the steps below to learn about Photoshop for face retouching:
Step 1. Duplicate the layer, press the "Filter" tab in the top toolbar, and choose "Other" to gain the "High Pass” option.
Step 2. Adjust the “Radius” to make the edges and features of the face clear. Next, you have to change the blend mode of the duplicate layer to Overlay or Soft Light to apply sharpening.
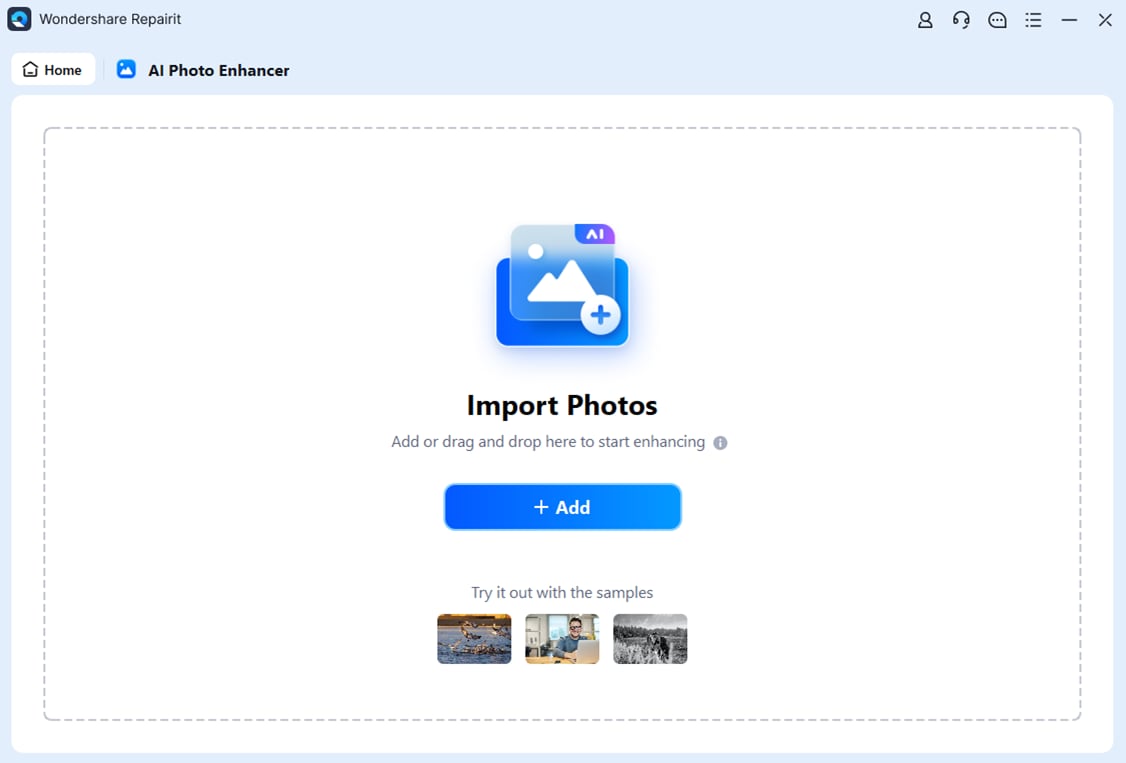
Part 3. The Most Powerful AI-Powered Portrait Retouching Alternative to Photoshop
As Photoshop portrait editing is not beginner-friendly, you are advised to go for Repairit - AI Photo Enhancer that can effortlessly enhance your images. It is designed to automatically adjust the color balance and enhance the quality of each image. Besides, its various AI models remove blurriness after sharpening image edges and adjusting their contrast. Ultimately, you can achieve a natural balance and vibrant look in the picture.
This platform offers a denoise feature through which you can remove noise and grain to enhance its clarity. By using the photo enhancer, you can upload unlimited images without worrying about their size, and it supports various formats, including JPG and PNG. Furthermore, note that the tool can process all your images at once, saving time from repetitive tasks.
Key Features
Facial Feature Recognition: This tool detects facial features in the picture and enhances the level of detail of the face, focusing on objective reality.
Preview Before Download: After working on your portrait enhancement, Repairit provides a preview of results, providing real-time insights before the final download.
Printed Grid: This feature allows users to easily remove gridlines and other distortions from the picture, converting it into a high-quality digital image.

Wondershare Repairit - AI Photo Enhancer
1,010,994 people have downloaded it.
-
Facial Feature Recognition: This tool detects facial features in the picture and enhances the level of detail of the face, focusing on objective reality.
-
Preview Before Download: After working on your portrait enhancement, Repairit provides a preview of results, providing real-time insights before the final download.
Guide to Using This Portrait Retouching Alternative of Photoshop
To edit the portrait after knowing the features of the above tool, look into the few steps below for your guidance:
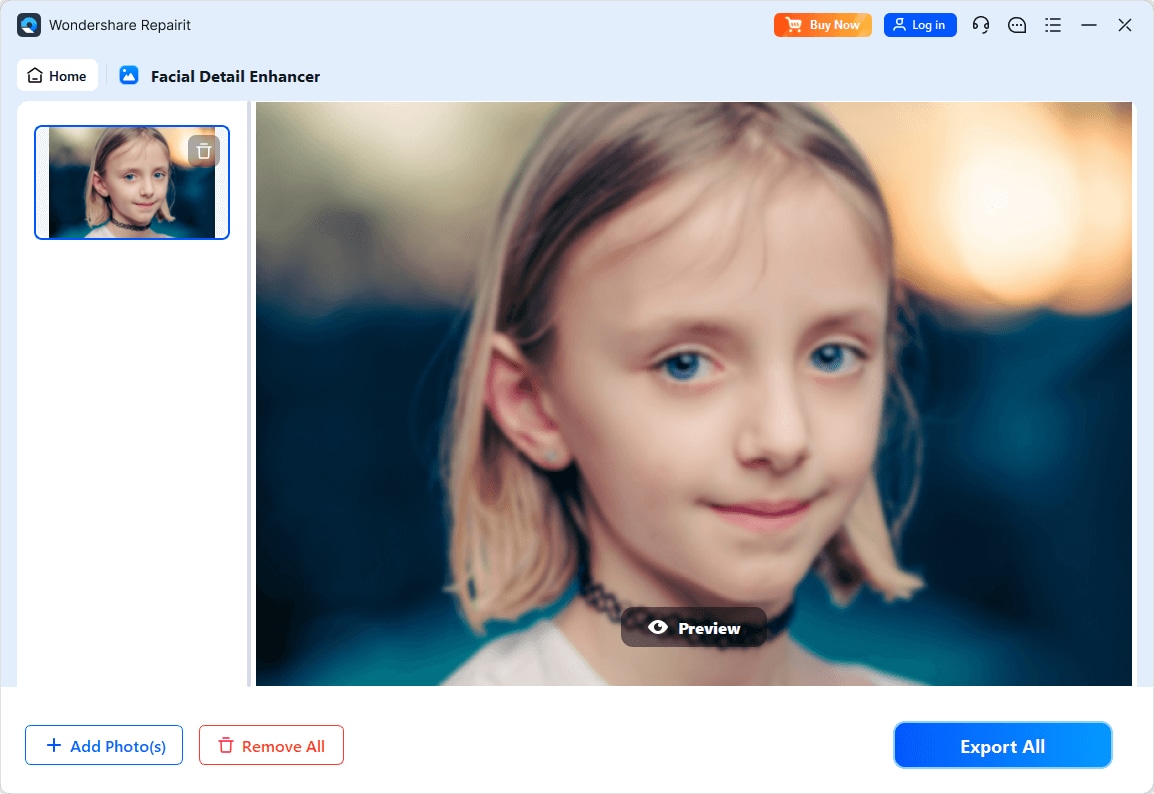
Step 1. Access the Facial Detail Enhancer
On accessing Repairit, click the “AI Media Enhancer” tab and then choose the “Facial Detail Enhancer.”

Step 2. Import the Target Portrait to Enhance It
After that, the user has to import the picture by pressing the “+ Add” button.
Step 3. Select the Portrait Enhancer
Once the blurry image is added, select the "Portrait Enhancer” and click the “Start Enhancing” button.
Step 4. Save the Enhanced Portrait After Preview
Finally, select a preferred “Output Resolution” and press the “Save All” button to migrate the results to your storage device.

Retouch Your Portrait Now
 Security Verified. Over 7,302,189 people have downloaded it.
Conclusion
To conclude, Photoshop face retouching provides professional tools to enhance portrait quality and refine facial features. Among them include Spot Healing and Dodge & Burn to make the enhancement achievable. Since working on the platform can be difficult for beginners due to its complex interface, they are advised to enhance the portraits with tools like Repairit. It offers AI-powered features that can perform face editing with few taps.
FAQ
-
Q 1. Is Photoshop face retouching non-destructive during the editing process?
Yes, Photoshop face retouching is non-destructive if you use separate layers and techniques during the process. There are many features, like layer masks and color correction, which can enhance the picture while maintaining the natural look. -
Q 2. Do AI alternatives provide the same level of control as Photoshop?
AI alternatives like Repairit offer speed and an easy process but cannot provide complete manual control like Photoshop. The user can just make the pictures enhanced by using such tools but can’t adjust each frame individually. -
Q3. Is Photoshop face retouching suitable for everyday social media users or just professionals?
It is suitable for both, but primarily for professional benefits, as it offers advanced features that social media users do not commonly use. Social media users don't need such advanced features for their daily posting, and to save time, they mostly use AI tools.
