Videos can look dull, noisy, soft, or poorly lit for many reasons, including low-light shooting, incorrect exposure, compression, or camera limitations. These problems are common and often become more noticeable during playback or export, even if the footage seemed fine during recording.
DaVinci Resolve Studio is a professional tool designed not just for editing, but for enhancing video quality through color correction, noise reduction, and detail recovery. This guide focuses on practical problem-solving—fixing real quality issues step by step—before you apply any creative looks.
Key Takeaways
- Video enhancement focuses on fixing exposure, color, noise, and detail issues—not applying creative looks.
- DaVinci Resolve Studio includes Studio-only tools (like advanced noise reduction) that can noticeably improve quality.
- Proper project setup is essential; incorrect settings can limit how effective enhancements are.
- Some problems (extreme blur, heavy compression, very low resolution) have hard limits and may not be fully recoverable.
Table of Contents
Quick Diagnosis: What Looks Wrong in Your Footage?
Use this table to jump to the most relevant section first (and avoid overprocessing).
| What you see | Most likely cause | Start here |
| Footage looks flat/washed out | Low contrast or log/gamma mismatch | Part 3.1 (Exposure/Contrast) |
| Colors look “off” (too warm/green, skin tones weird) | White balance/color cast | Part 3.2 (White balance + scopes) |
| Grainy/noisy shadows (especially low light) | High ISO/underexposure | Part 4 (Noise reduction) |
| Soft but not fully blurred | Slight focus softness / low micro-contrast | Part 5 (Sharpen + Midtone Detail) |
| Blocky artifacts/banding | Heavy compression / low bitrate | Part 7 (Export) + Part 8 (limits) |
| Looks worse after export/upload | Wrong codec/bitrate/recompression | Part 7 (Export) + Part 9 (mistakes) |
Part 1: What “Video Enhancement” Means in DaVinci Resolve Studio
Before adjusting any controls, it helps to define “video enhancement” so you don’t apply the wrong tools.
Video Enhancement vs. Color Grading
Video enhancement focuses on fixing technical quality problems so footage looks correct and usable. Color grading is about style and creative intent.
- Enhancement fixes: exposure, noise, softness, color accuracy
- Color grading adds: mood, contrast style, cinematic looks
Enhancement should always come first. Applying creative looks to uncorrected footage often makes problems more visible.
Restoration vs. Creative Styling
These are often confused but serve different purposes:
- Restoration: Corrects flaws caused by recording conditions (low-light noise, incorrect white balance, washed-out footage)
- Creative styling: Applies an artistic look after the footage is technically sound
Trying to “style” damaged footage usually exaggerates flaws instead of hiding them.
Common Video Enhancement Goals
Most users enhance video to solve practical problems, not for creative effects:
- Improve brightness and contrast
- Reduce noise and grain
- Sharpen soft or slightly out-of-focus footage
- Fix inaccurate or dull colors
Why Enhancement Comes Before Creative Grading
Correcting exposure, color balance, and noise first ensures:
- More predictable results when grading
- Less overprocessing
- Cleaner exports with fewer artifacts
Skipping enhancement and grading first often leads to harsher noise, clipped highlights, and unstable colors.
Part 2: Before You Enhance – Project Setup for Best Results
Incorrect timeline or color settings can limit how effective enhancements are and may cause footage to look worse than it actually is.
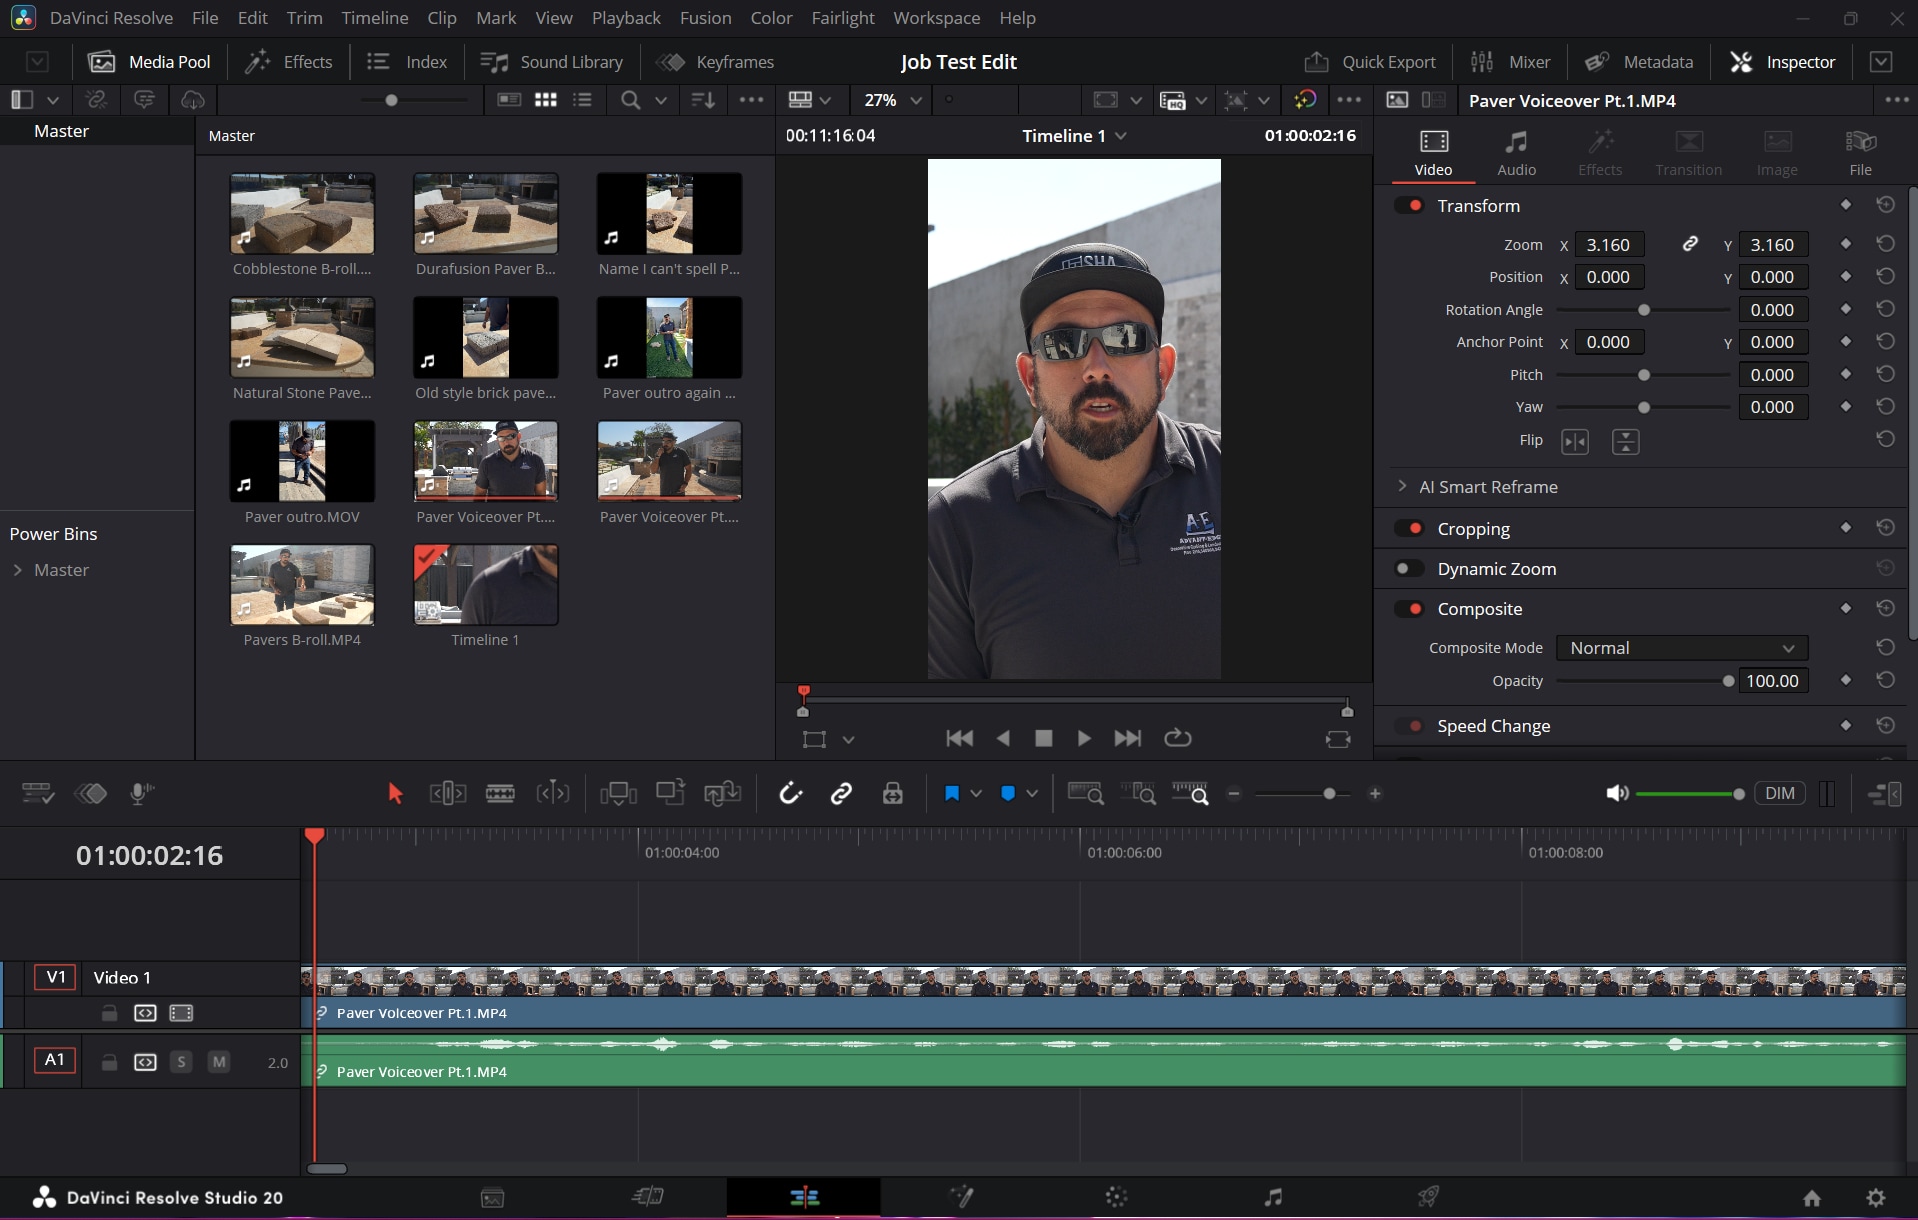
Import Footage Correctly
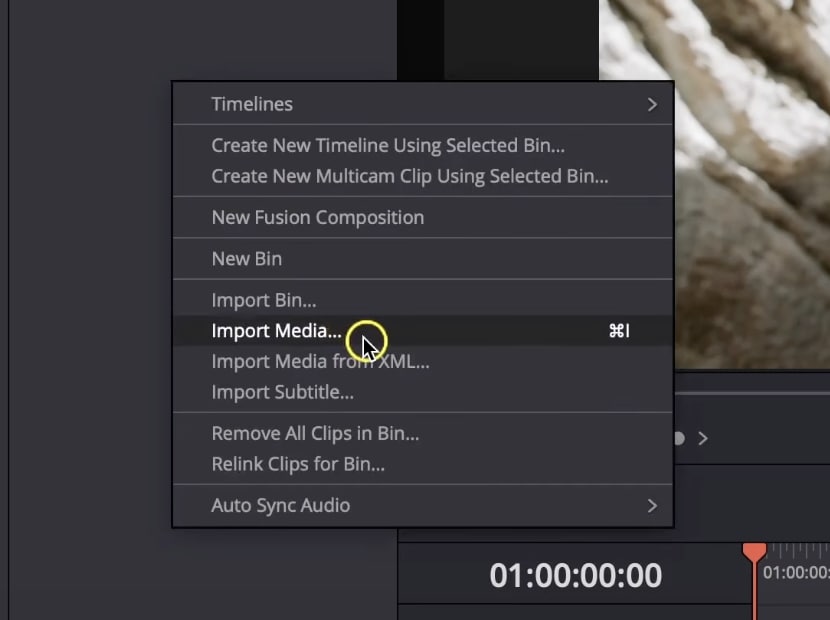
- Use the Media Pool to import original files whenever possible.
- Avoid importing already-exported or heavily compressed versions of the same clip.
- Confirm clips play smoothly before making adjustments.
Set the Correct Timeline Resolution
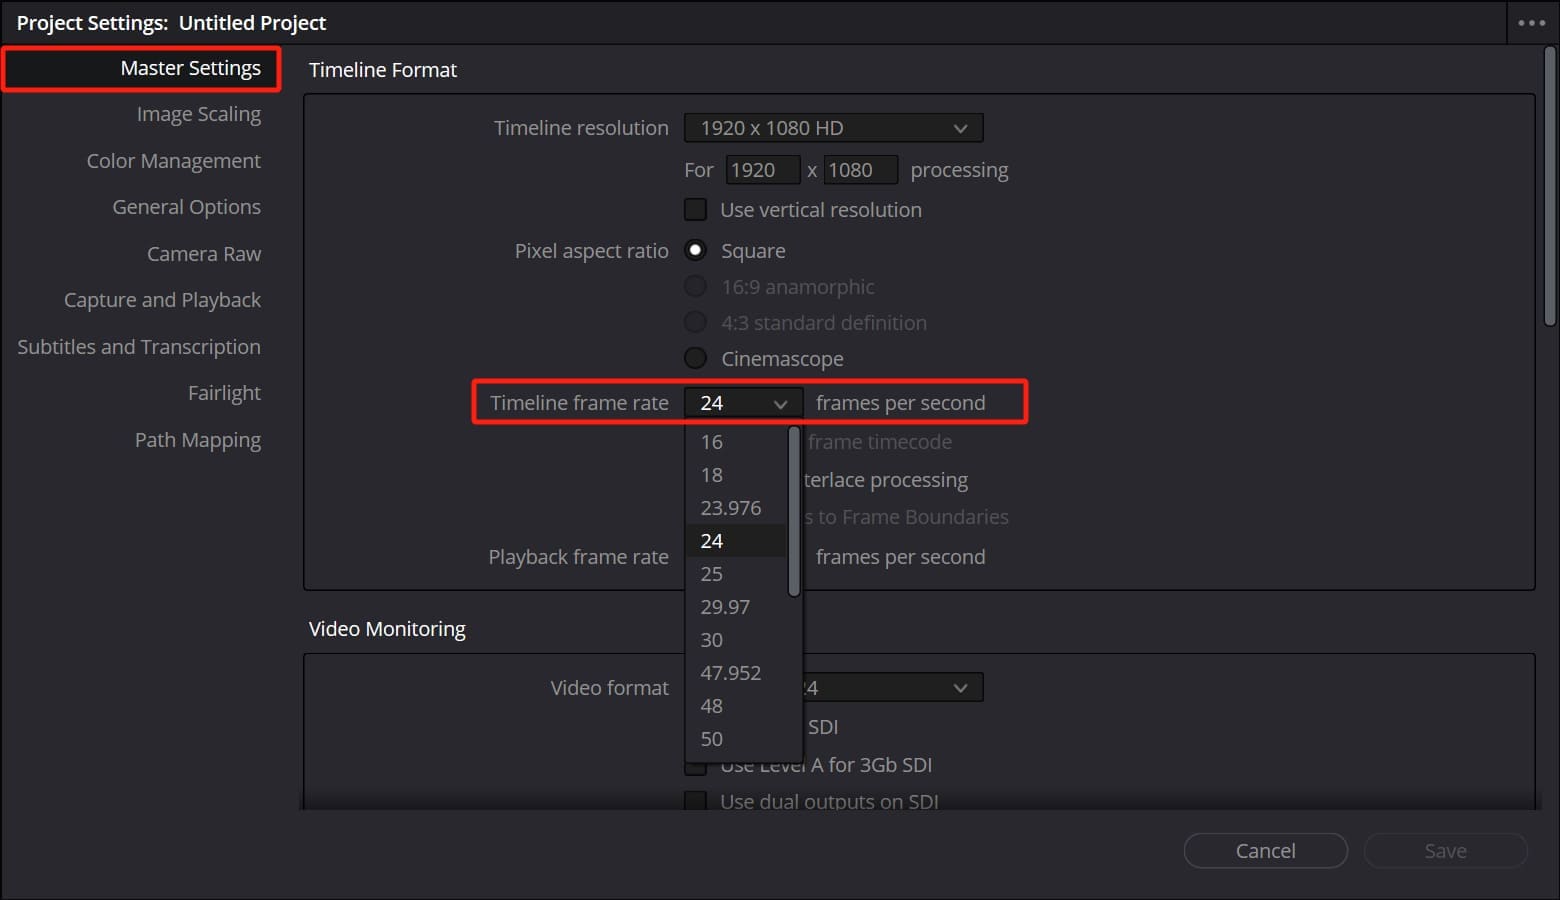
- Go to Project Settings → Master Settings.
- Match the timeline resolution to your source footage (for example, 1080p or 4K).
- Upscaling at this stage does not improve quality and can hide real detail issues.
Use this setup if: You want enhancements to reflect the actual quality of the footage.
Match the Frame Rate
- Set the timeline frame rate before editing.
- Match it exactly to your source footage.
- Changing frame rate later can introduce motion artifacts and stutter. Frame rate changes don’t “increase quality.”
Use this setup if: You notice unnatural motion or playback inconsistencies.
Choose the Right Color Management
DaVinci Resolve Studio offers two common options:
- DaVinci YRGB: manual control (good for learning enhancement basics)
- DaVinci YRGB Color Managed: helpful for mixed camera formats
Why setup matters: incorrect settings can make noise reduction less effective, cause exposure tools to behave oddly, and lead to misleading export results.
Part 3: Enhancing Video Color and Exposure (Core Fixes)
Most video quality issues come down to exposure and color balance. Instead of adjusting everything at once, fix the visible problem first.
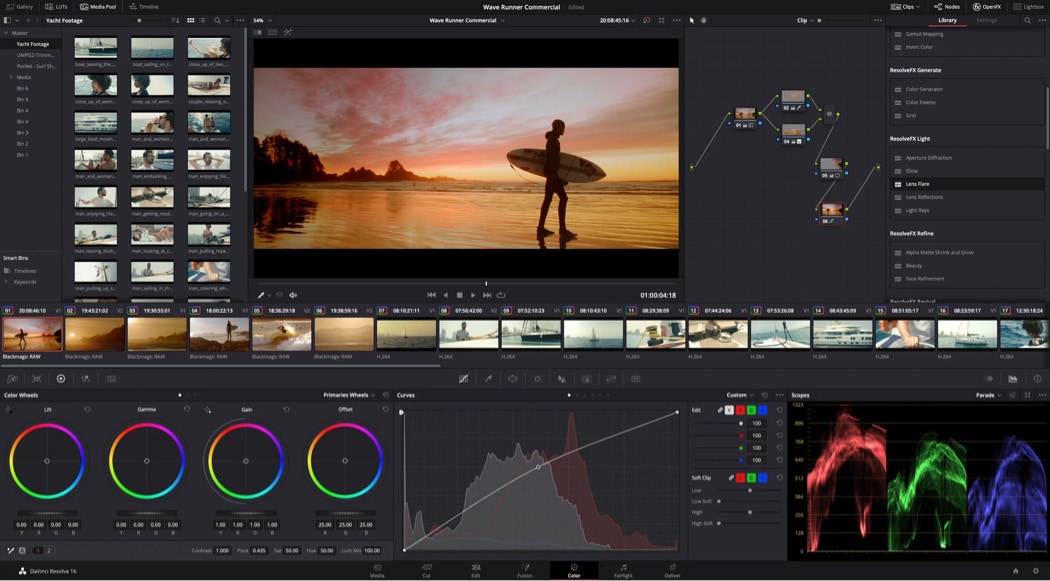
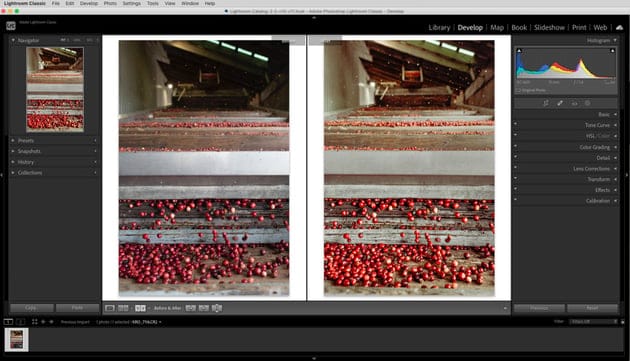
3.1 Fix Flat or Washed-Out Video
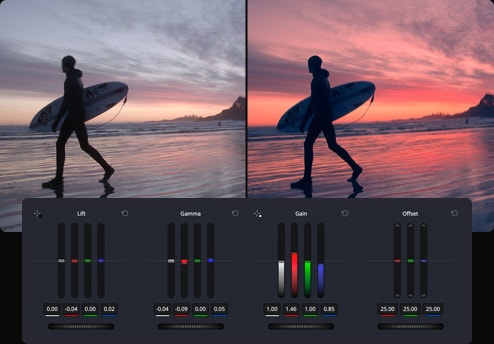
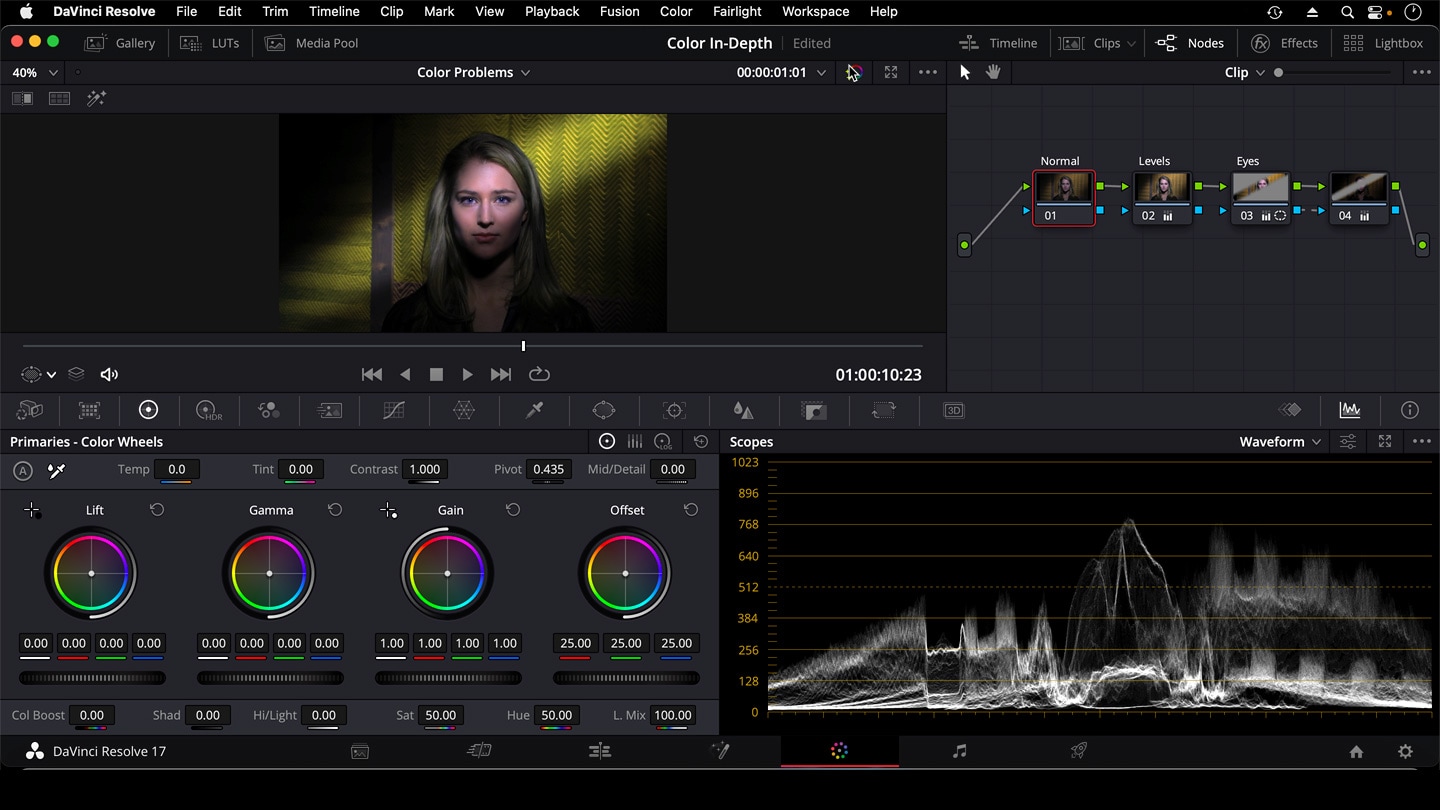
To bring life to dull or washed-out footage, focus on primary wheels and tonal adjustments:
Use Primary Wheels and tonal adjustments:
- Lift: Adjusts shadows/dark areas
- Gamma: Adjusts midtones
- Gain: Adjusts highlights/bright areas
Contrast and Pivot:
- Increase Contrast to make the image pop
- Adjust Pivot to shift the midpoint of tonal range for balanced brightness
Tips:
- Avoid clipping highlights or crushing shadows—check your Histogram or Waveform
- Make small incremental adjustments for natural-looking results
- Use scopes to monitor how changes affect detail across the image
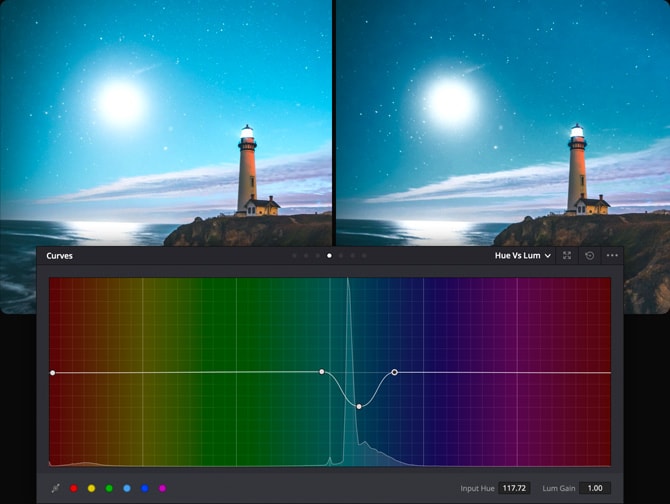
3.2 Correct White Balance and Color Casts
Proper white balance ensures colors look natural and eliminates unwanted color tints.
Temperature and Tint Controls
- Temperature: Adjusts warmth (yellow) vs coolness (blue)
- Tint: Corrects green vs magenta color casts
Using Scopes for Accuracy
- Waveform: Check overall luminance and color distribution
- Vectorscope: Ensure skin tones and key colors sit in the correct range
Common Beginner Mistakes:
- Overcompensating and introducing new color casts
- Relying only on the preview monitor instead of scopes
- Ignoring mixed lighting scenarios (e.g., indoor + window light)
Tips:
- Always correct exposure first—white balance works best on properly lit footage
- Make subtle adjustments to avoid unnatural color shifts
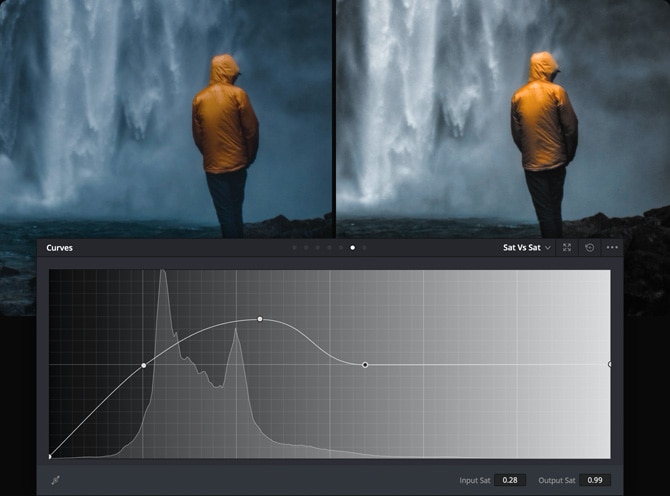
3.3 Improve Color Depth Without Oversaturation
Enhancing color depth makes your footage look richer and more detailed without making it look artificial.
Saturation vs Color Boost
- Saturation: Increases intensity of all colors equally; easy to overdo, may make skin tones look unnatural
- Color Boost: Targets less-saturated colors, producing a more balanced and natural look; ideal for flat footage
Midtone Detail
- Increases micro-contrast in midtones for better perceived sharpness and depth
- Small adjustments improve clarity; large adjustments can make skin rough or emphasize noise
Tips for Enhancing Without Oversaturation:
- Correct exposure and white balance first
- Increase Saturation gradually, then adjust Color Boost for subtle balance
- Use Midtone Detail sparingly to add depth
- Monitor scopes, not just the preview, to prevent overprocessing
- Avoid extreme adjustments that draw attention to corrections rather than the content
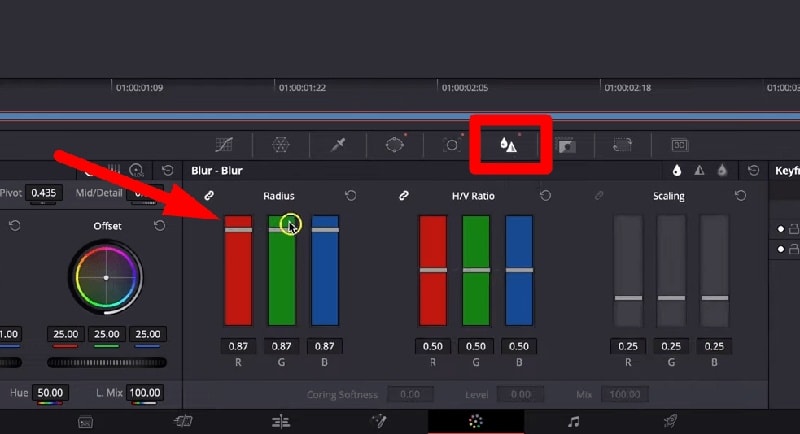
Part 4: Reducing Noise and Grain (Low-Light Footage Fixes)

⚠️ Studio-only: Temporal and Spatial Noise Reduction are DaVinci Resolve Studio features.
When to Apply Noise Reduction
- Apply noise reduction after color and exposure corrections, not before.
- Use it primarily for footage that looks grainy, speckled, or unevenly textured.
- Avoid applying it to already clean footage, as it can soften details unnecessarily.
Temporal vs Spatial Noise Reduction (Studio-Only Feature)
- Temporal Noise Reduction: Compares multiple frames to smooth out noise while preserving motion. Best for video with minimal fast-moving objects.
- Spatial Noise Reduction: Smooths noise within a single frame. Useful for still shots or slower footage.
Tip: Combine both for challenging low-light clips, but start subtly to maintain detail.
Step-by-Step Approach
Step 1: Open the Color page and select the clip needing noise reduction.
Step 2: Navigate to Motion Effects → Noise Reduction.
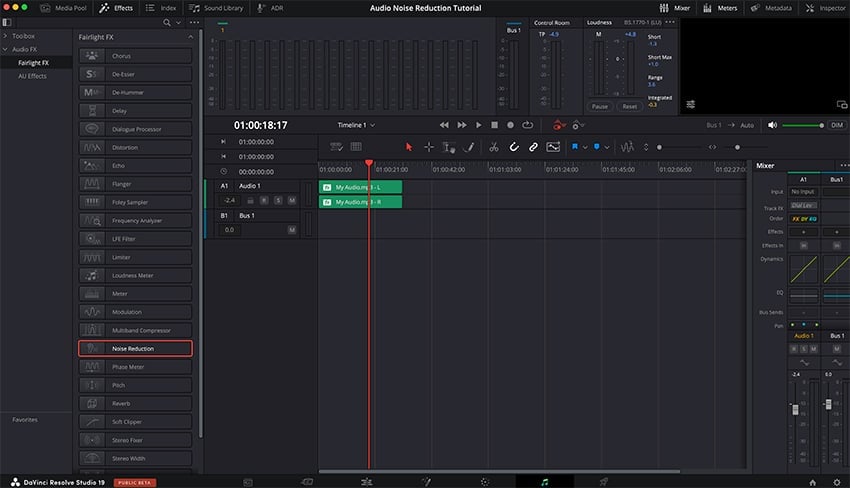
Step 3: Start with low values:
- Temporal: 2–4 frames
- Spatial: 10–20%
Step 4: Adjust gradually while viewing at full resolution.
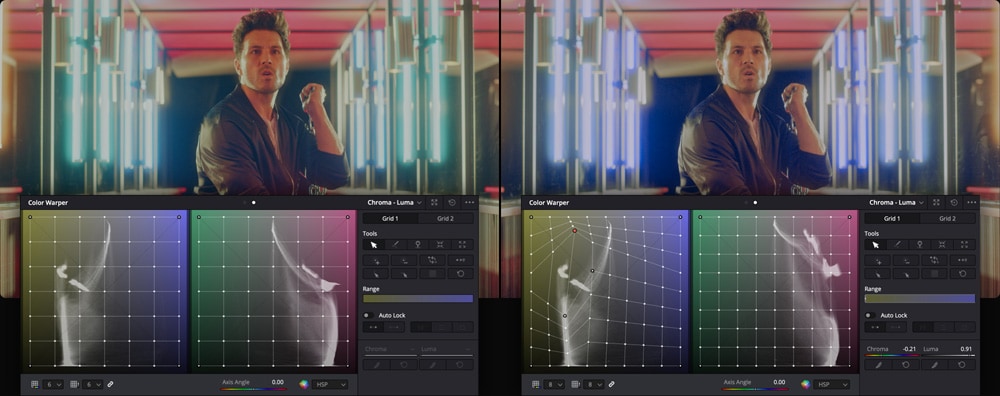
Step 5: Compare before/after using the Gallery or Split-Screen view.
Trade-Offs and Caution
- Detail Loss vs Smoothness: Higher values reduce noise but can blur fine details.
- Signs You’re Over-Processing: Skin textures look plastic, fine patterns disappear, or edges appear too soft.
- Always aim for a balance—smooth enough to reduce distraction, sharp enough to keep natural textures.
Pro Tip: Noise reduction is a subtle enhancement, not a magic fix. Correct exposure and white balance first, then use noise reduction sparingly to maintain the footage’s natural feel.
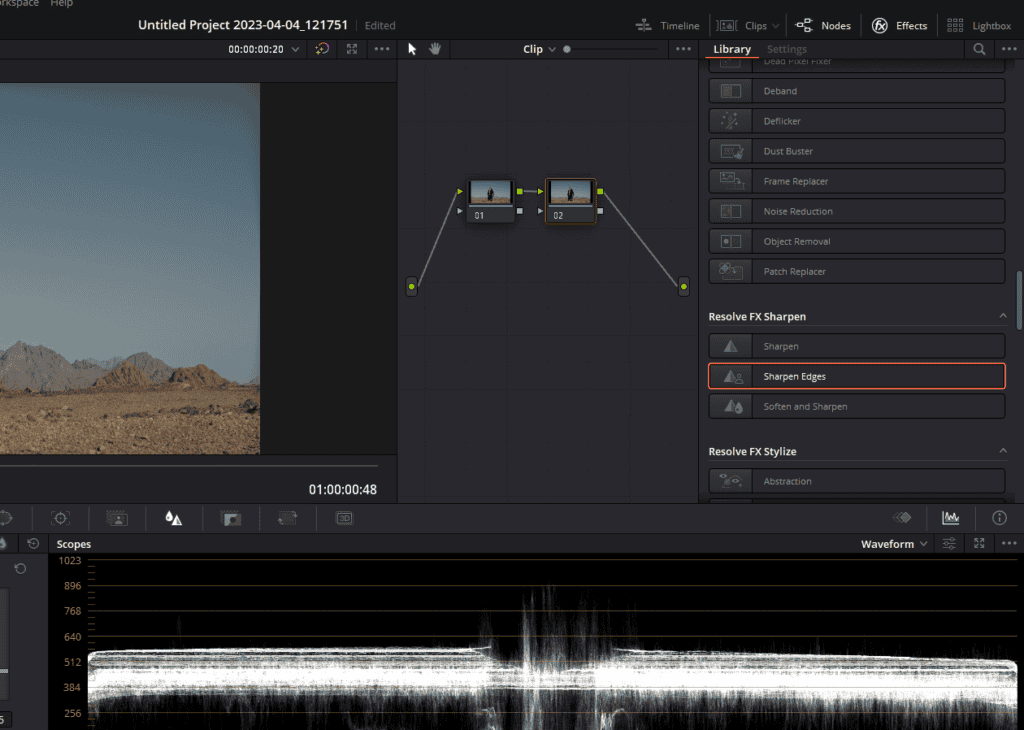
Part 5: Sharpening and Improving Detail Safely
Sharpening can improve soft footage, but overdoing it creates halos, noise, and unnatural textures. Here’s how to enhance detail safely in DaVinci Resolve Studio.
Understand the Difference Between Sharpening Tools
- Sharpen: Boosts overall edge contrast to make footage appear crisper. Effective for mildly soft footage but easy to overdo.
- Midtone Detail: Enhances micro-contrast in midtones without affecting shadows or highlights. Adds perceived depth and clarity subtly.
- Texture Pop-style Effects: Accentuates fine details and textures. Avoid extreme values—can make skin look harsh and amplify noise.
How to Enhance Soft Footage Without Halos
- Correct exposure and white balance before sharpening.
- Apply Sharpen in small increments (start around 5–15%).
- Gradually increase Midtone Detail only if needed.
- Watch closely for halos around edges—reduce adjustments if visible.
- Avoid using extreme Texture Pop effects unless necessary; subtlety is key.
⚠️ If noise is present, do noise reduction first, then sharpen lightly.
When Sharpening Won’t Work
- True resolution limits cannot be fixed—heavily blurred or low-resolution footage won’t regain lost detail.
- In these cases, use minor sharpening with other enhancements for subtle improvement rather than expecting a full fix.
Part 6: Enhancing Video with LUTs (When and When Not to Use Them)
LUTs, or Look-Up Tables, are widely used in video editing to quickly apply a specific color style or mood. They can save time and help maintain visual consistency across multiple clips. However, LUTs are not a magic fix for every video issue. Misusing them can make your footage look unnatural or fail to address underlying problems.
What LUTs Are Good For:
- Quickly achieving a consistent look across a project
- Adding cinematic tones or stylistic color grading
- Speeding up workflows when you need a ready-made color adjustment
What LUTs Cannot Fix:
- Noise or grain in low-light footage
- Soft or blurry images
- Artifacts caused by heavy compression
For best results, LUTs should always be applied after you’ve addressed basic video issues such as exposure, white balance, and contrast. Using LUTs as the first step can exaggerate color problems and make adjustments harder to control.
Tips for Using LUTs Safely:
- Apply them subtly; most LUTs look best at partial intensity rather than full strength
- Combine LUTs with manual tweaks to avoid overly stylized results
- Always check your scopes to ensure your highlights, shadows, and color balance remain natural
Remember, LUTs are a complement to your base enhancement work, not a replacement. Properly correcting your footage first ensures that the LUT enhances the video rather than masking flaws.
Part 7: Export Settings to Preserve Enhanced Quality
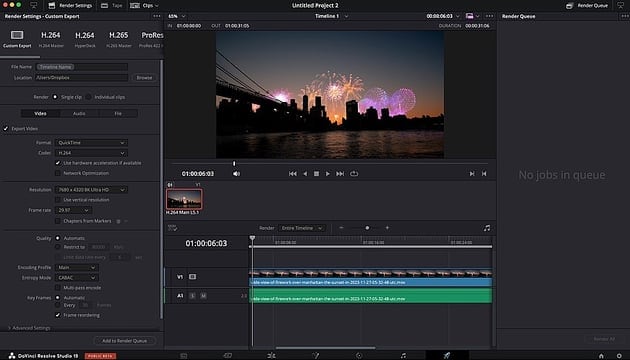
Even after carefully enhancing your video, improper export settings can undo all your work. Choosing the right codec, bitrate, and format is essential to preserve the improvements you’ve made in color, sharpness, and detail.
Codec Choices:
- H.264 – Widely compatible and good for web uploads, but may compress details slightly.
- H.265 (HEVC) – More efficient compression, preserves more detail at smaller file sizes, but may have slower encoding and compatibility issues on older devices.
- ProRes / DNxHR – Ideal for high-quality master files. Maintains maximum detail, suitable for further editing, archiving, or professional delivery.
Bitrate Considerations:
- Higher bitrates retain more detail and color accuracy.
- Avoid very low bitrates for enhanced footage, as compression can introduce banding, blur, or loss of sharpness.
- Many platforms (like YouTube) will recompress your file, so leaving some headroom in bitrate helps maintain quality after upload.
Platform-Specific Tips:
- YouTube / Social Media – Export using H.264 or H.265 with slightly higher bitrate than the platform’s recommended minimum to prevent degradation.
- Local Playback / Archiving – Use ProRes or DNxHR to preserve every enhancement without compression artifacts.
- Always match your export resolution and frame rate to the original or intended playback format to avoid scaling issues.
Proper export settings ensure that all the time spent correcting exposure, color, noise, and detail carries through to the final video. Skipping this step can make even perfectly enhanced footage look worse than it did before editing.
Part 8: When DaVinci Resolve Studio Isn’t Enough (Optional Alternative)
Resolve is powerful, but some problems have hard limits:
- Extremely low-resolution footage: When the original video lacks detail, Resolve cannot create true sharpness—enhancement can only go so far.
- Heavy compression artifacts: Videos that have been highly compressed often show blockiness, banding, or color issues that are difficult to fully correct in Resolve.
- Old or damaged videos: Footage from older cameras or physically degraded files may have noise, color shifts, or missing frames that require specialized restoration beyond Resolve’s scope.
Only If: Your Footage Has Hard Limits
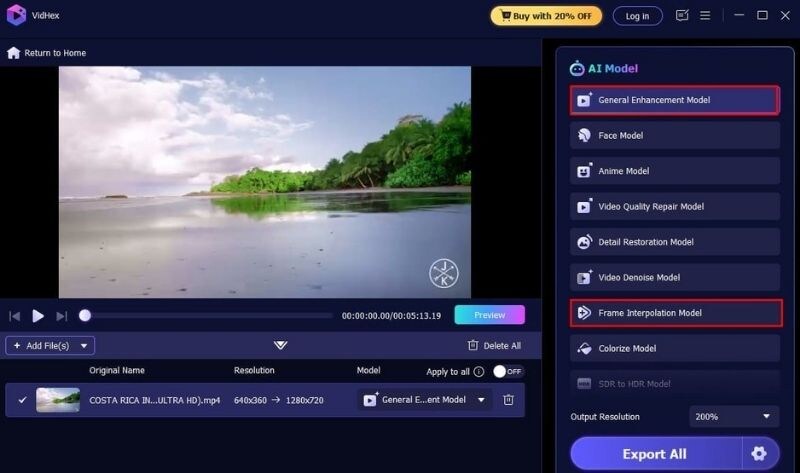
If your footage is very low-res or heavily compressed, Resolve can improve it only up to a point. You may consider an AI-assisted video enhancement tool to generate a cleaner base before doing final corrections in Resolve. Repairit Video Enhancer is an AI-based tool that may help in edge cases such as:
- Making low-resolution footage look cleaner before editing
- Reducing the visibility of certain compression artifacts
- Improving perceived clarity for old clips
What it cannot do:
- Restore true details that were never captured (no tool can fully recreate missing information)
- Replace proper exposure/color correction workflows in Resolve
Step-by-step Using Wondershare Repairit to Enhance Videos
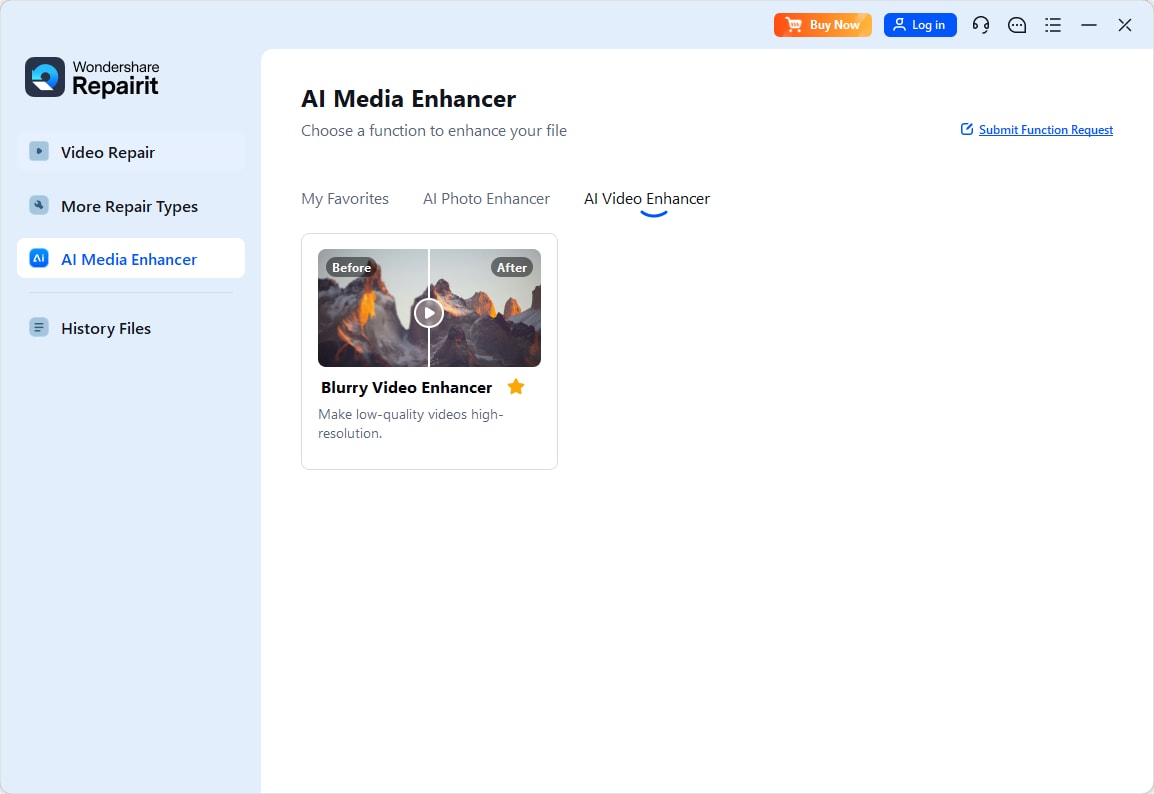
Step 1 Launch the software and Click AI Video Enhancer, and then upload the videos that you want to enhance.
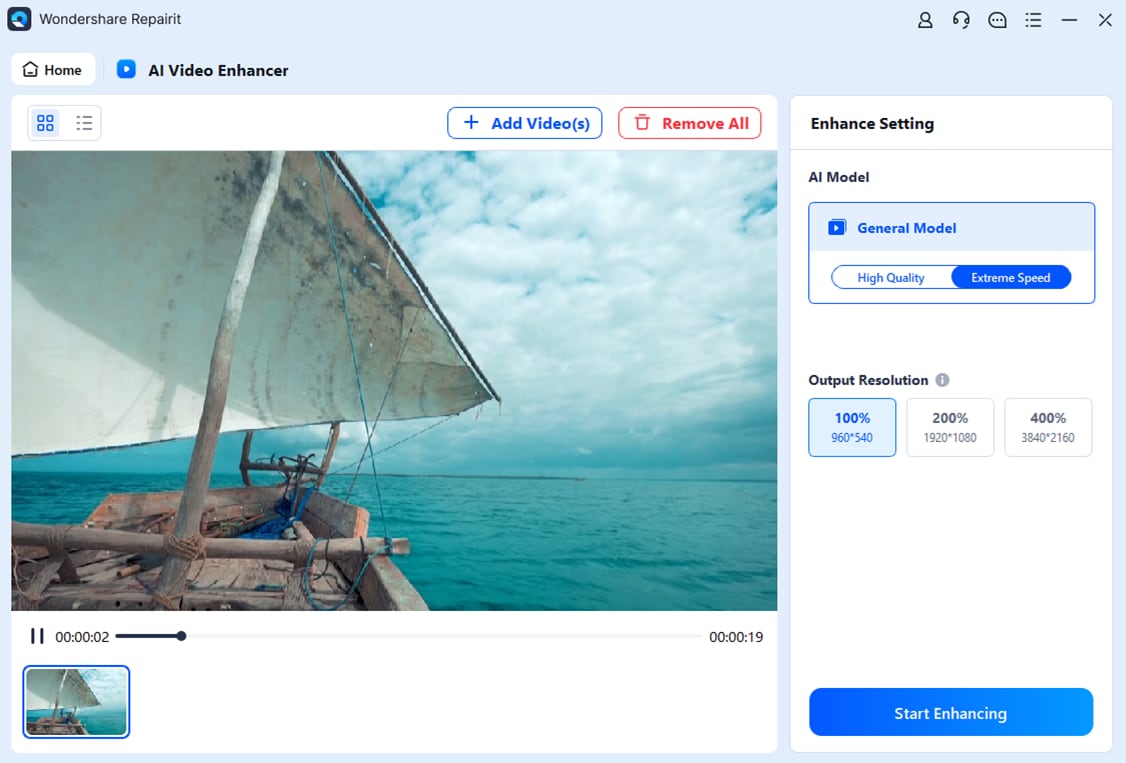
Step 2 After you select the output resolution, this program will start enhancing automatically.
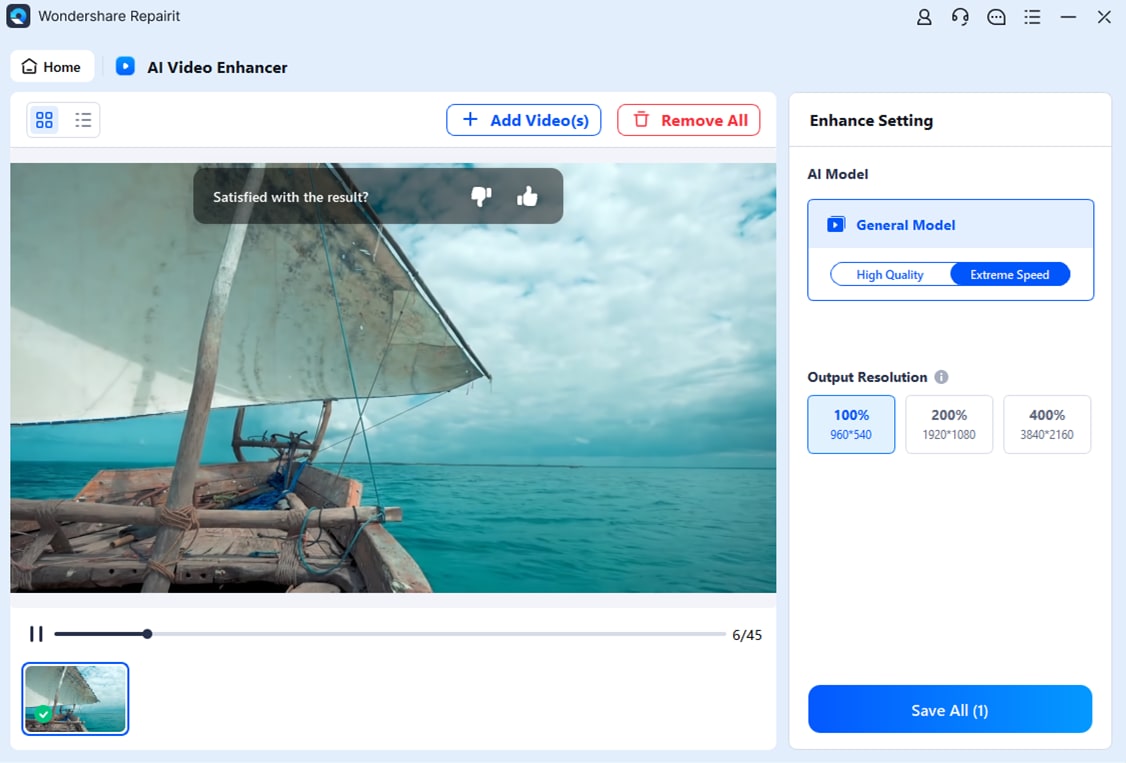
Step 3 All is done! Now you can preview the upscaled videos, and download them to your device.
Part 9: Common Mistakes That Make Video Look Worse
Even with powerful tools like DaVinci Resolve Studio, it’s easy to unintentionally degrade your video while trying to enhance it. Understanding common pitfalls helps you avoid overprocessing and maintain natural, professional results.
- Overusing Noise Reduction: Applying too much noise reduction can remove fine details, leaving your footage looking overly smooth or plasticky. Always balance smoothness with preserving texture.
- Excessive Sharpening: Too much sharpening may create harsh edges, halos, or exaggerate noise. Use subtle adjustments with Midtone Detail or Sharpen and avoid extreme settings.
- Relying on LUTs Alone: LUTs are great for quick grading or consistency, but they can’t fix noise, blur, or exposure problems. Always perform base enhancement before applying LUTs.
- Enhancing Without Scopes: Adjusting color and exposure by eye alone can result in clipping, inaccurate white balance, or unnatural saturation. Use Waveform, Vectorscope, and Histogram to monitor your changes.
- Exporting With Low Bitrates: Even well-enhanced footage can look degraded if exported with insufficient bitrate. Choose codecs and bitrate settings that preserve the improvements made during enhancement.
By avoiding these mistakes, you can make the most of DaVinci Resolve Studio and ensure that your enhancements genuinely improve video quality without introducing new issues.
Conclusion
Video enhancement is about fixing real problems—dull exposure, inaccurate color, noise, and mild softness—without overprocessing. DaVinci Resolve Studio works best when you follow a methodical order: setup → exposure/color → noise reduction → sharpening → LUT (optional) → export.
For difficult footage (very low resolution, heavy compression, older clips), optional AI-assisted tools like Wondershare Repairit can provide a cleaner starting point—but they’re situational and not a replacement for proper Resolve workflows. With the right steps and realistic expectations, most videos can be noticeably improved while staying natural.
FAQs
-
1. Is DaVinci Resolve Studio better than the free version for video enhancement?
Yes. Studio includes advanced features like Temporal/Spatial Noise Reduction and other Neural Engine tools that significantly help enhancement. -
2. Can beginners enhance videos using DaVinci Resolve Studio?
Yes. If you follow a basic correction-first workflow and rely on scopes, beginners can achieve strong improvements. -
3. What tools in DaVinci Resolve Studio help improve video quality the most?
Primary Wheels, scopes, Studio noise reduction, Midtone Detail, Sharpen (subtle), and correct export settings. -
4. Does enhancing video in DaVinci Resolve Studio affect export quality?
Enhancement improves image quality, but export settings can degrade it if codec/bitrate are set too low. -
5. Do I need a powerful computer to enhance video in DaVinci Resolve Studio?
For best performance, yes—especially for Studio noise reduction and GPU-heavy effects.