Is your Mac suddenly silent with no sound output? It’s completely annoying when you turn on your Mac to watch the movie, and you find that there is no sound. If this is your case, then don’t worry! It often happens, and it’s not a problematic issue you can’t resolve shortly. Many users report that their Mac audio is not working or that no audio output device is detected, but most of the time, these issues are easy to fix.
In this article, I have mentioned all the valuable and universal solutions to resolve the “Mac no output device found” issue. Whether you're dealing with a missing Mac audio output option or unclear sound settings, this guide has got you covered. However, you may need to work on all the suggested methods, but I suggest you stay calm while performing the fixes since it saves time and avoid technical glitches. Here we go!
Part 1: Overview of Mac No Output Device No Found
1. What is it?
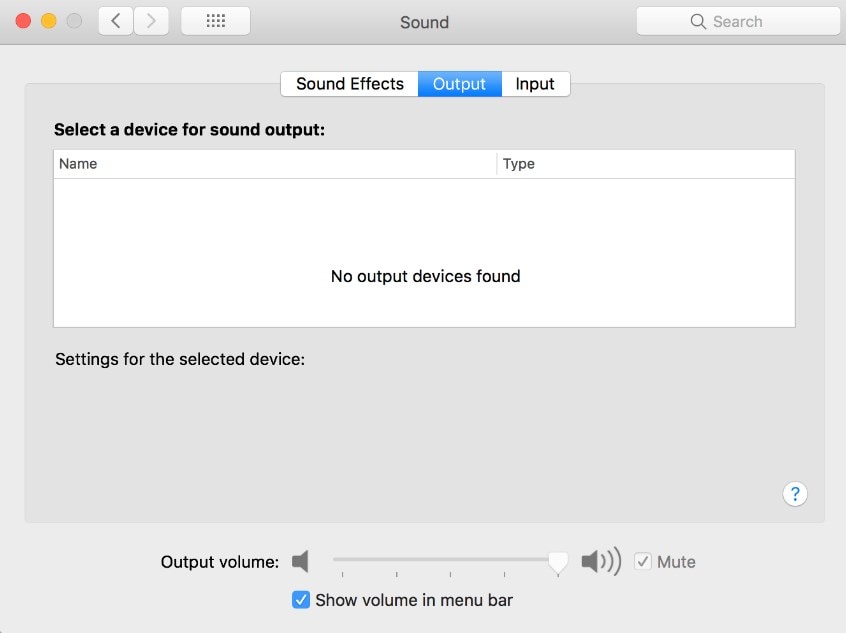
"Mac No Output Device Found" is basically an error that occurs when there is an issue in increasing or decreasing the volume of a Mac. This often results in Mac audio not working, even when everything seems properly connected. You can find this error under the sound effects settings. This can be either a hardware or software issue. Don’t worry—it is not a complex error to solve. You can resolve this error with a few changes and updates and enjoy the beat as usual.
If you want to check it yourself, follow the given process.
System preferences >> sound >> output
2. What will cause it?
Outdated Mac, corrupt, missing, or broken audio drivers are the universal reasons for Mac no sound output device found. However, several more reasons cause Mac no audio problems, such as app problems, external speakers, outdated iOS versions, RAM, etc. To help you out, I have mentioned all the tested solutions for the given issues. You’re requested to perform each solution until the problem goes away.
Part 2: Troubleshoot Mac No Output Devices Found
Try these following fixes and resolve no output devices found messages on Mac.
|
🔧 Fix |
✅ Advantage |
📋 How to Do It Briefly |
|
Quickly identifies if the issue is app-specific |
Test sound in multiple apps to isolate whether it's an app problem. |
|
|
Clears temporary glitches and resets system processes |
Press Control + Command + Power button to restart your Mac. |
|
|
Helps isolate user profile corruption |
Shut down, hold Shift key to boot in Safe Mode, and create a new user account. |
|
|
Prevents audio from routing to wrong external outputs |
Unplug any headphones or external speakers connected to the Mac. |
|
|
Ensures the correct output device is selected |
Go to System Preferences > Sound > Output and select internal speakers. |
|
|
Stops sound from going to Bluetooth devices |
Go to System Preferences > Bluetooth and turn off Bluetooth. |
|
|
Resets audio and hardware-related settings to default |
Shut down your Mac, hold Command + Option + P + R during startup for 20 seconds. |
|
|
Fixes OS-level bugs and ensures driver compatibility |
Go to App Store > Updates and install the latest macOS version. |
1. Check if it’s the app’s problem
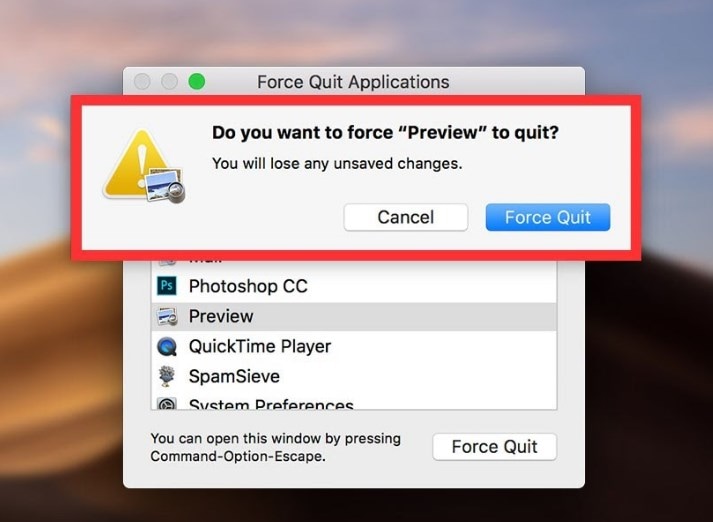
If Mac has no sound issue, you must figure out whether it is an app problem. For instance, you are using the Spotify app for music, and no sound issue occurs. So, play sound on another app like YouTube, iTunes, etc., to know the actual issue. If you see there is an app problem, then follow the given steps.
- Choose apple menu >> force quit the app (choose the app from the list) >> tap on force quit.
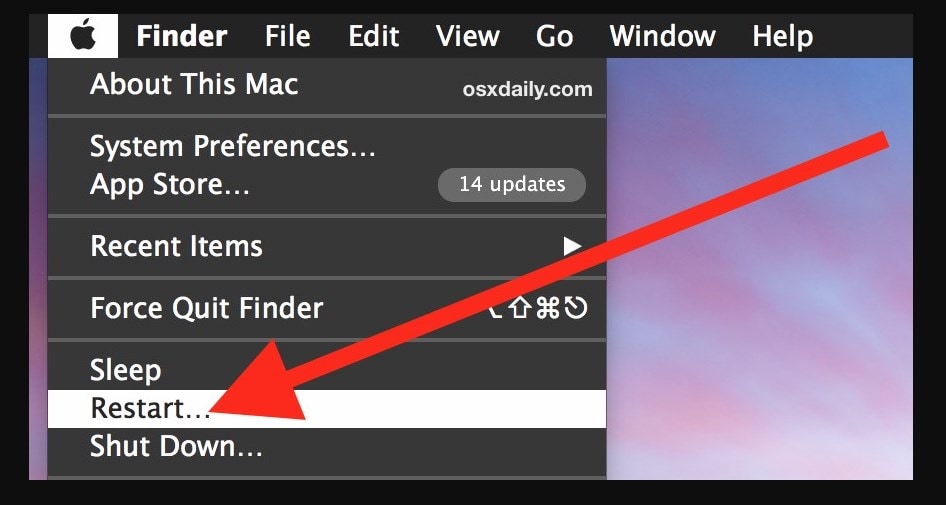
- Restart your Mac, choosing apple menu >> restart.
I hope this time you are not getting any issues.
However, if you see no cause for the app, moving to the next solution can be helpful.
2. Restart your Mac
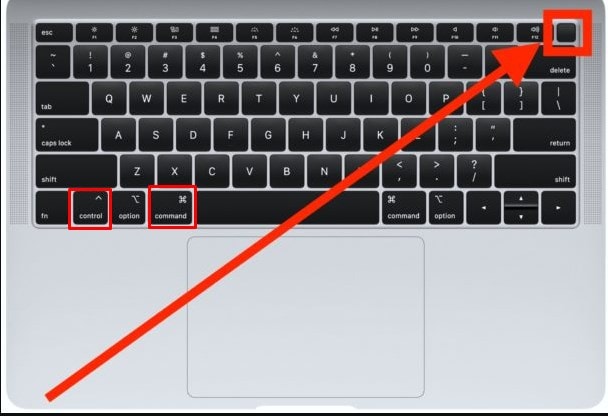
Restarting Mac is also one of the best options to resolve all glitches running on the computer. Even experts suggest restarting a computer can immediately remove bugs and resolve network issues.
To restart Mac, enter control + command + Power button.
3. Create a testing account in safe mode
Don't feel bad if the above two methods didn't work for you. Try testing your account on safe mode! With this method, you need to create a new Apple account and test it with a safe mode that works properly in the new account. Here's your step-by-step process:
Step 1: Shut down Mac.

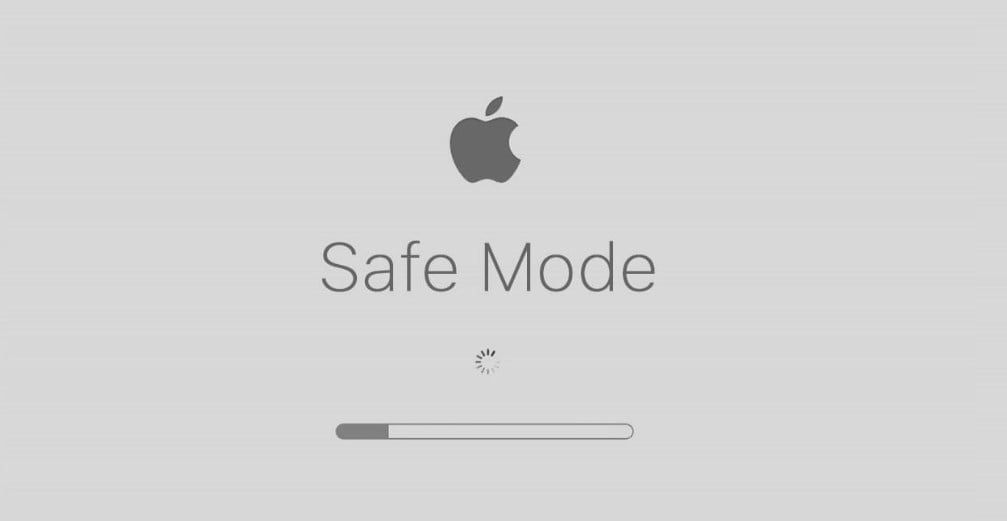
Step 2: Hold the shift key and press the power button to start with safe mode.
Don’t unpress the shift key until you see the Apple logo.
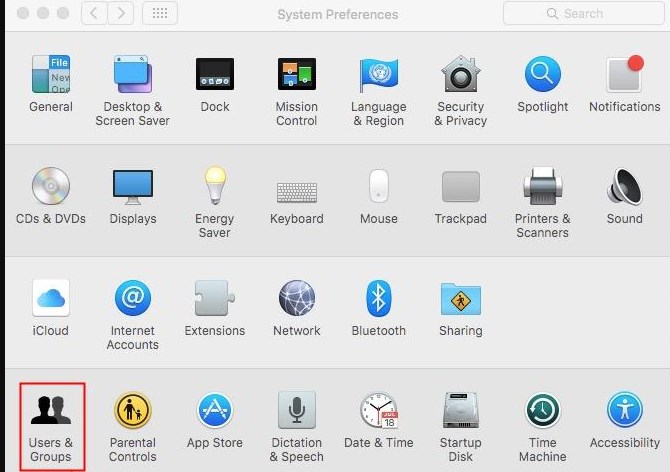
Step 3: Go to system preferences and click on users & groups.
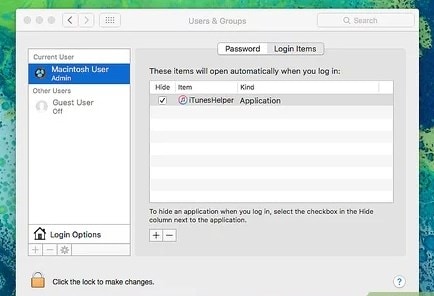
Step 4: Next, click on the lock icon >> add the icon.
Then, enter the user details, including the password, if asked.
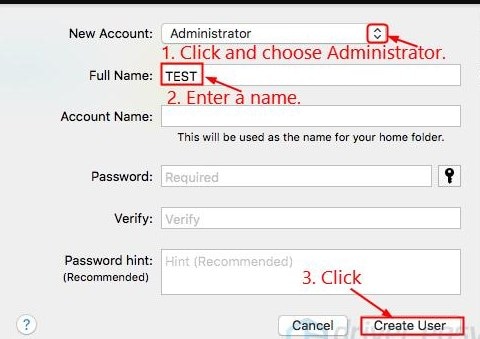
Step 5: Now, you have a new account.
Choose Administrator in your new account and enter your full name for your testing account. Then, click on create a user.
Step 6: Next, you will be asked to confirm creating the account without a password.
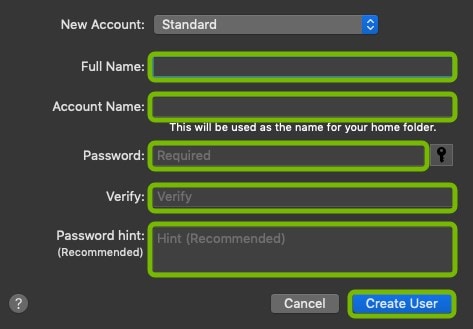
Step 7: Click on the OK button and close the window.
Step 8: Restart Mac and log in with your new testing account.
Check the sound if it is working now. If your answer is yes, this means your old account is corrupted. So, contact apple support to resolve this issue.
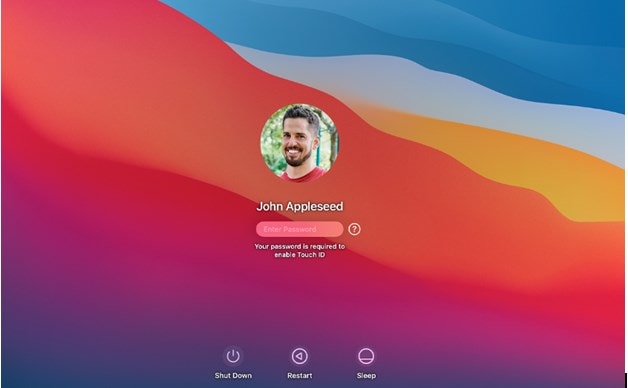
However, if your answer is no, move to the next solution!
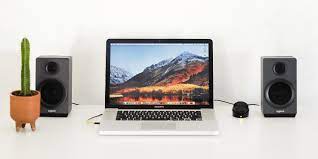
4. Disconnect external speakers
Sometimes, Mac, no output device found error occurs because it is sending audio to other external speakers attached. So, cross-check the external devices and ensure they are unplugged.
5. Check the audio settings
Another easy solution you can try is checking the audio settings on Mac. Here’s how you can do this.
Step 1: Navigate the system and preferences on Mac and then go to the sound option.
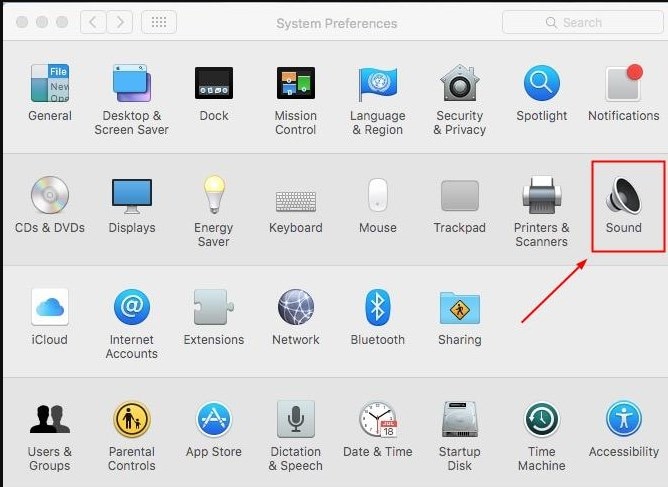
Step 2: Click on the output button, then choose internal speakers.
Next, move the output volume slider to a higher notch and ensure the mute button is unchecked.
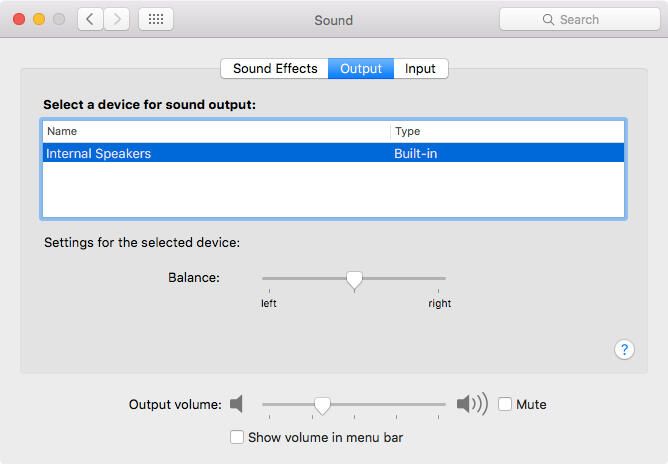
Step 3: Now, check if you can enjoy the sound again.
6. Turn off Bluetooth
Check if Bluetooth is on, then turning it off makes sense since it sends sound to connected devices. Here’s how you can turn off the Bluetooth.
Step 1: Go to the system & preferences option and click on Bluetooth.
Check if it says on; then turn it off.
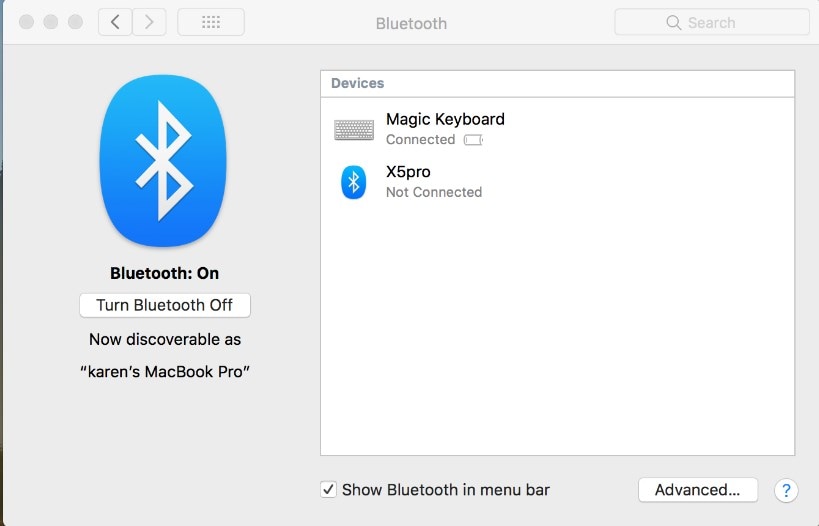
If it says no, close the window and proceed to the next solution.
7. Reset NVRAM
If none of the fixes works for you, resetting NVRAM can help you out of the Mac no sound issue. Here’s how you can process the resetting.
Step 1: First, shut down your computer.
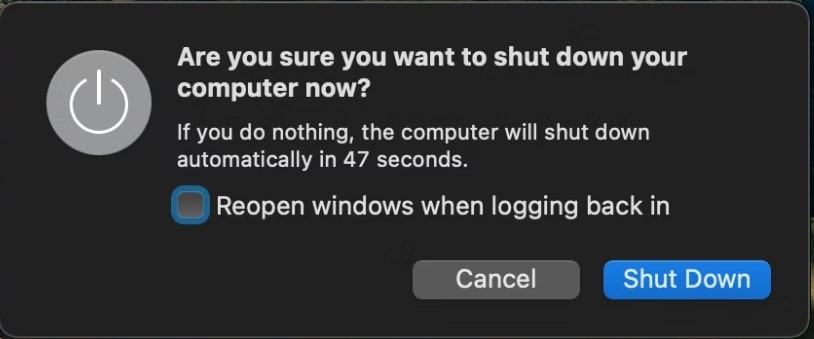
Step 2: After a few seconds, turn on the computer by pressing the power button.
And immediately hold down the command key + options/alt key + P and R simultaneously.
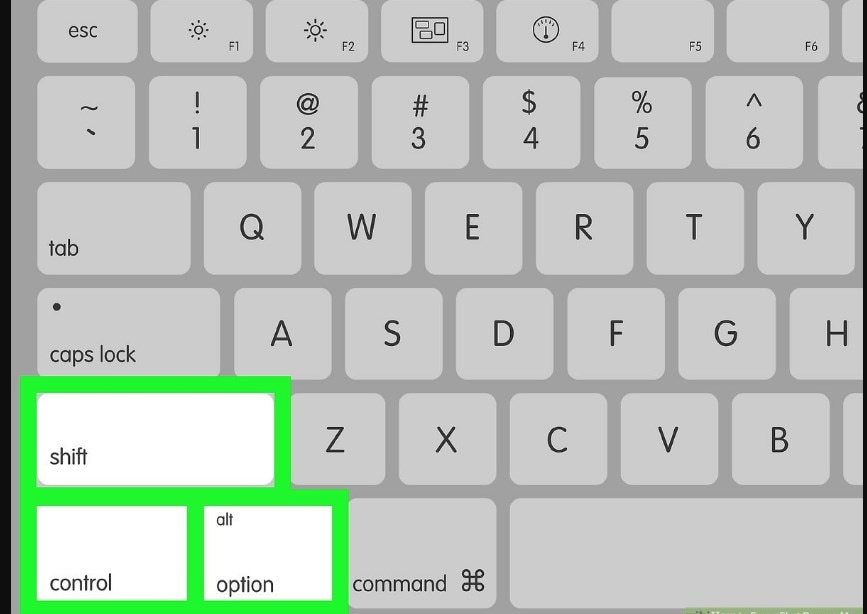
Step 3: Press all keys for 20 seconds until you won’t hear the start-up sound.
Step 4: Once done, your computer will feel refreshed with default settings, and you’re ready to go.
At this point, you might need to configure volume settings.
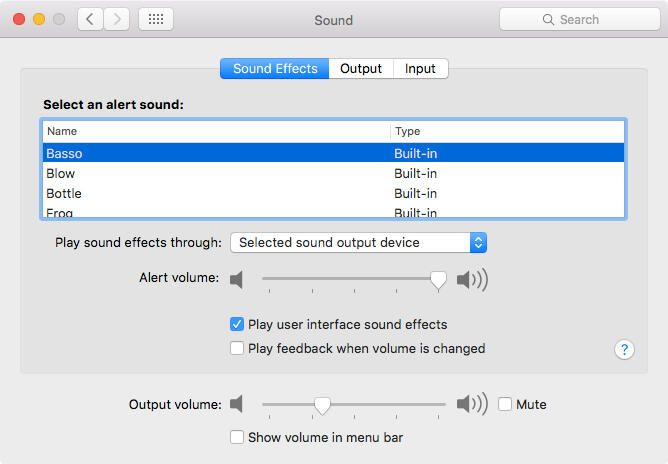
Step 5: Now, test the sound if it is playing.
8. Update your Mac OS
Still, if you’re facing the no output device found error, then updating Mac OS can resolve all minor to significant glitches present on Mac. To update the Mac OS, follow the given steps.
Step 1: Go to app stores and choose updates.
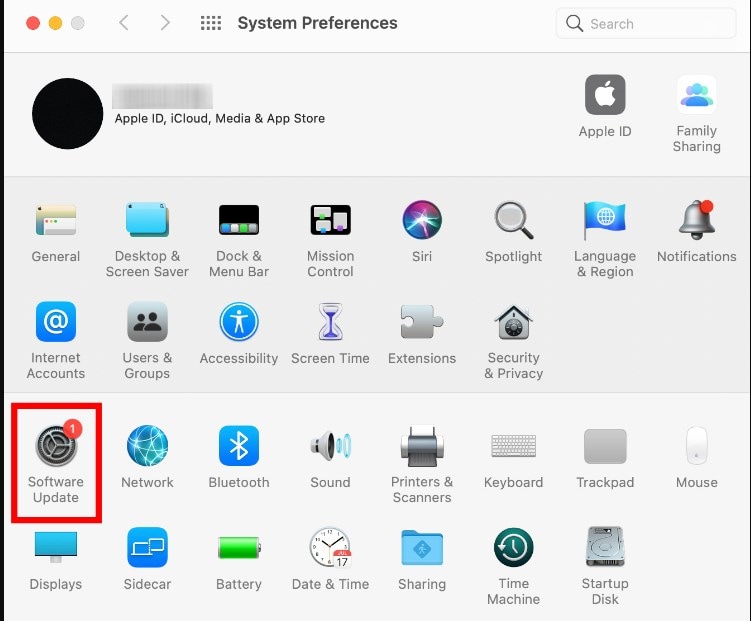
Step 2: Choose the latest Mac OS updates to update.
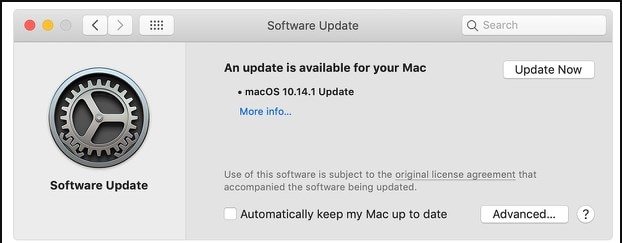
Step 3: Wait for a few minutes until the updates won’t be installed.
Then, your computer will restart automatically.
Check now, everything is fixed, and you’re ready to enjoy the sound.
Part 3: How to Fix Corrupt Audio Files on Your Mac
Here is your bonus! If you want to avoid "Mac no sound output devices found" error, try Wondershare Repairit - Audio Repair. First, it is not an application that resolves your error but helps you enjoy the sound back since it repairs corrupted audio files on your Mac.

Wondershare Repairit - Audio Repair

-
Repair damaged audios with all levels of corruption, such as audio not working, clipping audio, humming audio, rumbling audio, sibilant audio, out-of-sync audio, etc.
-
Repair audios of diverse formats, including MP3, M4A, FLAC, AAC, WAV, etc.
-
Repair damaged or corrupted audios from mutiple devices: portable voice recorder, recording software, shooting apparatus, SD cards, phones, hard drives, USB flash drives, etc.
-
Support Windows 11/10/8/7/Vista, Windows Server 2003/2008/2012/2016/2019/2022, and macOS 10.12~macOS 14.
To help you out, I am sharing a step-by-step guide on how to use Wondershare Repairit to repair audio files on Mac. Here we go!
Step 1: First, you must download the Wondershare Repairit for Mac on your computer.
Step 2: To upload the damaged or corrupted audio files from your Mac, choose "More Types Repair" from the sidebar, and click "Audio Repair". Then press the "Add" button.
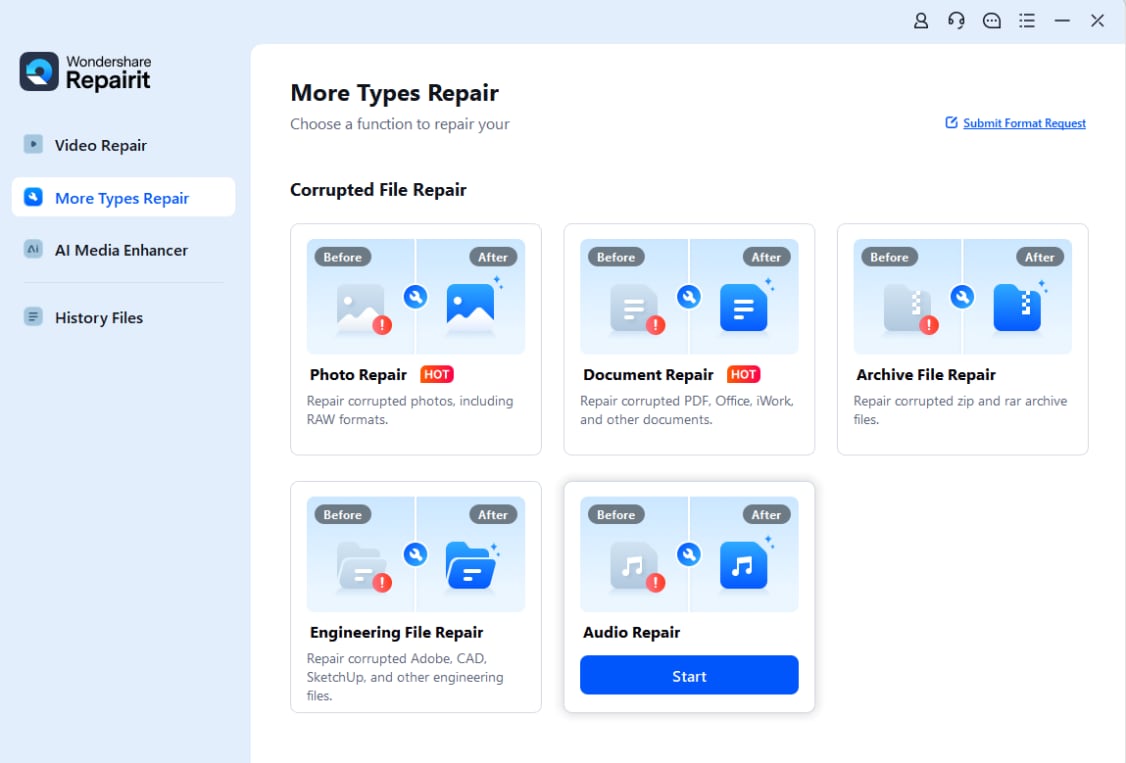
Note: Repairit's batch processing capability allows you to input numerous audio files in various formats and repair them all at once.
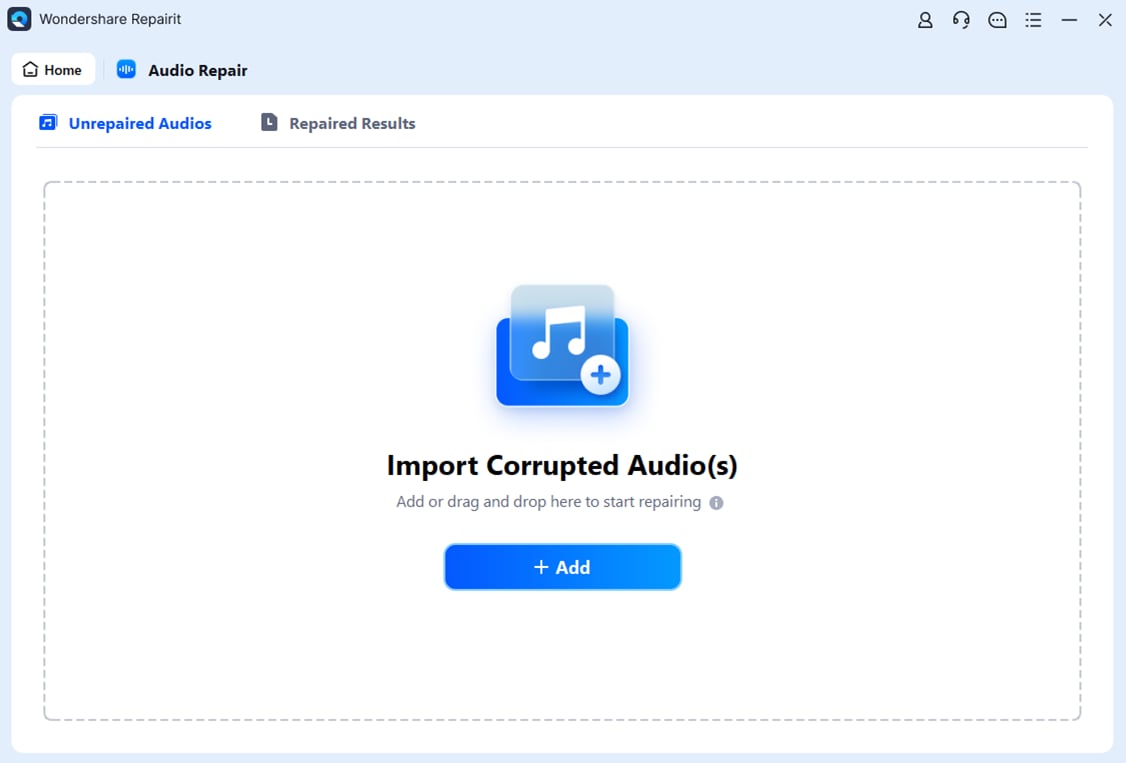
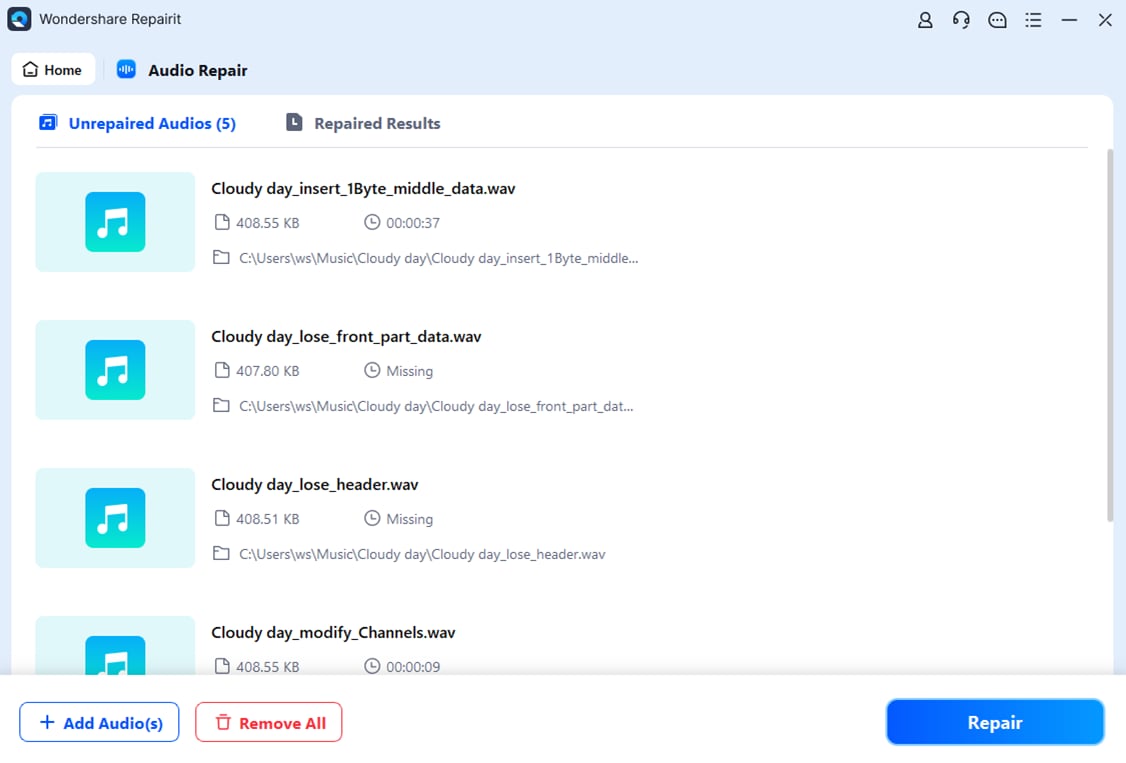
Once your audio files have been uploaded to Repairit, you can view each one's specific details and check the File Name, File Size, and File Path. Then, you can delete any audio file by selecting the trash can icon next to its information or by selecting the "Remove All" button at the bottom to eliminate all audio files that have been uploaded.
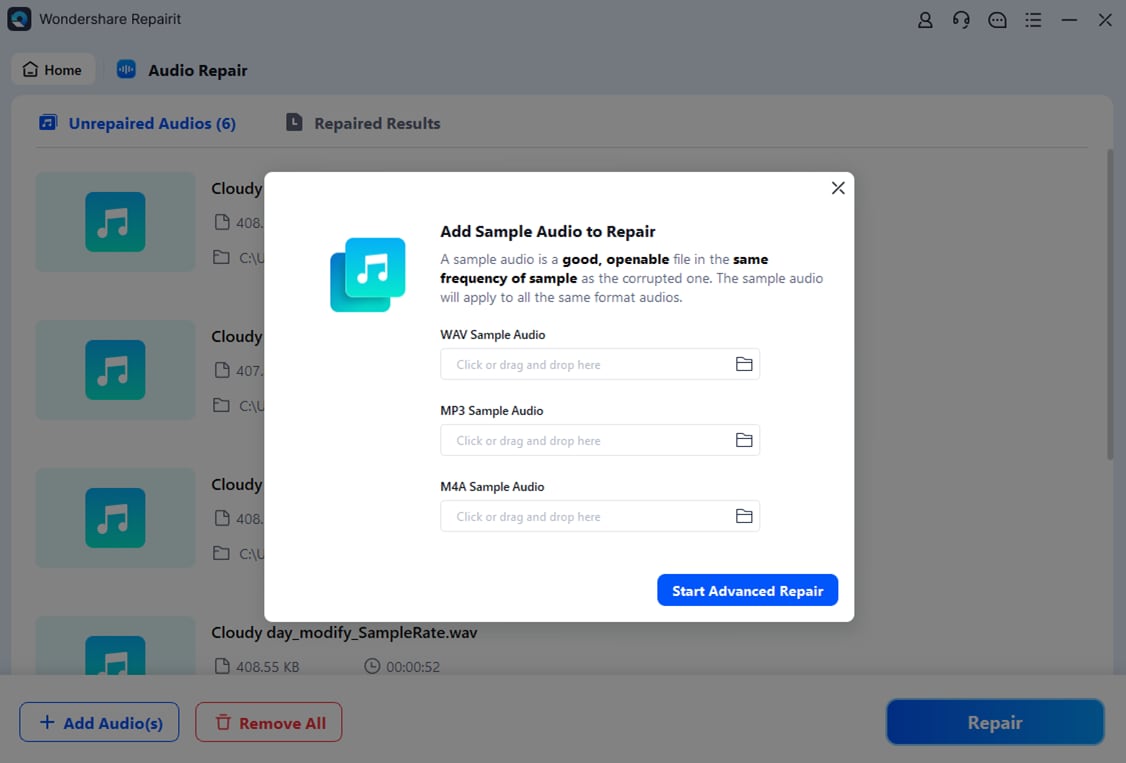
Step 3: Please click the "Advanced Repair" option to begin the audio mending procedure after verifying the uploaded audios.
You will see a new box telling you to add sound samples in the same format as the damaged audio samples.
Step 4: When the uploaded audios have been successfully fixed, Repairit will display a "Completed" status and the results of each audio's repair on the screen.
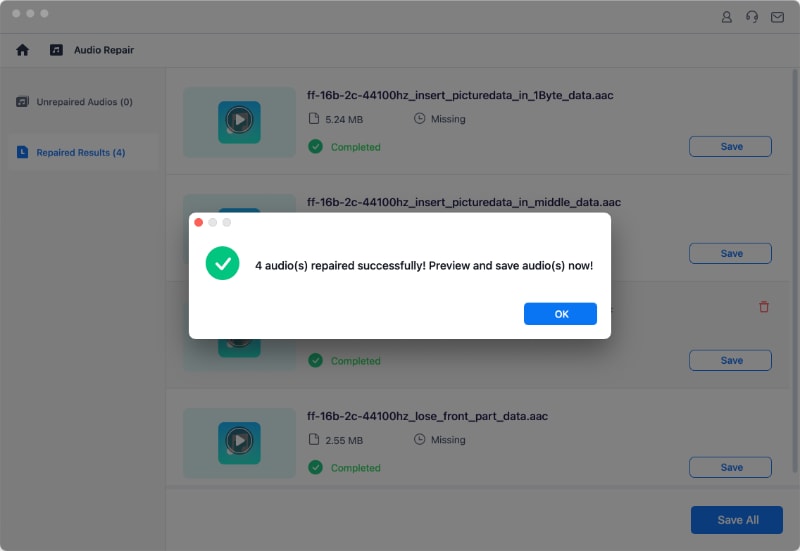
To hear a sample of the repaired audio, click the "Preview" button next to it. If you are happy with the outcome of the repair, select a location to save the repaired audios by clicking the "Save" button.
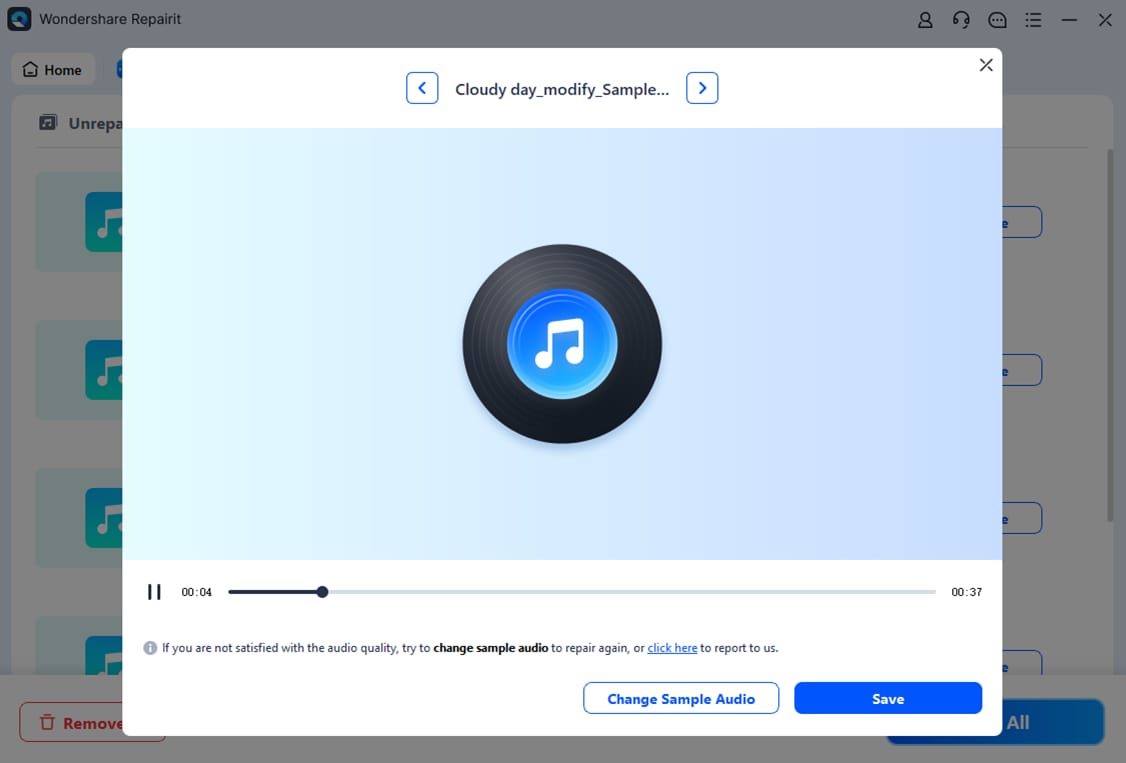
After a few seconds, the successfully corrected audios will be saved.
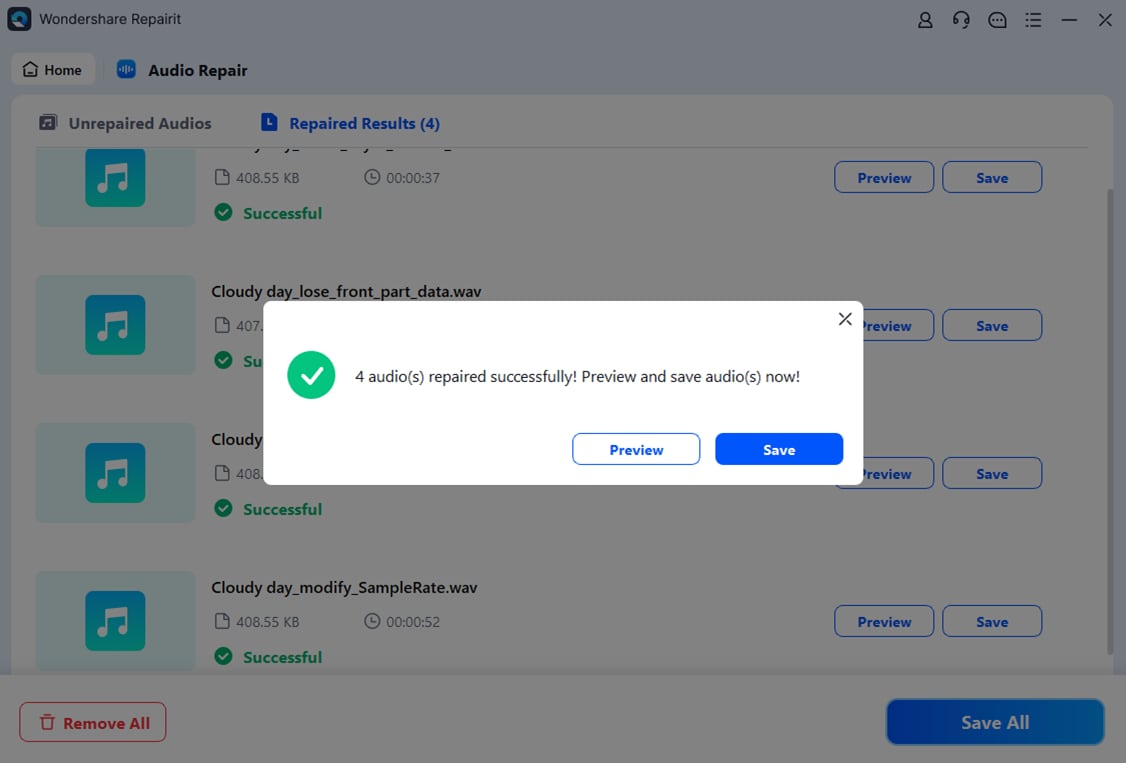
The aforementioned steps must be followed in order for Wondershare Repairit to effectively save your audio files to the desired location on your Mac. You may easily retrieve your fixed audio files by going to the specified area where they are saved.
Bonus Tip:
Get a "no audio output device is installed" error on Windows? Check to Fix "no audio output device is installed" on Windows 11/10/7/8.
Conclusion
Congratulations!! You have learnt how to recover the no output device found MAC issue. Now, it's your turn to incorporate the best solution for your Mac. However, nothing is best to repair corrupted audio files than Wondershare Repairit. It is one of the leading tools help fix corrupted audio files and restore smooth audio output. Don’t forget to share your experience with the fix you applied, and keep checking for more tech solutions from us!
People Also Ask
-
How do I fix no output devices on my Mac?
Go to System Settings > Sound > Output and make sure “Internal Speakers” is selected. You can also try restarting your Mac, updating macOS, or resetting NVRAM to fix the issue. -
Why is my Mac sound not working?
Common causes include incorrect audio settings, Bluetooth output, app glitches, or macOS bugs. Check your output settings and try basic fixes like restarting or updating your system. -
Are there any limits to repairing audio files?
With Repairit, there are almost no limits—you can repair various audio formats regardless of corruption level, without file size or length restrictions.


 ChatGPT
 Perplexity
 Google AI Mode
 Grok
Grok
