If your external or internal hard drive isn’t showing up in Windows 11/10, the cause usually falls into one of these buckets: connection/power, Windows settings (drive letter/driver), disk status (offline/unallocated/not initialized), or hardware failure.
This guide walks you through safe, step-by-step fixes first, then moves to higher-risk actions only if needed, so you can restore access without accidentally losing data.
Table of Contents
Part 1. Identify What’s Actually Happening
Sometimes the drive is fully dead. Other times, it is just hidden or not set up correctly. The first step is to check where the drive appears, and where it doesn’t.
Check If the Drive Appears in:
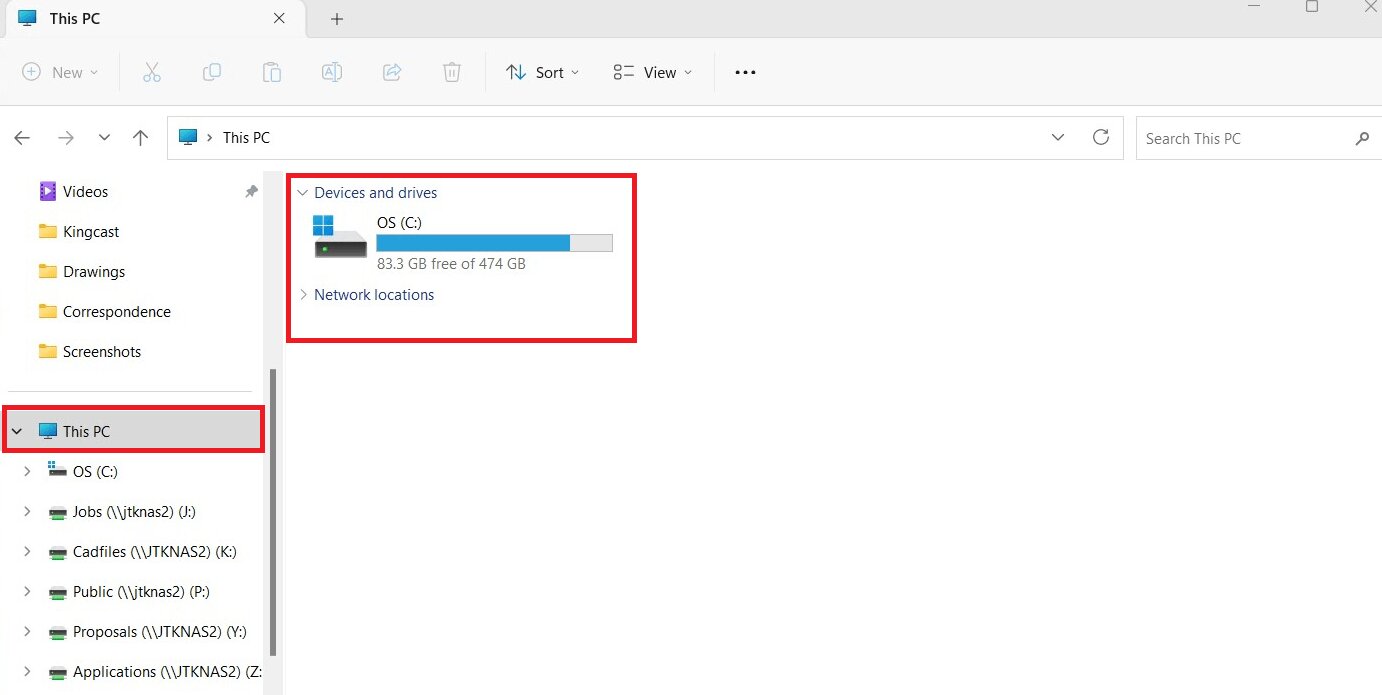
File Explorer
The quickest place to check is to find it on your File Explorer and look under This PC. If you see the drive, it is detected. If you don’t see it, it may not have a drive letter, or Windows is not recognizing it properly.
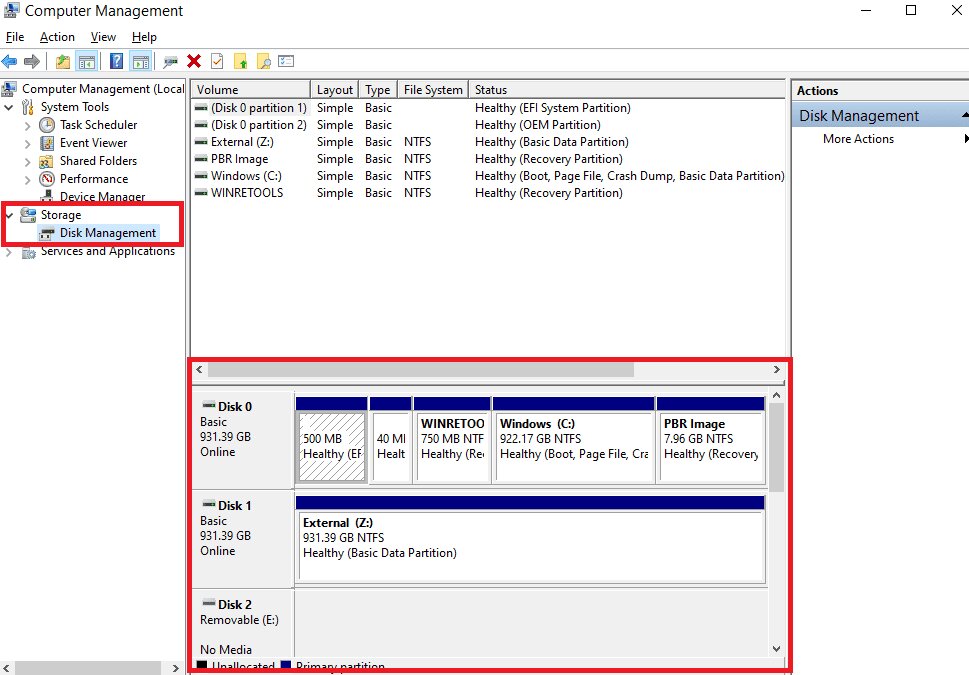
Disk Management
Open Disk Management. Here, you can see all drives connected to your PC, even hidden ones. Look for:
- A drive with no letter
- “Unallocated” space
- “Not Initialized”
- “Offline”
If the drive appears here, that’s good news. It means Windows can see it, but something needs to be fixed.
Device Manager
Open Device Manager and expand Disk drives.
- If your drive is listed, the hardware is detected.
- If it shows a warning icon, it may be a driver issue.
- If it’s missing, the connection, cable, or drive itself could be the problem.

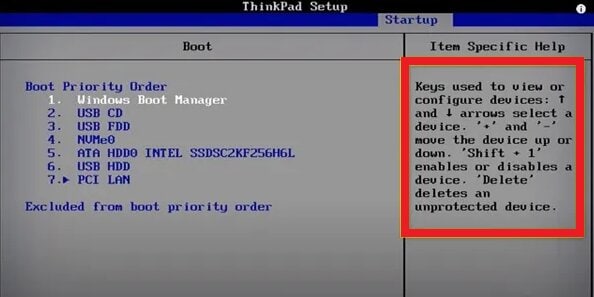
BIOS
If the drive does not show in Windows at all, restart your PC and enter the BIOS. The BIOS shows drives at the hardware level. If the drive appears in BIOS, it is likely a Windows issue. If it does not appear, the problem may be with the cable, port, or the drive itself.
Scenario Table
Take a few minutes to check these places. Once you know what you’re dealing with, fixing the problem becomes much easier.
| What You See | What It Means | Try This First |
| Not in File Explorer, but visible in Disk Management | Missing drive letter or not initialized | Assign a drive letter or initialize the disk |
| Shows as “Unallocated” | Partition missing/damaged | Try recovery/backup first; avoid creating new volume |
| Shows as “Offline” | Drive is disabled | Set disk to Online |
| Not showing anywhere | Hardware problem | Check cables, USB port, or test on another PC |
| External drive keeps turning off | Power issue | Try a different cable or powered USB hub |
Part 2. Fixes for External Hard Drive Not Showing Up
Now that you know what’s happening, it’s time to fix the problem. Start with the safest solutions first. Then move to advanced steps only if needed.
1. Check Hardware Connections (Lowest Risk)
Before changing any settings, check the simple things first. Many drive issues are caused by loose or faulty connections.
Plug the USB cable firmly. Try a different USB port. If possible, use another cable. You can also test the drive on another device or computer. If it works there, the problem may be your PC and not the drive.
2. Assign or Change Drive Letter
Windows Disk Management is a built-in tool that lets you see and manage your storage drives. You can use it to check, format, or fix drive issues. If your external hard drive is not showing up, it may just need a drive letter to appear in File Explorer.
Here’s how to assign one:
Note: This does not delete your files. It simply helps Windows recognize and display the drive properly.
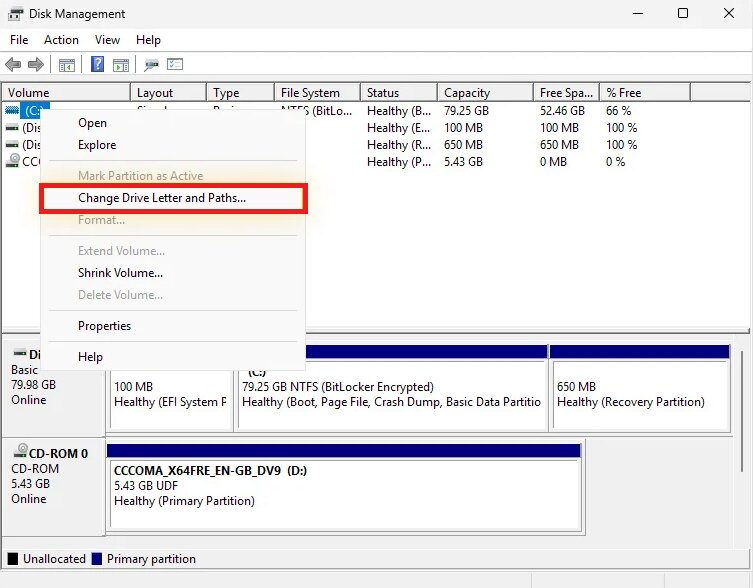
Step 1: Access Disk Management and look for your external drive in the list.
Step 2: Check the storage size to make sure you pick the correct one. Once you find it, right-click the drive and choose Change Drive Letter and Paths.
Step 3: In the new window, hit Add and pick a drive letter from the dropdown list. Click OK to save the changes.
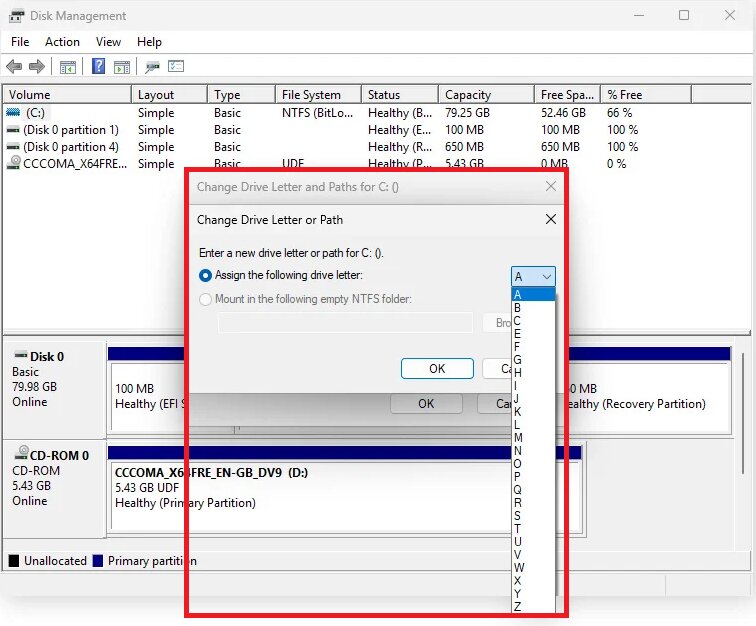
Step 4: After that, unplug your drive and plug it back in. Check File Explorer to see if it appears.
3. Update or Reinstall Drivers
Drivers are software programs that assist your computer in talking to its hardware. Your graphics card, network adapter, audio system, and hard drive need drivers to work properly.
New driver updates are released often. If your drivers are outdated or damaged, your hard drive may not work correctly or may not show up at all.
You can update drivers manually on Windows through system settings. You can also use driver update software to make the process faster and easier.
Step 1: In Device Manager, click the arrow next to Disk drives. Find the disk that is not recognized. Right-click it and select Enable device to see if Windows can detect it.
Step 2: If you don’t see the Enable device option, it means the drive is already enabled. In that case, move to the next step.
Step 3: Right-click the unrecognized disk again and choose Uninstall device or Update Driver.
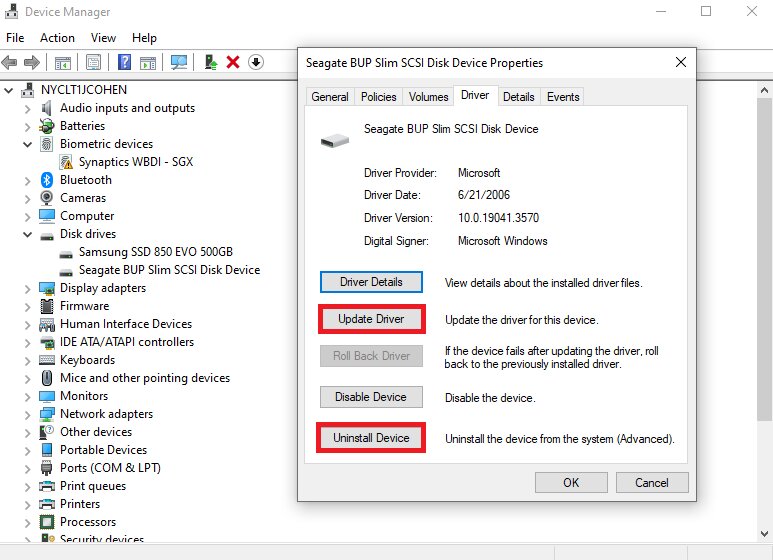
Step 4: After that, restart your computer. Windows will swiftly reinstall the driver during startup. Once your PC turns back on, check if the disk is now recognized. If it’s still not working, proceed to the next troubleshooting step.
4. Scan for Hardware Changes
Sometimes, your computer simply fails to refresh its device list after you connect a drive. This means the hardware is plugged in, but Windows hasn’t recognized it yet.
Scanning for hardware changes forces your system to check for newly connected devices. It’s quick, safe, and does not delete any data. In many cases, this quick step can make your missing hard drive appear instantly.
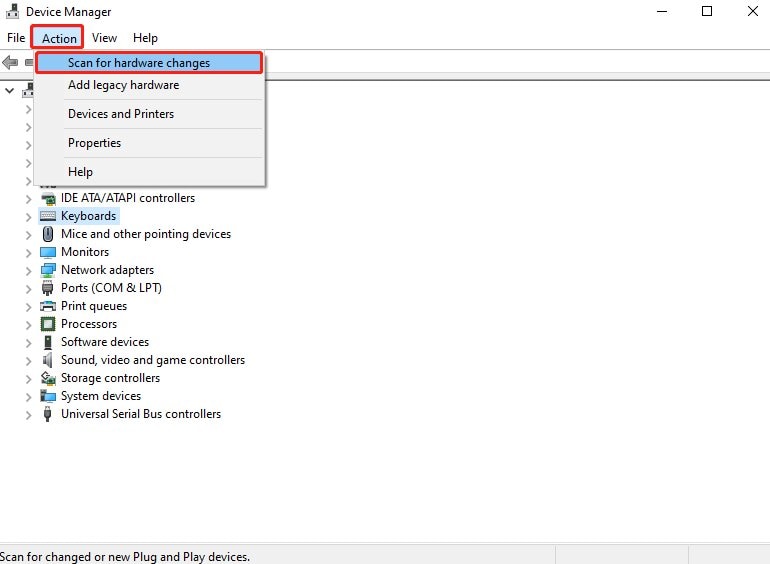
Step 1: Go to your Device Manager.
Step 2: Click Action at the top.
Step 3: Choose Scan for hardware changes. This tells Windows to look for newly connected devices.
5. Run CHKDSK (Medium Risk)
CHKDSK is a great Windows tool that checks and repairs disk errors. It can help fix file system problems on your hard drive. You can use the CHKDSK command to scan and repair the drive. This tool checks for bad sectors and fixes disk errors.
Warning: CHKDSK may modify or remove corrupted file data during repair. While it helps recover access, there is a small risk of data loss if files are severely damaged. Use this method only if basic fixes did not work, and back up your data first if possible.
Here’s how to use it:
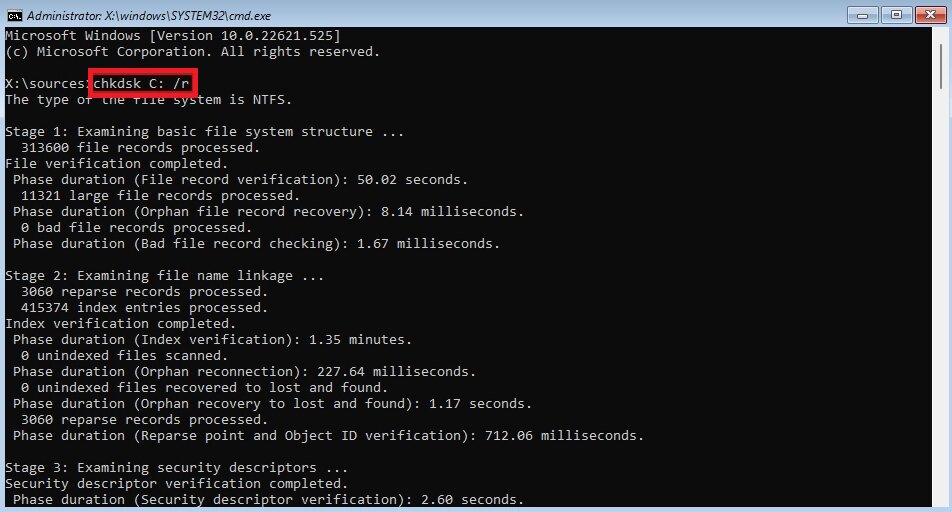
Step 1: Open your Command Prompt window and run it as administrator.
Step 2: In the window, type:
chkdsk X: /r
Replace X with your drive letter.
Step 3: Hit Enter to begin the scan and repair procedure.
Part 3. Fixes for Internal Hard Drive Not Showing Up
If your external drive is not the problem, the issue may be inside your computer. An internal hard drive not appearing in Windows 11 can feel more serious, but don’t worry. In many cases, the fix is still simple.
1. Check BIOS/UEFI Settings
Before Windows loads, your computer checks for connected hardware in the BIOS or UEFI settings. If your internal hard drive is not enabled there, Windows will not detect it.
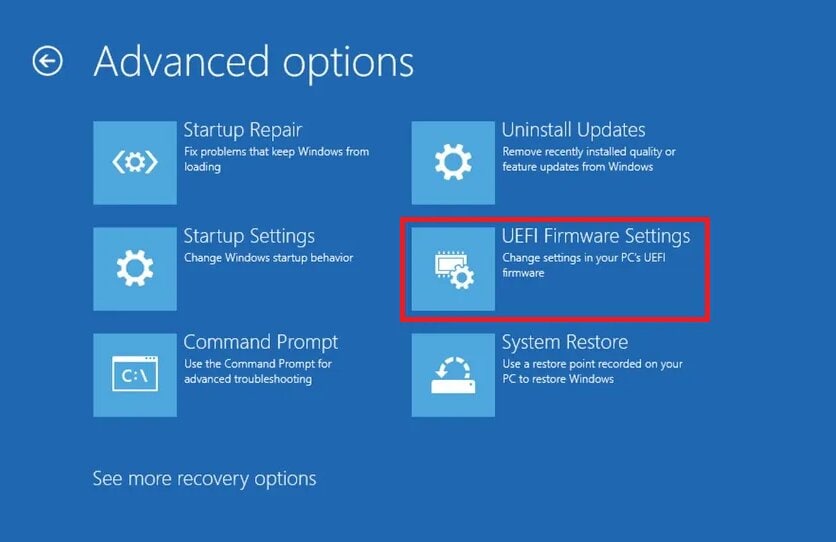
Step 1: Restart your PC and enter the BIOS/UEFI menu (usually by pressing F2, F10, DEL, or ESC during startup). Look for the storage or drive section and check if your hard drive appears.
Step 2: If you see it, make sure it is enabled.
Step 3: If you don’t see it, it could be a loose cable or hardware issue.
2. Initialize Disk (Data Loss Risk)
If your internal drive shows up in Disk Management but says “Not Initialized,” you may need to initialize it. Initializing prepares the drive so Windows can use it. However, this process can erase existing partition information.
Important: Initializing a disk may cause data loss if the drive already contains files. Only proceed if the drive is new or you don’t need the existing data. If the drive is brand new, initializing it is normal and required before use. If it’s an old drive with important files, consider data recovery options first.
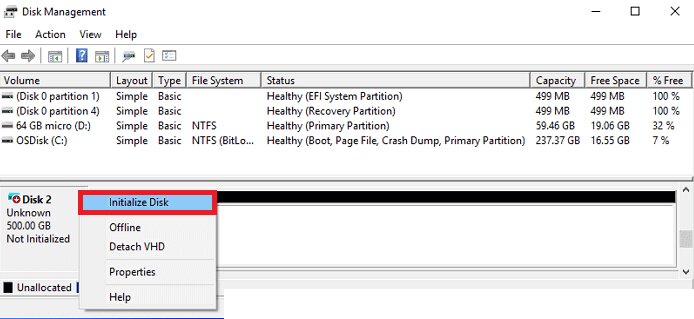
Step 1: Open the Run box and enter diskmgmt.msc to access your Disk Management.
Step 2: Find the disk that says “Not Initialized.” Right-click it and choose Initialize Disk.
Step 3: In the new window, pick a partition style (MBR or GPT), then hit OK to proceed.
Part 4. If the Drive Is Detected But Files Are Corrupted
If the drive appears in File Explorer/Disk Management but files won’t open, you may see:
- “The file is corrupted and cannot be opened”
- Files are blank/garbled
- The drive shows as RAW (Windows can’t read the file system)
What to do first (before any tools)
- Try opening the files on another PC
- Copy a few files to your internal drive (if copying works)
- If the drive is unstable/disconnecting, stop repeated attempts and consider professional help
When a file repair tool can help
If the drive is detected and you’ve already copied the files off (or the drive is stable), a file repair tool may help fix documents/videos/photos that won’t open. One best option is Repairit File Repair. It focuses on fixing damaged videos, photos, documents, and other files that won’t open. It’s also important to understand its limits. It repairs corrupted files only. It does not fix hardware damage or detect a missing hard drive.
Step-by-Step Guide:
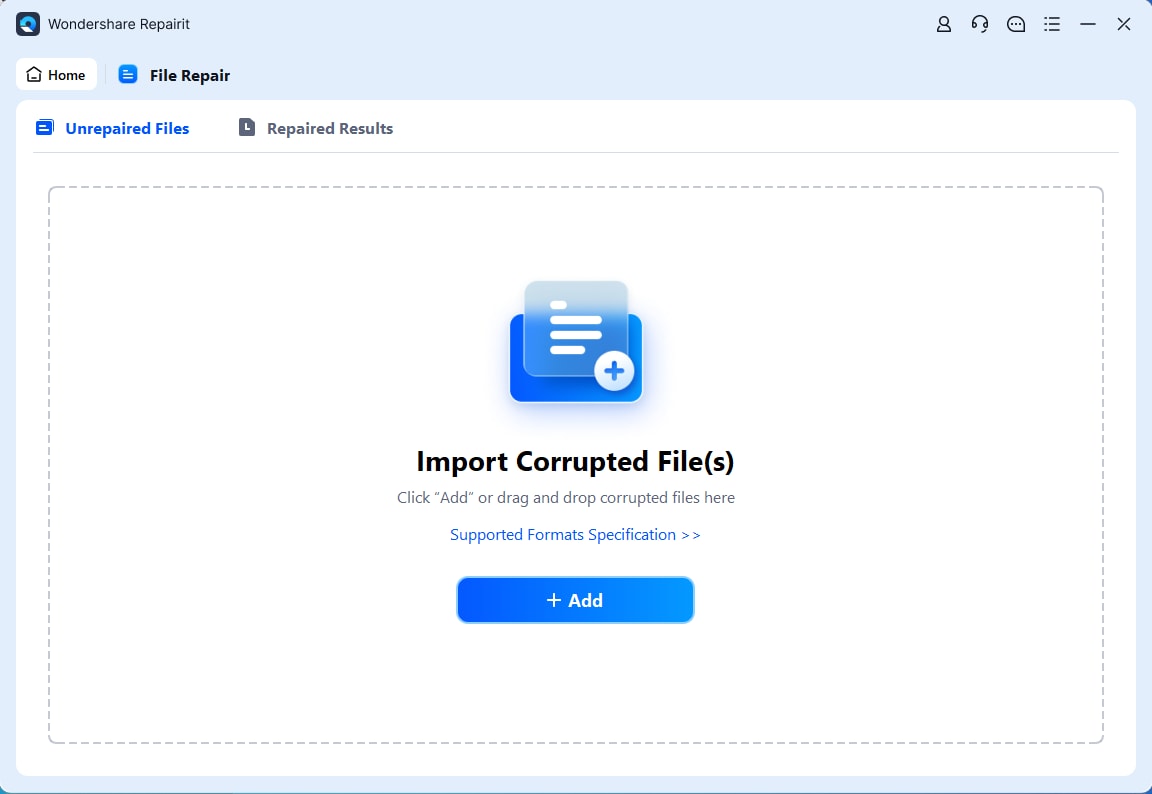
Step 1: Install and open Repairit. Go to More Types Repair and File Repair. Press Add to input your corrupted files.
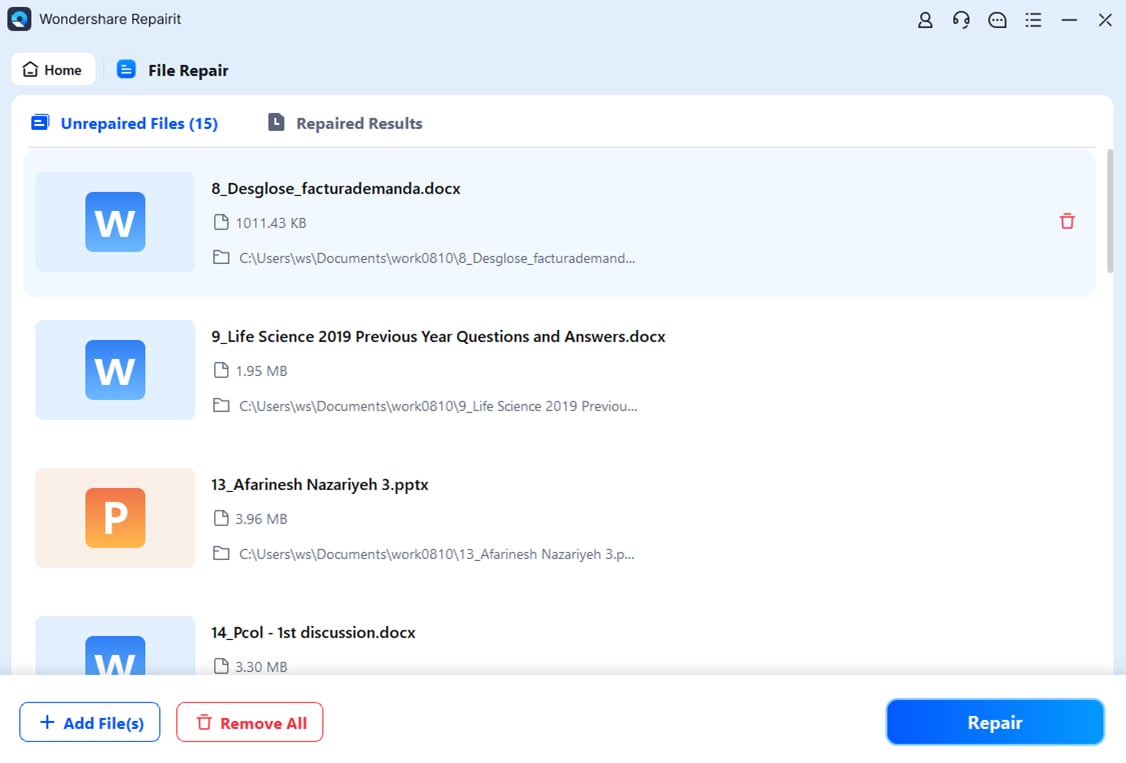
Step 2: Tick Repair so Repairit will scan and fix the uploaded files automatically.
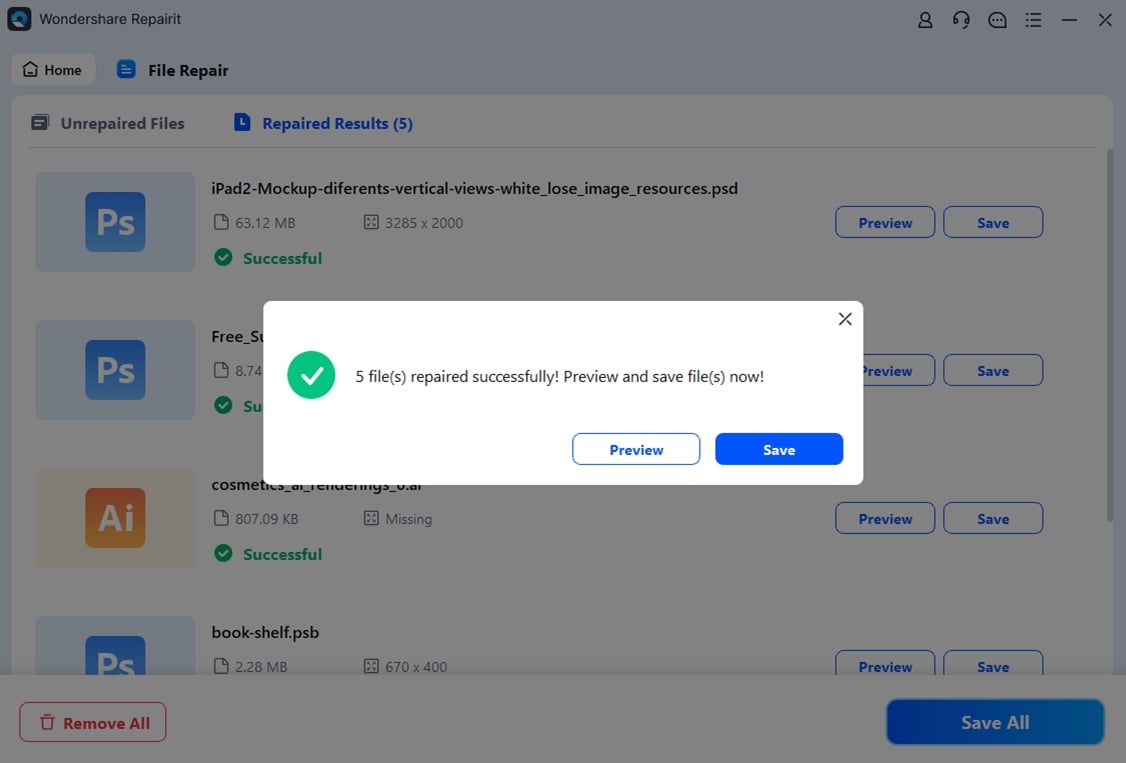
Step 3: Press Preview to see the fixed file(s) first before downloading them. If the result looks great, click Save or Save All to export multiple files at once. Your fixed file(s) will be downloaded and ready to open without errors.
Part 5. Preventive Tips to Avoid Hard Drive Not Showing Up on Windows Error
Fixing a hard drive problem is stressful. Losing your files is even worse. The good news? You can prevent many drive issues with quick tips:
Tip 1. Safely Eject External Drives
Never unplug your external hard drive while files are still being used. If you remove the drive suddenly, it can damage the file system and even turn it into RAW format. Always click “Safely Remove Hardware” before disconnecting it. This allows Windows to properly stop all background processes.
Tip 2. Regularly Update Windows and Drivers
Outdated systems can cause detection problems. Make sure your Windows updates are installed. Also, see the updated USB and storage drivers in Device Manager. Updates fix bugs, improve compatibility, and help Windows detect your drives correctly.
Tip 3. Back Up Important Files
Even with careful use, drives can fail. Hardware does not last forever. That’s why backing up your important files is very important. You can:
- Use another external drive.
- Save files to cloud storage.
- Create regular system backups.
If something goes wrong, you won’t panic because your data is safe.
If Nothing Works
If you’ve tried all the fixes and your hard drive still isn’t showing up, don’t panic. There are a few more things you can do before giving up.
- Test on Another PC
- Use a Different Enclosure
- Contact the Manufacturer
- Consider Professional Recovery Service
Connect your drive to a different computer. If it works there, the problem is likely your original PC. Maybe it's ports, drivers, or system settings. If it still doesn’t show up, the issue is probably with the drive itself.
Sometimes, the problem is not the hard drive itself but the outer case. The USB board inside the enclosure can fail while the actual disk is still working. If you’re using an external drive, you can remove the internal disk and place it in a new enclosure or use a SATA-to-USB adapter. If the drive operates with the new setup, then the old enclosure was the root cause.
If your device drive is still under warranty, contact the manufacturer for support. For example, brands like Seagate or other drive makers may offer repair or replacement options. Check the warranty status before opening the drive yourself. Opening it may void the warranty.
If the drive contains very important files and it is not detected anywhere, the issue may be physical damage. In this case, a professional data recovery service (Seagate) may help. These experts employ rightful tools and cleanroom labs to recover data from damaged drives.
Conclusion
If your chosen external hard drive is not showing up in Windows 10/11, don’t worry. Most problems are easier to fix than they seem. It’s just a loose connection, a missing drive letter, an outdated driver, or a disk that needs initialization. You can check your File Explorer, Disk Management, Device Manager, and BIOS to quickly find the cause and fix it safely.
If the drive is detected but the files are corrupted, file repair tools can help recover them without replacing the disk.
FAQs
-
What to do if the Seagate external hard drive is not detected?
Unplug the drive that has detection problems and plug it back in firmly. Try another USB port or cable. You can also test it on a different computer. Then open Disk Management and verify if the drive appears. If it does, assign a drive letter or update the driver. If it still doesn’t work, contact Seagate support , especially if it’s still under warranty. -
How can I check if the hard drive cable or port is faulty?
Use a different USB cable first. Then try another USB port. You can also plug another device into the same port to see if it works. If the drive works on another PC, your port may be the problem. If it doesn’t work anywhere, the cable or the drive could be faulty. -
Why does my SSD appear in BIOS but not in Windows?
If your SSD shows in BIOS, the hardware is fine. The issue is likely in Windows. The drive may not have a designated letter, may need to be operated, or the driver may be outdated. Open Disk Management to check and fix it.