Hard drive not showing on Mac? It’s stressful, especially if you need important files. This can occur with both internal and external drives. The problem may be caused by connection issues, system errors, or even hardware damage.
This guide will discuss safe and easy fixes to help your hard drive show up again. We’ll cover both built-in and external drives with the tools already on your Mac. Most importantly, we’ll help you troubleshoot safely to protect your data.
Table of Contents
Part 1. Identify Where the Drive Appears
Before starting any fixes, the first step is simple. Check where the drive is showing up. This helps you recognize what the main issue really is. Your Mac may detect the drive in one place but not in another.
If the drive contains important data, avoid actions that write to the disk (such as Erase, Reformat, or enabling write access on an unstable drive) until you’ve tried safe detection steps first. Some fixes can permanently remove partition information or overwrite file system structures.
If the drive is brand new or you already have a full backup, you can proceed more freely with advanced repairs.
Here’s where you should look:
Finder
Step 1: Open Finder and check the sidebar under Locations.
Step 2: If you see the drive here, it’s connected and readable. If you don’t see it, keep checking the next place.

Step 3: You can also click Finder, Settings, Sidebar and check External disks.

Disk Utility
Step 1: Look for Applications, Utilities and Disk Utility.
Step 2: If the drive appears here but not in Finder, it may not be mounted. If it’s greyed out, click it and choose Mount. If it doesn’t appear at all, the issue could be deeper.

System Information
Step 1: Click the Apple menu, About This Mac and System Report.
Step 2: Check under USB (for external drives).

Step 3: If you see the drive listed here, your Mac detects the hardware. If it’s not listed, there may be a connection or hardware problem.
Quick Scenario Guide
| Situation | What It Likely Means | Try This First |
| Drive shows in Finder but won’t open | Permission issue or minor file system error | Try restarting Finder or run First Aid (if drive is stable) |
| Shows in Disk Utility but not Finder | Drive not mounted | Click Mount in Disk Utility |
| Shows in System Information only | Hardware detected, but mount/file system issue | Try Mount → If fails, run First Aid carefully |
| Not showing anywhere | Connection, cable, enclosure, or hardware problem | Try another cable, port, or Mac first |
| Drive disconnects or powers off | Power or enclosure issue | Use a powered hub or test on another computer |
Part 2. Quick Fixes to Mac Hard Drives May Not Show Up (Low Risk)
Before you try anything advanced, start with simple and safe checks. In most situations, your hard drive does not show up because of small settings or minor errors.
1. Check Hardware Connections
Sometimes the problem is as simple as a loose cable or weak connection. Even if the drive powers on, your Mac may not read it properly. A quick check of the cable, adapter, or port can avoid hassles, saving you a lot of time and stress.

In real-world cases, drives that power on but fail to appear are often caused by weak USB power delivery, damaged cables, or failing enclosures rather than full disk failure.
2. Repair the Drive Using First Aid
If the drive has minor errors, macOS may block it from opening. The First Aid tool in Disk Utility can scan the drive and fix common file system problems. However, if the drive is repeatedly disconnecting, making unusual clicking sounds, or responding very slowly, avoid running First Aid multiple times. Repeated repair attempts on a failing drive may worsen the damage.
If your files are very important and the drive appears unstable, consider data recovery options before attempting repairs.
Step 1: Press Command + Space to access Spotlight Search.

Step 2: Type Disk Utility and open it.
Step 3: Choose your hard drive, then click First Aid at the top and hit Run to confirm.

Step 4: First Aid will check the drive for errors and try to fix them. When it’s done, close Disk Utility and see if your hard drive now appears.
3. Fix Compatibility Issues
Not all hard drives use a format that works smoothly with macOS. Drives formatted for Windows, such as NTFS, may show up but not open or allow changes. Formats like exFAT or APFS work better with Mac. If a drive was mainly used on Windows, compatibility could be the reason it’s not behaving properly on your Mac.
Step 1: Access your Disk Utility and see the drive’s format (NTFS, exFAT, APFS, etc.).
- Keep in mind that your Mac can read NTFS but can’t write to it without extra software. The exFAT and APFS work fully on Mac.
- If the drive is formatted as NTFS, macOS can read it but cannot write to it without third-party software. However, if you suspect the drive may be failing, avoid enabling write access immediately. Writing new data to an unstable drive can increase the risk of corruption.
- If possible, copy important files off the drive first (read-only). Only install NTFS write software if the drive is stable and functioning normally.
Step 2: If you have a backup or don’t need the files, reformat the drive to exFAT (for use on Mac and Windows) or APFS (Mac only).

Step 3: Reconnect the drive to make sure macOS can read and write to it properly.
Part 3. Advanced Fixes for Hard Drive Not Showing Up on Mac
If the basic fixes didn’t work, you may need to try a few advanced solutions. These steps go deeper into your Mac’s system settings. They can help in complex cases. But you should move carefully, especially if you have important files on the drive.
1. Reset NVRAM/PRAM (Intel Only)
On Intel-based Macs, system settings like disk preferences are stored in NVRAM or PRAM. If these settings become corrupted, your Mac may fail to detect a drive properly. Resetting them can sometimes restore normal hardware detection without affecting your personal files.
Follow these steps:
Step 1: Shut down your Mac and turn it back on. Press and hold Option + Command + P + R simultaneously.

Step 2: Keep pressing for about 20 seconds. Your Mac may restart during this process.
Step 3: Let go of the keys and allow your Mac to start normally.
Step 4: After restarting, see if your hard drive now appears in Finder or Disk Utility.
2. Reset SMC (If Applicable)
The System Management Controller (SMC) controls hardware functions like power and USB ports on certain Macs. If there is a power or hardware communication issue, resetting the SMC may help your Mac recognize the drive again.
To reset SMC, shut down your Mac first. Then follow the steps depending on your Mac model:
For MacBooks with Non-Removable Battery (most modern MacBooks)
Step 1: Hold Shift + Control + Option on the left side and the Power button at the same time.

Step 2: Keep all keys pressed for 10 seconds.
Step 3: Release the keys and hold Power to turn on your Mac.
For MacBooks with Removable Battery
Step 1: Take out the battery carefully.
Step 2: Hold your MacBook's power button for 5 seconds.

Step 3: Put the battery back and turn on your Mac.
For Desktop Macs (iMac, Mac Mini, Mac Pro)
Step 1: Disconnect your device (iMac, Mac Mini, Mac Pro) from power for 15 seconds.
Step 2: Turn it back and wait 5 seconds.
Note: After resetting the SMC, check if your hard drive appears in Finder or Disk Utility.
3. Reformat the Drive (Data Loss Risk)
If the drive appears but cannot be repaired, reformatting may fix deeper file system problems.
⚠️ Stop Before Proceeding:
Reformatting permanently erases all files and partition information on the drive. Only proceed if:
- The drive is brand new, or
- You already have a complete backup, or
- You’ve decided that data recovery is no longer required.
If you need the data and the drive contains important files, consider recovery options before reformatting.
Step 1: To start, go to Applications, Utilities and Disk Utility.
Step 2: Click the drive you want to reformat from the left sidebar.
Step 3: Hit Erase at the top of the window.
Step 4: Pick APFS (Mac only) or exFAT (Mac and Windows).
Step 5: Place a new name for the drive.
Step 6: Tick Erase to begin reformatting. Once finished, the drive is ready to use.

Part 4. If the Drive Mounts but Files Are Corrupted
Sometimes the hard drive mounts successfully, but individual files won’t open. It’s important to distinguish between two different situations:
- File-Level Corruption – The drive mounts normally, but specific documents, photos, or videos show errors or appear blank.
- File System-Level Issue – The drive mounts but shows the wrong format (such as RAW), missing folders, or widespread errors.
If the issue affects only certain files, a file repair tool may help. If the entire drive structure appears damaged, the issue is more likely related to the file system and may require recovery-focused solutions instead of file repair.
In cases of file-level corruption, a file repair tool can sometimes restore damaged files without modifying the drive itself. One example is Repairit File Repair.
It may help repair documents, photos, or videos that:
- Show error messages when opened
- Appear blank or unreadable
- Were damaged due to unsafe ejection or power loss
However, it’s important to understand its limitations:
- It cannot make a missing drive appear in macOS.
- It does not repair physically damaged hardware.
- It does not rebuild an entire corrupted file system.
Always save repaired files to a different drive, not back to the original problematic disk.
Step-by-Step Guide:
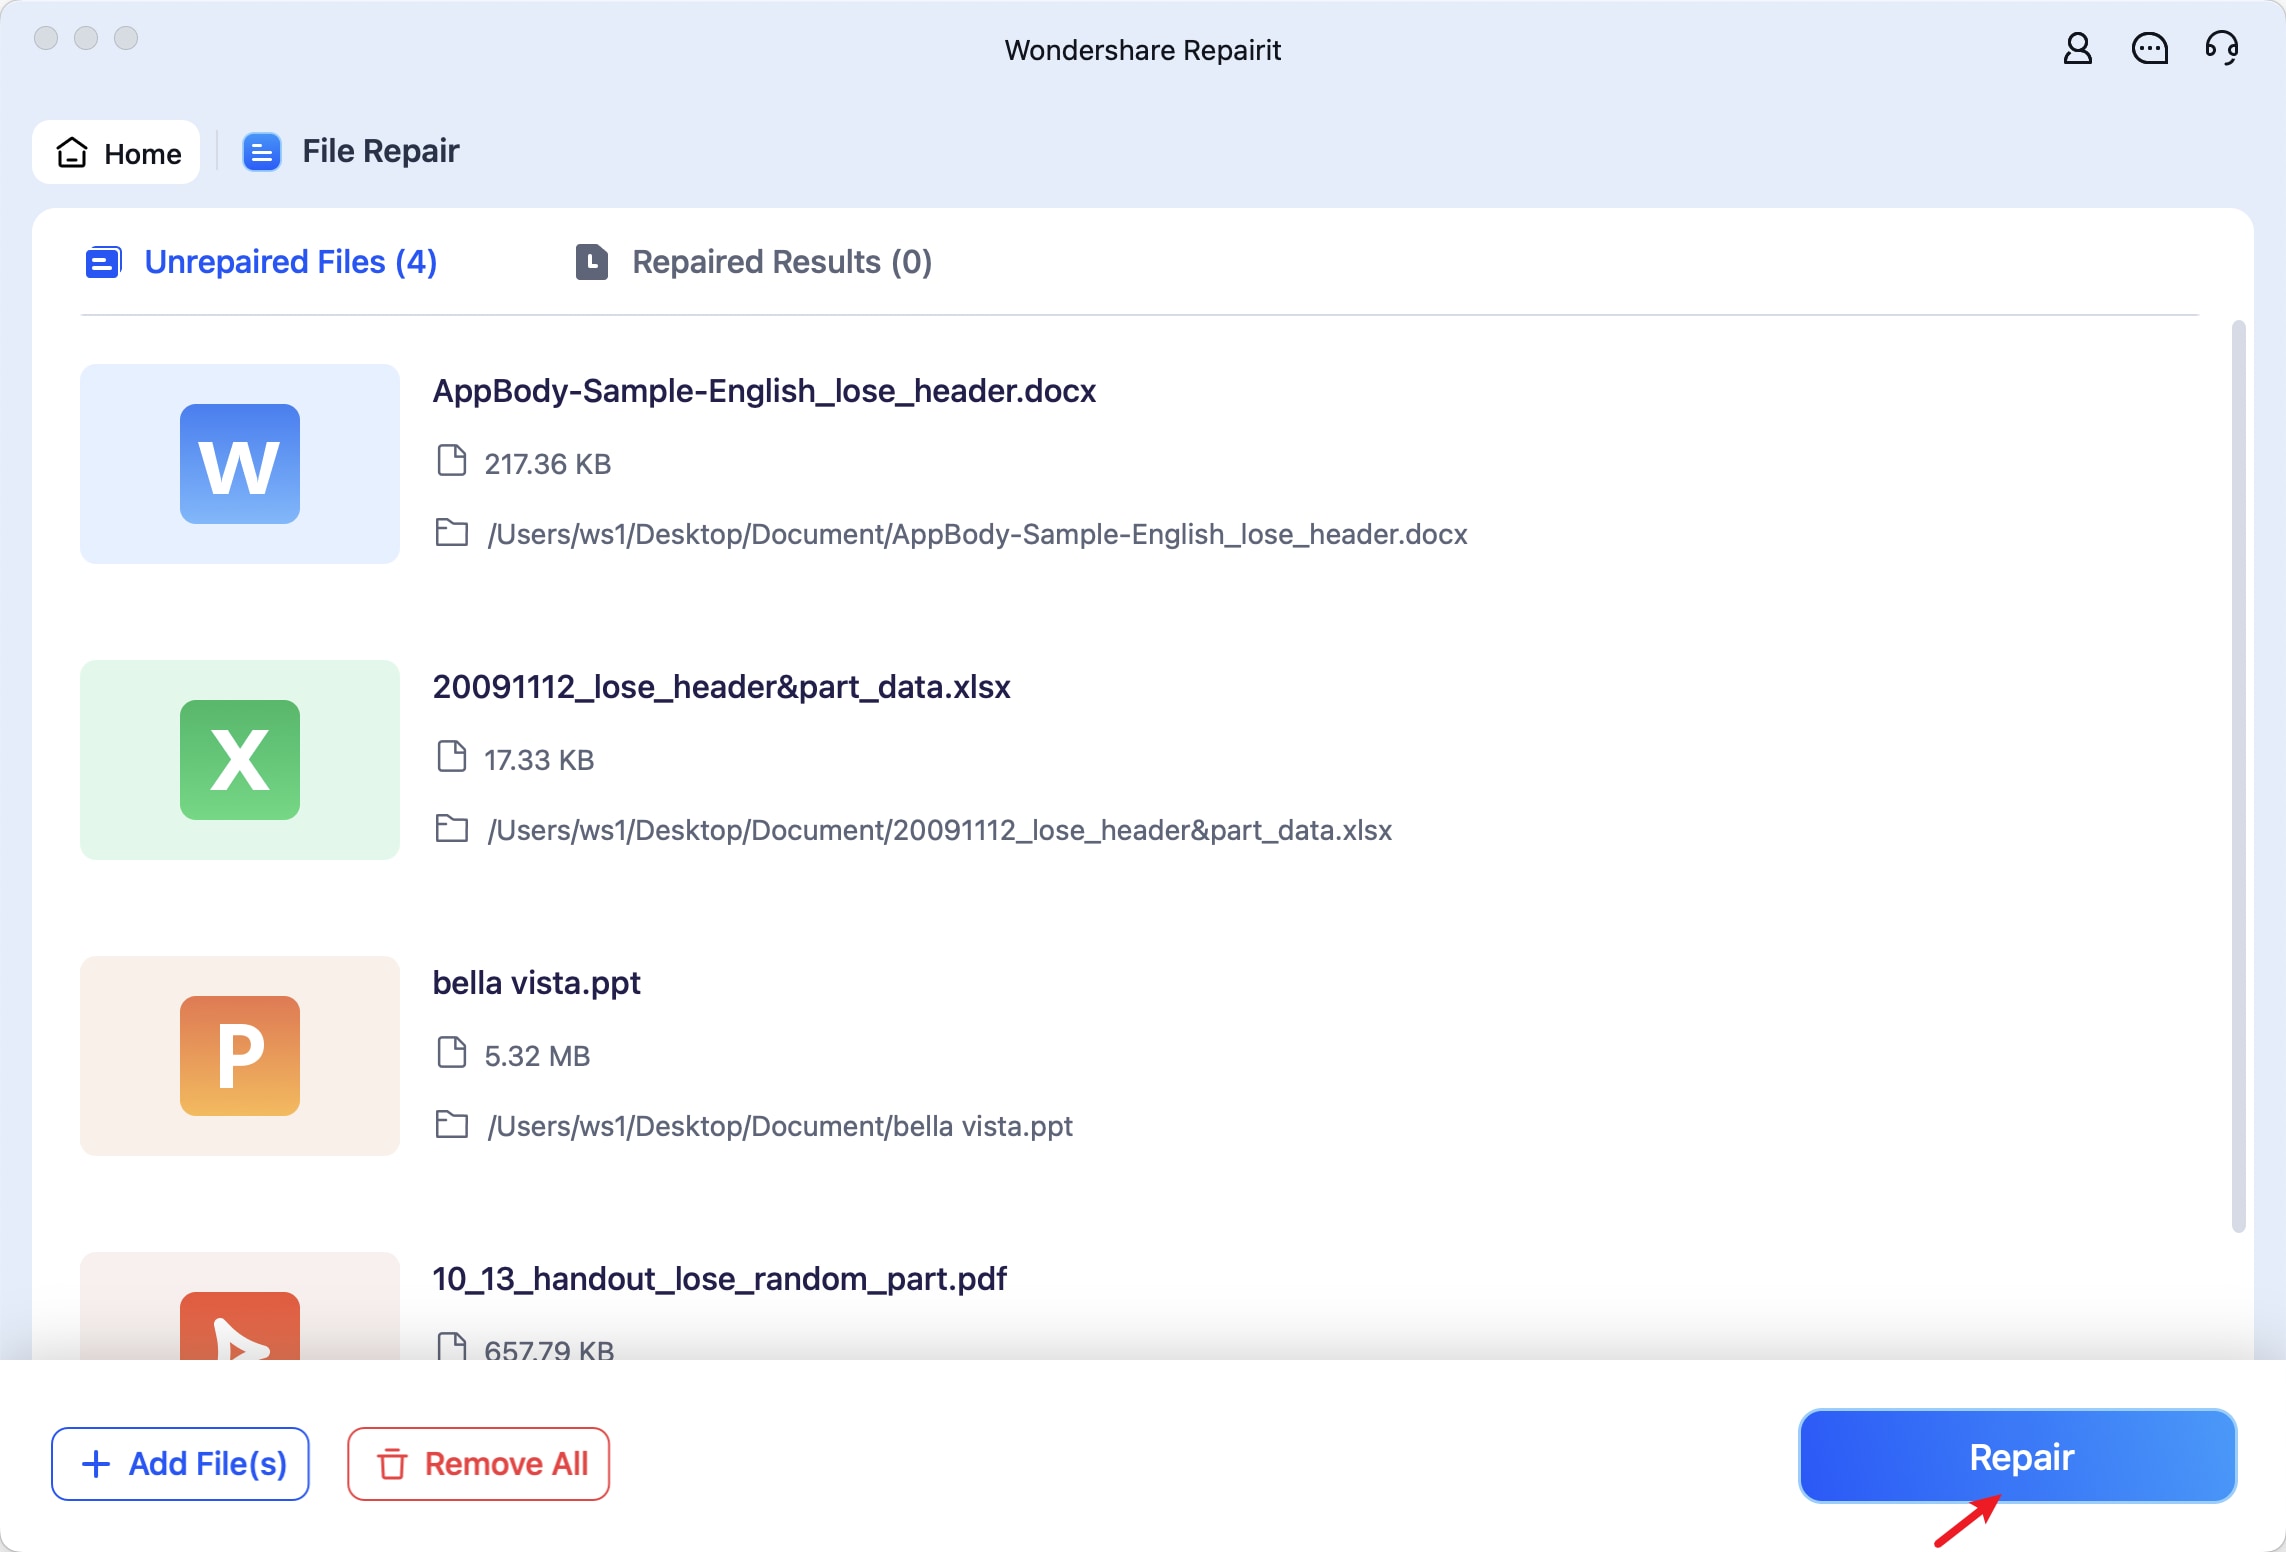
Step 1: Open Repairit and go to More Types Repair, and File Repair. Click +Add to drop your corrupted files into the app.

Step 2: Click Repair to start the process on your Mac.
Step 3: After repair, click Preview next to a file to check it. If it looks good, click Save and choose where to store it on your Mac.

H3: If Nothing Works
Sometimes, even after trying all the fixes, your hard drive still won’t show up. At this point, it’s time to try a few last options to figure out the problem and protect your data.
1. Test on Another Mac
One simple way to check if the drive is the problem is to connect it to another Mac. If it works there, the issue may be with your original computer rather than the drive itself.
2. Use a New Enclosure
For external drives, the problem could be the casing or the connection inside the enclosure. Trying the drive in a new enclosure can help your Mac detect it properly.
3. Contact Apple Support
If your drive still isn’t showing up, contacting Apple Support is a good next step. They can help check for system issues, hardware problems, or firmware updates that might fix the detection problem.
4. Professional Recovery Service
If the drive is still not detected anywhere and contains important files, a professional data recovery service may be your best option. Experts have the tools and experience to recover data from damaged or failing drives safely.
Part 5. Tips to Avoid Mac Hard Drive Not Showing Up issue
Here are some simple steps to prevent your hard drive from disappearing on your Mac:
- Don’t unplug external drives without ejecting them first. This prevents file system errors and data corruption.
- Keep your macOS and system updates up to date. Updates often fix bugs and improve how your Mac works with external devices.
- Use good-quality cables and avoid faulty USB hubs. Cheap or damaged cables can cause connection problems, even if the drive seems powered on.
- Keep your Mac and drives properly powered to prevent damage to files or the drive.
- Use Time Machine or other backup solutions to protect your data in case the drive fails.
- Periodically run Disk Utility’s First Aid to detect and fix minor errors early.
Conclusion
A hard drive not showing up on your Mac can be fixed with simple checks. First, ensure connections are secure, use Disk Utility’s First Aid, or check the drive format. For bigger issues, you can try resetting NVRAM/PRAM, SMC, or reformatting. But always back up your data first. If your files are corrupted, Repairit File Repair safely restores them.
FAQs
-
Why is my drive not showing in Finder but visible in Disk Utility?
The drive may not be mounted, or the Finder settings might be hiding it. Mount the drive in Disk Utility or check Finder preferences to make it appear. -
Why does my drive work on Windows but not on Mac?
Some drives are formatted for Windows (like NTFS), which macOS can’t write to without extra software. Using exFAT or APFS works better on Mac. -
Does resetting NVRAM fix drive issues?
Sometimes. Resetting NVRAM can fix minor detection or hardware settings problems on Intel Macs, but it won’t repair damaged files or a broken drive. -
Will formatting erase my data?
Yes. Formatting a drive removes all files. Only format if you have a backup or if data recovery is no longer possible.