How to Fix a Blurry Video on a Computer
Have you saved your favorite videos on your computer so you can enjoy them anytime? And only to find that when you play video, the computer screen stops and blurs? What can you do? We’ve prepared a guide to help you fix this frustrating problem.
Our guide will help you understand the causes of blurry videos and show you how to fix a blurry video on Mac and Windows computers. We’ve rounded up several proven methods and included easy-to-follow instructions. Let’s get to it.
Part 1: Causes of Blurry Videos
Playing videos but not watching them in their original quality can be frustrating. But why are my videos blurry? That can happen for various reasons. Usually, blurry videos are the consequence of problems while shooting. However, many other factors can cause blurriness in videos.
Thus, if you understand what causes blurry videos, you can fix the problem. These are the most common causes of blurry videos:
- File corruption – If your video file gets corrupted, it can malfunction and become blurry.
- Outdated graphics drivers – Graphics drivers are crucial for your computer to work correctly. You can experience many issues if they’re obsolete, including blurry videos.
- Out-of-date codecs – Each video file gets a codec after compression. If they’re outdated, your video can become blurry or non-playable.
- Used-up disk space – Your videos can get blurry during playback if you have insufficient storage space.
Part 2: How to Fix a Blurry Video on Windows
Now that we’ve covered the possible causes of blurry videos, it’s time to fix the problem. We’ve prepared four ways to help you improve blurry videos on a Windows device. With our step-by-step instructions, you’ll make your videos clear quickly.
| 🔧 Fix Method | 🎯 Suitable for | ⭐ Key Advantages |
| 🛠 Wondershare Repairit | Corrupted, blurry, or unplayable videos | ✅ Professional AI repair, restores original quality, supports multiple formats |
| 🎮 Update Graphics Drivers | Blurry playback, lagging videos | 🚀 Enhances video processing, resolves hardware compatibility issues |
| 🎞 Update Video Codecs | Videos not playing or displaying incorrectly | 🎥 Ensures system supports the latest formats, improves playback compatibility |
| 💾 Free Up Disk Space | Slow video playback, buffering issues | 📈 Boosts system performance, optimizes video loading speed |
Fix 1: Use Wondershare Repairit (Desktop Video Repair)
Damaged or corrupted videos can show some errors when you play them. Thus, you can use video repair software like Wondershare Repairit to fix blurry video problems. It’s a powerful video repair tool to restore the original video quality in just a few clicks.
- Repair all types of video corruption, including playback errors, missing codecs, blurry, flickering, and out-of-sync audio.
- Support high-resolution video repair up to 8K and 20+ formats, including MP4, MOV, WMV, and MPEG.
- Fix RAW, Log, and HDR footage from professional cameras like Blackmagic, RED, and ARRI.
- Ensure seamless compatibility with professional editing software, including DaVinci Resolve, Final Cut Pro, and Premiere Pro.
Use Repairit to Repair Your Blurry Video Now

Here’s how to fix a blurry video with Wondershare Repairit’s desktop video repair tool:
Step 1: Download and launch Wondershare Repairit.
Step 2: In the Video Repair section, click Add to upload the blurry videos that need fixing.

Step 3: Once you’ve added damaged videos, you’ll see them on the screen. Click Repair to initiate the process.
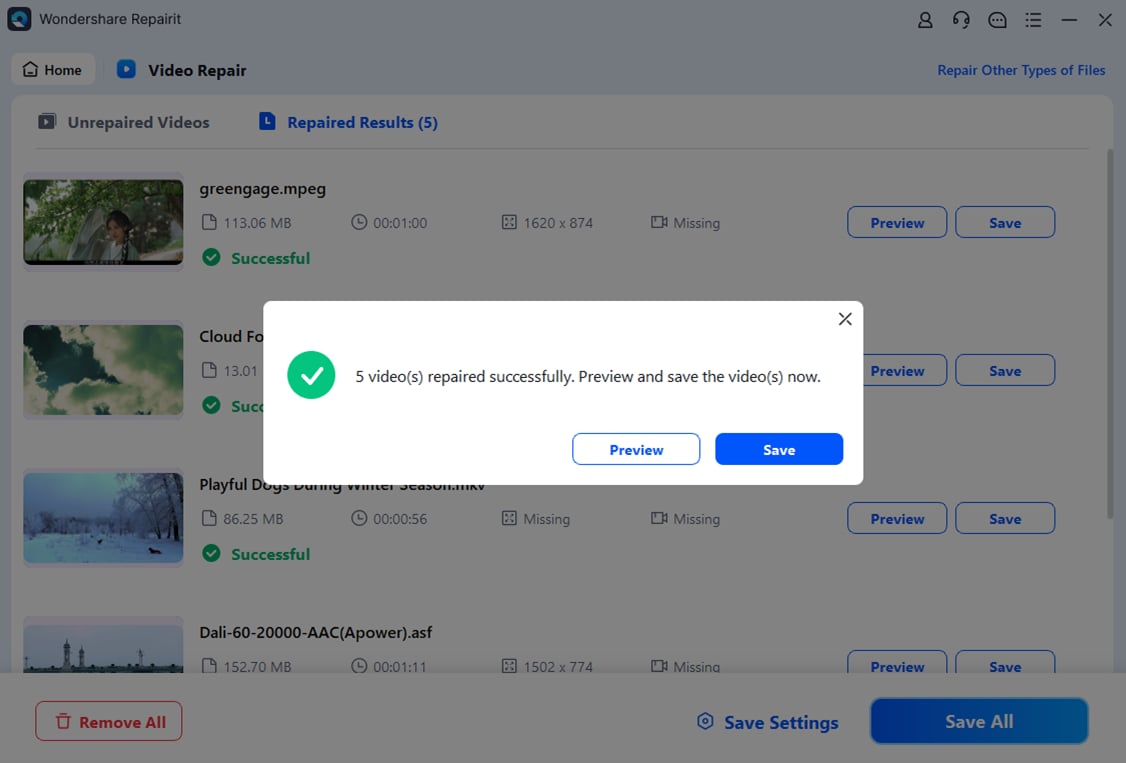
Step 5: Preview the repaired videos. If the results meet your expectations, click Save. Otherwise, click Advanced Repair.

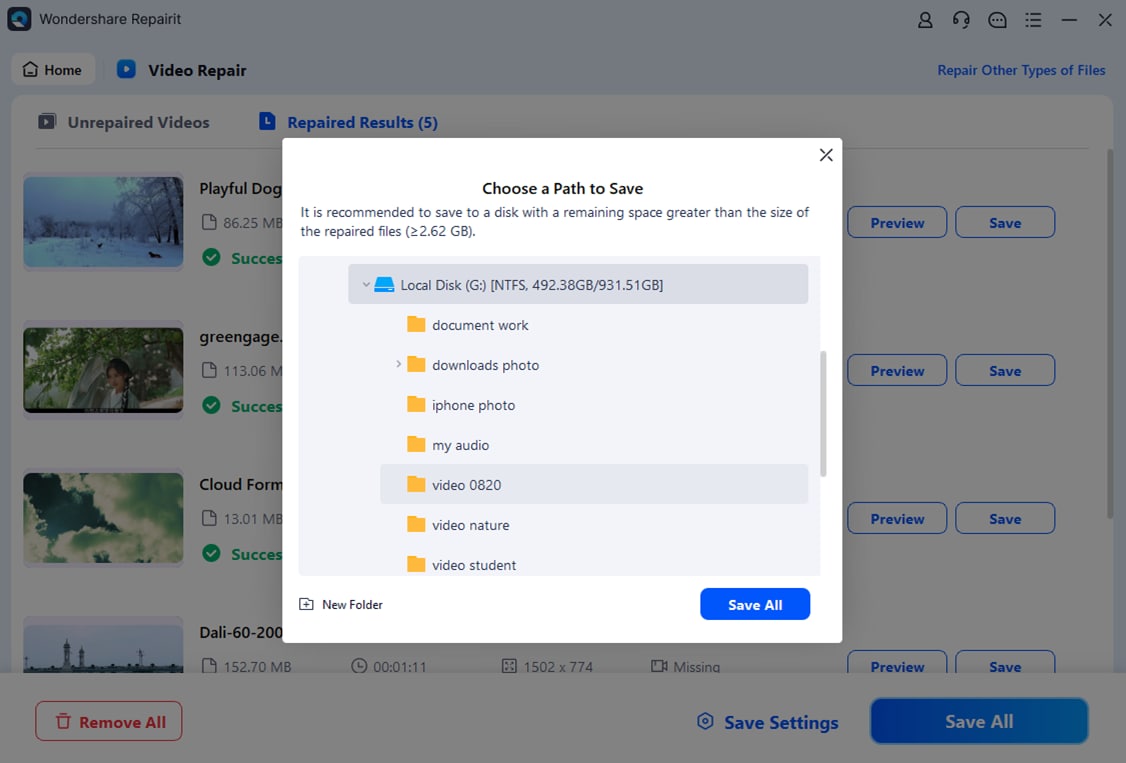
Step 6: Select a safe location for your restored videos and click Save.
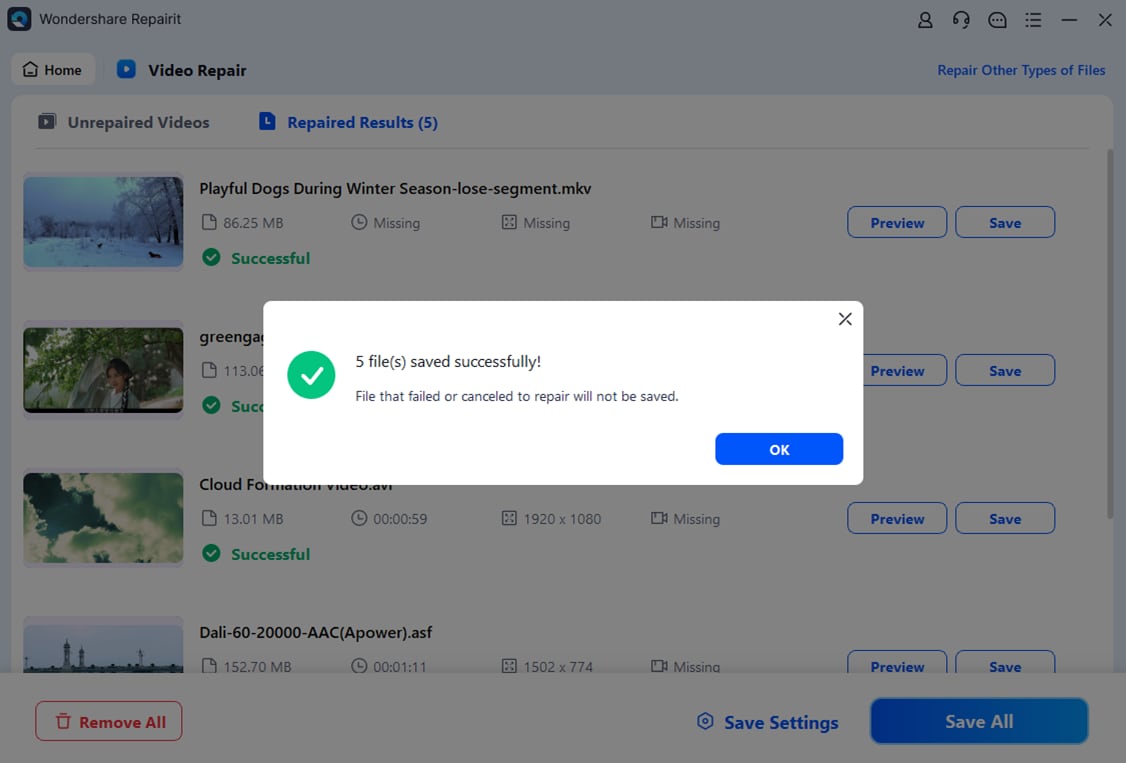
Step 7: Click OK once you see a success message.
Fix 2: Update Graphics Drivers
If your graphics drivers are outdated, you’ll experience problems with video playback. Outdated graphics card drivers can cause blurriness in videos and other issues. Updating them will fix the error and make your videos clear again.
Follow these steps to check if your graphics card drivers are out of date and update them:
Step 1: Click the Windows button, find the Device Manager, and open it.

Step 2: Expand Display adapters.
Step 3: Right-click your GPU and select Properties.

Step 4: Go to the Driver tab and find your GPU model and version number. Write them down.

Step 5: Now that you know your graphics driver version, you can check if it needs an update. To do that, visit your graphics card manufacturer’s website.
Step 6: If their latest version matches your GPU driver version, your graphics drivers are up to date. Otherwise, install the update from your GPU manufacturer’s official website.
Fix 3: Update Codecs
Video codecs are essential to play, compress, and decompress video files. If your video file is blurry, you can update Windows Media Player codecs to fix the problem. Even though Windows Media Player has many video and audio codecs, some might have gone missing, while others could be outdated and cause blurry videos.
Thus, follow these steps to update your Windows Media Player codecs and fix blurry videos:
Step 1: Open Windows Media Player. Click Tools and select Options.

Step 2: Click the Once a day radio button in the Automatic updates section. Then, click Apply > OK.

Windows Media Player will now check for updates daily and update codecs regularly.
Fix 4: Free Up Disk Space
Video files can get blurry during playback if you’ve used up all your computer’s disk space. Limited disk space can impact your computer’s performance, and you can experience many troubles when using it. Thus, freeing up some disk space might help you play your videos without issues.
Check your computer thoroughly and free up as much space as you can. You can use external hard drives to extract some files and free up internal memory. Once your disk has more room, try playing your videos again and check if they’re clear.
Note:
For permanent fixes, consider using a dedicated video repair tool.
Part 3: How to Fix a Blurry Video on Mac
The methods above are helpful for Windows users. However, you can try different solutions to fix blurry videos if you’re a Mac user. We’ve prepared three fixes to help you repair your blurry videos and make them clear again.
| 🔧 Fix Method | 🎯 Suitable for | ⭐ Key Advantages |
| 🌐 Wondershare Repairit Online | Corrupted, blurry, or unplayable videos | ☁️ Online repair, no software installation required, AI-powered enhancement |
| ▶️ VLC Media Player | Only works for AVI files | 🔄 Built-in repair tool for minor file corruption |
| 🎬 iMovie | Blurry or shaky videos | 🎭 Stabilization and video quality enhancement, ideal for editing improvements |
Fix 5: Use Wondershare Repairit (Online Video Repair)
We’ve already mentioned the Wondershare Repairit desktop version for Windows users. However, you can use the online version on your Mac computer to fix blurry videos. Wondershare Repairit Online also uses advanced AI technology to restore video files and make them playable again.
Follow these steps to use Wonderhsare Repairit’s online video repair tool to fix blurry videos:
Step 1: Go to the Wondershare Repairit online video repair page. Click Add to upload your blurry videos.
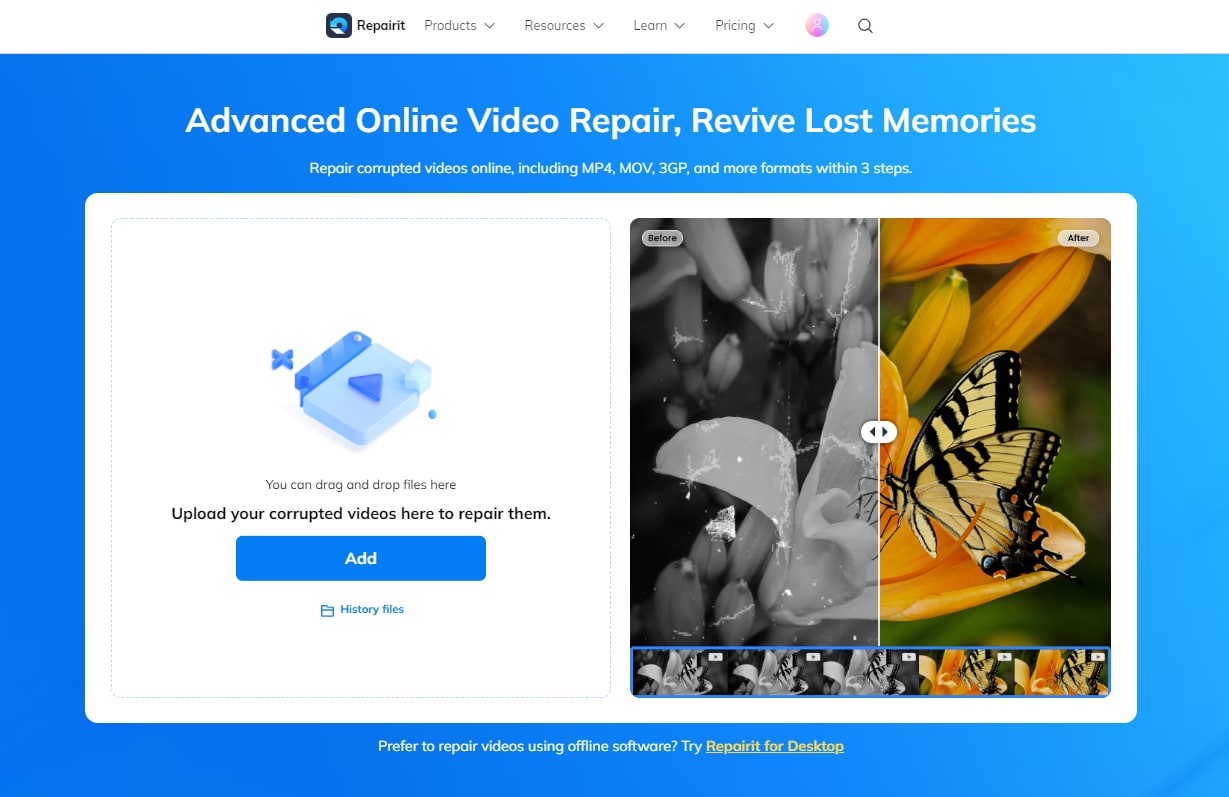
Step 2: The list of uploaded blurry videos will be on the screen. Click Repair to start the process.
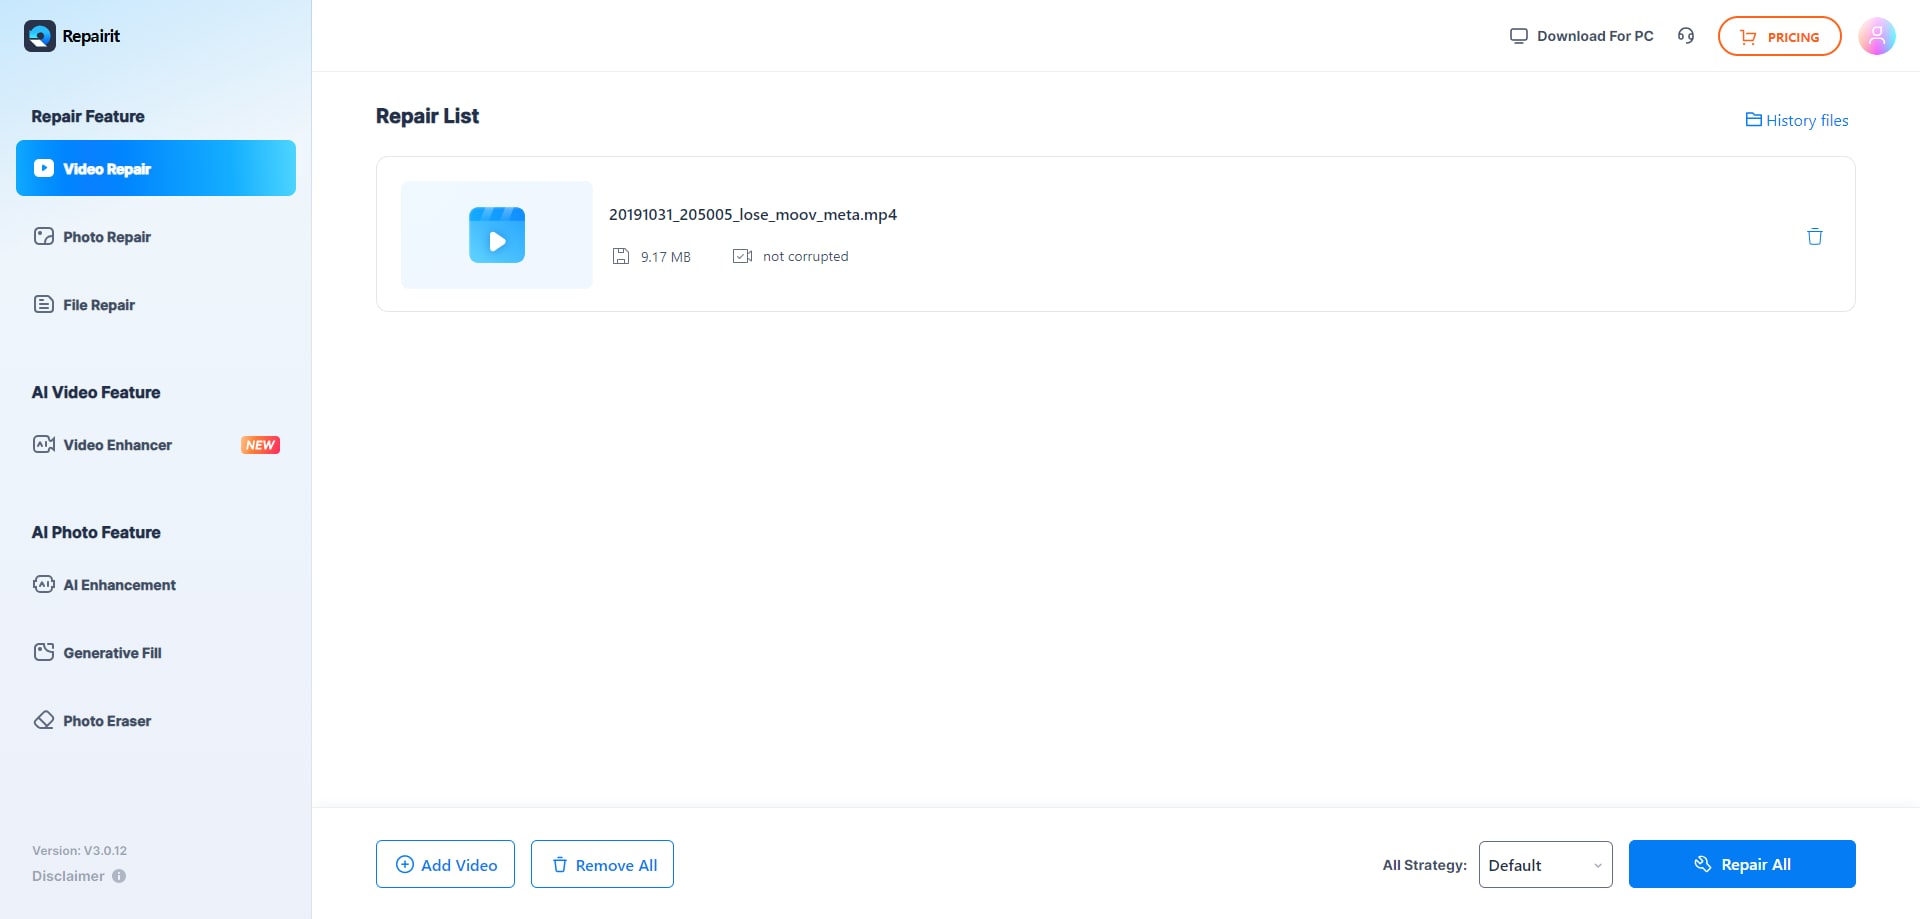
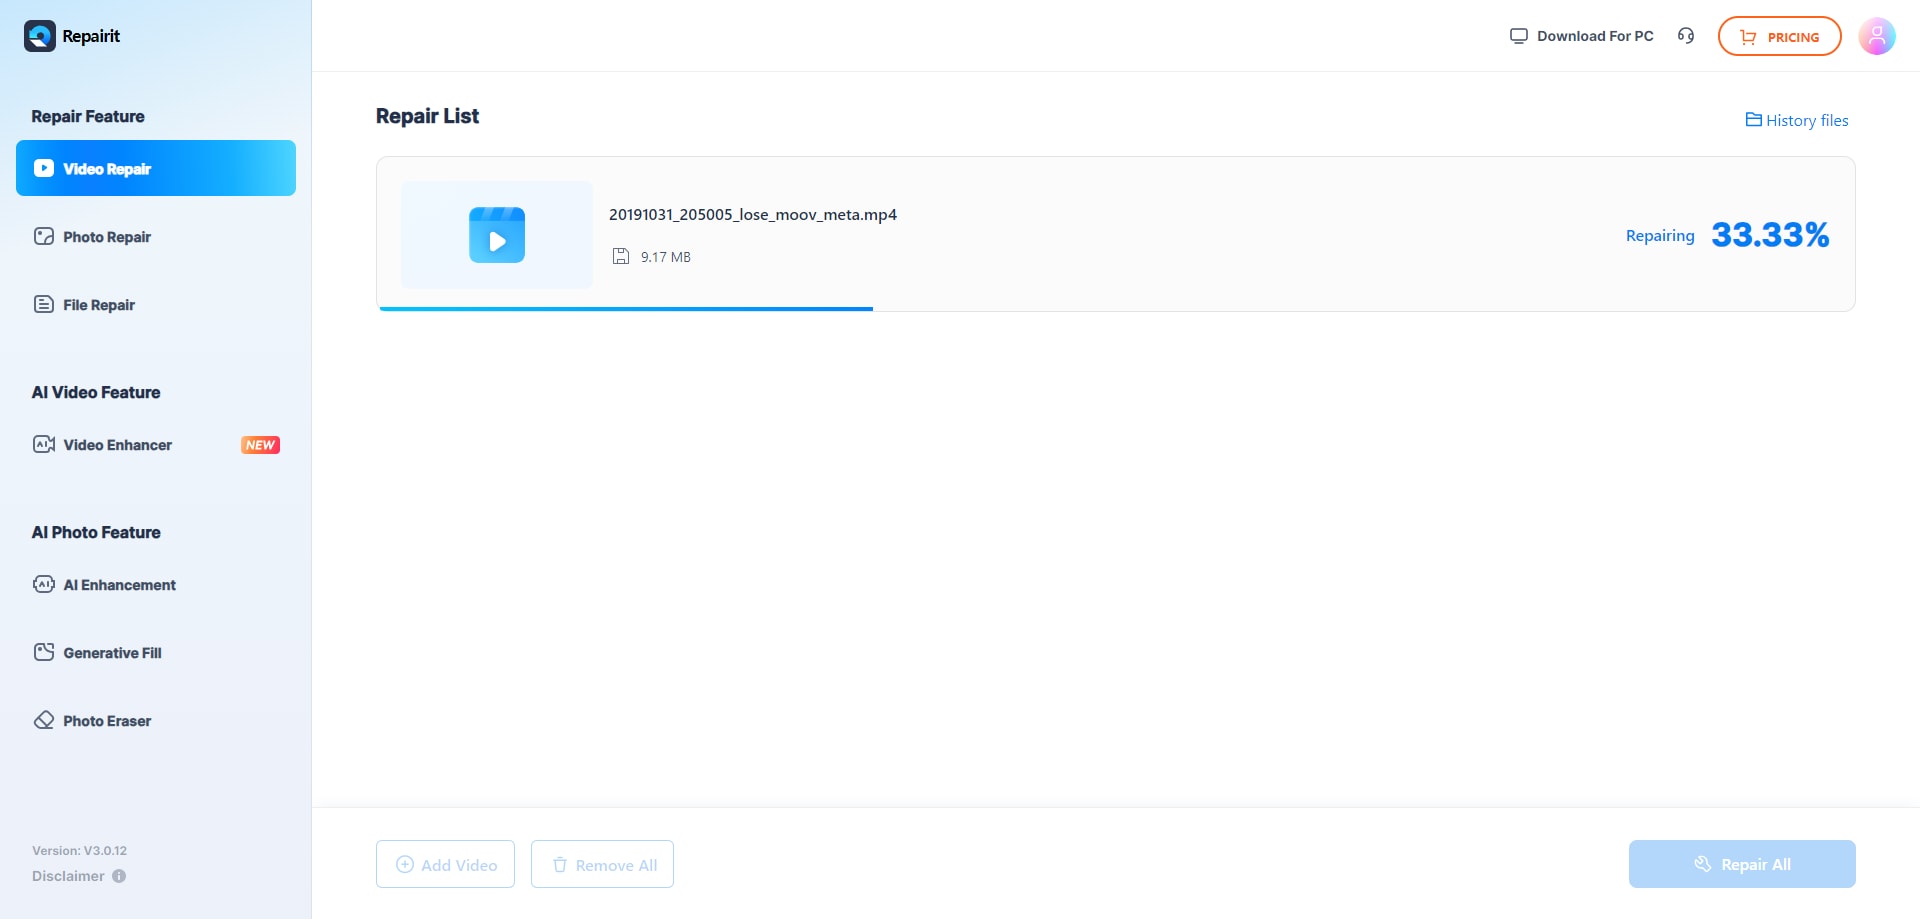
Step 3: The program will fix your videos one by one. You can monitor the progress next to each video.
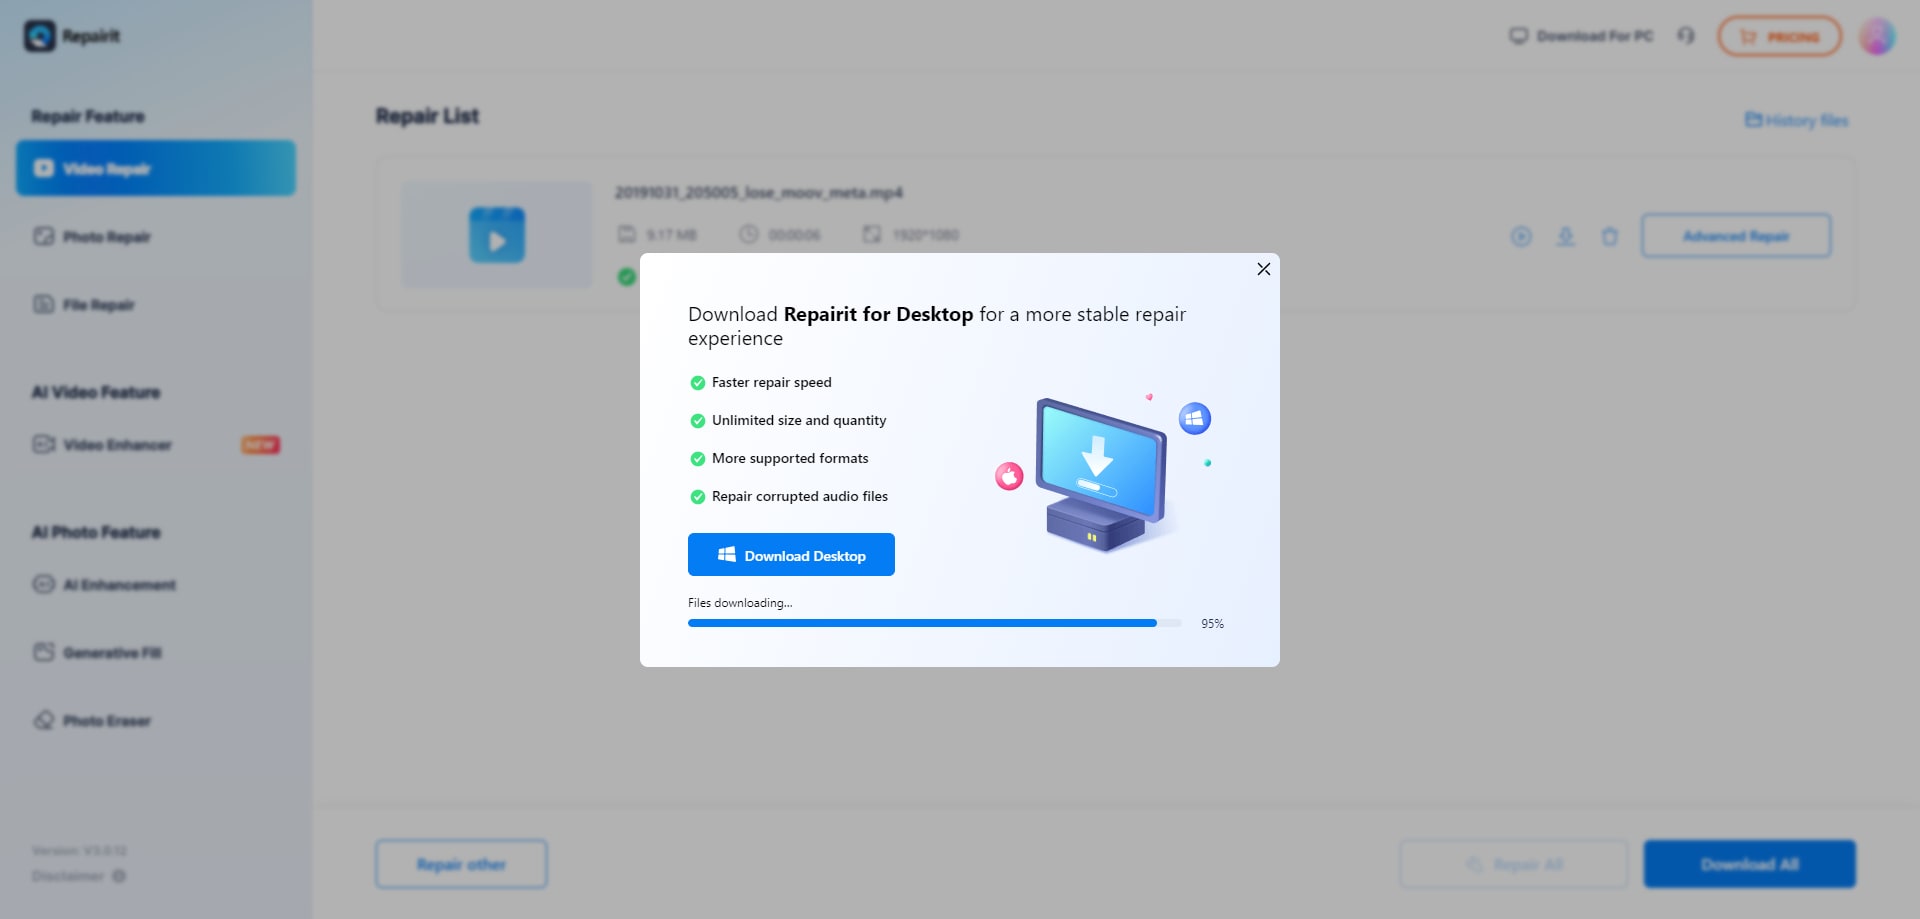
Step 4: Preview the videos once the tool repairs them. If you like what you see, click Download All and wait for the videos to download.
Fix 6: Use VLC Media Player
VLC is a media player for audio and video files. However, it also has a repair feature to fix minor video corruption causing blurriness. Unfortunately, this feature only works for AVI files. Thus, before repairing your blurry video in VLC Media Player, change its format to AVI.
Once you convert the format, follow these steps to use VLC Media Player to fix your blurry videos:
Step 1: Open VLC Media Player on your Mac.
Step 2: Click Tools at the top of the screen and select Preferences.

Step 3: Go to the Input / Codecs section in the Simple Preferences window.

Step 4: You’ll see a drop-down list in the Damaged or incomplete AVI file section. Click it to expand it and select Always fix.

Step 5: Click Save to apply the changes.
Fix 7: Use iMovie
iMovie is perfect for improving blurry video quality on Mac devices. It’s easy to use and has the Rolling Shutter feature to fix blurriness. Thus, use iMovie if you still haven’t repaired your blurry videos.
Follow these steps to fix blurry videos with iMovie:
Step 1: Open the iMovie Library and select your blurry video

Step 1: Click the Shaky Video icon.
Step 2: Tick the Stabilize Shaky Video checkbox, which will become a loading icon. That means iMovie is analyzing and stabilizing the video.

Step 3: Play the video to preview the changes. You can further improve the video quality by reducing rolling shutter distortion. Tick the Fix Rolling Shutter checkbox and wait for it to finish.

Conclusion
If your favorite videos is blurry, you don’t need to worry. That can happen for various reasons, such as damaged files, used-up disk space, or outdated graphics drivers and codecs. Fortunately, you can fix these problems and make your videos clear again.
If you’re a Windows user, you can fix blurry videos by updating graphics drivers and codecs, freeing up disk space, or using Wondershare Repairit’s desktop video repair tool.
If you’re a Mac user, you can use Wondershare Repairit’s online video repair, VLC Media Player, or iMovie to fix your blurry videos quickly.
People Also Ask
-
How to Make a Blurry Video Clear?
One-stop solution: Use Wondershare Repairit to repair corrupted videos and restore original quality.
System Optimization: Update graphics drivers and video codecs, and free up disk space for better playback. -
How Do I Clear a Bad Quality Video?
Fast & Easy – Wondershare Repairit’s AI Video Enhancer upscales resolution, reduces noise, and sharpens details automatically.
Manual Editing – Adjust brightness, contrast, and sharpness using iMovie or Premiere Pro. -
How to Fix a Blurry Video on a Computer?
Wondershare Repairit – Fix corrupted and blurry video files with the desktop or online tool.
System Updates – Update graphics drivers & codecs for smoother playback.
Alternative Tools – Use VLC (for AVI files) or iMovie (for stabilization and enhancement on Mac).


 ChatGPT
 Perplexity
 Google AI Mode
 Grok
Grok
