

Audio files are still one of the widely used formats for storing and sharing media. Similarly, as it is easily accessible, podcasts and songs are released in audio format. Yet, users may face the "Audio Codec Not Supported" error while they try to play their favorite podcasts or songs. This happens when the device cannot decode the audio format due to unsupported codecs or other settings.
Since different files use various audio compression methods, some formats may not work on certain devices. So, we will explain the common reasons behind this error and how we will solve them in this guide. From simple solutions to using advanced tools, this guide will explain every method to ensure your audio files are easily accessible.
In this article
Part 1. Why Did I Receive "Audio Codec Not Supported" Message?
As said above, this error occurs due to issues with the decoding settings in the media player. To be more precise, the following reasons should explain why the audio codec not supported Samsung phones or other devices:
| Reasons | Description |
| Unsupported Format | Some media files use advanced audio formats that your device may not support. So, if your media player lacks the correct decoder, it cannot process the sound. |
| Missing Codec Pack | Although your device comes with codecs, not all formats are included. That's why your device cannot decode audio files, as the required decoders are unavailable. |
| Media Player | Many default players have limited compatibility, which prevents them from decoding certain files. Hence, using a media player with wider codec support can solve this issue. |
| Damaged Audio | If the file is incomplete or damaged, your device may struggle to decode it. This can happen due to incomplete downloads or errors during the file-transferring process. |
Part 2. Top Solutions to Fix the "Audio Codec Not Supported" Issue
After knowing the reasons behind this problem, let's apply the top workable solutions to enable you to play your audio. So, follow the given methods to resolve the Samsung audio codec not supported:
Solution 1. Install the Required Audio Codec Pack (Windows)
Since the error occurs due to unsupported decoders, the ideal solution is to install them from somewhere online. For this, the K-Lite Codec Pack is widely used as it supports all major file formats. However, you can only follow this method on Windows, as decoders can’t be installed separately on Android. To learn about how you can install it to resolve the “audio codec not supported” problem, follow these steps:
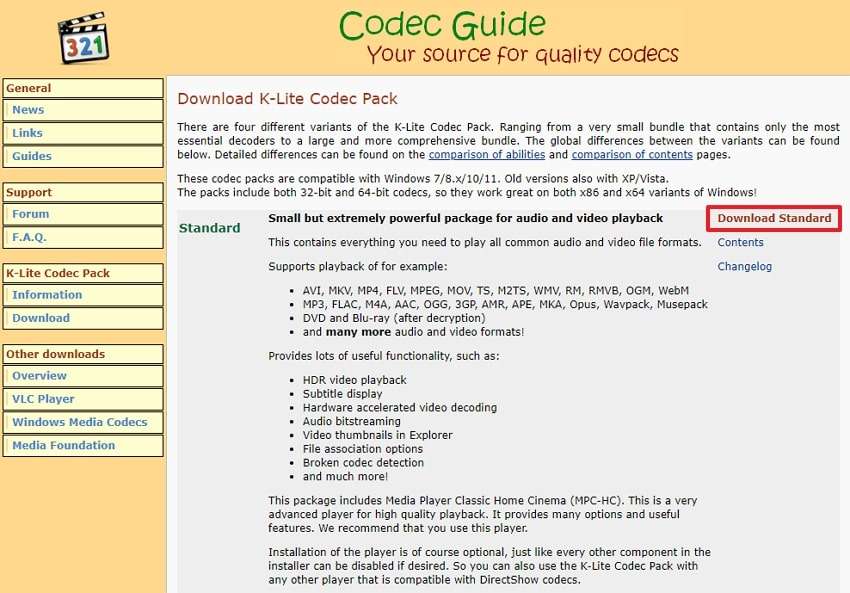
Step 1. Initiate by downloading the K-Lite Codec Pack from their download page. Here, choose any option that meets your requirements, press the "Download" button, and select any server from the next page.
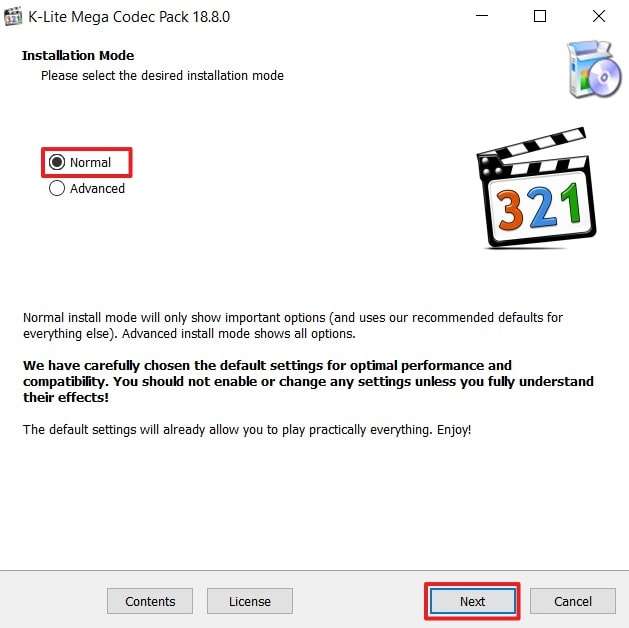
Step 2. Once the pack is downloaded, double-click on it and click the "Yes" option from the popup. Afterward, select the "Normal” option from the installation screen and press the “Next” button.
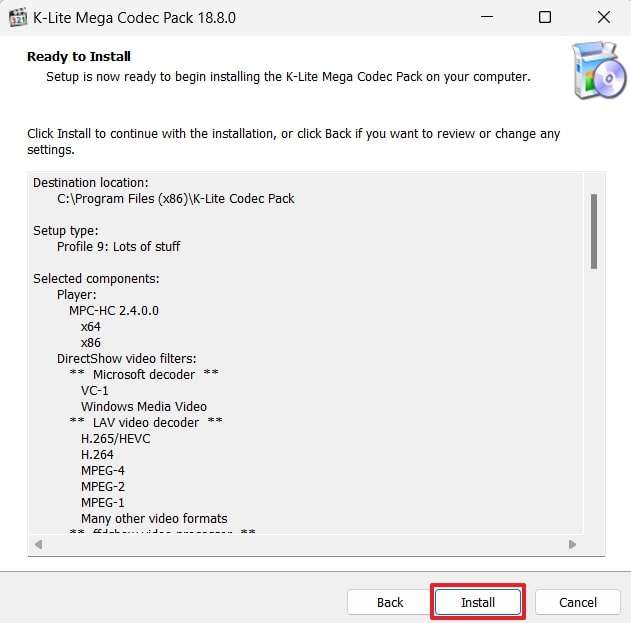
Step 3. On the following screen, select your desired settings, including the storage location, and move ahead by pressing the “Next" buttons. Finally, click the "Install” button on the final screen to complete the setup process.
Solution 2. Convert Audio to Other Supported Format (Computer/Smartphone)
When installing decoders is not an option, you can convert the audio file to a supported format. You can find many online tools, supported by all operating systems, that allow you to change the file format. It is recommended to convert the audio files to MP3 as it is supported by all players. You can follow the steps to solve the audio codec not supported on Android and computer:
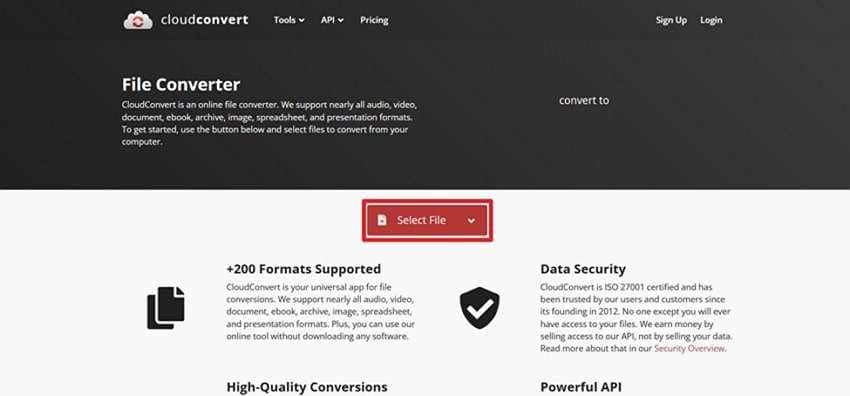
Step 1. To start, access the audio converter in CloudConvert and press the “Select File” button to upload the problematic file.
Step 2. Upon uploading the file, select your desired format from the “Convert To" drop-down menu. Afterward, click the "Convert” button to start conversion and press “Download” to save the file after the process completes.
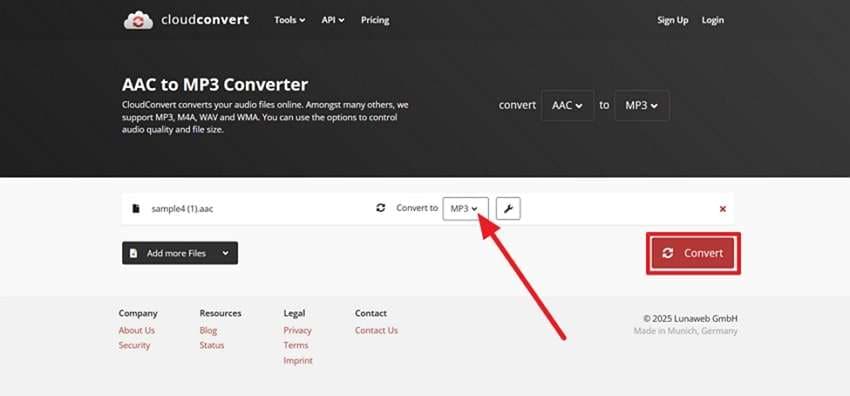
Instructions. Access the same converter tool on your mobile browser and press the "Select File" button. After selecting the audio file, tap the "Convert To" drop-down and select your targeted format. Then, press the "Convert” button and tap the “Download” button after completion of the process.

Part 3. Fix Corrupted Audio Directly with the Best AI-Powered Tool
With these solutions, you can easily resolve the “audio codec not supported” error and play your favorite music smoothly. However, when all these methods fail, it could indicate a problem with the audio file itself. In such cases, you will have to use some tools to repair the audio file and recover its playback features. As a recommended solution, Repairit solves all your audio problems by repairing the damaged files.
It supports the recovery of all popular formats, including M4A, AAC, FLAC, and WAV. In addition to the decoding problems, it can simply restore audio from various recording devices, like cameras and voice recorders. Besides its support for millions of devices, Repairit also boasts a high success rate in recovering the audio to its original quality.
Key Features
- Audio Preview: After repairing your corrupt or damaged audio, you can play it within the tool to see if it works.
- Clipping Issues: Repairit can resolve clipping from your audio, which occurs when you speak too close to the microphone.
- Version Support: You can access this robust AI audio repair software on all versions of Windows, from Vista to 11.
Detailed Guide to Solve “Audio Codec Not Supported” Problem in Repairit
After going through these features, you can see how it is the ideal solution for your audio problems. So, you can follow these steps in Repairit to solve the “Samsung TV audio codec not supported” problem:
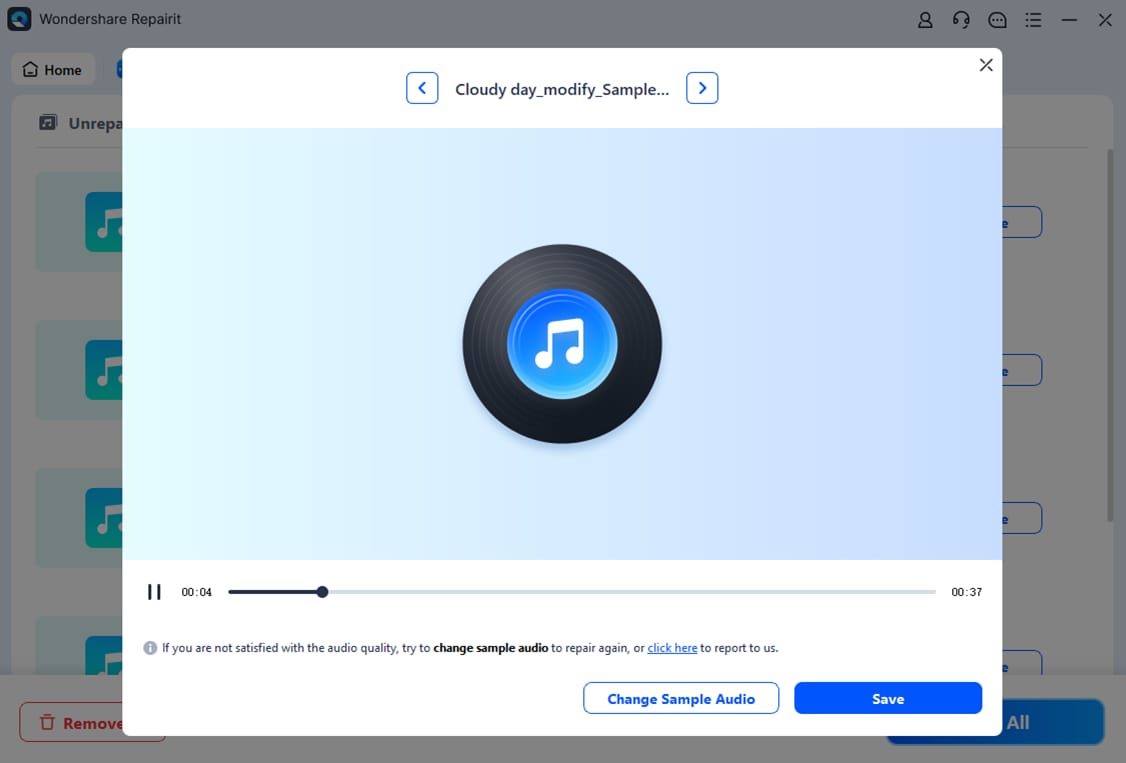
Step 1. Launch the tool and access the “Audio Repair” feature from the “More Types Repair” tab. Then, press the “+ Add” button to import damaged audio files into the tool.

Step 2. Import Corrupt Audio and press the “Repair” button to start repairing them.

Step 3. When the audio repair process ends, open any file to listen to it and click on the "Save” button to export it.
Repair Corrupted RAR Files
 Security Verified. Over 7,302,189 people have downloaded it.
Conclusion
In short, when you see the "audio codec not supported" message, it means your device cannot decode the format. This issue can be resolved by using a media player with broader support or by installing the necessary audio codecs. You can also use various online tools to convert the audio format into another one.
These are simple solutions that work when the problem is related to compatibility issues. So when the problem is with the file itself, you will need to use tools like Repairit to repair them. This tool supports the repair of all types of errors within minutes without changing the original content of the audio file.
FAQ
-
Q1. Can I fix "Audio Codec Not Supported" without installing a new app?
The problem can be solved by converting the file to a compatible format using various online tools. Other than file conversion, switching between different media players can also solve the error. In case the issue is with the audio file, employing Repairit is highly recommended. -
Q2. Why do I get the "Samsung TV audio codec not supported" error when playing movies?
This happens when your TV does not support the specific audio codec used in the movie file. Formats like DTS are not supported on certain models and require an external media player. Hence, convert these files into other data types to get rid of the error. -
Q3. Do all Android devices support the same audio formats?
Different devices have varying levels of codec support depending on the manufacturer and software version. Some phones and tablets support advanced audio formats, while others may lack the necessary decoders. When a phone has problems in playing audio formats, you should try switching between other players.
