

"Anyone know how to import MOV files into Davinci Resolve?" - Reddit user
Struggling to import MOV files into DaVinci Resolve? You’re not alone.
DaVinci Resolve supports MOV files, allowing you to import, edit, and export them. However, MOV is just a container that holds different codecs. Many users still face issues like DaVinci Resolve MOV files not loading or getting the dreaded "media offline" error.
This guide covers six simple tips to fix the issue and ensure a smooth editing process. Let’s get started.
Fix Can't Import MOV Files to Davinci Resolve Issue
 Security Verified. Over 7,302,189 people have downloaded it.
In this article
Part 1. Why Can't I Import MOV Files to Davinci Resolve?
If you're having trouble importing MOV files into DaVinci Resolve, here are some common reasons:
- Unsupported Codec: MOV is just a container, and DaVinci Resolve may not support some codecs inside it.
- Free Version Limitations: The free version of DaVinci Resolve doesn’t support certain codecs, like Apple ProRes.
- Corrupt MOV File: If the file is damaged, Resolve may not recognize or import it properly.
- Incorrect File Settings: Issues with frame rate, resolution, or audio settings can cause import failures.
- Missing Codecs: Your system might lack the necessary codecs to decode the MOV file.
- Media Offline Error: Even if the file imports, you might see a DaVinci Resolve MOV media offline message due to a missing file link or an unsupported format.
Part 2. Top 4 Solutions to Import Davinci Resolve MOV Files
Need a fix? While compatibility issues can arise due to codec mismatches or file format restrictions, there are fixes to it. Below are the top four solutions to help you import MOV files into DaVinci Resolve.
Solution 1: Convert MOV to Davinci Resolve-Compatible Formats
DaVinci Resolve is a popular video editing tool, but some files like WebM, AVI, and MKV may not import properly. If you have this issue, you can convert your videos to a supported format. Before learning how, let's first check which formats DaVinci Resolve supports.
- Video formats: MOV, MP4, AVI, ARI, R3D, MXF, MTS, CDX, ProRes, DNxHD, DPX, CIN, EXR, etc.
- Audio formats: AAC, MP3, AIFF, WAVE, Broadcast Wave.
- Image formats: TIF, PSD, PNG, DNG, JPG, EXR, DPX.
- Other files: FXPXML, EDL, AAF.
If your video format isn’t supported, you’ll need to convert it using a tool like WonderFox HD Video Converter Factory Pro. Even some MP4 or AVI files may not work if they use an unsupported codec, so changing the video codec may also be necessary.

WonderFox HD Video Converter is a simple tool that quickly converts MOV files while keeping their quality. This easy-to-use tool helps fix video and audio compatibility issues with DaVinci Resolve. It supports batch conversion and hardware acceleration, allowing you to process multiple large files quickly. You can also adjust video resolution, aspect ratio, and more to fit your needs.
Download the WonderFox HD Video Converter and follow the guide below to make your videos editable in DaVinci Resolve.
Step 1: Open the Converter module. Click + Add Files or Video Folder to import videos. You can also quickly drag and drop the MOV video files directly into the program.

Step 2: Hit the format icon on the right to open the output format library. Under the Video tab, select a supported format. MP4 (H.26.AAC) is the best choice. Adjust codecs and other settings in Parameter Settings if needed.

Step 3: Choose an output folder or keep the default location. Click Run to start converting the videos.

Once done, you can import the converted files into DaVinci Resolve for smooth editing.
Solution 2: Update DaVinci Resolve
If your MOV files don’t open in DaVinci Resolve, the issue might be an outdated version of the software. Older versions may not support certain video codecs, which causes import errors. New versions fix bugs and MOV compatibility issues.
The updates also add new features and performance improvements, making the software more compatible and stable. However, the updates may take time to download and install. Follow the steps below to proceed immediately.
Step 1: Before updating, back up your projects to avoid losing any work. Open DaVinci Resolve and go to File and Project Manager. Right-click a project and select Project Backup. Choose a folder to save your backup for easy restoration later.

Step 2: Click DaVinci Resolve in the top-left corner. Select Check for Updates.

If a program update is available, click Upgrade and follow the on-screen instructions to download and install it.

Step 3: After updating, DaVinci Resolve may ask you to upgrade your database to keep your files compatible. Open Project Manager and look at the left panel. Follow the prompt to update the database.

You can also check for updates on the Blackmagic Design Support Center under Latest Downloads. This section also includes details on new features in each update.

Solution 3: Check File Integrity
If DaVinci Resolve doesn’t import your MOV files, they might be corrupt or incomplete. A damaged file can cause playback errors, freezing, or import failures. Checking file integrity helps identify these issues early and avoids future import failures.
You can easily check file integrity using Event Viewer. Adhere to the instructions followed:
Step 1: Open Event Viewer and go to Windows Logs and Security.
Step 2: Click Filter Current Log under the Action panel.
Step 3: Search for Event ID 4656 to find file integrity changes.
Step 4: Double-click an event to view its properties.

You must repeat these steps for all files and folders. However, manually checking each event is time-consuming and inefficient, especially for large organizations.
Solution 4: Install Required Codecs
Updating codecs can help DaVinci Resolve work smoothly with MOV files. New versions improve compatibility, enhance performance, and support more video formats, ensuring a better editing experience.
DaVinci Resolve supports various codecs to compress and decompress video and audio files for smooth playback and high quality. Commonly used codecs include:
- Video Codecs (ProRes, DNxHD, DNxHR, H.264, H.265 (HEVC), and uncompressed CinemaDNG)
- Audio Codecs (WAV, MP3, AAC)
- RAW Codecs (ARRIRAW, RED RAW, X-OCN, Cinema RAW Light, Blackmagic RAW, and more)
The best codec depends on your project’s needs, balancing quality, file size, and compatibility. Here’s how to install codecs in DaVinci Resolve.
Step 1: Visit the codec’s official website (e.g., K-Lite Codec Pack) and download it.
Step 2: Run the installer and see the on-screen instructions.
Step 3: Open the software and import your video or audio file. If the codec isn’t recognized, restart the program or your computer.

Part 3. How to Repair Corrupted MOV Files?
Imagine spending hours shooting the perfect footage, carefully setting up your angles, lighting, and composition. Excited to start editing, you import the MOV files into DaVinci Resolve — only to be met with an error. The video won’t play, frames are missing, or worse, the software crashes. Panic sets in. Was it a bad transfer? A storage issue? Or is the file itself damaged?
This situation is more common than you’d think. MOV file corruption can happen for several reasons. These can include power failures during file transfers, unexpected system crashes, or even using the wrong codecs. Whatever the cause, this issue can be frustrating and time-consuming.
Thankfully, there’s a solution. Repairit MOV Repair is a powerful program that fixes corrupted MOV video files. Simply upload your damaged MOV file, let Repairit analyze and fix the errors, and save the repaired version. Within minutes, you can recover your MOV files and continue your editing without any disruptions.
Here are some of its remarkable features:
- Fixes corrupt, unplayable, or damaged MOV files in just three steps.
- Maintains the original MOV file quality with a high success rate.
- Uses a sample video with the same format and settings to repair severely corrupted MOV files.
- Preserves original resolution, frame rate, and color grading.
- Batch repair feature for fixing multiple MOV files at once.
- Allows previewing repaired MOV videos before saving them.
- Works seamlessly with DaVinci Resolve, ensuring smooth importing and editing.
Follow the steps below for a professional mode repair of MOV files.
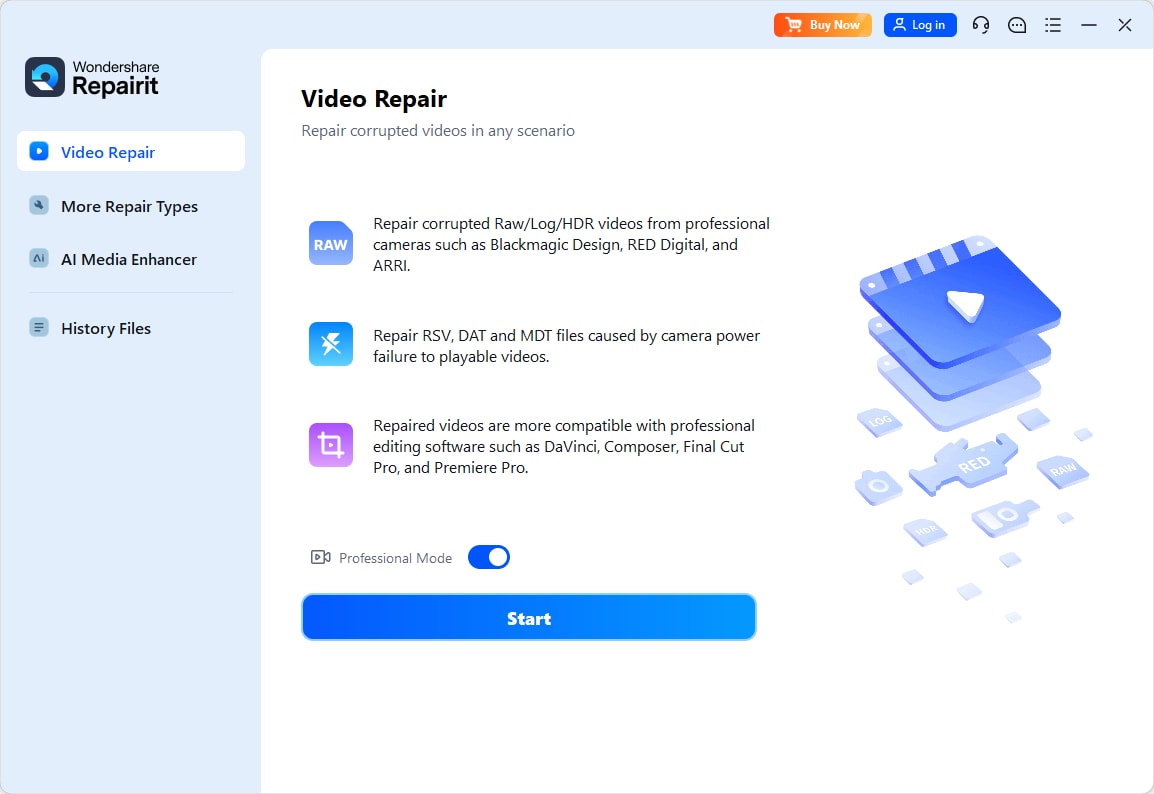
Step 1: Open Repairit. Toggle on Professional Mode and hit Start to enter.
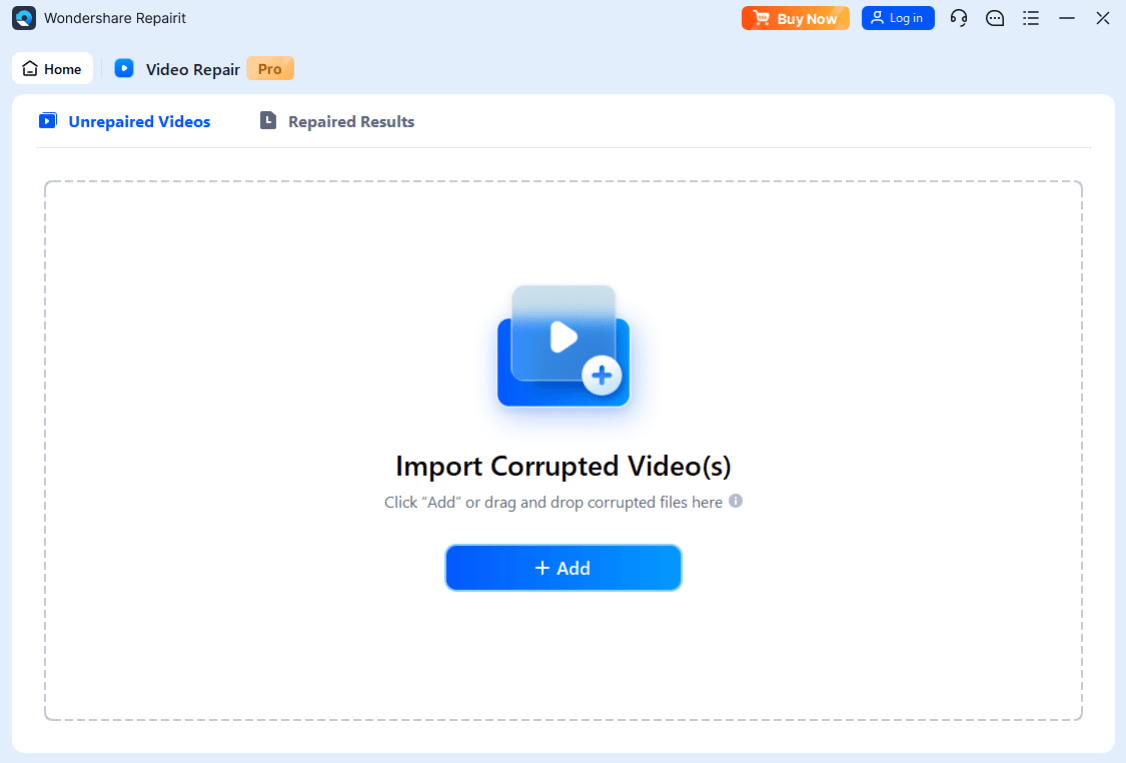
Select Add or drag and drop your corrupted MOV files.
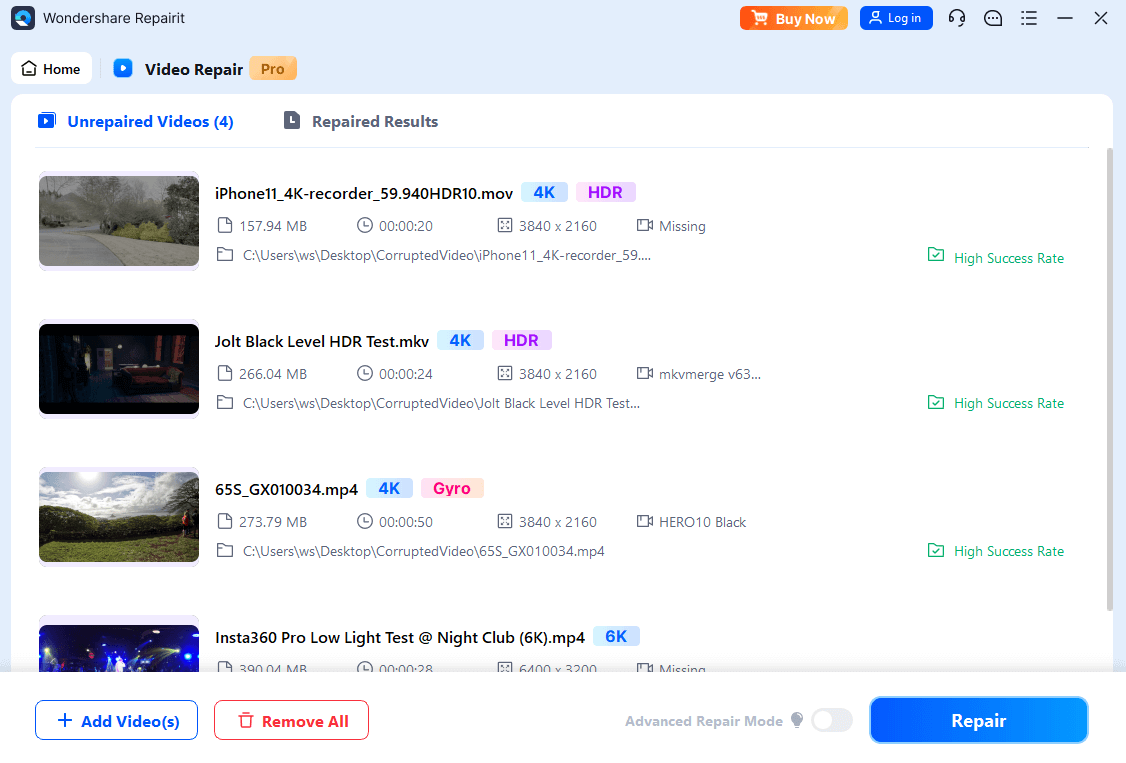
Step 2: Click Repair to start fixing your MOV files. Wait a moment for the process to complete. Once done, preview the repaired MOV files before saving.
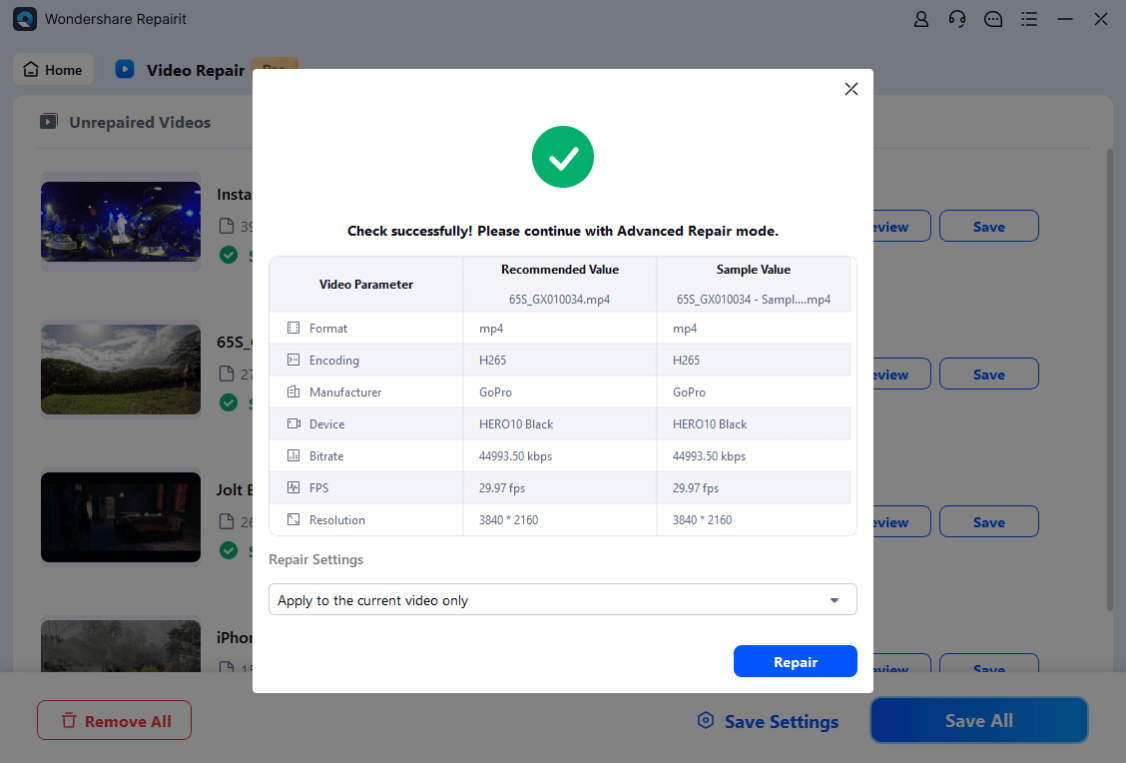
If the basic repair doesn’t work, try Advanced Repair for heavily damaged MOV files. Upload a sample MOV file from the same device and format.
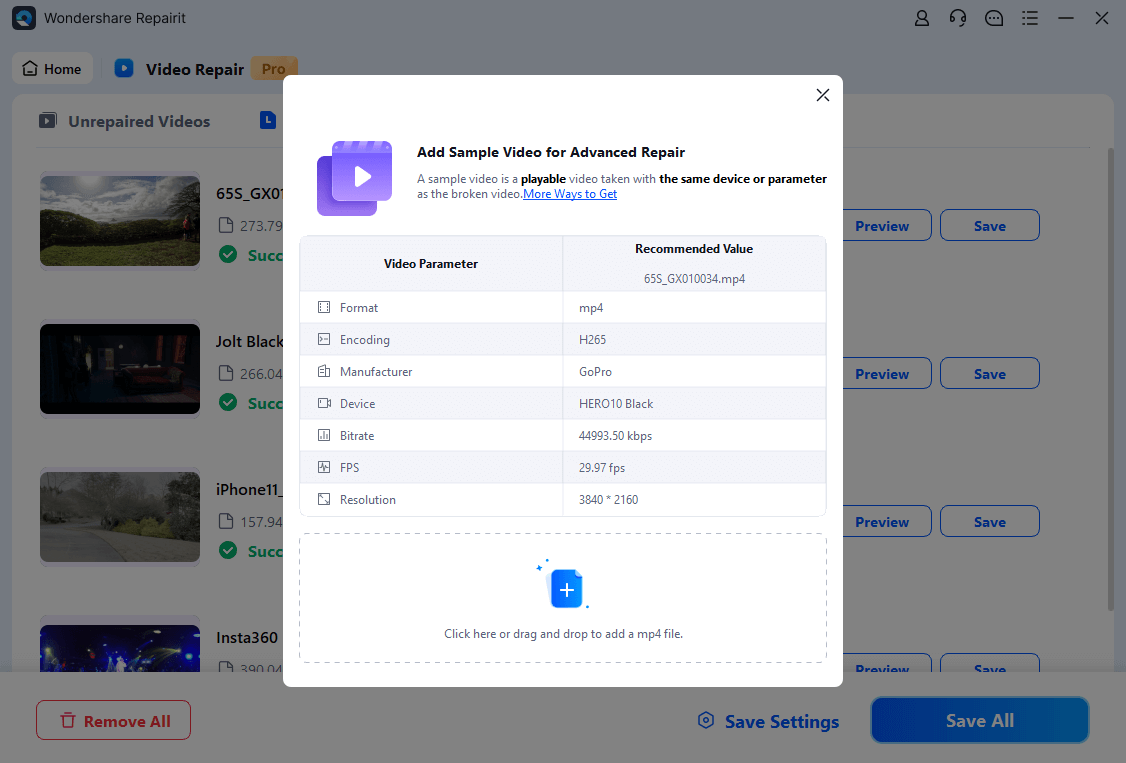
Repairit will analyze the sample MOV file and use its data to fix the corrupted issues. Click Repair, wait for completion, then preview the outcomes.
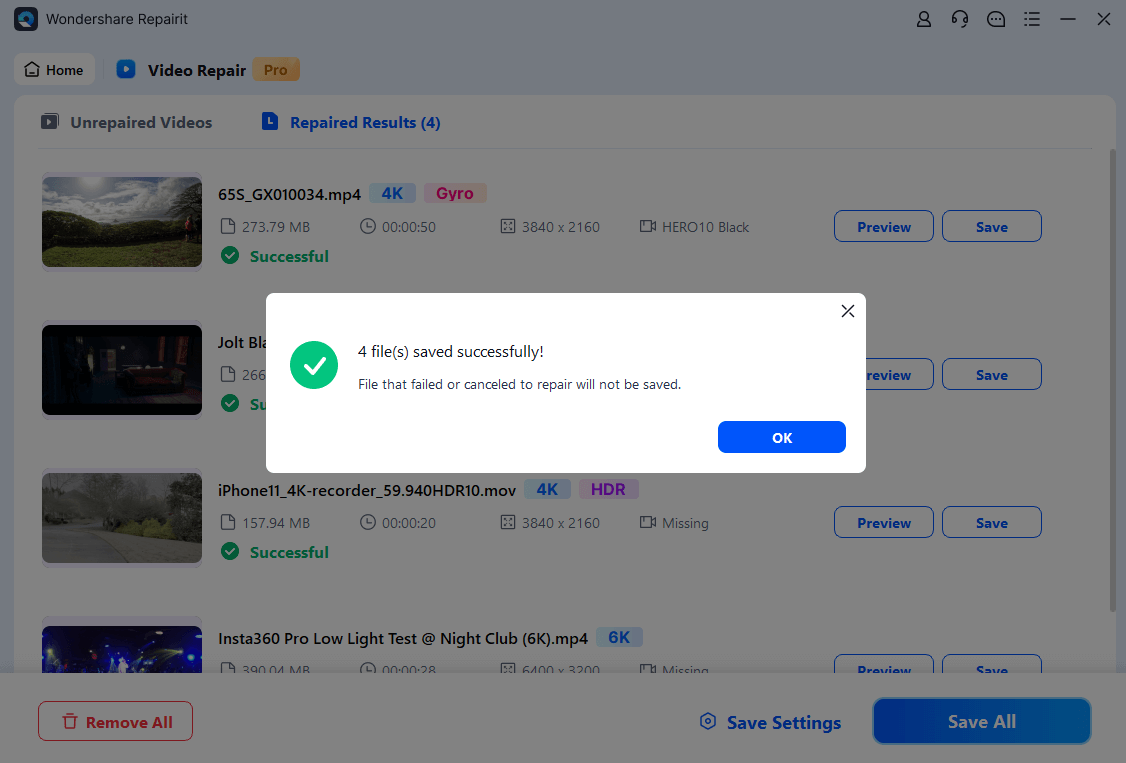
Step 3: Click Save and pick a destination folder. Avoid saving the MOV files in the same location where they were lost. Your repaired MOV files are now ready to import in your Davinci Resolve without problems.
Repair Corrupted MOV Files to Import and Edit on Davinci Resolve
Security Verified. Over 7,302,189 people have downloaded it.
Conclusion
Importing MOV files into DaVinci Resolve can be easy. Check your codecs, update the software, convert unsupported files, or repair corrupted videos to fix offline media errors. If issues persist, tools like WonderFox HD Video Converter and Repairit Video Repair can help. With these fixes, you can edit MOV files without frustration.
FAQ
-
How do I import media files quickly in DaVinci Resolve?
1. Open DaVinci Resolve and go to File > Import > Media.2. Select your video and click Open to add it.
3. Click Edit to start editing.
-
How do I export media files in DaVinci Resolve?
Click Deliver to open the export settings.1. Select Custom Export, name your file, and choose a save location.
2. Set the format, codec, and resolution as needed.
3. Click Add to Render Queue, then Render All to export.
-
What are the best media export settings for DaVinci Resolve?
Format: MP4 or QuickTime MOVCodec: H.265 (best, but requires Studio) or H.264 (recommended)
Resolution: Match your original footage (e.g., 4K for 4K footage)
Frame rate: Match the original video (never exceed it)
Quality: Set to Automatic (Best) or Restrict to 2000x the frame rate
Encoding Profile: High
Keyframes: High
Audio: Use AAC codec with a constant bitrate for best quality.
