Q: How to extract audio from video using a VLC media player?
"I am willing to extract audio from video using VLC media player. I do not have a single clue about doing this task. The audio that I want to extract from my video has great significance for me. Delaying this task would result in poor performance in my academic life. I want the quickest steps to extract audio from video using VLC media player."
Millions of VLC users want to extract audio from video. The majority of the people are unaware of any methods to extract audio from video using VLC. Extracting audio from video with VLC is not a stiff task. In this guide, you will have multiple methods to extract your audio. You will be given methods to extract video using VLC and other alternatives. You just need to follow them properly. Don't stress yourself you will extract your audio in a really short period.
In this article
Part 1: How to Extract Audio from Video with VLC Player?
First of all, let's get to know the basic method to extract audio from video. This method is one of the most used methods to do the task. These steps might be extensive but are effective. You just need to turn on your device and let's get to start the process. Follow these few steps;
Step 1: Start your extraction by opening the VLC first. In the drop, the menu selects or presses the option of convert/save as in the picture below.

Step 2: After clicking you will have an open media window on your screen. Click on the option "Add" and then navigate to the video you want to extract audio from.

Step 3: Now click the option given in the right bottom "convert/save".
Step 4: After clicking the previous option, the convert window will be activated. Click on the Browse option. Next, navigate where you desire to save your extracted audio file.

Step 5: Name the file accordingly with a .mp3 file extension. You can witness the destination path.
Step 6: In front of the profile, you will have a drag down option. Select Audio-mp3.

Step 7: Now, you need to do a few more small changes. Click on the spanner and screwdriver icon at the right of the drop-down list box. The encapsulation window will be opened. Select the option "Raw" and then click the Audio codec tab.

Step 8: You will have another drop-down list in front of you and select MPEG audio. Furthermore, you need to change the bitrate for better quality, the default is 128 kb/s.

Step 9: Finally, click Save. The process will take some time.
Part 2: How to Extract Audio with Specified Parameters from Video with the VLC Command-Line?
Okay, so if you have tried the above method and you face problems with that method. You can extract audio with specified parameters from the video with the VLC command line. Follow these simple steps;
Step 1: Create a new folder, add the video you want to extract the audio from.
Step 2: Now, open the command prompt from the start menu.

Step 3: Direct the command prompt to the location at which you have saved the folder with the video.
Step 4: Press enter.
Step 5: Type rename (location of your video).mp3.
Step 6: Check if the video is converted to mp3.
Part 3: How to Extract Audio from Video Using VLC Alternatives?
If you are tired of using VLC for extracting audio from video. Here's, good news. You can extract audio from videos using VLC alternatives. There are two alternatives for you. One is that you can use any of the online tools to extract your audio. If not that, you can use any of the audio extracting software. There are multiple software's out there to help you out. You can extract your audio using these two alternative methods mentioned below;
1. Online Tool
This is the simplest VLC alternative for extracting audio from video. You just need an internet connection to access any online tool. Online tools come in handy when you are stuck in a situation like this. This alternative consists of a few short steps. Follow them carefully:
Step 1: Open your browser.
Step 2: Search for an online tool to extract audio from video. For example (audio extractor. Net)

Step 3: Select the video from your computer.
Step 4: Upload the video and select audio format mp3.
Step 5: Start the extraction, wait for a while.
Step 6: Download the extracted audio.
2. Extracting Software
Lastly, you can also extract the audio from video without using VLC with the help of an extracting software. Using audio extracting software can also save you valuable time. You can download easefab audio extracting software for your ease. Once you have downloaded the software. Follow these steps;
Step 1: Download and run easefab software. Click the option of "Add" to select your video from which you want to extract the audio. You can simply drag the video into the window.

Step 2: Now, you need to navigate to the profile library. Select the audio format from the "common audio" catalog. Select mp3 as an example.

Step 3: Once done with the previous step, come to the main screen. Open the setting window. You can change the bit rate, sample rate, channels here. After customization click "Ok".

Step 4: In the end, select the location where you want to save the audio file. After that, click on the convert button and wait for a while.
Bonus Tip: Can I Extract Audio Not Synced with the Video?
Yes, you can extract audio not synced with video. People who think that they can't extract audio not synced with video, can try VLC. VLC can be used to extract audio not synced with video. There is no time taking steps. You can do this in a matter of time. VLC is versatile enough to do this.
There is another way to fix your problem. You can use Wondershare Repairit Video Repair to fix audio not synced with video. Wondershare Repairit Video Repair is effective enough to fix your audio not synced with a video issue.
Wondershare Repairit Video Repair can repair corrupt, broken, or damaged videos in MOV, MP4, M4V, M2TS, MKV, MTS, 3GP, AVI, FLV, and more file formats. And whichever camera brand you own it works on all — Canon, Sony, Go Pro, Olympus, Nikon, Fuji, Samsung, Panasonic, DJI, Parrot, Skydio, and many others. The program supports various video corruption scenarios like video not playing, audio-video sync issues, video playback interrupted frozen videos, blurry videos, etc.
These are the steps you need to follow to solve your issue.
Step 1: Add your corrupted video
Run the software on your PC, once the application is open click on the option of "Add" and select your audio not synced with the video file.

Step 2: Repair your videos
After you have added the audio not synced with the video file, click on the option of repair. Wait for a while, let the application repair the video.

Step 3: Preview the repaired videos
The repairing process might take a while. Once it is done you will see information about the fixed video. Preview your recovered video and press "OK" to proceed.

Step 4: Advance mode for severely corrupted video (optional)
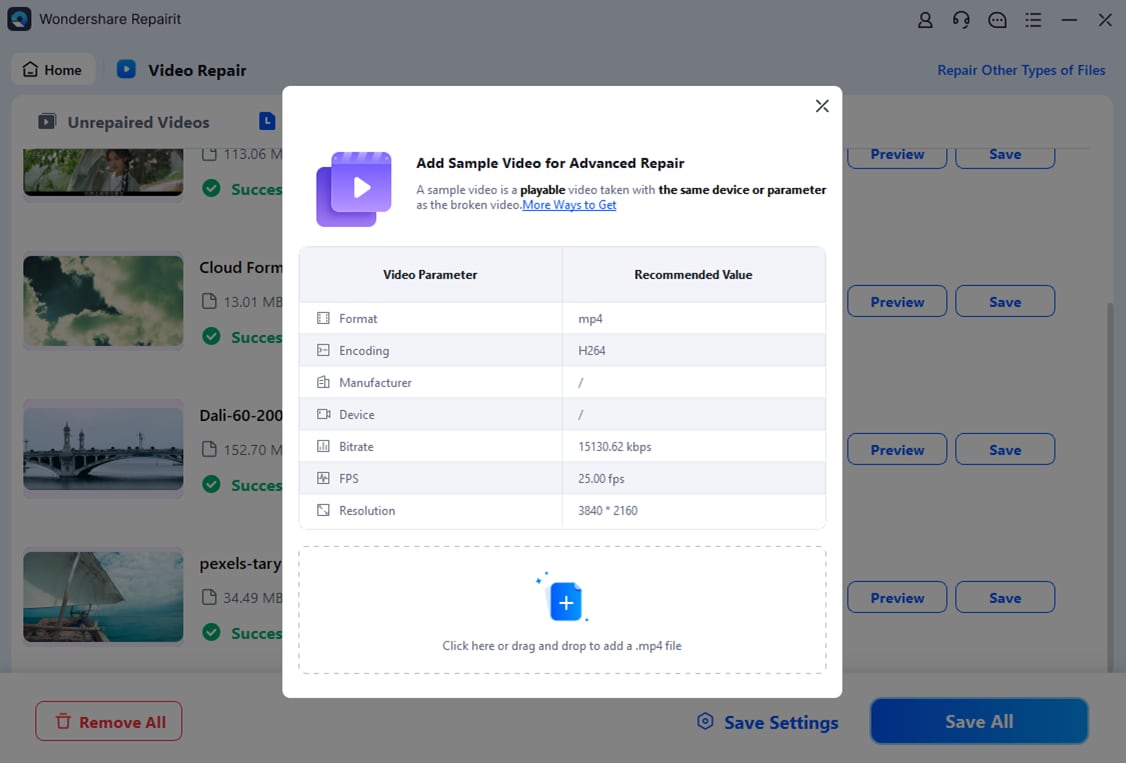
If the videos are severely corrupted and not repaired successfully, please go to the advanced repair mode. Just click the "Advanced Repair" button.
Then add a sample video and repair it now.

Step 5: Save repaired video
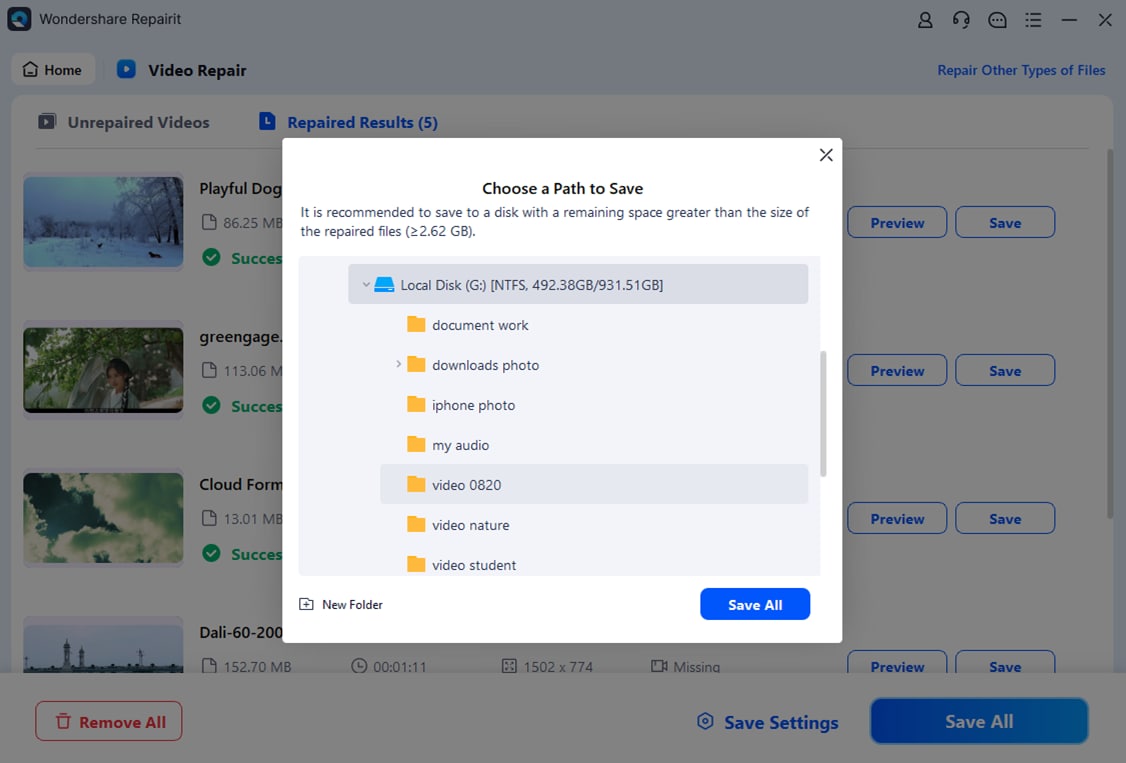
When all corrupted videos are repaired, you can click the "Save" button to store videos to any location on your computer.


 ChatGPT
 Perplexity
 Google AI Mode
 Grok
Grok
