
If you’re new to DaVinci Resolve, you might have seen people talk about proxies and wondered what they are. Are they just lower-quality videos? Do you really need them? These are common DaVinci resolve proxy questions. It is particular if you’ve only worked with basic editing before.
This guide will explain what proxies are and how to create them in DaVinci Resolve. You’ll also learn how to fix common proxy problems, so you don’t waste time restarting your project.
Fix Common Proxy Media Issues in DaVinci Resolve
 Security Verified. Over 7,302,189 people have downloaded it.
In this article
Part 1: What Are Proxies in DaVinci Resolve?
Proxy media in DaVinci Resolve means lower-resolution copies of your original video files. These copies are much smaller and easier for your computer to play and edit. The main reason people use proxies is to make editing faster and smoother, especially with large files like 4K, 6K, or 8K footage.
Editing high-resolution videos takes a lot of power because your computer has to process every detail in every frame. If your computer is not powerful enough, you might notice freezing, skipping, or slow playback when you try to edit. Proxies help by letting DaVinci Resolve switch to these lightweight copies during editing, so your timeline plays smoothly.
The best part is, proxies do not affect your final video quality. When you export your project, DaVinci Resolve automatically switches back to the original files, so you still get full quality in your final video.
Common Reasons People Use Proxies
- Editing High-Resolution Footage. Working with 4K, 6K, or 8K footage can be too much for many computers, even if they are powerful. If you film with cameras like RED, Blackmagic URSA, or Canon R5, your files will be very large. Using proxies helps your computer play these clips much faster, so editing feels smoother.
- Working on Older Computers or Laptops. If you edit on a laptop or a computer with slower hardware, large files can cause choppy playback or make your audio fall out of sync. Proxies allow you to work with smaller files, so even older computers can handle editing without constant lag.
- Managing Large Projects. Editing big projects with hundreds of files, like a documentary or wedding video, can also slow down DaVinci Resolve. Even if the files are not all 4K, having so many large files at once puts pressure on your system. Proxies help by lightening the load so the timeline stays responsive.
- Sharing Files for Remote Work. When you need to share clips with editors or clients, sending full-quality 4K or 6K files can take a lot of time to upload and download. Proxies are much smaller, so they are faster to share, especially if you need quick feedback from someone working remotely.
- Editing with Heavy Effects or Color Grading. If your project has lots of effects, transitions, or color grading, playback gets slower because your computer has to process every effect in real time. By using proxies, you only apply these effects to smaller files, making playback much smoother.
- Working with Footage from Different Cameras. Sometimes you need to edit mixed footage from different cameras, like a GoPro, drone, and cinema camera in the same project. Each camera might use different settings, formats, and resolutions, which can make playback unstable. Proxies with matching settings make everything more stable and easier to work with.
Part 2: How to Create Proxies in DaVinci Resolve?
Creating proxies in DaVinci Resolve is very simple if you know where to find the right options. Here’s a quick and reliable guide you can follow:
Step 1: Import Your Video Files
- Open DaVinci Resolve.
- Go to the Media Pool and import your videos.

Step 2: Generate Proxy Media
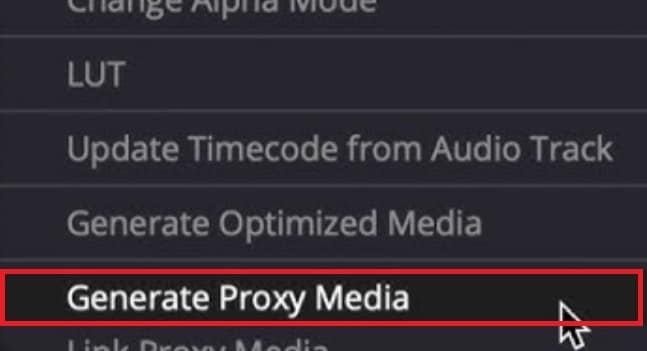
- Right-click on your video file inside the Media Pool.
- Choose Generate Proxy Media.
Step 3: Set Proxy Format and Quality
- Go to Project Settings. Choose Master Settings.

- In the Optimized Media and Render Cache section, choose the proxy format and resolution you want (ProRes, DNxHR, or H.264).
- Pick a lower resolution, like ¼ or ½ resolution, for faster editing.
Step 4: Edit Using Proxies
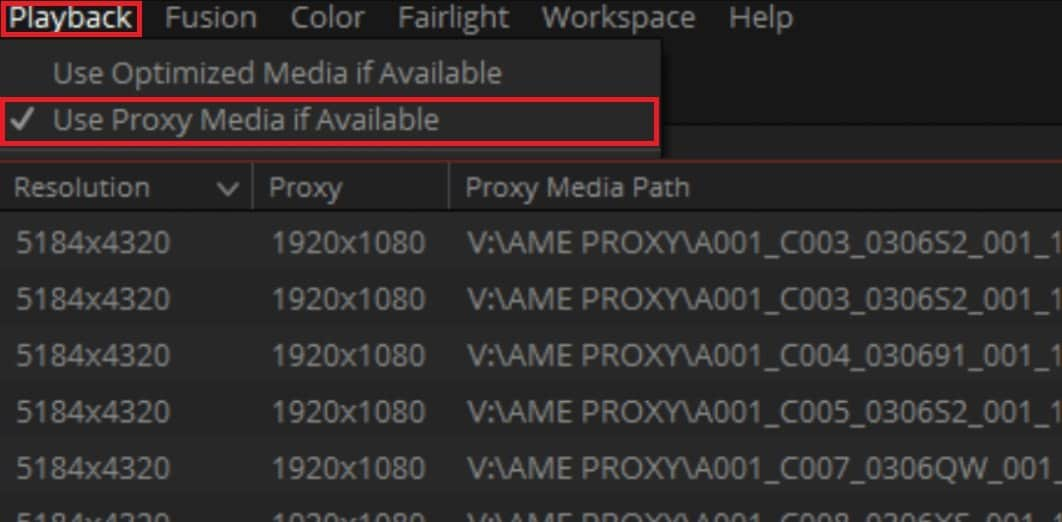
- After generating proxies, DaVinci Resolve will automatically switch to using proxy media.
- If you want to manually switch between original files and proxies, go to Playback. Then, select Use Proxy Media If Available.
Part 3: How to Fix Common Proxy Media Issues in DaVinci Resolve?
Sometimes, proxy media in DaVinci Resolve doesn’t work the way it should. You might see errors when you try to generate proxies, or the files might not link correctly to your original videos.
In some cases, the proxies play with glitches, don’t open at all, or cause DaVinci Resolve to crash. These problems often happen because the files were damaged when they were created, or something went wrong during the process. If your storage drive has issues, that can also corrupt proxy files.
To save time, you don’t need to start over when this happens. Instead, you can repair the damaged proxies using Repairit Video Repair. This tool is made to fix broken video files, and its Professional Mode works especially well with high-resolution and professional files. This includes proxies made in DaVinci Resolve.
Repairit can fix errors caused by broken file structure, missing metadata, or incomplete data. With this tool, you can repair your proxies and get back to editing without creating new ones.
Key Features of Repairit Video Repair:
- Repairs proxies and high-resolution files from professional cameras.
- Fixes broken metadata, so DaVinci Resolve can recognize the proxies correctly.
- Works with formats like MOV, MP4, MTS, MXF, and more.
- Repairs files damaged during proxy creation, file transfers, or software crashes.
- Supports batch repair if you have many damaged proxies.
Here’s a quick and reliable guide on how to repair proxy media using Repairit Video Repair’s Professional Mode feature:
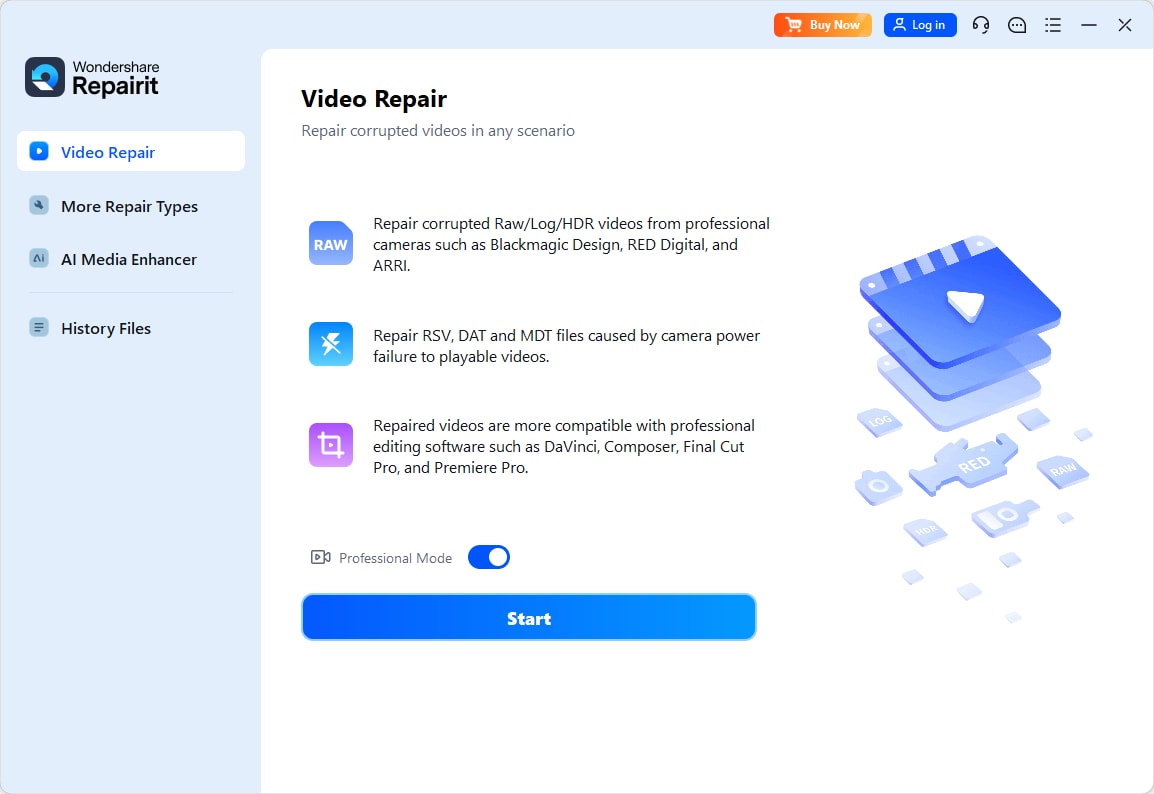
Step 1. Download and install Repairit to start. Toggle on Professional Mode for high-resolution or professional proxy files. Then, hit Start.
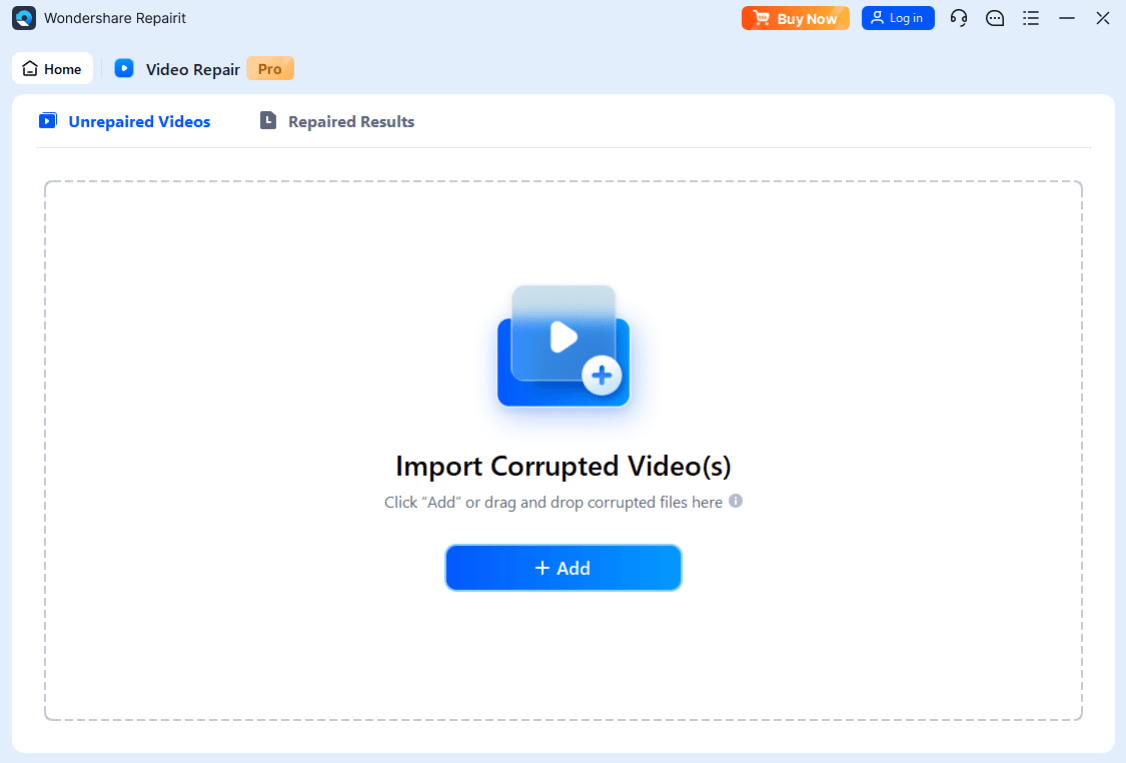
Step 2. Open the software and +Add your damaged proxy files.
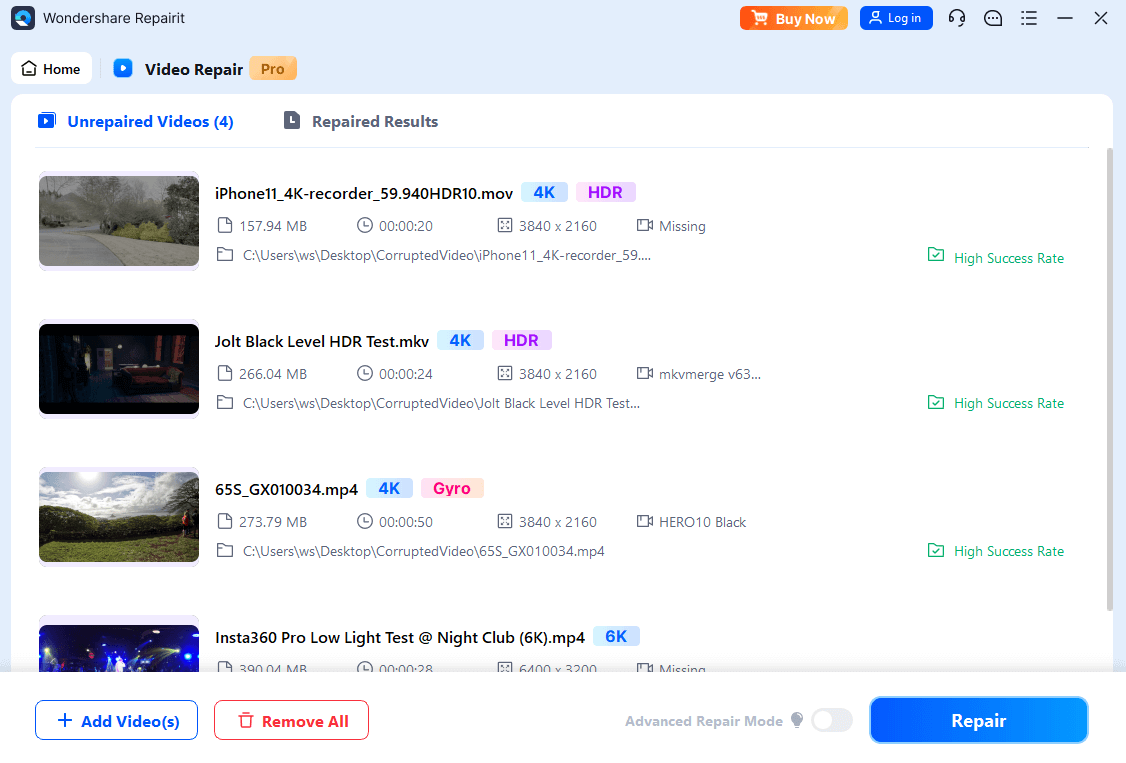
Step 3. Continue the process by pressing Repair.
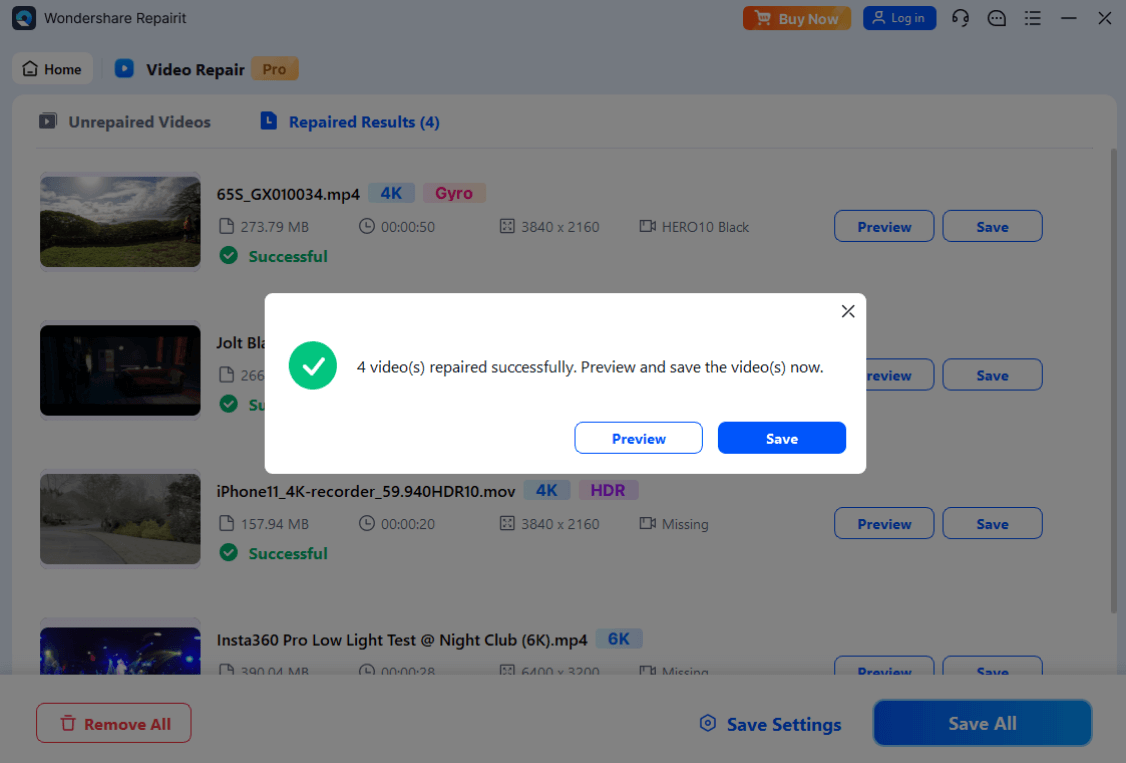
Step 4. Preview and Save the repaired proxies on a safe location.
Fix Common Proxy Media Issues in DaVinci Resolve
Security Verified. Over 7,302,189 people have downloaded it.
Conclusion
Proxies in DaVinci Resolve are a powerful way to speed up your editing, especially if you’re working with large files. They help you edit faster without stressing your system. But proxies don’t always work perfectly. If they get corrupted, you don’t need to start over. With tools like Repairit Video Repair you can fix damaged proxies quickly and get back to editing without losing progress.
Next time you work with proxies in DaVinci Resolve, you’ll know exactly how to create them, how to avoid problems, and how to repair them fast if something goes wrong.
FAQ
Why do you need proxies for editing?
Proxies make editing smoother by replacing large video files with smaller, easier-to-play copies. This is very useful if you work with 4K, 6K, or 8K footage. Without proxies, playback can freeze or lag, especially if your computer is older or not very powerful.Why do some proxies fail to generate in DaVinci Resolve?
This can happen if the original file is corrupted, the storage drive has bad sectors or connection issues, or DaVinci Resolve runs into a format compatibility problem. In some cases, software bugs or outdated versions of DaVinci Resolve can also cause proxy generation to fail.How can you avoid proxy problems in DaVinci Resolve?
To avoid problems, always use file formats that DaVinci Resolve supports, keep your software up to date, and store your files on a healthy, fast drive. If you suspect a file is damaged, you can repair it before generating proxies to avoid errors.
