HDR DaVinci Resolve is known and used for stunning videos, but how exactly does it work? One Reddit user asked, “Anyone know how HDR works with the full version of Davinci? I know HDR is not supported in the free version but, with the full paid-for version is it as easy as 'drag and drop' with HDR clips or is color correction a MUST?”
If you are looking for some ideas don't skip and stay in this article. This guide will show you everything you need to know about the tools, tips, and workflows of HDR DaVinci Resolve. So what are you waiting for? Let's dive in!
Repairit provides a Professioanl Mode to repair RAW/LOG/HDR videos from cameras such as Blackmagic Design, RED Digital, and ARRI.

In this article
Part 1. What is HDR DaVinci Resolve?
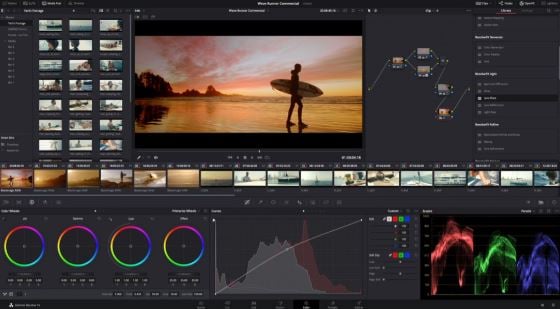
High Dynamic Range (HDR) in DaVinci Resolve is a technique that improves the color and contrast of a video, giving it a wider range between the lightest and darkest parts of the image. This results in images that look more realistic and detailed. HDR in DaVinci Resolve allows for brighter highlights, deeper blacks, and more detail in shadows.
DaVinci Resolve makes it easy to work with HDR by offering different color wheels for adjusting the brightness of shadows, mid-tones, and highlights separately. It also supports popular HDR formats like HDR10, Dolby Vision, and Hybrid Log Gamma.
Part 2. What Are The HDR Standards?
When working with HDR, it's essential to understand the different HDR standards that determine how video quality is displayed. In this section, we’ll explore the most commonly used HDR standards and explain how they differ from each other.
HDR10 and HDR10+
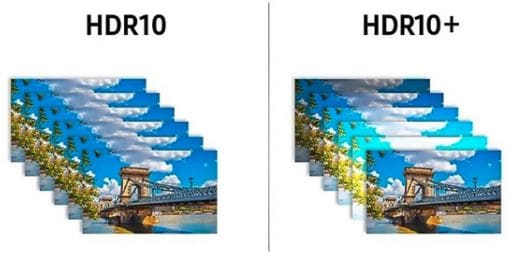
The Blu-ray Disc Association uses the ST 2084 PQ curve and supports both HDR10 and HDR10+. The main difference between them is how they handle metadata. Because HDR10 uses static information, the video's brightness levels remain constant. This can cause the image’s highlights to lose some detail. However, HDR10+ employs dynamic information, which modifies brightness frame-by-frame to improve viewing on various screens.
Dolby Vision
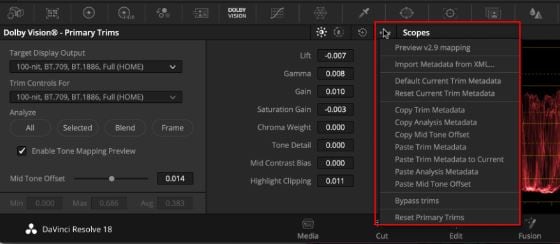
Dolby Vision uses the SMPTE 2084 PQ EOTF, which helps convert digital images into visible light, much like a gamma curve. It includes colorist control metadata to ensure the creator's vision is preserved across different screens. Dolby Vision can support a wide range of brightness, from 0 to 10,000 nits, and includes a dual-layer output option to make sure the image looks good on both SDR and HDR displays.
Hybrid Log Gamma (HLG)
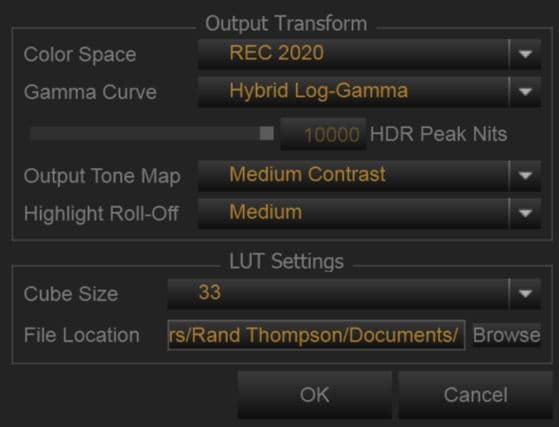
The BBC and NHK developed the HDR encoding technique known as HLG. It starts with a linear curve and smoothly switches to logarithmic encoding for the highlights. This means that on an SDR display, most of the image will look the same as on an HDR display, with the only difference being the compression of the highlights.
Part 3. How to Setup DaVinci HDR Workflow?
In this section, we'll guide you through setting up DaVinci Resolve for HDR work, making sure your HDR display is correctly connected and set up. Let's see one by one.
1. Connect the Capture and Playback Device
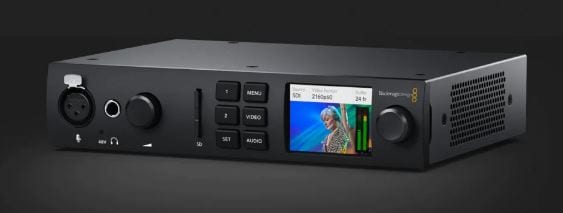
To get started with HDR in DaVinci Resolve, you'll need a capture and playback device from Blackmagic. You can use an UltraStudio 4K Mini or a DeckLink PCIe card. This device sends a clean video signal from DaVinci Resolve to your HDR monitor. The monitor must show the actual video output, not just the full-screen display from the graphical interface (GUI). Why? Because the image on the monitor and the GUI will look different when working in HDR.
For UltraStudio devices, connect the monitor using HDMI and link the device to your computer through Thunderbolt. If you’re using a desktop PC, a DeckLink PCIe card with HDMI and SDI outputs will work, fitting into your PCIe slot. Make sure your device supports HDMI 2.0, as HDR requires a wider color range and transmits more data to the monitor.
Configuring HDR Display with DaVinci Resolve
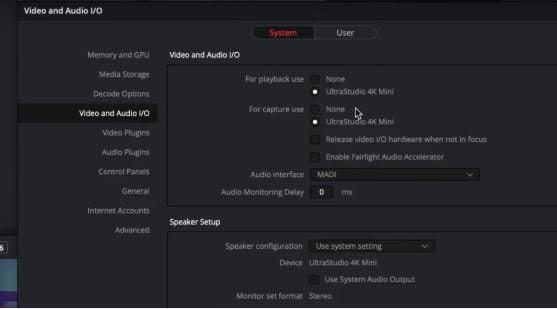
Once your capture and playback device is connected, follow these steps to set up DaVinci Resolve for HDR grading:
Step 1. Open DaVinci Resolve and go to DaVinci Resolve > Preferences in the top left corner.
Step 2. In the Video and Audio I/O settings, check that DaVinci Resolve detects your UltraStudio or DeckLink device under the "Monitor Device"options. If it doesn鈥檛, you may need to install the Desktop Video software that comes with your device for compatibility with Mac, Windows, or Linux systems.
Now that your HDR monitor is connected and DaVinci Resolve is ready, you can start working on HDR content. In the next sections, we'll explore the tools and techniques for HDR grading in DaVinci Resolve.
2. Monitor in Different Resolutions with Davinci HDR
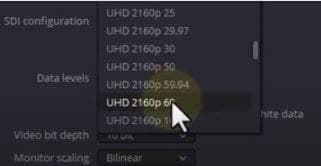
DaVinci Resolve gives you the option to work with different timelines and monitoring resolutions. This helps reduce the load on your graphics card when working with HDR. For example, you can edit in an HD timeline while monitoring your output in 4K. In this section, we’ll show you how to change your monitoring resolution in DaVinci Resolve.
Changing the Monitoring Resolution
Step 1. Open your project in DaVinci Resolve.
Step 2. From the top menu, go to File and Project Settings.
Step 3. In the Master Settings tab, you'll see the timeline resolution set to 1920x1080 (HD). Keep it as it is.
Step 4. Go to the Video Monitoring section and change the video format resolution to UHD 2160p 23.976 (or the frame rate of your project).
Step 5. Then, in the Image Scaling section, uncheck the "Match Timeline Settings" box.
Step 6. Change the output resolution from HD to Custom and set it to 3840x2160 (4K).
After saving these settings, the monitor will briefly flicker off and on, confirming that the changes have been applied. Now, you'll be working in an HD timeline while monitoring in Ultra HD, allowing DaVinci Resolve to process the timeline in HD while you see the output in 4K. This is especially useful when working with high-resolution footage, as it lightens the load on your graphics card while still giving you a high-resolution preview of your work.
3. Setup DaVinci Resolve Color Management for HDR Workflow
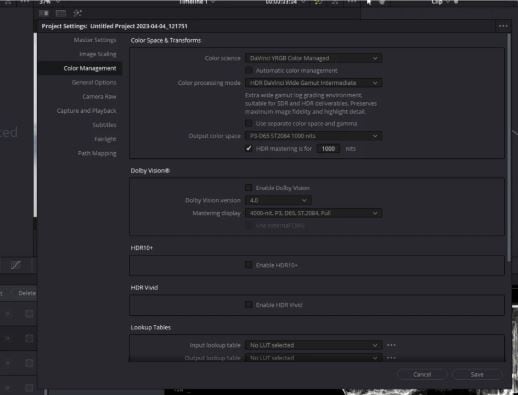
Brightness and color vibrancy are increased with High Dynamic Range (HDR) content. And if you want a good result, it’s important to set up DaVinci Resolve Color Management properly.
Setting Up Color Management for HDR
Step 1. Open the project you want to work on in DaVinci Resolve.
Step 2. Click File and Project Settings in the top menu to open the settings window, where you can adjust various project options.
Step 3. In the Project Settings box, select the Color Management tab on the left.
Step 4. The BBC and NHK developed the HDR encoding technique known as HLG. Change it to DaVinci YRGB Color Managed to unlock advanced color processing options needed for HDR content.
Step 5. To manually adjust the color settings, uncheck the Automatic Color Management box.
Step 6. In the Color Processing Mode drop-down menu, select HDR DaVinci Wide Gamut Intermediate. This option is ideal for log grading and ensures high-quality results for both SDR and HDR content.
Setting the Output Color Space for HDR
Step 1. Scroll down in the Color Management tab until you find the Output Color Space section.
Step 2. The default setting, Rec 709 (Scene), is for standard SDR content. Change this to P3-D65 ST2084 1000 nits. The P3-D65 color space is widely used for HDR, and ST2084 is the mode that matches HDR standards.
Step 3. Check the box labeled HDR mastering for 1000 nits to configure DaVinci Resolve for HDR grading at this brightness level.
Step 4. In the Project Settings window's lower-right corner, click the Save button. You should see a change on your HDR monitor, confirming that DaVinci Resolve is now set up for HDR grading.
4. Understand the Differences Between the HDR Monitor and the Interface Preview
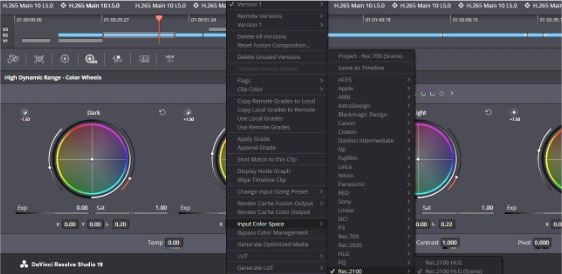
When working with HDR content, it's important to understand that the image on your HDR monitor is not the same as what you see in the DaVinci Resolve interface. The interface preview only gives you an idea of the HDR image but does not show the full brightness and color accuracy that your HDR monitor can provide.
Grading with an HDR Monitor
As you edit your project, you'll notice a clear difference between the image in the DaVinci Resolve interface and the one on your HDR monitor. The interface preview is a simplified version and doesn't capture the full brightness range or color accuracy of HDR content.
For accurate grading, rely on your HDR monitor because it displays the true colors and brightness levels of HDR. By using the HDR monitor as your main reference, you can ensure your work looks its best in HDR and meets the required quality for HDR deliverables.
5. Fine-tune Your HDR Grading with DaVinci Resolve and HDR Monitors
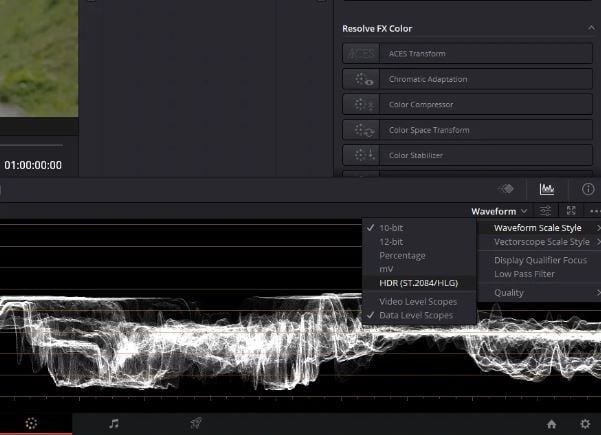
To get the best results when working with HDR footage in DaVinci Resolve and an HDR monitor, it’s important to set up your workflow for accurate colors and brightness.
Adjusting Video Scopes for HDR
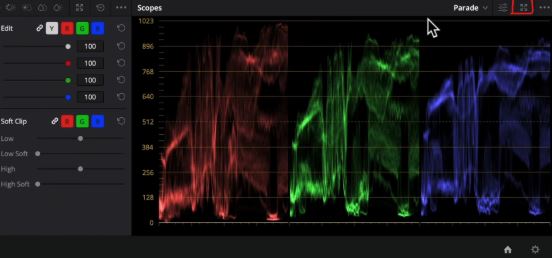
In DaVinci Resolve’s Color Page, you can tweak the video scopes to better suit HDR grading. Click the three dots above the scopes to change the Waveform Scale Style to HDR (ST.2084/HLG). This adjusts the scopes to display HDR values, including highlights up to 1000 nits.
Grading Your Footage
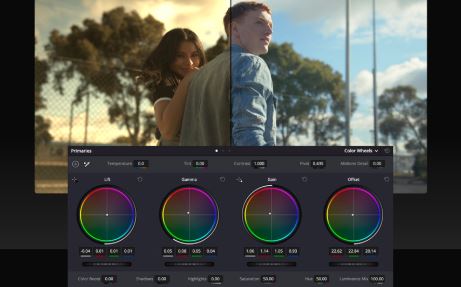
Once your setup is ready, you can start grading your HDR footage. Adjust brightness, shadows, and contrast to bring out the best in your video. Keep in mind that the image in DaVinci Resolve’s interface might look different from the one on your HDR monitor. Always trust the HDR monitor for the most accurate view of your final output.
Using Different HDR Profiles
DaVinci Resolve and HDR monitors support various HDR profiles like Hybrid Log-Gamma (HLG). If you want to use a different profile, you can easily configure both your monitor and the software to match the format.
Part 4. How to Fix HDR Video Not Playing on DaVinci Issue?

Working with DaVinci Resolve HDR can sometimes present challenges. These issues can arise due to file corruption, damaged metadata, or incomplete encoding. Here are common problems you might encounter with your DaVinci Resolve HDR and how Repairit Video Repair can help:
❌HDR Video Fails to Import
The Problem: You encounter an error when trying to import your HDR video into DaVinci Resolve. The file may not load due to corruption or broken metadata, preventing you from starting your project.
How Repairit Helps: Repairit scans and restores the structure of corrupted HDR video files. It fixes issues with metadata and encoding, ensuring your video is ready to import into DaVinci Resolve without errors. Also, if you think the file is severely damaged, Repairit offers an Advance Repair feature to fix the video.
⚠Playback Issues on the Timeline
The Problem: Your HDR video stutters, skips frames, or freezes during playback in DaVinci Resolve. This makes it impossible to review and edit your footage effectively.
How Repairit Helps: Repairit repairs damaged frames and restores smooth playback, eliminating lags and frame drops.
🌈Incorrect Colors or Brightness
The Problem: Your HDR video looks dull or displays inaccurate colors and brightness levels, compromising the visual quality you expect from HDR content.
How Repairit Helps: Repairit preserves the integrity of HDR metadata and adjusts corrupted sections to ensure that colors and brightness are accurately restored.
🖥Blank or Distorted Video Preview
The Problem: The video appears pixelated, blank, or distorted during playback in DaVinci Resolve, making it unusable for editing.
How Repairit Helps: Repairit repairs corrupted frames and removes pixelation or distortion. This tool helps to restore the video’s original clarity and detail so you can preview it properly.
💥Crashes During Import or Playback
The Problem: Importing or playing your HDR video causes DaVinci Resolve to crash repeatedly. This can happen when the video file is severely damaged.
How Repairit Helps: Repairit repairs severely corrupted files by analyzing the file’s structure and fixing deeper issues. Its advanced repair mode uses a sample file to restore your video, ensuring it no longer crashes your software.
Conclusion
Exploring DaVinci Resolve HDR is an exciting opportunity to make something within your videos. At first, it could seem a little complicated, but you'll get the hang of it with time and practice. Take your time to explore the tools and understand how each adjustment affects your footage. Making errors is a necessary part of learning, therefore don't be scared to do it. Keep experimenting and trust your creativity.
FAQ
Can I use DaVinci Resolve for HDR grading with the free version?
No, DaVinci Resolve's free edition does not enable HDR grading. You need the Studio (paid) version to access HDR-specific tools and workflows.What kind of monitor do I need for HDR grading in DaVinci Resolve?
You need an HDR monitor capable of displaying at least 1000 nits of brightness and supporting HDR standards such as HDR10 or Dolby Vision. Ensure it's connected via a compatible capture and playback device like the Blackmagic UltraStudio or DeckLink.Why does my HDR video look different on my monitor and in the interface preview?
The DaVinci Resolve interface preview doesn’t fully represent HDR content due to limitations in brightness and color accuracy. Always rely on your calibrated HDR monitor for accurate grading and assessment of HDR visuals.


 ChatGPT
 Perplexity
 Google AI Mode
 Grok
Grok

