
 TL;DR:
Fixing persistent video buffering requires resolving network bandwidth bottlenecks, freeing up local system resources, or repairing corrupted video files.
● Switch your wireless router to the 5GHz band, configure high-speed public DNS servers like Google (8.8.8.8) or Cloudflare (1.1.1.1), and utilize a hardwired Ethernet connection to eliminate bandwidth limitations.
● Update your Intel, Nvidia, or AMD graphics card drivers via Windows Update, lower the streaming resolution, and force-close background programs to prevent hardware overload.
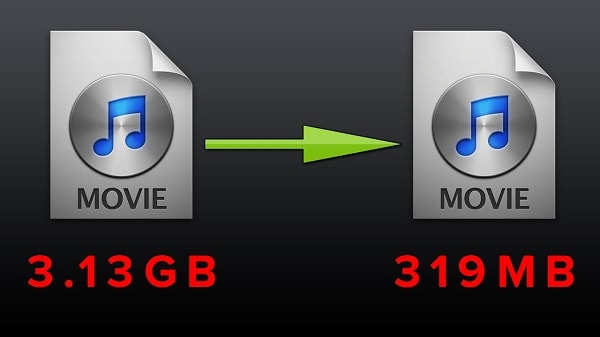
● If playback fails due to file corruption, use the free Wondershare Repairit Online Version for files under 3GB (limited to 150 videos per month), or the Desktop Version for Mac and Windows if the video exceeds 3GB or is severely damaged.
Ask AI for a summary
 ChatGPT
 Perplexity
 Gemini
 Claude
 Grok
Grok
Video buffering is an old enemy of streaming. The irritating loading symbol annoys more when you can't trace its root cause. But that ends today. Because in this post, we'll tackle why videos buffer and how to fix video buffering problems.
Part 1. Why Do Videos Keep Buffering?
We had to kick off this video-buffering-fix tutorial with video buffering meaning to bring the point home:
Video buffering is a delay at some point while downloading your data but it takes some time before playing your video. And a spinning, loading symbol appearing on the screen.
Buffering is the process of preloading video into a reserved area of memory called a buffer. This way, the streaming service loads video ahead in the background to keep things running smoothly.
Ideal buffer reserves should ensure a smooth playback process with no interruption. However, this isn't always the case. Sometimes you might encounter slow buffering that can't download fast enough to keep pace with playback, thus, pausing the stream.
And there are lots of reasons that causes slow video buffering, including:
Internet-related issue
At its bottom, buffering problems stem from insufficient internet bandwidth. When internet bandwidth is limited, video file can't download fast enough to keep pace with playback.
In other words, you experience slow video buffering. And internet issues that might be the culprit of buffering problems include:
- Technical problems on your ISP (Internet Service Provider) side or they might be having overload with traffic.
- Not enough bandwidth speed from your internet to support the video quality that you are streaming.
- Your modem or router is out-of-date, damaged, or not operating properly.
- Or there are too many devices on the network at one time.
Computer-Related Problem
It is easy to blame your internet. But sometimes you can find video keeps buffering but internet is fine with fast internet. And in such cases, the problem might be on your local computer. It could be:
- Outdated graphic card drivers.
- Your browser might be overloaded with temporary and cache data that slows it down.
- Or you might be under malware attack.
Device-Related Problems
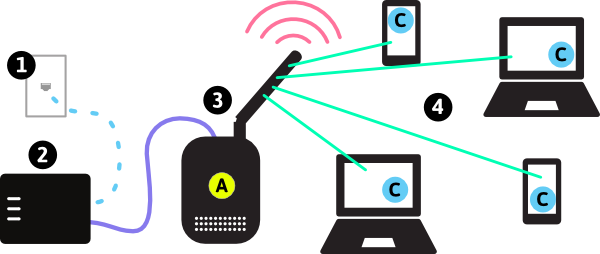
Other times, the underlying buffering problem might be in your Wi-Fi device. When a Wi-Fi network slows down than usual, you might experience slow video buffering.
While wireless routers are not created equal, they all last a long time. However, the technology that these devices employ might get outdated pretty fast. Meaning if your router is more than 3-years old, it might come in handy to confirm if its specs can support the internet speed you're paying for.
Video-Related Problems
If all else fails, fixing video buffering issues might call lowering the video quality.
Yes, it isn't a cool solution. But sometimes, a video quality might exceed what your internet could support.
Or maybe the server you are trying to stream from might be loading the video slowly, or serving multiple users at a time.
With the causes out of question, how to fix video buffering on Chrome or any other platform?
Let's find out right now.
Part 2. Fix Videos Keep Buffering Caused by Video Corruption
By now, you know several reasons plus the most probable video buffering fixes.
And suppose your video problems exceed prime video buffering, and have a corrupt or not-playing-video file on your local storage, you can fix that too.
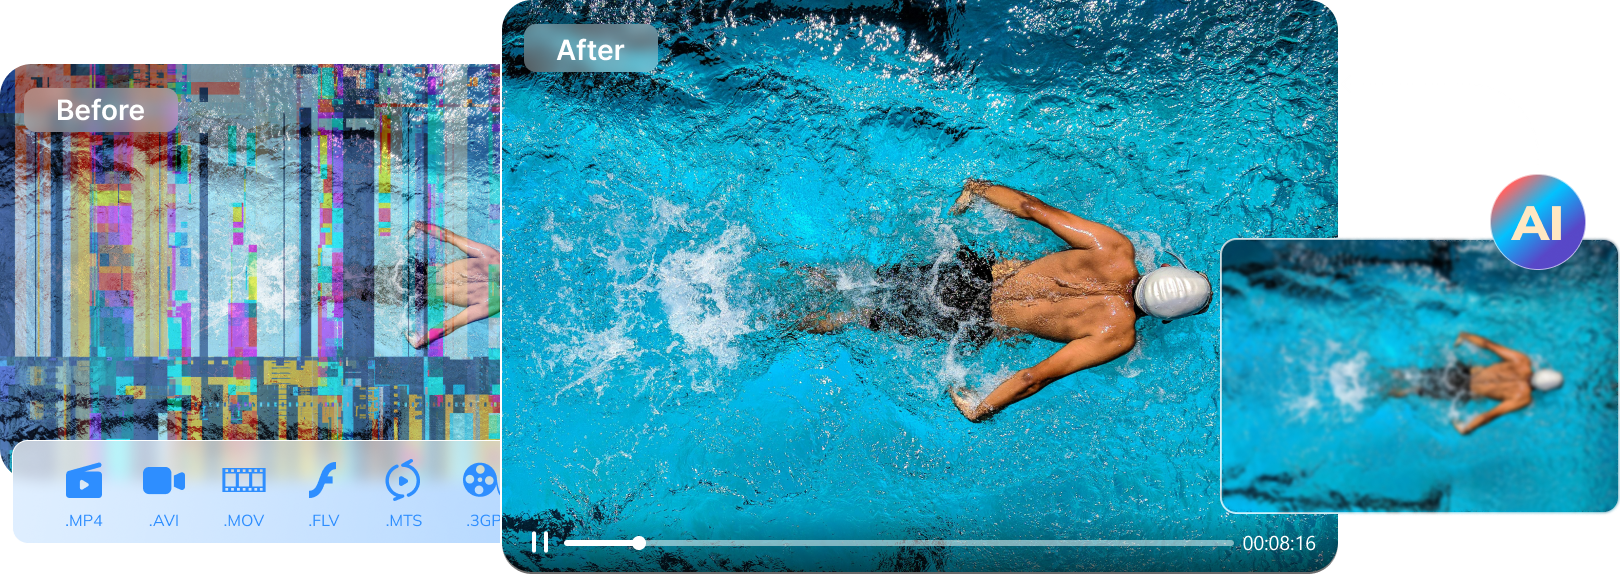
Because, there are tools to repair nearly all kinds of video file formats: MP4, AVI, FLV, MOV, M4V, MTS, 3GP, and even more. In fact, you can repair videos that got corrupt while shooting, recording, transferring, converting, and processing.
But you'd ask: Which is the reliable software?
Well, Wondershare Repairit is quite a good choice. There're two versions you could have a try. That's Wondershare Repairit Online Version and Wondershare Repairit Desktop Version. It's super easy to use. If your corrupted video is larger than 3GB, or it is severely damaged, even the video formats are out of the supported range, you can try the desktop version of Wondershare Repairit. It has proved appropriate-on for any platform-from different storage devices. Mac or Windows are both available.
This begs the question:
How do you use the Wondershare Repairit Video Repair Tool?
Step 1: Download and Install Wondershare Reparit Video Repair
Head over to Wondershare official site and download the correct version of the video repair tool for your pc. There are Mac and Windows versions. Download and install.
Step 2: Launch the Software
After installation, double click on the Wondershare Video Repair icon on the desktop.
This step is the same in both Mac and Windows PC.
Step 3: Add the Corrupted video to the interface
To execute the repair, you'll first add the corrupted video on the software interface. And there are two ways:
- You can click the 'Add corrupted video' button and start the repair option on the screen.
- Or you can click the Add button on the bottom left of the interface.

Step 4. Repair the Video
After adding the corrupted video successfully, hit the Repair button on your bottom right to initiate the repair process. Once done, click OK on the small windows that will pop up.

You also have the option of previewing the video before saving.
That's how you can repair a corrupt video on Windows and Mac platform with Wondershare Repairit Video Repair Software.
If your corrupted video is less than 3GB, then you could go to the Wondershare Repairit Online Video Repair website because it's totally free and requires no download. Just simply upload the corrupted video files, then wait for the repair process finished.
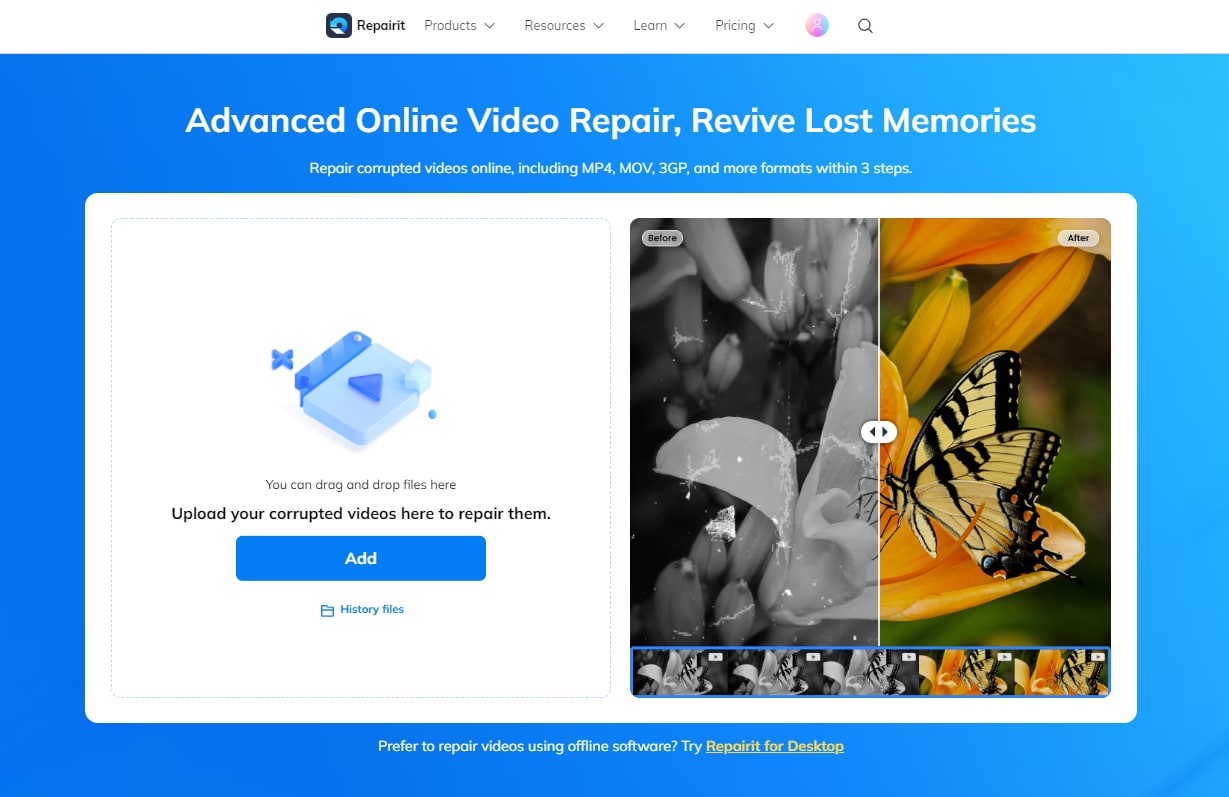

Wondershare Repairit Online
-
Repair damaged videos with all levels of corruption, such as video not playing, video no sound, out-of-sync video or audio, playback errors, header corruption, flickering video, missing video codec, etc.
-
It supports customers repair 150 videos per month and supports each video of 3GB online.
-
Repair critically damaged or corrupted videos available on SD cards, phones, cameras, USB flash drives, and more.
-
The online version supports various video formats: MOV/MP4/M2TS/MKV/MTS/3GP/AVI/FLV/MXF/M4V.
-
Security enough: videos are transferred via a 2048-bit encrypted connection and deleted after 3 hours.
-
It fixes videos online without damaging the original quality or integrity.
This video can help you fix your corrupted video files with a step-by-step guide.
Part 3. 8 Common Solutions To Fix Videos Keep Buffering
Now, if you find yourself greeted by an endless spinning wheel and a "loading" message, instead of your video, there are some fixes you can try for how to stop a video from buffering.
And depending on the route cause, your approach to the buffering problem will vary. If you don't know where the problem originates from, start with solution one. If it doesn't fix work for your case, move to solution two until you find the right video buffering fix.
Let's get started.
Solution 1. Check Internet Speed
ISPs offer different rates of speed at different prices. And lots of people only go for higher internet connection speed when they need to support multiple users. After all, in a household, everyone should surf the internet even when all devices connect to the network.
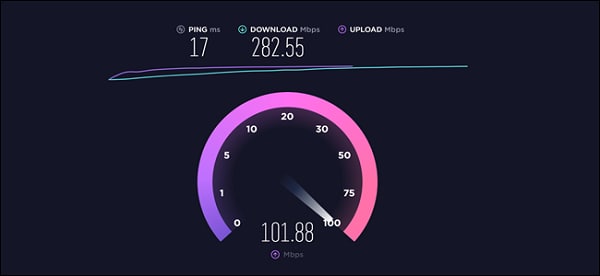
But sometimes that slow internet speed. And to ensure your internet speed isn't the culprit, execute an internet speed test. You'll determine if your internet speed measures up and if the ISP is making good of its promise.
Suppose you find that you need more speed. You don't necessarily have to spend more money with your ISP. There are some hacks you can execute to make your internet even faster. They include:
- Restart your router or modem. In other words, unplug your router for 30 seconds and then reconnect.
- Set your wireless router to use the 5GHz band rather than 2.4GHz. At a higher band, your network will encounter less interference.
- Limit yourself from exceeding the monthly traffic allowance. Some ISP throttle users who consume too much bandwidth.
- Configure your router to use Google (8.8.8.8) or Cloudflare (1.1.1.1) DNS because the one you ISP offer might be slow. These two servers offer high-speed public DNS.
- Run a virus / malware scan as they suck lots of your PC's bandwidth. Removing them will give you a speed boost.
Solution 2. Connect Your Streaming Device, With Ethernet Instead of Wi-Fi
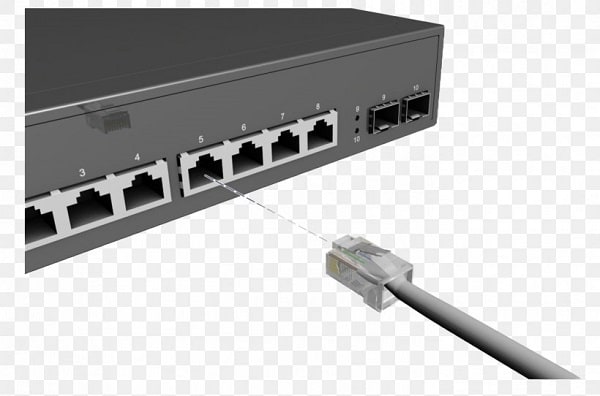
There is no question that Wi-Fi is convenient-at home, in hotel room, or anywhere else. But it doesn't matter how fast a Wi-Fi connection is. It is by no mean a close substitute for hardwired connection.
If you have high internet speed, but you still encounter buffering, you should try a networking cable.
Solution 3. Reset and Upgrade Your Wi-Fi Device
Nearly everyone tends to set up a Wi-Fi router and then forget about it. However, routers need regular maintenance as well to help tackle video buffering issues. Check with your manufacturer for firmware updates. What's more, it might come handy to hard-reset your Wi-Fi once in a while.
It is simple to hard-reset your Wi-Fi connection:
- First, unplug the power cord on the unit's power source
- Wait for about 30 seconds, and then plug it back
And that's it.
If the reset process does not significantly improve, you might want to upgrade your Wi-Fi device.
Solution 4. Cut Down on Background Running Programs
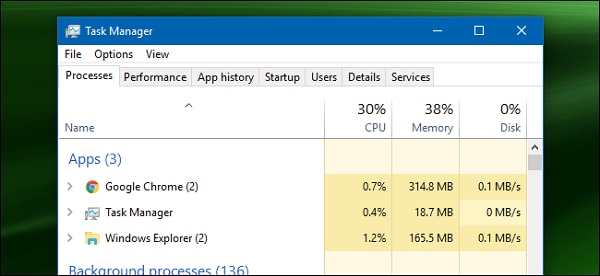
When your computer executes many tasks at a go, it might have limited capacity to stream videos without a flaw. Even when you minimize the running application-they still consume system resources.
So, if you have a buffering problem close all the applications you're not using.
However, it isn't easy to know all the programs running in the background-especially those that are not open-or those that start right as soon as you reboot your computer. If you're on a Windows platform, here's a step-by-step guide to stop all the background programs:
- Head for the Ctrl + Alt + Delete keys and click them simultaneously. A new screen with a menu will appear
- Press the Alt + T to open the task manager's application tab. You'll see a list of running applications
- Next, hit the Down Arrow, and use the Shift and the Down Arrow keys to select all the programs you want to stop
- After selecting, press the Alt + E keys
- Finally, press the Alt + F keys and close the Task Manager
Closing all programs dedicates your PC's resources to the app you're using to video stream with.
Further Reading:
7 Ways to Fix YouTube Video Freezing Problems
Solution 5. Reduce Video Quality
You might know that the longer the video files, the longer it takes to transmit to your computer or mobile device. And if you can make the files smaller, you won't have to wait for long. The easiest fix would be to watch your video at a lower resolution.
And that's possible on multiple platforms like Netflix and YouTube.
1. Head over to the settings icon on the video. A small window will pop up.
2. On the small pop-up screen, navigate the Quality tab and click on it to display the available resolution then pick on a lower quality.
Solution 6. Pause The Stream to Create A Larger Buffer

Sometimes all you need to solve slow buffering is to take a break. Pausing allows the video to build up a bigger buffer to reducing buffering when you resume the play.
It is tempting to restart the video playback after every buffering pause immediately. But it works great if you pause the stream for a few minutes to save you video streaming buffering.
Solution 7. Update Graphics Card Drivers
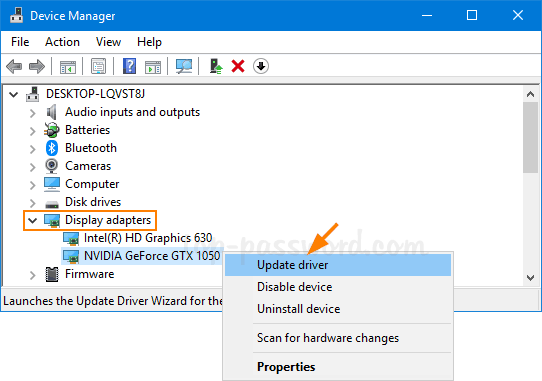
If you're demanding a lot from video streaming-and playing videos does-it calls for up-to-date hardware and drives support.
Intel, Nvidia, and Amd are continually refining and optimizing graphic driver performance, and some driver updates can make a significant difference.
While new drivers are typically faster than the previous models, a version with flaws might slip through but are usually quickly rectified. So, it is essential to have the latest driver.
- Open the Start Menu by clicking on the Windows icon on the lower left of the home screen.
- Select the Setting option. This will open the Windows Setting screen.
- Hit the Windows Update Security option and check if there is any update.
Solution 8. Limit the Number of Devices Connected to Your Network
Multiple devices on the same network consume the bandwidth of the network and cause buffering, primarily when the router cannot support a heavy traffic load.
Therefore, when streaming videos, make sure your internet usage is limited across devices. So power off any internet-connected device that you're not using.
Closing words
Now Video Buffering will never ruin your streaming experience again. Wondering, what do I do to stop videos from buffering? By following the solutions shared in this guide, you can easily enjoy smooth video playback, whether it's increasing your internet speed, updating your device, or optimizing your streaming settings. If video corruption is the problem, Wondershare Repairit offers simple and effective solutions to fix a wide range of video issues, ensuring your files play perfectly every time. Try Repairit today and get the perfect viewing experience!
Related Content You Might Want to Know
-
Why do my videos keep buffering on my phone?
Your mobile phone may be able to connect via WiFi or mobile data, but it can't use both the connections at the same time. So, if the connection fades, your phone is automatically disconnected. -
Why does my laptop keep buffering when watching videos?
It means there is a problem with your internet connection. Probably, your internet data speed is slow and can't support that specific video. -
How to stop buffering when streaming?
- Limit the number of devices connected to your network.
- Close any other background programs.
- You can restart your router.
- Reduce the quality of the video in the settings.
- Keep the bandwidth below 1 Mbps
- Settle on a wired encoder rather than a wireless one.
-
How to stop buffering on Android?
- Pause the video and allow a good amount of data to download.
- Close unnecessary tabs.
- You can also update virus protection on your Android device.